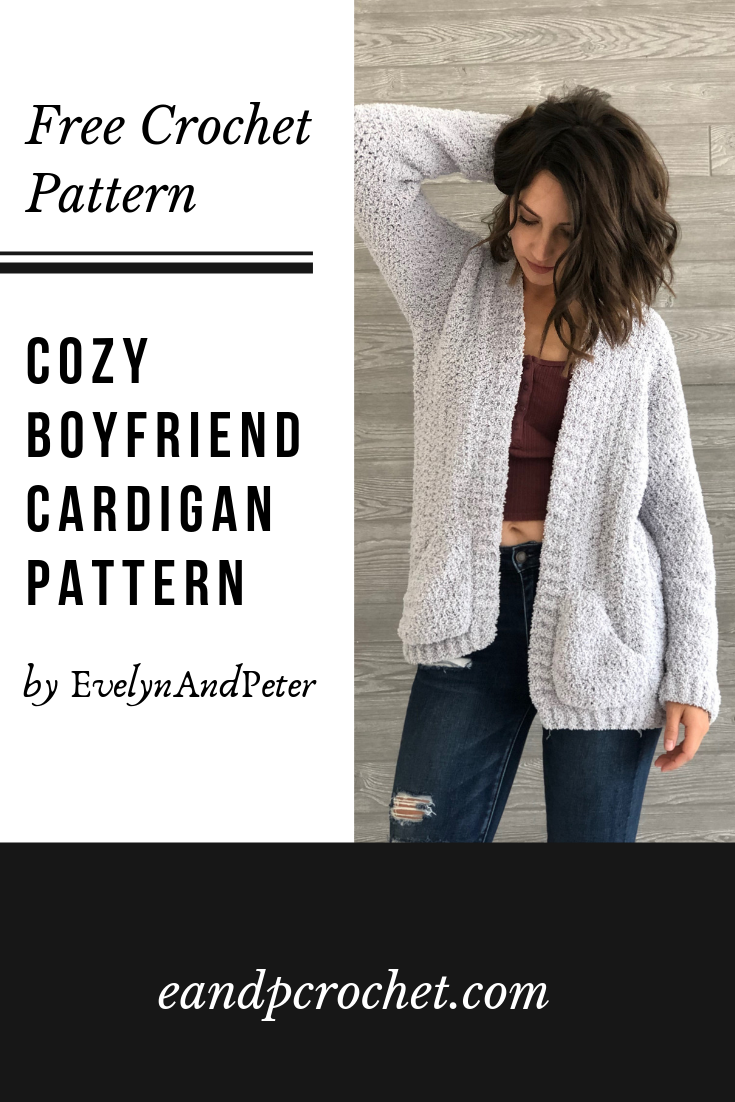
Pattern: Cozy Boyfriend Cardigan
There is finally a chill in the air! I woke up this morning and it was cold enough for a cozy sweater while waiting at the bus stop with Evie! I’ve been keeping this pattern a secret for sooooo long. I finally get to share with you guys my “Cozy Boyfriend Cardigan” which is part of Lion Brands, 12 Weeks Of Christmas! I know, I know. Christmas seems so far away but it’s never too early to start making gifts right? Especially when they are handmade and take a bit more time. Yay for slow fashion!
My Cozy Boyfriend Cardigan is available as a kit from Lion Brand at a super awesome discounted price of 40% off! Use code “SAVE40SEPT” at checkout. Go snag yours now so you can get started! Did you know you get a free printed PDF of my pattern when you buy the kit? Yup.
If you have the yarn but still want a pretty PDF to print out, grab it from my Etsy Shop or Ravelry Shop.
This design was inspired by the chunky oversized sweaters you see at the mall. I wanted it to be something you could throw on with leggings and a tee. The Boucle yarn gives it just the look I was going for! I know the Boucle yarn can sometimes be intimidating but if you take it slow, use stitch markers and count by feeling your stitches you will be fine!
Materials:
-
Baby Soft Boucle (bulky,5) Skeins needed 9(10,11,11,12,13,13). 1040(1120,1210,1290,1360,1450,1500) yards. I recommend buying the kit here.
-
6.00mm Crochet Hook
-
Yarn Needle
Gauge:
4X4” square= 10 Hdc by 7 Rows
Finished Sweater Measurements:
XS- 26” long, 19.5” wide, 18” sleeve
S- 27.5” long, 21.25” wide, 18” sleeve
M- 29” long, 23” wide, 18.25” sleeve
L- 30.5” long, 24.75” wide, 18.25” sleeve
XL- 32” long, 26.5” wide, 18.25” sleeve
2x- 33.5” long, 28.25” wide, 18.5” sleeve
3x- 35” long, 30” wide, 18.5” sleeve
Pattern Notes:
-
The main body of the sweater is worked in one large piece. You will then fold the front pieces over, seam the sides to close and add the sleeves last.
-
The sleeves are worked in continuous rounds.
-
This yarn can be difficult to see your stitches. You will need to “feel” your stitches to ensure correct stitch count. Use stitch markers where needed. Do not pull yarn too tightly.
-
The Ch 1 does not count as a stitch.
Stitches and Abbreviations:
Ch- Chain
Fhdc- Foundation Half Double Crochet
Hdc- Half Double Crochet
Hdc2tog- Half Double Crochet Two Together
Fphdc- Front Post Half Double Crochet
Bphdc- Back Post Half Double Crochet
Pattern (main body):
Row 1: 130(134,138,142,146,150,154) Fhdc. Turn. (130(134,138,142,146,150,154 Hdc)
Rows 2-21(23,25,27,29,31,33): Ch 1. 1 Hdc in each St across. Turn. (130(134,138.142,146,150,154 Hdc)
You will now be working only halfway across the row and stopping.
Row 22(24,26,28,30,32,34): Ch 1. 1 Hdc in next 65(67,69,71,73,75,77) stitches. turn. (65(67,69,71,73,75,77 Hdc)
Rows 23(25,27,29,31,33,35)-26(28,30,32,34,36,38): Ch 1. 1 Hdc in each St across. Turn. Do not turn after last row made here. Ch 66(68,70,72,74,76,78). Turn.
Row 27(29,31,33,35,37,39): 1 Hdc in second Ch from hook and each Ch across. Continue along the rest of the row with 1 Hdc in each remaining stitch. Turn. (130(134,138,142,146,150,154 Hdc)
Rows 28(30,32,34,36,38,40)- 47(51,55,59,63,67,71): Ch 1. 1 Hdc in each St across. Turn.
Do not tie off.

Seaming:
Fold your sweater in half so the 2 front flaps are laying on top of the main back panel. Sl St up the side of your sweater, joining your first front panel to the back panel. Stop just above 2/3rds of the way up, leaving an opening for your arm hole. Tie off. Repeat on other side, stopping at the same point so your arm holes are the same size. Turn your work correct side out, so that your seams are now on the inside of your sweater. Do not tie off, you will now continue to the first sleeve.

Sleeves:
With your sweater correct side out and continuing with the same hook and yarn at the bottom seam of the arm hole opening. You will be working in continuous rounds. Do not join. Do not turn. Place a stitch marker in the first Hdc of the first round. Move your stitch marker up each round to keep your place.
Round 1: Ch 1. Work 1 Hdc, 40(44,48,52,56,60,64) times evenly around the opening of the arm hole. (40(44,48,52,56,60,64 Hdc)
Rounds 2-16: 1 Hdc in each St around.
Round 17: Hdc2tog, 18(20,22,24,26,28,30) Hdc, Hdc2tog, 18(20,22,24,26,28,30) Hdc. (38(42,46,50,54,58,62 Hdc)
Rounds 18&19: 1 Hdc in each St around.
Round 20: Hdc2tog, 17(19,21,23,25,27,29) Hdc, Hdc2tog, 17(19,21,23,25,27,29) Hdc. (36(40,44,48,52,56,60 Hdc)
Rounds 21&22: 1 Hdc in each St around.
Round 23: Hdc2tog, 16(18,20,22,24,26,28) Hdc, Hdc2tog, 16(18,20,22,24,26,28) Hdc. (34(38,42,46,50,54,58 Hdc)
Rounds 24&25: 1 Hdc in each St around.
Round 26: Hdc2tog, 15(17,19,21,23,25,27) Hdc, Hdc2tog, 15(17,19,21,23,25,27) Hdc. (32(36,40,44,48,52,56 Hdc)
Rounds 27&28: 1 Hdc in each St around.
Round 29: Hdc2tog, 14(16,18,20,22,24,26) Hdc, Hdc2tog, 14(16,18,20,22,24,26) Hdc. (30(34,38,42,46,50,54 Hdc)
Note- Try your sweater on at this point. You can continue to decrease the sleeves every 2 rows here if you want the forearm to be more fitted. Continue with the row count as normal.
Rounds 30-35(35,36,36,37,37,38): 1 Hdc in each St around.
Round 36(36,37,37,38,38,39): 1 Fphdc in first St, 1 Bphdc in following St. *1 Fphdc, 1 Bphdc.* Repeat around.
Rounds 37(37,38,38,39,39,40)- 38(38,39,39,40,40,41): Repeat last round. Each Fphdc will be worked around the Fphdc of previous round. Each Bphdc will be worked around the Bphdc of previous round.
Tie off. Repeat second sleeve on opposite side. You will be joining your yarn at the seam of the arm hole with a Sl St. Repeat all rounds.
Trim:
With your sweater correct side out- join yarn with a Sl St to the bottom front corner of the cardigan. You will be working up the front side, along the neckline and down the other side, stopping at the opposite corner. Note- exact stitch count is not crucial for the trim. Just be sure you work evenly and end with an even stitch count.
Row 1: Ch 1. 1 Hdc evenly around cardigan opening. Stitch count will be approximately 120(124,128,132,136,140,144) Hdc. Stop at corner. Turn.
Row 2: Ch 1. 1 Hdc in first St. *1 Fphdc in next St, 1 Bphdc in following St.* Repeat across row. Finish with 1 Hdc in last St. Turn.
Rows 3&4: Repeat Row 2.
Do not turn after last row. Do not tie off. You will now be working along the bottom of your cardigan to complete your trim.
Row 1: Ch 1. Work 1 Hdc evenly across bottom of cardigan. Stitch count will be approximately 94(98,102,106,110,114,118) Hdc. Turn.
Row 2: Ch 1. 1 Hdc in first St. *1 Fphdc in next St, 1 Bphdc in following St.* Repeat across row. Finish with 1 Hdc in last St. Turn.
Rows 3&4: Repeat Row 2.
Tie off.
Pockets (X2):
Row 1: 16(16,18,18,20,20,20) Fhdc. Turn. (16(16,18,18,20,20,20 Hdc)
Rows 2-6(6,7,7,8,8,8): Ch 1. 1 Hdc in each St across. Turn.
Row 7(7,8,8,9,9,9): Ch 1. Hdc2tog. 14(14,16,16,18,18,18) Hdc. Turn. (15(15,17,17,19,19,19 Hdc)
Row 8(8,9,9,10,10,10): 13(13,15,15,17,17,17) Hdc. Hdc2tog. Turn. (14(14,16,16,18,18,18 Hdc)
Row 9(9,10,10,11,11,11): Hdc2tog. 12(12,14,14,16,16,16) Hdc. Turn. (13(13,15,15,17,17,17 Hdc)
Row 10(10,11,11,12,12,12): 11(11,13,13,15,15,15) Hdc. Hdc2tog. Turn. (12(12,14,14,16,16,16 Hdc)
Row 11(11,12,12,13,13,13): Hdc2tog. 10(10,12,12,14,14,14) Hdc. Turn. (11(11,13,13,15,15,15 Hdc)
Row 12(12,13,13,14,14,14): 9(9,11,11,13,13,13) Hdc. Hdc2tog. Turn. (10(10,12,12,14,14,14 Hdc)
Row 13(13,14,14,15,15,15): Hdc2tog. 8(8,10,10,12,12,12) Hdc. Turn. (9(9,11,11,13,13,13 Hdc)
Row 14(14,15,15,16,16,16): 7(7,9,9,11,11,11) Hdc. Hdc2tog. Turn. (8(8,10,10,12,12,12 Hdc)
Row 15(15,16,16,17,17,17): Hdc2tog. 6(6,8,8,10,10,10) Hdc. Turn. (7(7,9,9,10,10,10 Hdc)
Tie off, leave a long tail for sewing.
Sew pockets:
Place your pockets on the front of the cardigan as shown in photo. Place on front of sweater so the side and bottom of pocket is right next to ribbing/trim. Using the tail of yarn and a needle, sew the pocket to the sweater. Leave the side decrease rows un-sewn for pocket opening. Repeat on opposite side. Tie off.
Weave in all ends.

I hope you guys love this cozy sweater as much as I do! Be sure to tag me in your photos so I can see!


Cynthia Senger | 13th Sep 19
Thank you for this lovely pattern! I will have to try the yarn you used! I will definitely add this to the list of things I really want to make! ♥️
Margarita Rojas | 13th Sep 19
I love this!! Actually I love all your designs! Now to find the time to make them! This one I did put on my Ravelry to make. Being in Phoenix AZ will let me finish the cotton tees and start this one by next month! Great discount too from LB!
Bonnie | 29th Sep 19
Well I decided to try this pattern using a different yarn (bernat baby velvet). I managed to get the gauge correct by adjusting my hook size. My problem is that I am now at the point of chaining 69 to form the other front side of sweater. The chain isn’t long enough, ugh! I think it’s because the yarn. It is very springy (don’t know how else to describe it). So I’m going to adjust the chain length to match the other side. Wish me luck!