Pattern: The Sunny Slouch
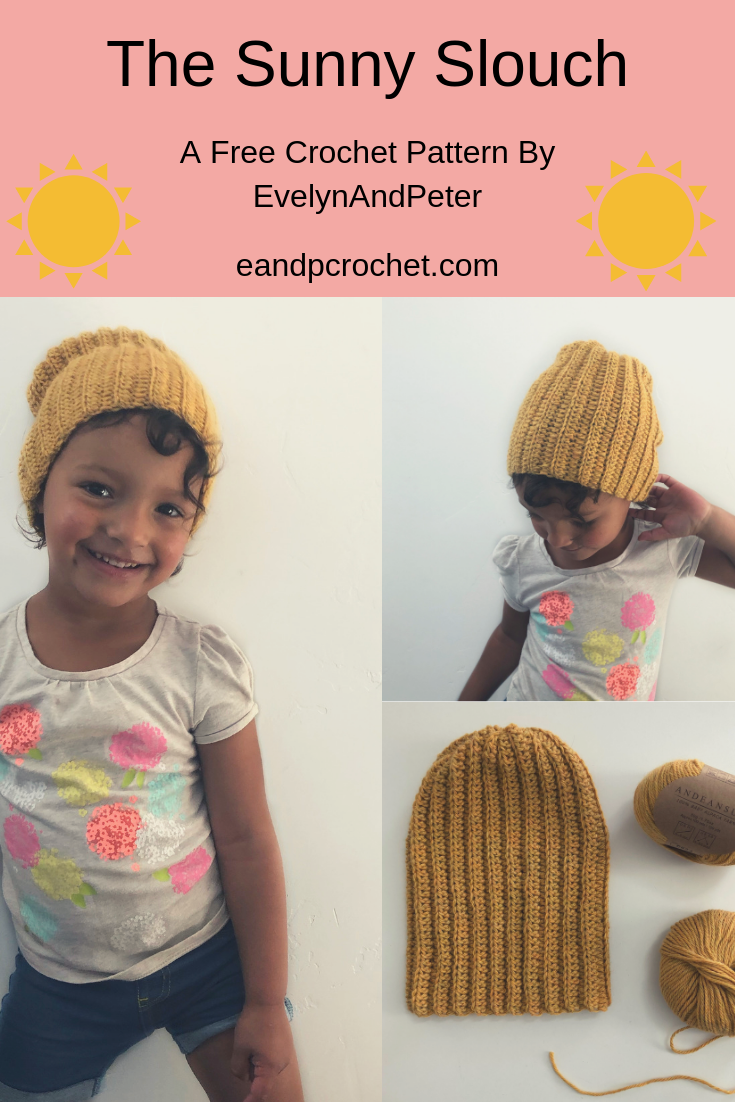
I was recently given the chance to try out some new yarn and I love it! It’s a gorgeous 100% baby alpaca light weight yarn. The Andeansun website has so many pretty yarns to try out so be sure to take a look! I decided on the color “sunset”. It’s a beautiful yellow color and when you look up close it has small flecks of green. I wanted to make something fun with a simple stitch so that the yarn could really shine in this project. A while back I made my “basic chunky slouch” beanie and thought that a re-make of the pattern with a lighter yarn would be perfect for it!
This beanie is very customizable size wise. Simply make the starting foundation row as long as you want it. The longer the row the more “slouch” your beanie will have. Work as many rows as you need for the hat to fit around your head. I’ll include a rough estimate for amount of rows needed but you can easily adjust it.
Materials:
- Light (3) weight yarn. I used Andeansun baby alpaca in the color “sunset” Approximately 70(90,120,150,190) grams.
- 4.00mm crochet hook
- yarn needle
Notes:
- Pattern is written as follows Child S(M,L,Women’s,Mens)
- This pattern is worked in rows and seamed together at the end to form the hat.
- add or takeaway rows and stitches to fit your size needs.
- Click here for FHDC tutorial
- You will be working in the BLO throughout the pattern.
Gauge:
4×4″ square= 12 rows by 18 Hdc (blo) stitches
Stitches and abbreviations used:
- Fhdc- Foundation Half Double Crochet
- Hdc- Half Double Crochet
- BLO- Back Loop Only
- St- Stitch
- Sl St- Slip Stitch
Sizing:
Child Small(2-4yr)- 7″ wide by 9.5″ long
Child Medium(5-8yr)- 8″ wide by 10″ long
Child Large(9-12yr)- 9″ wide by 10.5″ long
Women- 10″ wide by 11″ long
Men- 12″ wide by 12″ long
Pattern:
Row 1: 44(46,48,50,54) Fhdc. Turn.
Rows 2-43(46,49,55,64): Ch 1. 1 Hdc (BLO) in each St across. Turn.

Fold your piece in half. Join the first and last row together by slip stitching (through the outer loops only) across the row, to form a tube. (I recommend trying your beanie on at this point to be sure it fits, before continuing.) Tie off, leaving a tail long enough to sew the top of your hat shut. Using a yarn needle, weave your tail in and out of the stitches at the ends of the rows. Pull tight to close. Secure shut with a few knots. Weave in all ends.


