I was sooooo excited to see that shrug and bolero style sweaters were starting to become popular again! They are one of my favorite styles so I knew I had to design one, which is exactly what I did! I’m so excited to share The Tilda Shrug crochet pattern with you all!
I stepped out of my comfort zone a bit with this one in terms of shaping. You’ll find some short rows around the opening of the shrug as well as increase shaping within the rows of the sleeves! The Tilda Shrug is worked in 2 separate mirrored panels. You will then do a small seam up the back as well as under the arms.
I used wool ease recycled yarn for this project and loved it! This was my first time using it and it worked up so well. The Tilda Shrug crochet pattern is a kit so if you need yarn I recommend checking it out! If you are intimidated with making the Tilda Shrug crochet pattern be sure to check out the video tutorial! Thank you guys so much for subscribing!
If you love this design be sure to check out some of my other cardigans and sweaters free here on my blog!
I’m so excited to finally release The Wisteria Sweater! I finished this one several weeks ago and am so happy to get it out in the world! You can find the full written pattern below, along with links to the Lion Brand kit, video tutorial and printable PDF!
The front and back panels of The Wisteria Sweater are worked from the bottom up. Then, you will seam the sides and shoulders before attaching and working the sleeves top down. For a longer top, add more rows in multiples of 4 before you begin the underarm shaping. For longer or shorter sleeves, just add or remove more rounds before beginning the cuff! The great part about the sleeves being worked top down is you can try it on and adjust the sleeves before fastening off!
I used Lion Brand Re-spun yarn in the bonus bundle, color “blush”. You can find The Wisteria Sweater as a kit on the Lion Brand website, which comes with all the yarn needed to make your sweater plus a free copy of the ad-free printable PDF! You can also customize your yarn color.
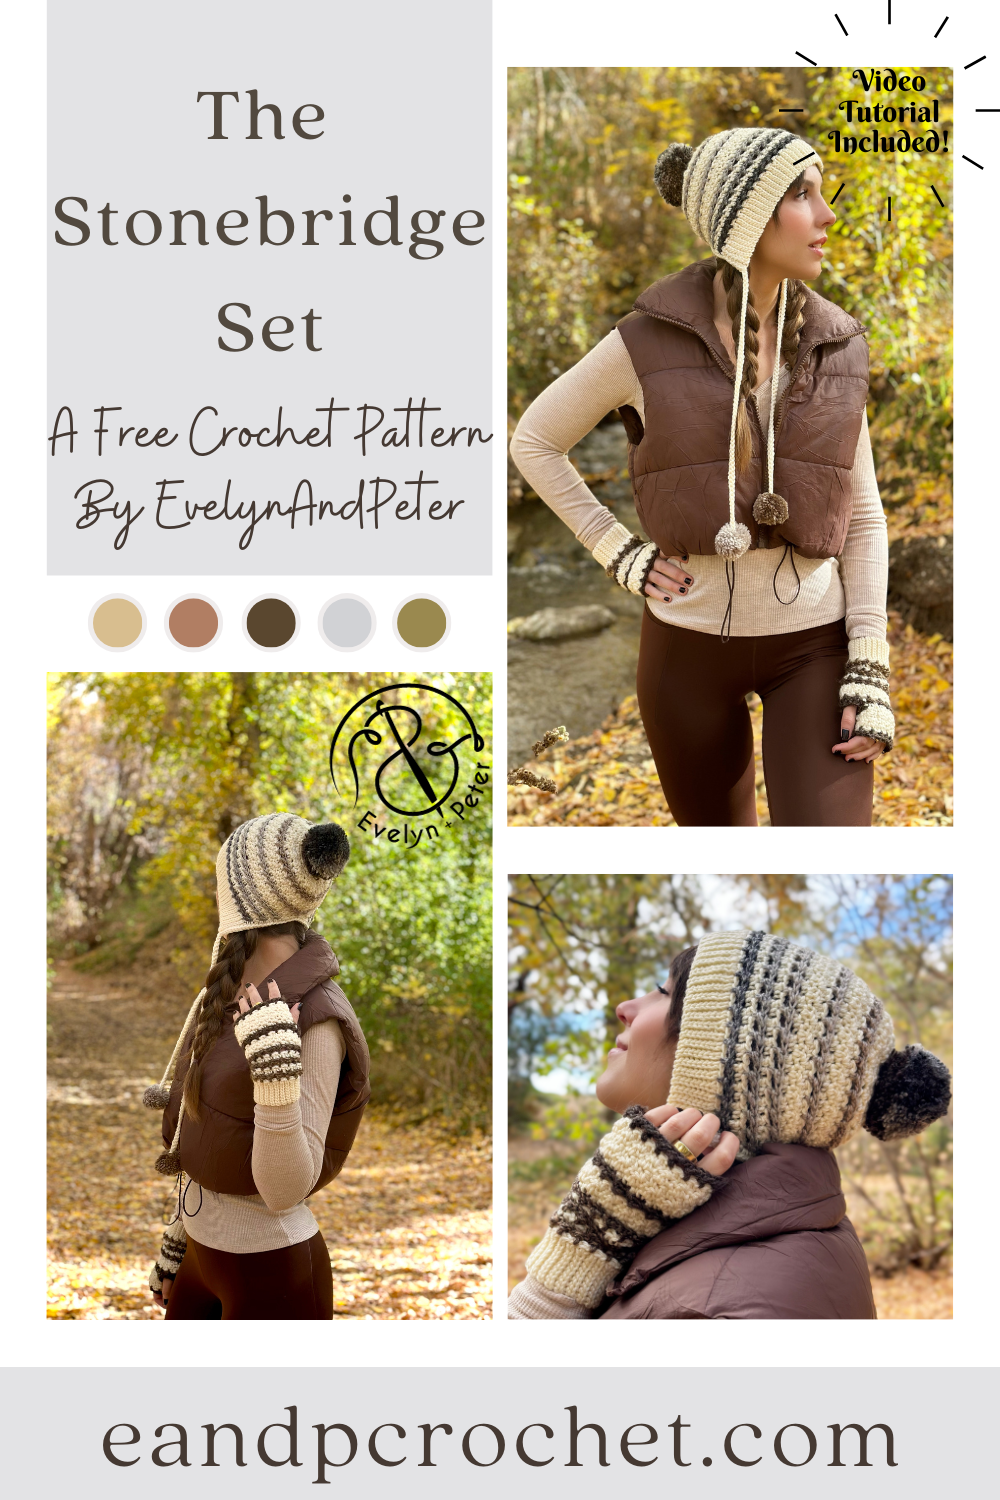
I can’t believe it’s already November and cold enough for my annual Beanie and Mitt set! Last winter I released The Winter Moonlight Set and this year is The Stonebridge Set crochet pattern!
I wanted to do something a little bit different than your typical beanie. I decided to construct it in more of a “bonnet” style and add a tie with little poms on the ends! You’ll start the beanie by creating the ribbing in rows, then crocheting your first row into the sides of the ribbing rows made. You’ll continue the first several rows back and fourth before joining the piece together and crocheting the remaining beanie in joined and turned rounds. Don’t forget the turn! It’s very important to do so within the pattern.
The fingerless mitts uses the same stitches but worked up slightly different. The ribbing is made the same as the beanie but you will immediately join together and worked in turned rounds throughout the entirety of the main body of the mitt. Take note of the thumb hole round! This will be slightly different for the left vs. the right mitt. Other than that, both left and right will be the same!
I used worsted (4) weight yarn for this set. The main color A is Lion Brand Skein Tones in “Ivory or Basic Stitch Anti-pilling in “ecru” (these are the same colors and either one will work) and Color B is Ferris Wheel in “Morning Java”. If you want your fingerless mitts to have the same color stripes, be sure to start on the same color within the ferris wheel skein. You’ll have to pull the yarn out and cut so you can start at the same point! Other than that, no need to worry about rearranging the colors as they stripe on there own! You can find this yarn in the Lion Brand kit along with a free copy of my PDF pattern!
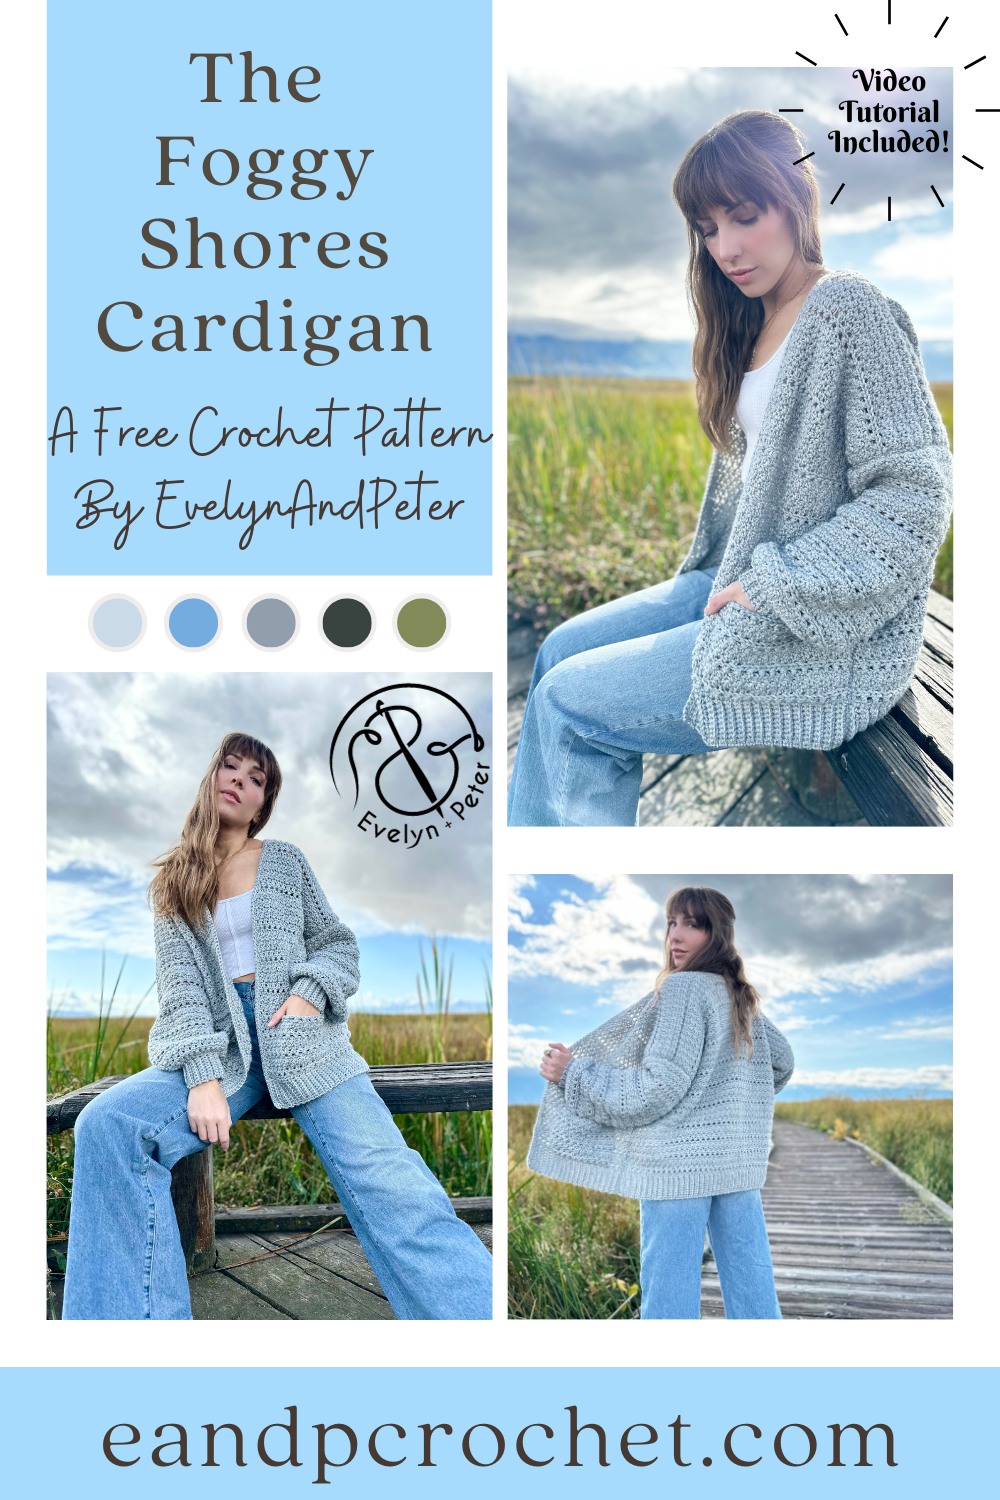
I had to sneak in one more crochet cardigan using Heartland yarn before the end of the year! The Foggy Shores Cardigan crochet pattern turned out exactly how I wanted. I love the style of my Stony Shore Cardigan and Kiah Cardigan and I think you guys do too! I wanted to keep the style similar but decided I needed something a bit more oversized and cozy! I think The Foggy Shores Cardigan is the perfect addition to my Heartland collection!
The Foggy Shores Cardigan is worked from the bottom up and is easily customizable. It has cozy pockets worked into the front panels. You can easily skip this part if you want if you prefer no pockets! Instead of working the chain length, just continue across the row with your regular stitch repeat. If you prefer your cardigan longer or shorter just add or remove rows to both the back and front panels until its the length you desire. If you don’t want your cardigan as oversized you can follow a size smaller than you normally would!
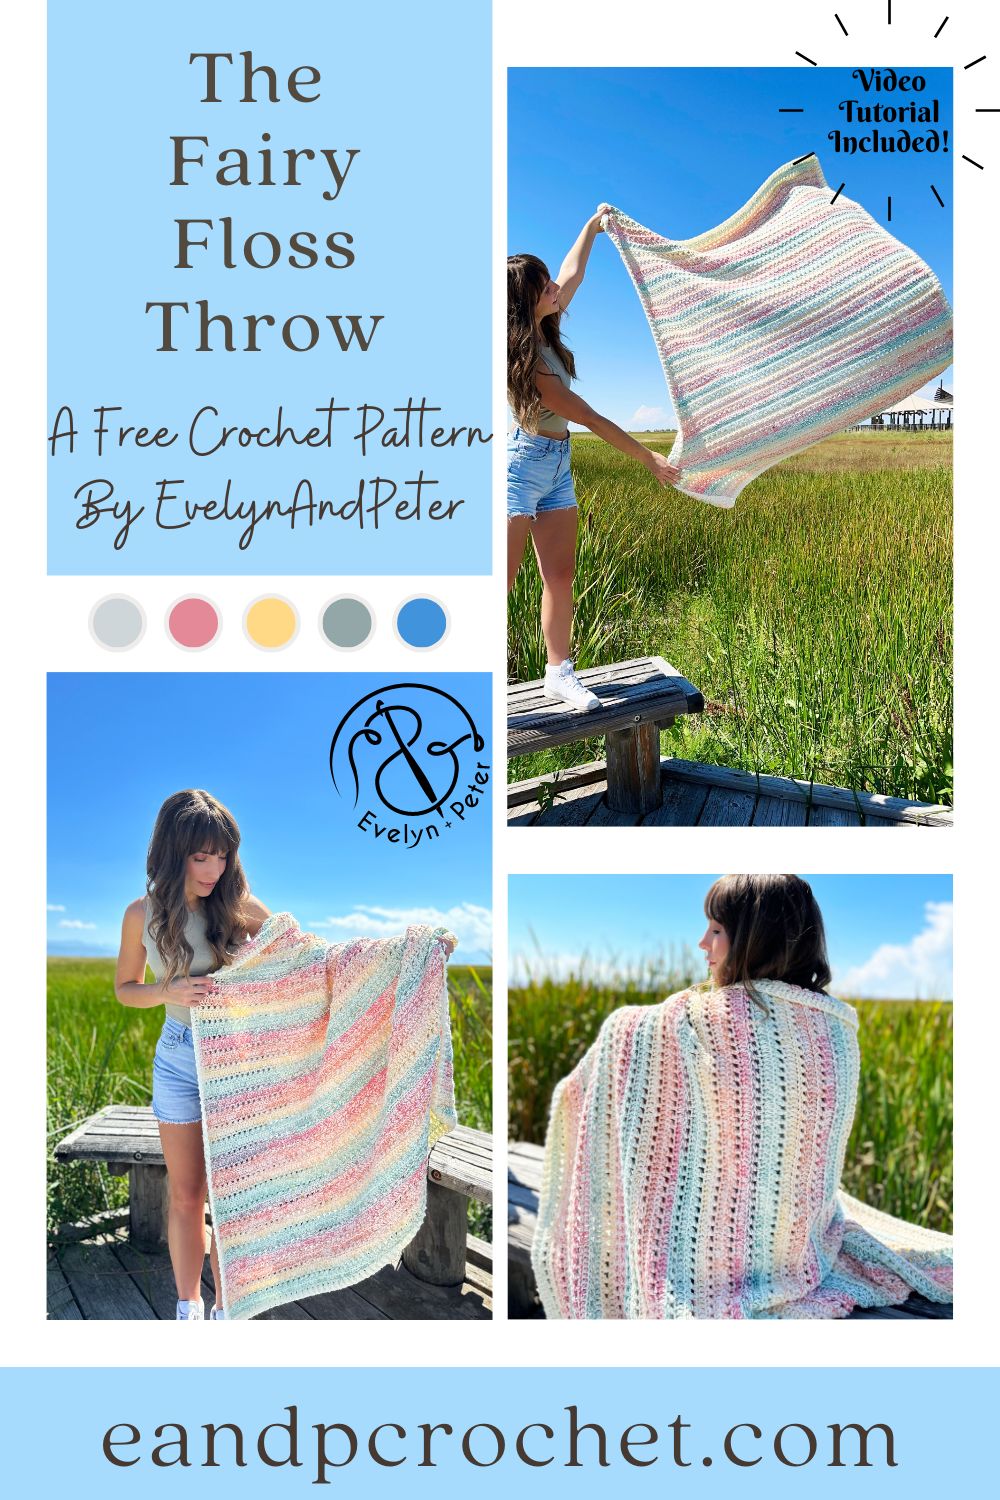
I love a good blanket project that is mindless, don’t you? There is just something about being able to curl up with it, put on whatever current binge worthy show and crochet without having to think about what i’m doing! Even better, The Fairy Floss Throw uses yarn held double. So not only does it work up quicker, it gives a beautiful but effortless look!
The Fairy Floss Throw uses two different yarns, both of them Lion Brand. First is Pound Of Love which is a worsted weight and the second one is Mandala String which is a super fine weight. The Mandala String yarn does allllll the talking in this pattern. It creates a beautiful stripe effect with zero effort on your part.
There are so many different color combinations for this blanket. I used vintage white (but you can also use Vanilla or White for the same look) and Jazz for the mandala yarn. I wanted to see what it would look like with a darker yarn and I totally love it just as much!! Check it out below! You can use Charcoal or Black to achieve this look.
If you want more of a neutral look you can swap out the Jazz color for the color Ballad. I think this would look amazing! I’m so excited to see everyones blankets! If you plan on getting yarn I recommend grabbing the kit from lion brand which comes with a free copy of the printable pattern!
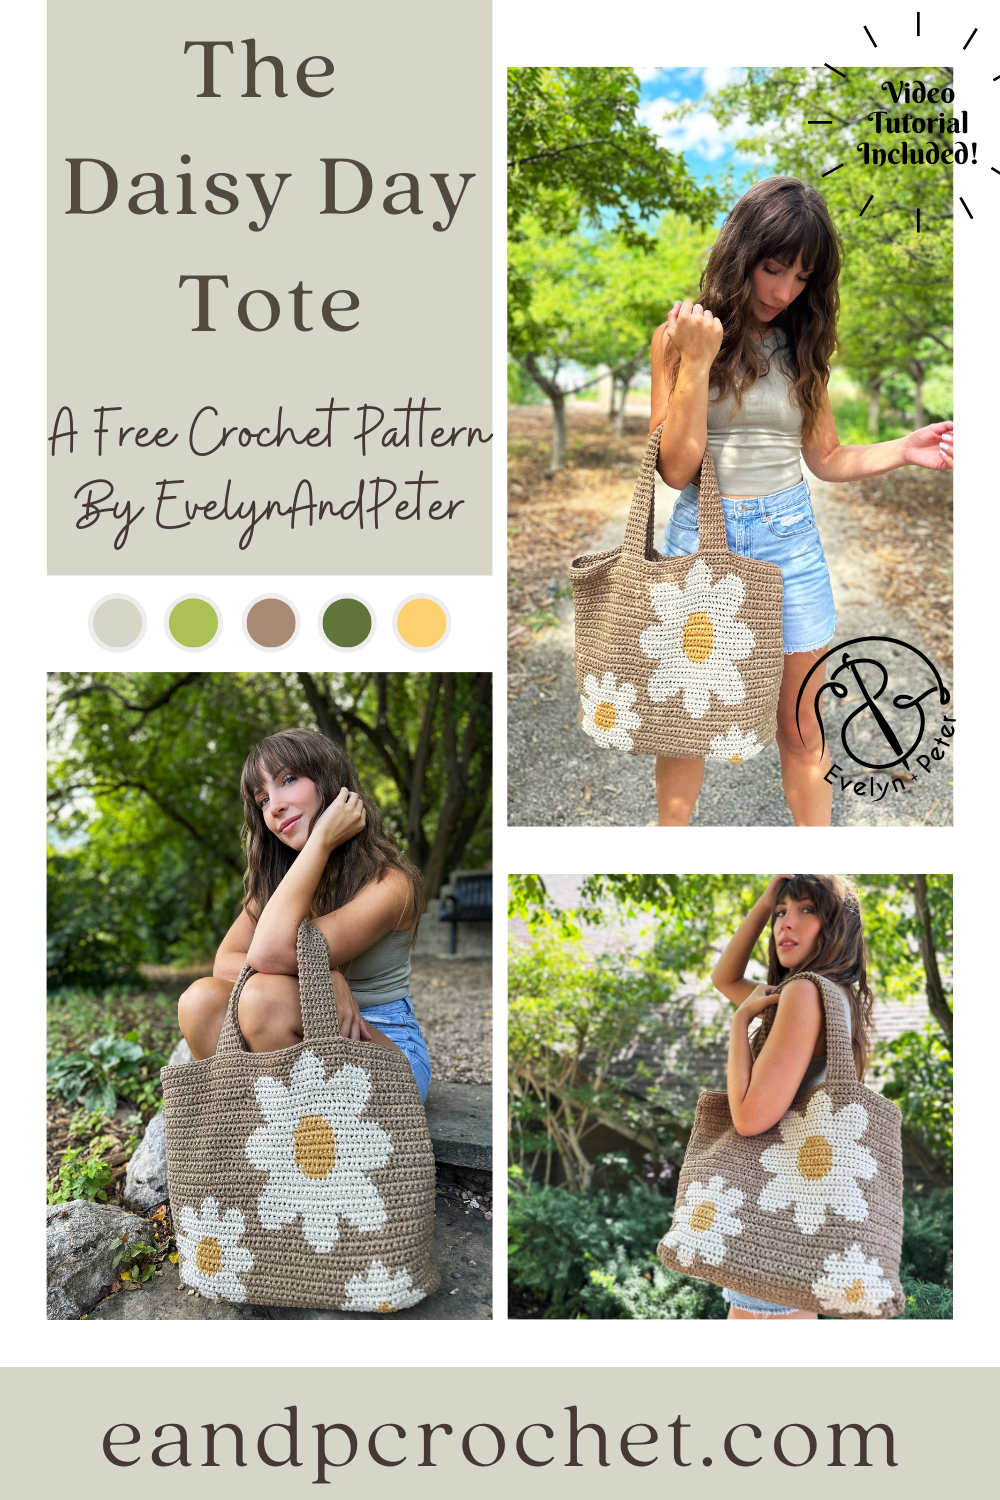
It’s been a long time coming… The Daisy Day Tote is finally here! You might recognize the cute little flowers from my previous pattern The Daisy Day Throw! I always knew I wanted to expand this collection and a large tote is what came next! Maybe there will be a Daisy Day Rug down the road??
The Daisy Day Tote Is made in 2 separate panels from the bottom up. You will also be making 2 straps. Then you will sew together! When you work the main panels of the bag you will be carrying Color A and Color B throughout. For mine, I crocheted directly over the yarn I was carrying to hide it. You will bring it up with you each row. If you aren’t familiar on how to carry yarn along in color work be sure to check out the video tutorial! For Color C, you will not carry it. Simply leave Color C where it is at and when you come back to it in the next row, just pick it up again. Only the center of the flower uses Color C so we don’t need to carry it. Once the center of one is finished just cut Color C and move to the next flower center.
The straps are made using thermal stitch which makes them extra sturdy! Be sure when you sew the straps to the bag that you place them far enough down on the inside of the tote before seaming. This keeps everything nice and secure.
If you plan on purchasing yarn, I recommend checking out the Lion Brand kit! The kit comes with all the yarn you need to make your Daisy Day Tote plus a FREE copy of the printable PDF pattern! You can even customize your yarn colors.
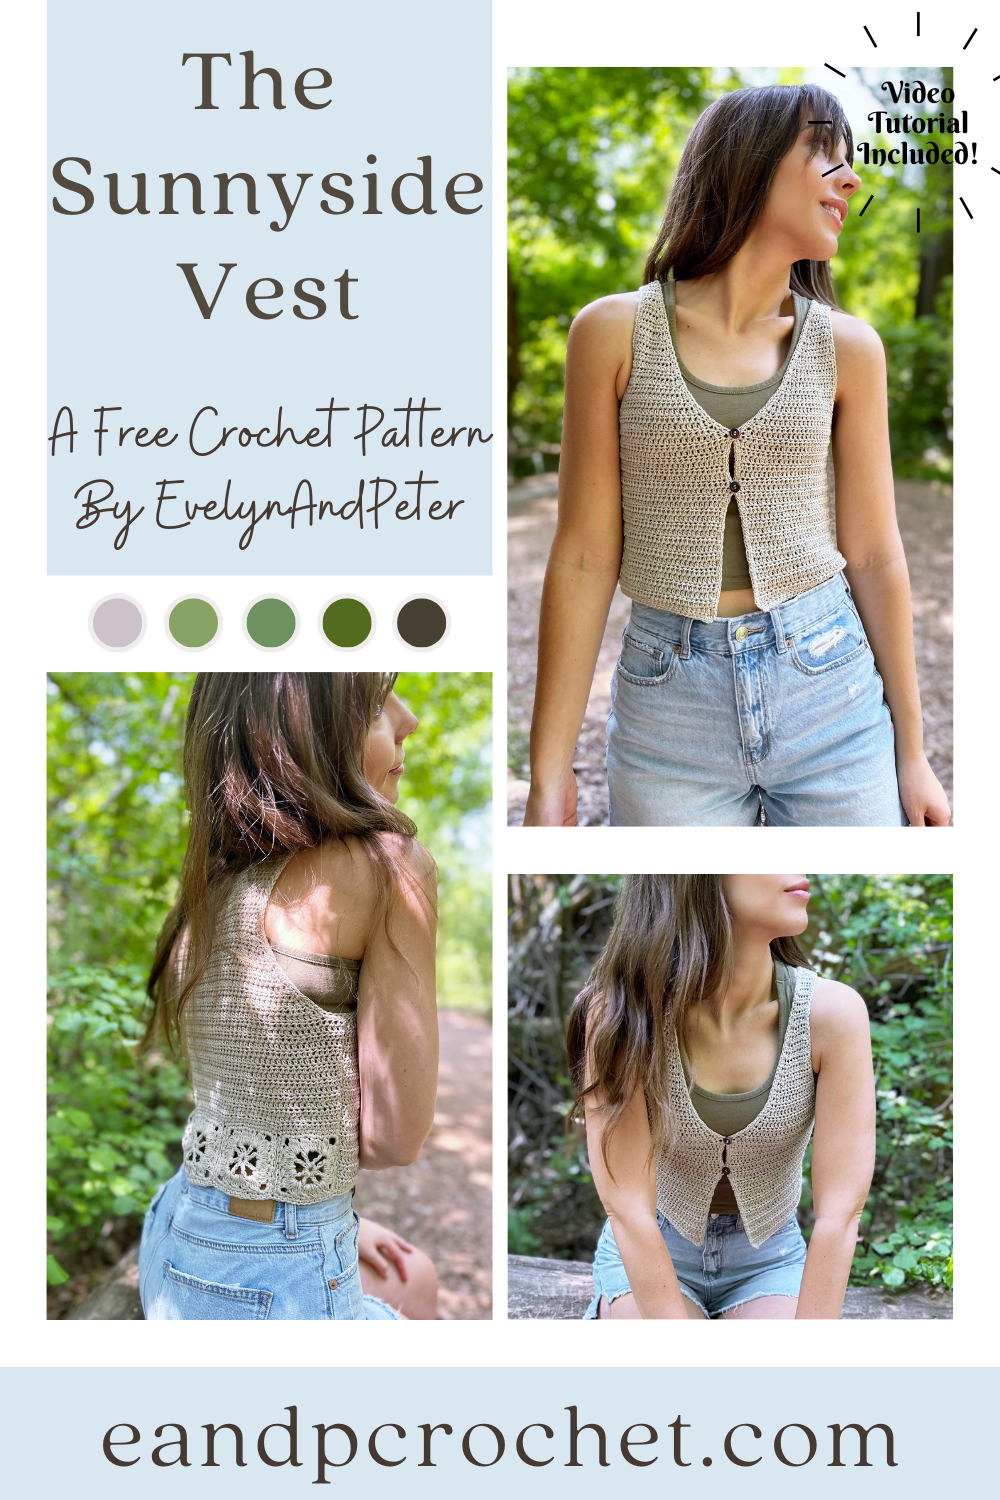
I’ve always wanted to crochet a cute little vest but I wanted to do something a little more unique than just all basic stitches. I knew I wanted to incorporate granny squares or motifs somehow after being inspired by a shower curtain with pretty motifs along the middle that reminded me of sunshine. That’s how we ended up with The Sunnyside Vest crochet pattern!
The Sunnyside Vest is worked in 3 separate panels after you get the motifs worked up. Each size will have a different amount of motifs along the back. Once you make all of your motifs you will join them together before finishing the back panel from the bottom up. The front panels are also worked from the bottom up before being joined at the shoulder and side seam.
I used Cotton Bamboo Linen yarn from Lion Brand which is a Fine (2) weight yarn. This is a newer yarn and has some lovely colors. I used Shale for my Sunnyside Vest crochet pattern. I loved the lightweight feel of this yarn and the fiber combo is perfect for a warm weather garment!
You will notice some of the sizes are combination sizes. This is due to the fact that it is a form fitting garment and the motifs along the back are all the same size. To find your size, just locate your bust size on the chart!
Usually I make a full video tutorial walkthrough for my designs. For this one I was not able to do a tutorial for the entire thing. I did make a video on how to make the motifs, join the motifs, and set up the first row for the back panel. In my opinion this might be the trickiest part for beginners so I wanted to make sure I provided a visual for you guys! After you are all set up it is just Hdc stitches throughout, with some decreasing and shaping! I had a very busy month when designing the Sunnyside Vest crochet pattern and my family was sick with the stomach bug for weeks. I hope you can forgive me for not having a full walkthrough but I am always available to help with pattern questions! Check out the video tutorial here!
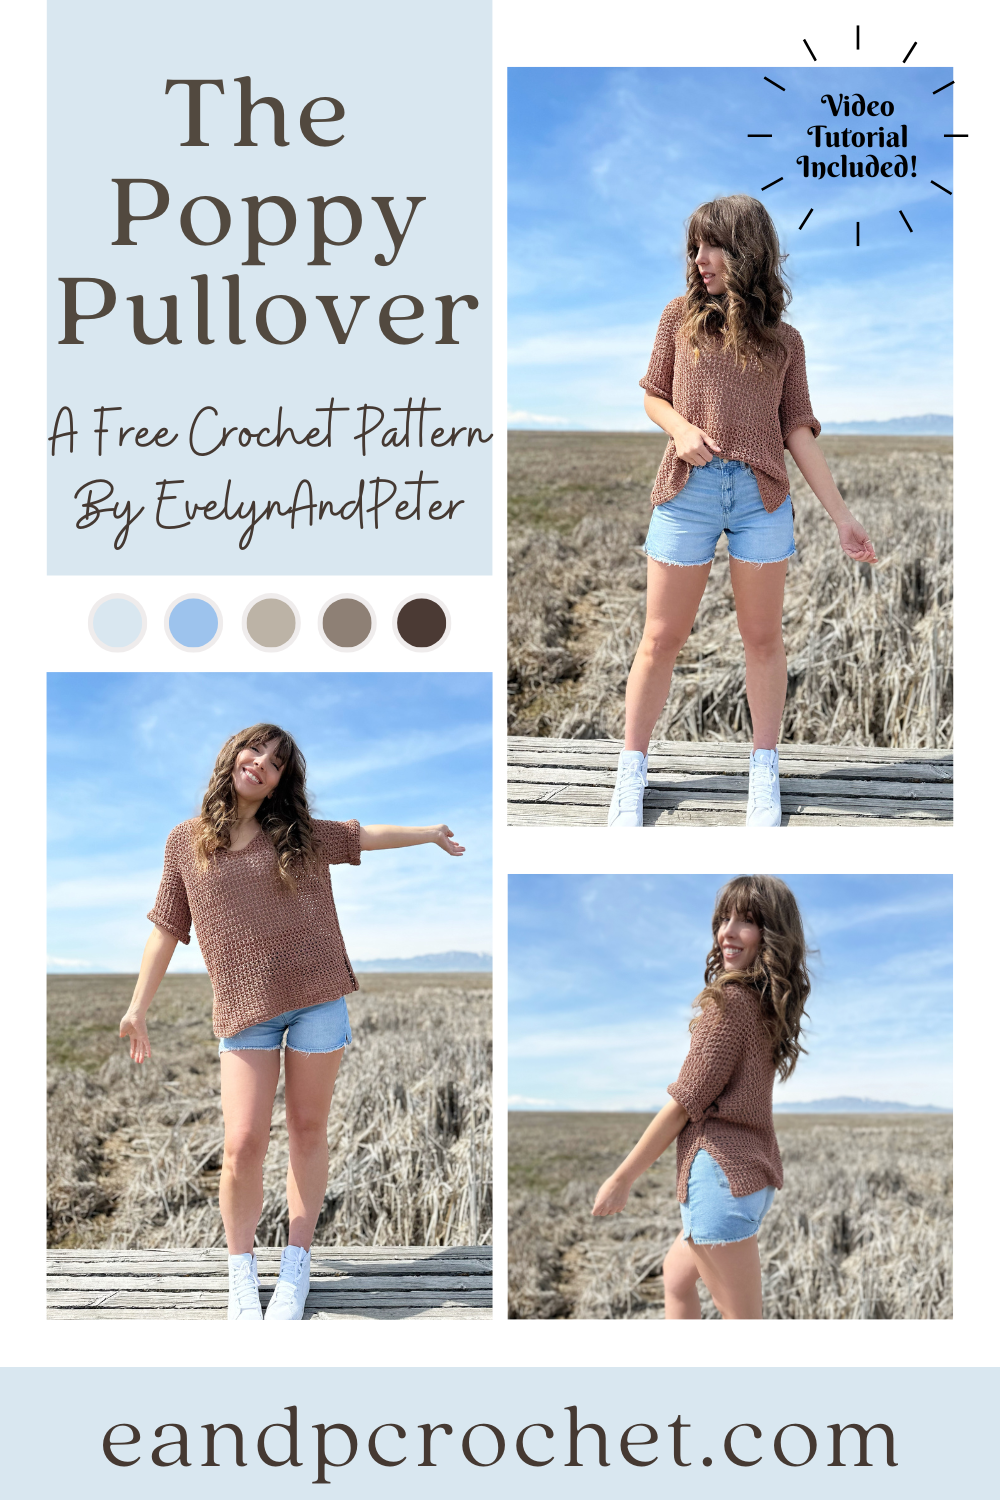
Did I just find my new favorite cotton yarn? I think I did. Be prepared for so many designs using this yarn because I am obsessed! My first make using this yarn is called The Poppy Pullover!
I used Lion Brand 24/7 cotton DK for the Poppy Pullover crochet pattern. Don’t get it confused with the worsted weight version! The DK weight is obviously thinner and much more soft. It had no splitting and no tangles as I crocheted. I’m absolutely in love with it! I used the color Cacao for mine but they have a lot of pretty choices.
The Poppy Pullover is crocheted in separate panels from the bottom up. You’ll be using a larger hook in comparison to the yarn to give it more of a mesh look. It’s important to not pull your stitches tight. You want a relaxed and even tension so you can give it the perfect drape. Feel free to go up in hook size if you normally have a tight tension and/or your gauge is off. Once you have all your panels complete you will sew them together.
The Poppy Pullover is easy to make adjustments to. You can add or takeaway as many rows as you want on the back panel to adjust the length. Just be sure to make the same adjustments on the front panel as well, right before you split the neckline.
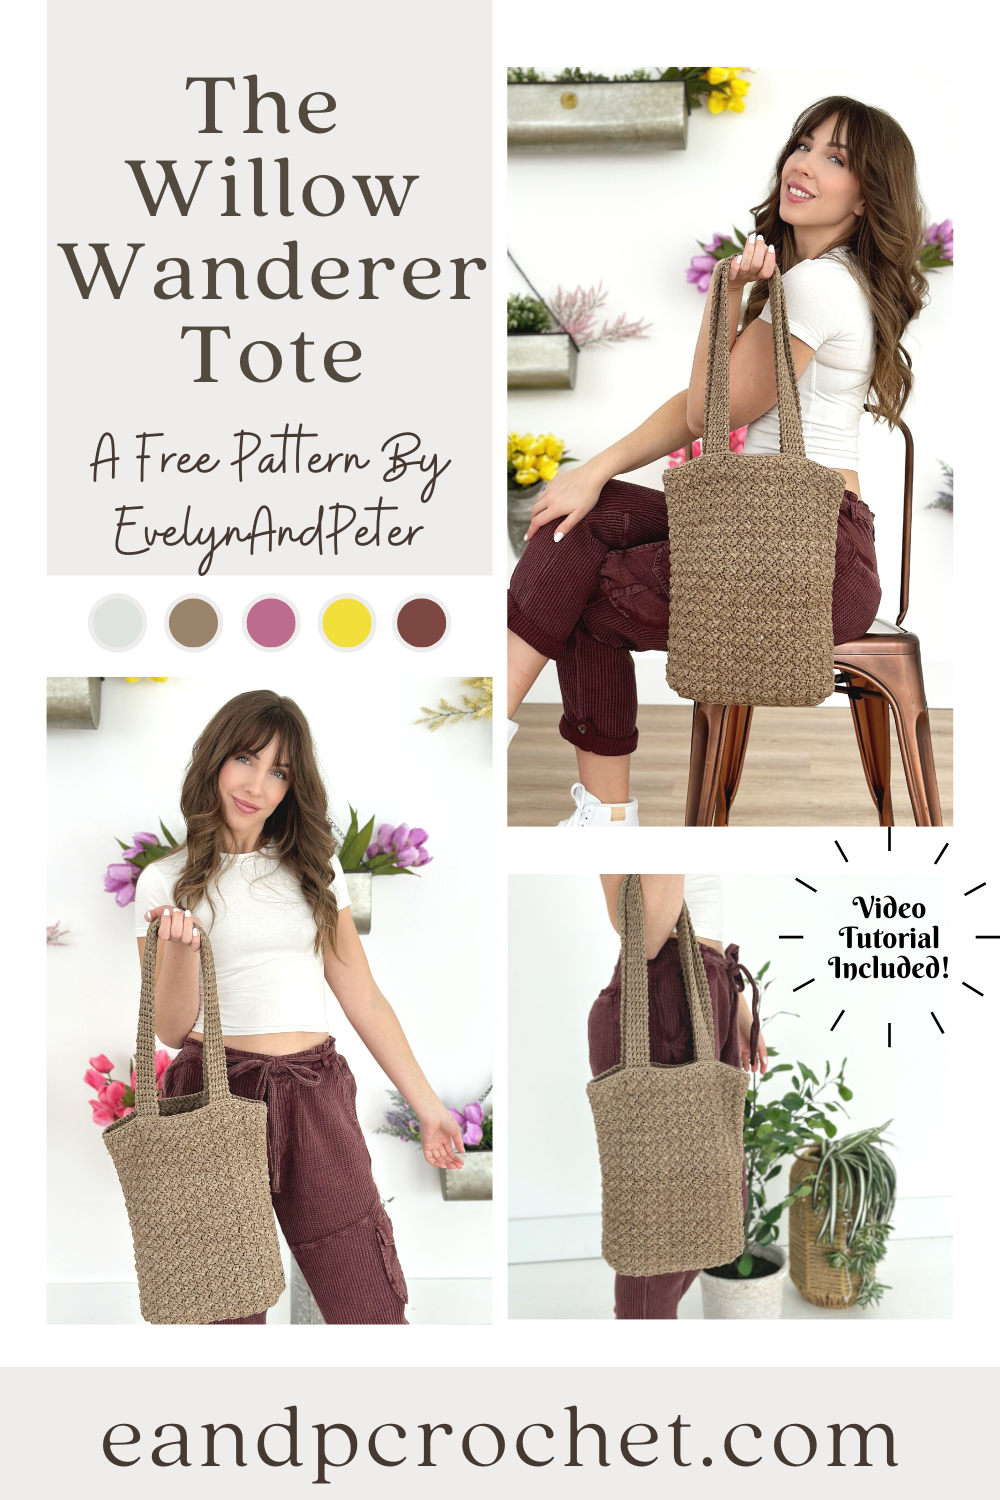
I love a good tote bag! I especially love a good tote bag when it uses Rewind yarn. The Willow Wanderer Tote uses Rewind yarn AND one of my favorite stitches!
The Willow Wanderer Tote is worked in 2 matching panels from the bottom up. Once both panels are made you’ll join them down the sides and bottom. The panels are made using the Sedge Stitch! You might recognize this stitch from my Kiah Cardigan and my Winter Moonlight Set! Overall this pattern is pretty beginner friendly. There is one spot where you will need to know how to work a Foundation Single Crochet (Fsc). It’s only a small part totaling 6 Sc in the shaping. If you don’t know how to work a Fsc, don’t worry!! I show you how to do it in my video tutorial, so be sure to check it out.
Once you have the 2 main panels made you have to make the straps! The straps are worked up in the Thermal Stitch. This is a very thick and sturdy stitch. My straps are approximately 26″ long. When you sew them onto the bag you will position it about 1.5″ down from the top of the bag on both sides. This way when you sew it on, it’s attached in a square shape and makes it extra sturdy.
I used Rewind yarn for this bag. This is such a nice yarn in my opinion. It’s super soft and a flat tape shape. There are so many nice colors too! My tote is available as a Lion Brand kit which comes with all the yarn you need to make your tote plus a FREE copy of the digital PDF pattern!
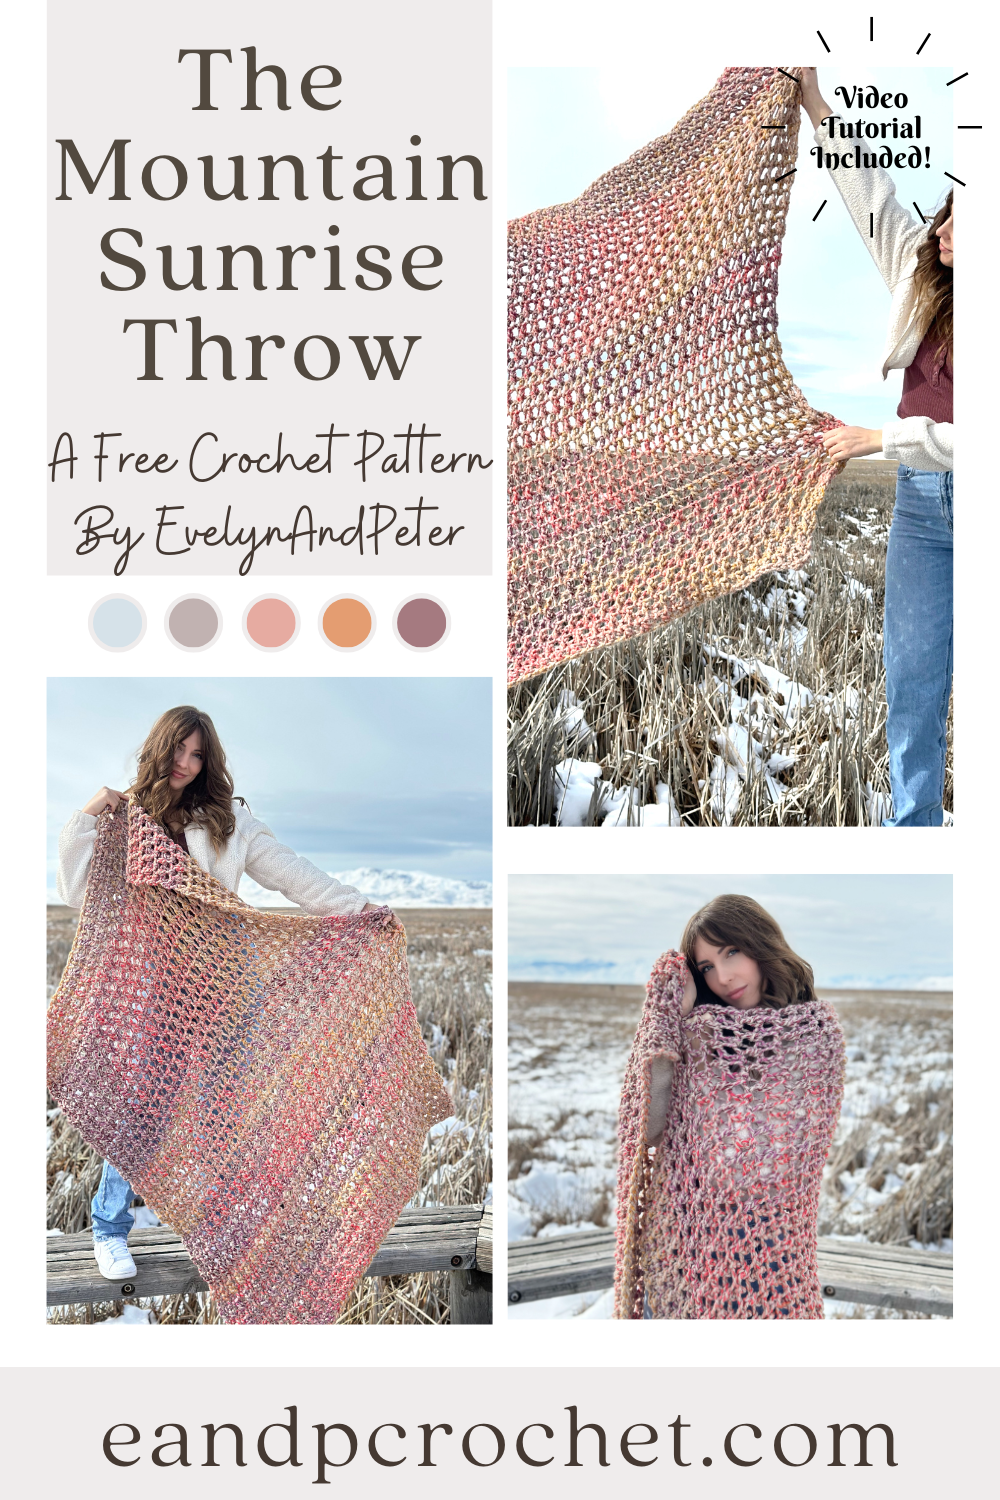
I’m hosting a Crochet Along! I’m so excited you guys, it’s been a while since i’ve done a CAL and I’m pumped to be hosting one for The Mountain Sunrise Throw! Keep reading for all the info you need on where to join the CAL and the next steps to get started!
The Mountain Sunrise Throw is easy breezy to work up, beginner friendly, has bouncy stitches, amazing drape and is FUN to crochet!! I hope you guys are excited to crochet along with me!
What do I do first?
The CAL officially starts on March 20th 2023! I wanted to give you guys plenty of time to get all of the materials before we start.