search results for
cardigan
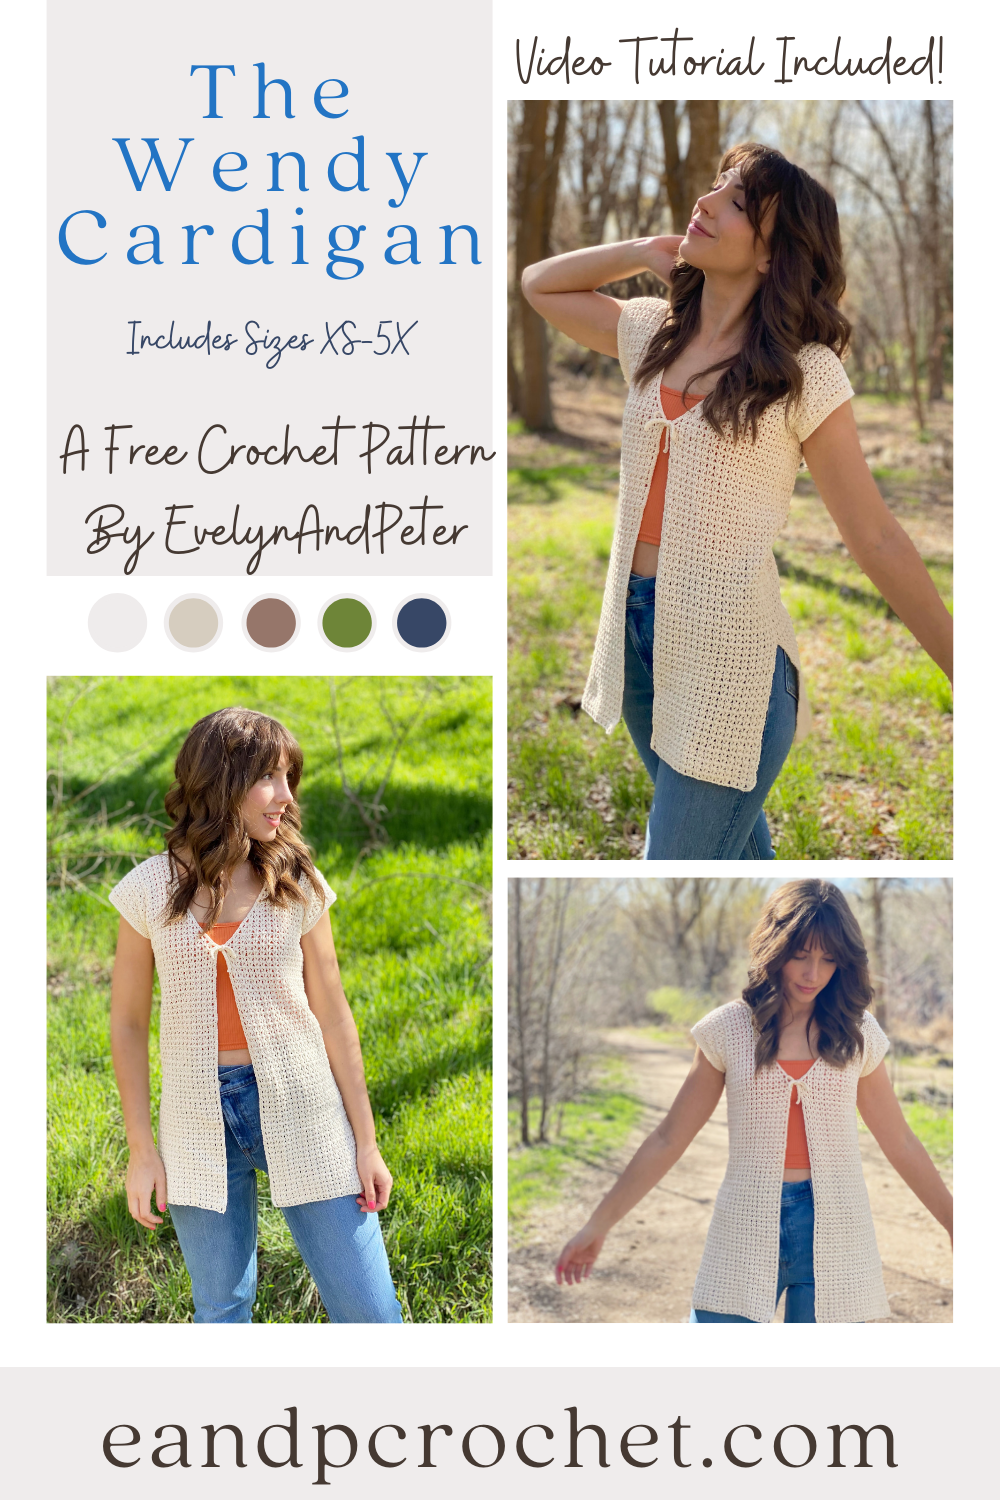
I love the soft romantic vibes that The Wendy Cardigan gives. Somebody suggested the name Wendy for it on my name contest because it reminded them of Peter Pan and I totally see it. 🙂 It’s light weight and made of soft cotton which makes it perfect for warm weather. I’m excited to pair mine over sundresses this summer!
The Wendy Cardigan is worked from the bottom up in 3 separate panels. You can easily adjust the length of your cardigan by adding or taking away rows before you begin to decrease on the front panels. Make sure you adjust the same amount of rows on the back panel as well. I think this cardigan would look SO cute cropped. If you make a cropped version I would love to see it!
The stitch used in this cardigan is very similar to the classic V stitch but it does not have the Ch 1 in between the 2 Dc stitches. This is a great pattern to make and not have to use much brain power on the stitches! It’s just Dc stitches across the row, working them in between the 2 Dc from the previous row!
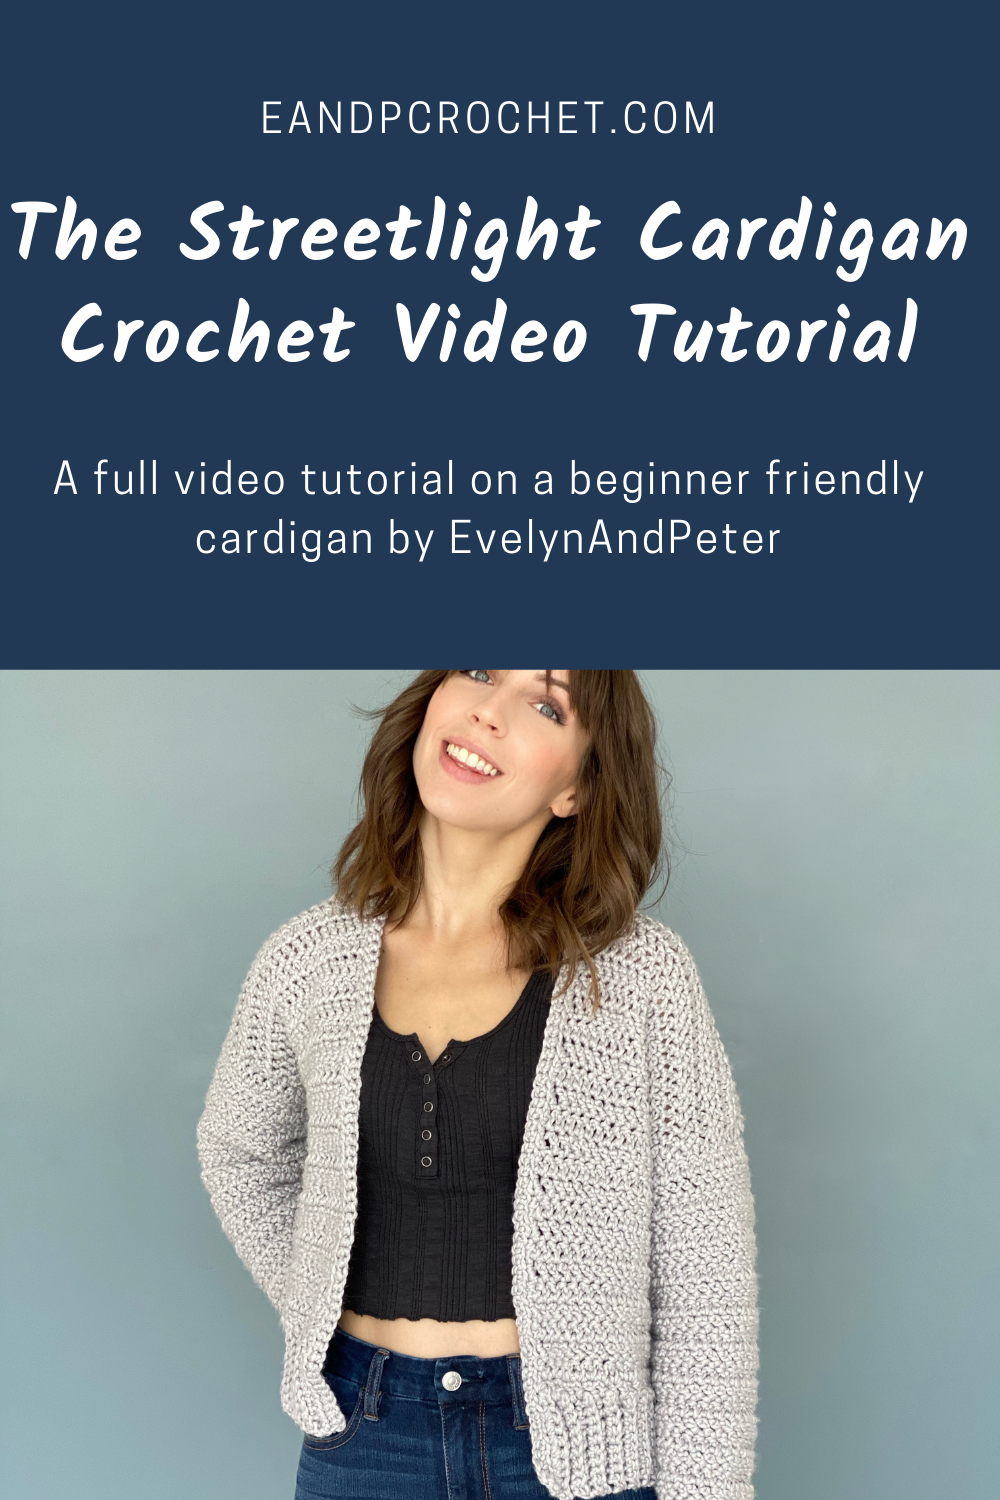
If you are a beginner and need a little bit of extra help, then be sure to check out my full video tutorial! I’ll walk you through step by step on The Wendy Cardigan crochet pattern!
If you like this pattern be sure to check out some of my other cardigans too!
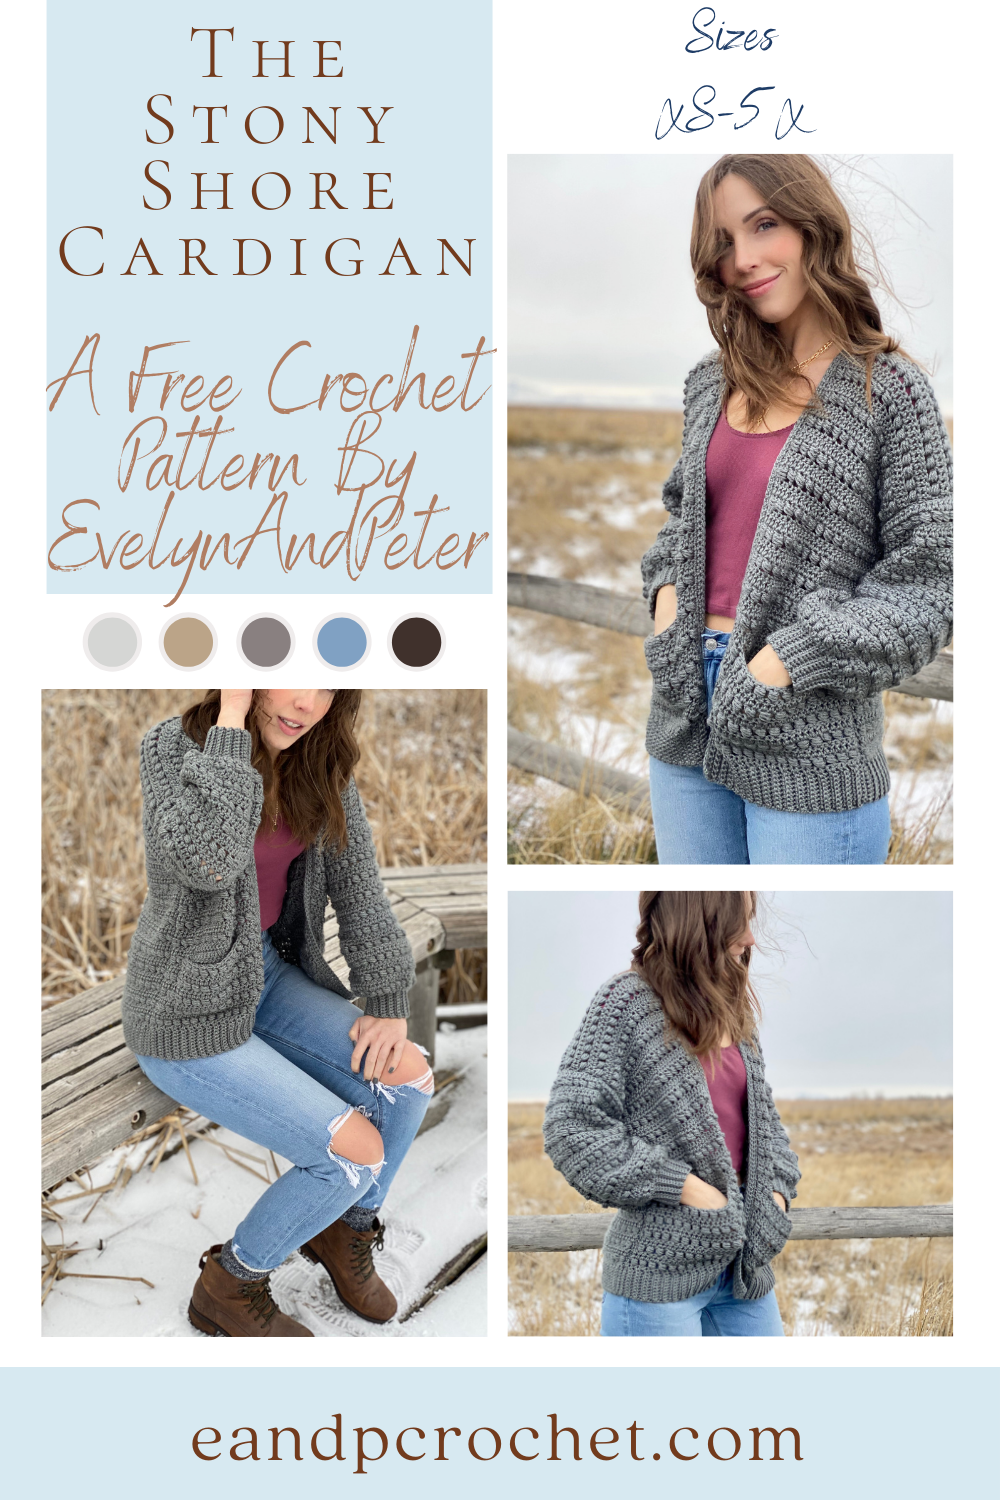
The Stony Shore Cardigan Crochet Pattern is here! I’ve been wanting to make something with this stitch for a long time and I’m glad I finally did it! I also knew immediately I would be doing a loose balloon style sleeve. I actually attempted it on my Sunset Bomber but it just didn’t go with the style. I’m sooooo happy that it worked out that way because they look AMAZING on this cardigan.
I’ve been posting sneak peeks of this sweater on TikTok and Instagram. The amount of crocheters that told me they couldn’t wait for this pattern was kind of insane. I can’t even begin to tell you all how much I appreciate the love and support on this design. It’s also a bit nerve wracking because I hope it lives up to the hype. I just want you all to love it as much as I do. Even my husband said this was his favorite sweater of mine and he is my toughest critic when it comes to crochet!! lol.
The Stony Shore Cardigan Crochet Pattern is worked in separate panels from the bottom up and is beginner friendly. Once you get the bead stitch nailed down it’s a breeze to make. You will alternate bead stitch rows and double crochet rows throughout. You can easily make your sweater longer or shorter by adding/taking away rows in multiples of 2 before tying off. Same with the sleeves!
If you are a complete beginner and need a little extra help then be sure to check out my full video tutorial!
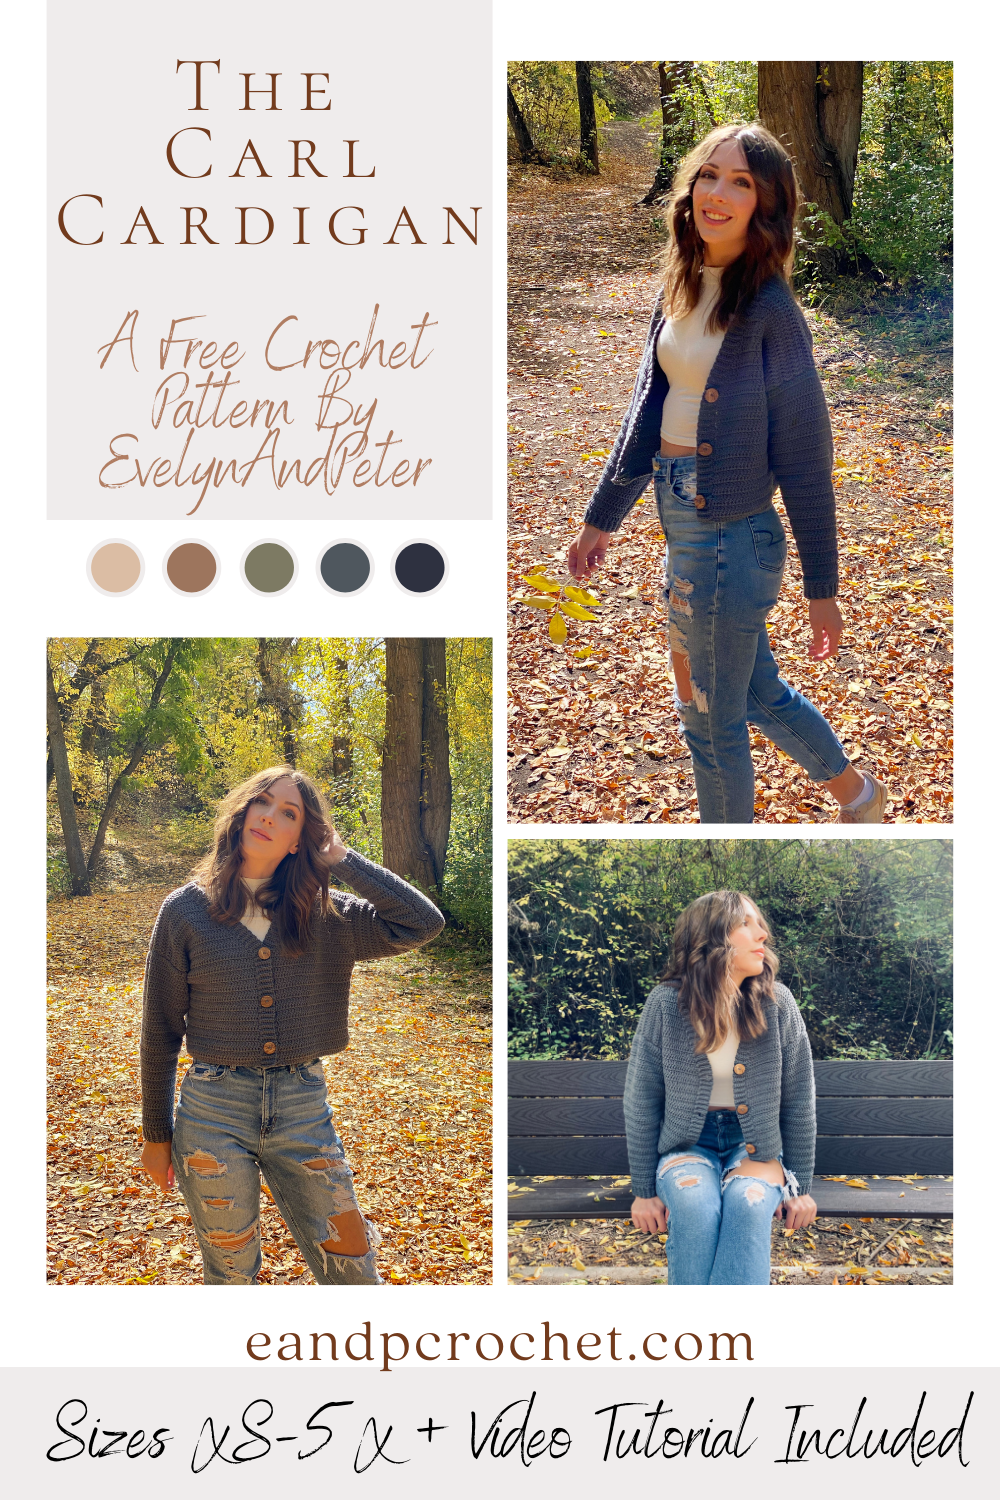
I love the look of oversized V-neck button up cardigans. There’s just something about them that I find so appealing! They give me such comforting “grandpa” vibes haha. I knew I had to make one but put my own trendy spin on it. The Carl Cardigan is my cropped and a bit more girly version of this!
The Carl Cardigan is worked in separate panels from the bottom up. When you break it down into each piece tackling this sweater is a breeze. I used the same stitch throughout and have very beginner friendly shaping. I used Feels Like Butta which is one of my favorite soft yarns. It’s very smooth to work with and frogs back easily if you make a mistake!
I know some of us prefer to have our cardigans longer instead of cropped. Good news, it is super easy to make this longer! Just add as many rows as you would like to the back panel (in multiples of 2). Then, when you make the front panels, add the same amount of rows before you start decreasing! Remember, you will need extra yarn!
You might recognize the ribbing technique around this cardigan. I did the cuffs from The Pemberly Pullover the same way! You will be working the trim of the cardigan directly off the sides of the front panel. It might look a little intimidating at first, but when it comes down to it, you are just slip stitching to the panels as you go! If you are new to this technique be sure to check out my video tutorial where I show you exactly how to do it.
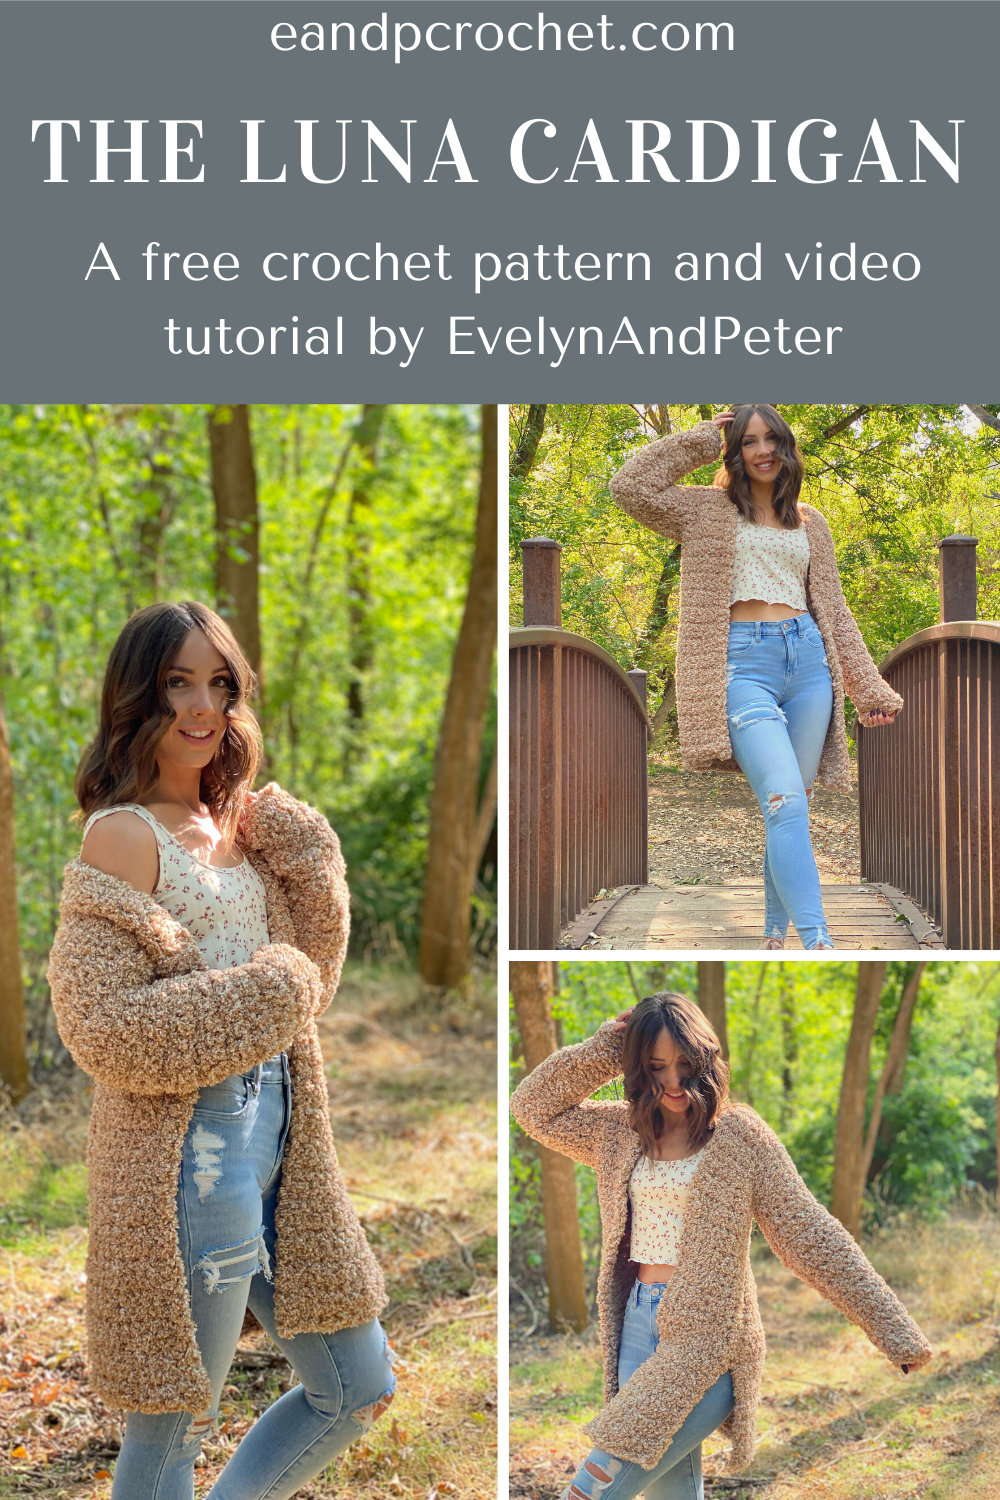
The secret is finally out!! My friend Meghan and I have been working on an awesome collab for you guys and we finally get to reveal it! The Luna Cardigan isn’t being released by herself. She has a knit sister design called The Lottie Cardigan!
The Luna (crochet) and The Lottie (knit) are both beginner friendly and available in sizes XS-5X! Although one is knit and one is crochet we designed them so that they would still be similar in look and fit! Both are free on our blogs and each have a full video tutorial! Not only that but they each are available as kits with Lion Brand! As always, the kit comes with the yarn to make your own cardigan + the PDF digital download of the pattern.
The Go For Fleece Sherpa yarn is so soft and amazing! Although it does take a tiny bit of practice working with fluffy yarn, the outcome is worth it! I have a full video tutorial available in case you need some extra help!
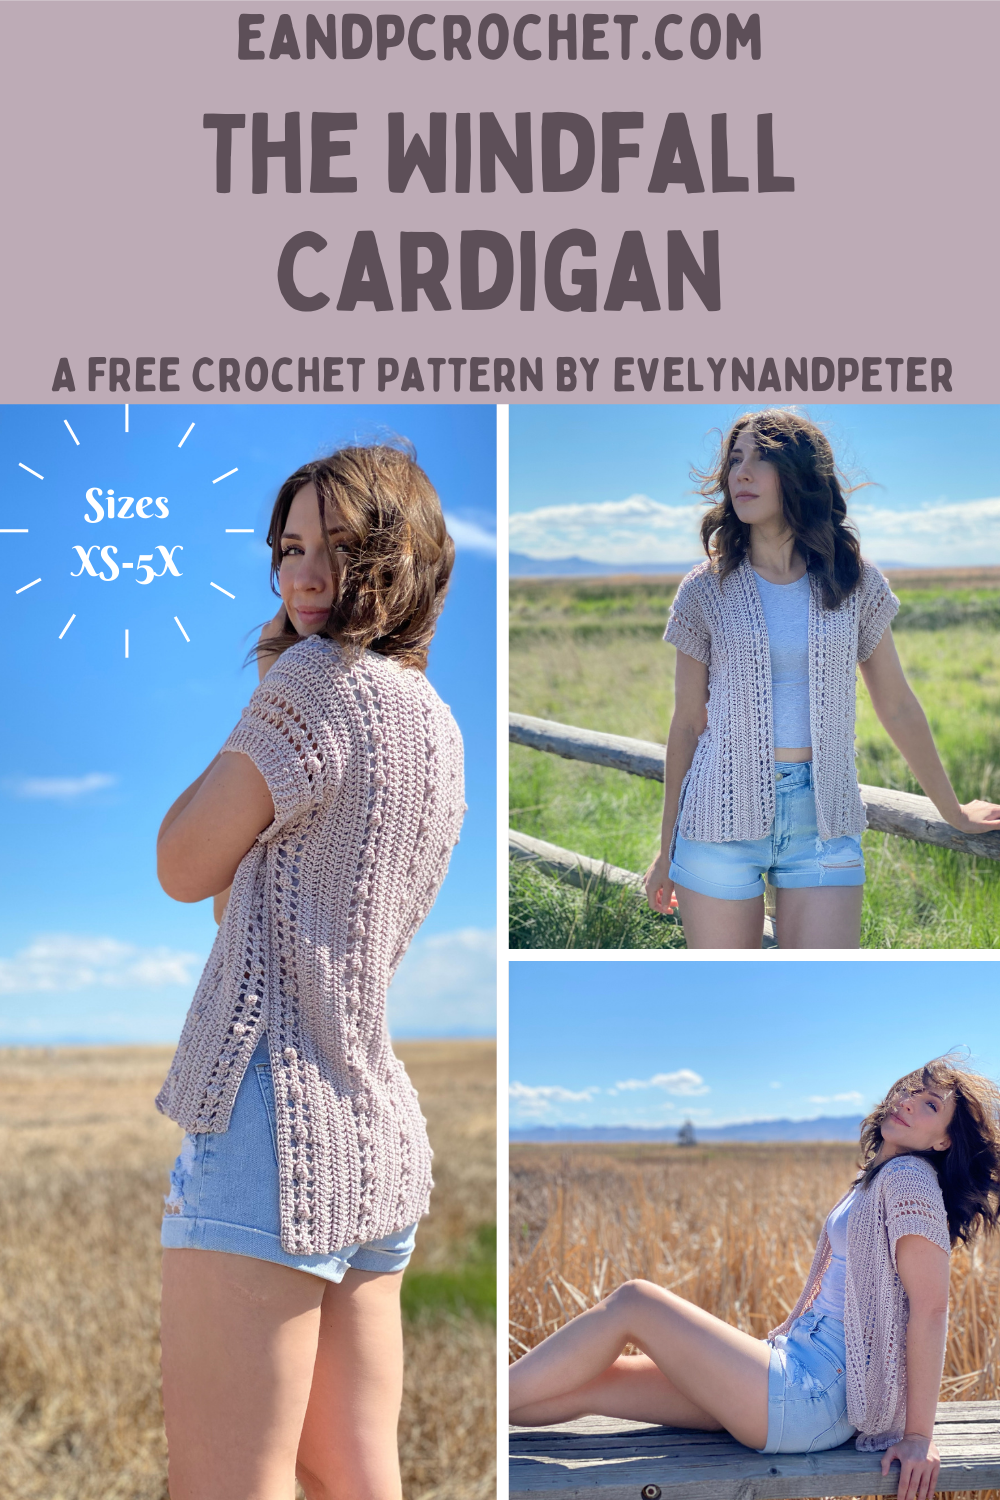
Have you ever crocheted a cardigan in one piece from side to side before? I’ve done a few different designs like this and I’m super excited to introduce The Windfall Cardigan which is made the same way! One of the great things about it is very minimal seaming. There is only one small section on both sides of the cardigan that you need to seam!
I used Lion Brand Nuboo yarn to make this cardigan but I think it would also look great in a cotton yarn! The Nuboo is very silky and smooth. It is similar to Truboo with a bit more of a bounce and a little bit thicker! Can’t find any Nuboo or want to use a different yarn? Check out Yarnsub.com and enter in “Nuboo” in the search. It will bring up a ton of different yarn substitutions for you to choose from.
I have a full video tutorial available for this cardigan. If at any point you get confused or stuck I recommend checking out the video to see if I answer your question there! If you find it helpful I would be so grateful for a thumbs up and subscribe!
If you like this cardigan be sure to check out some of my other ones!
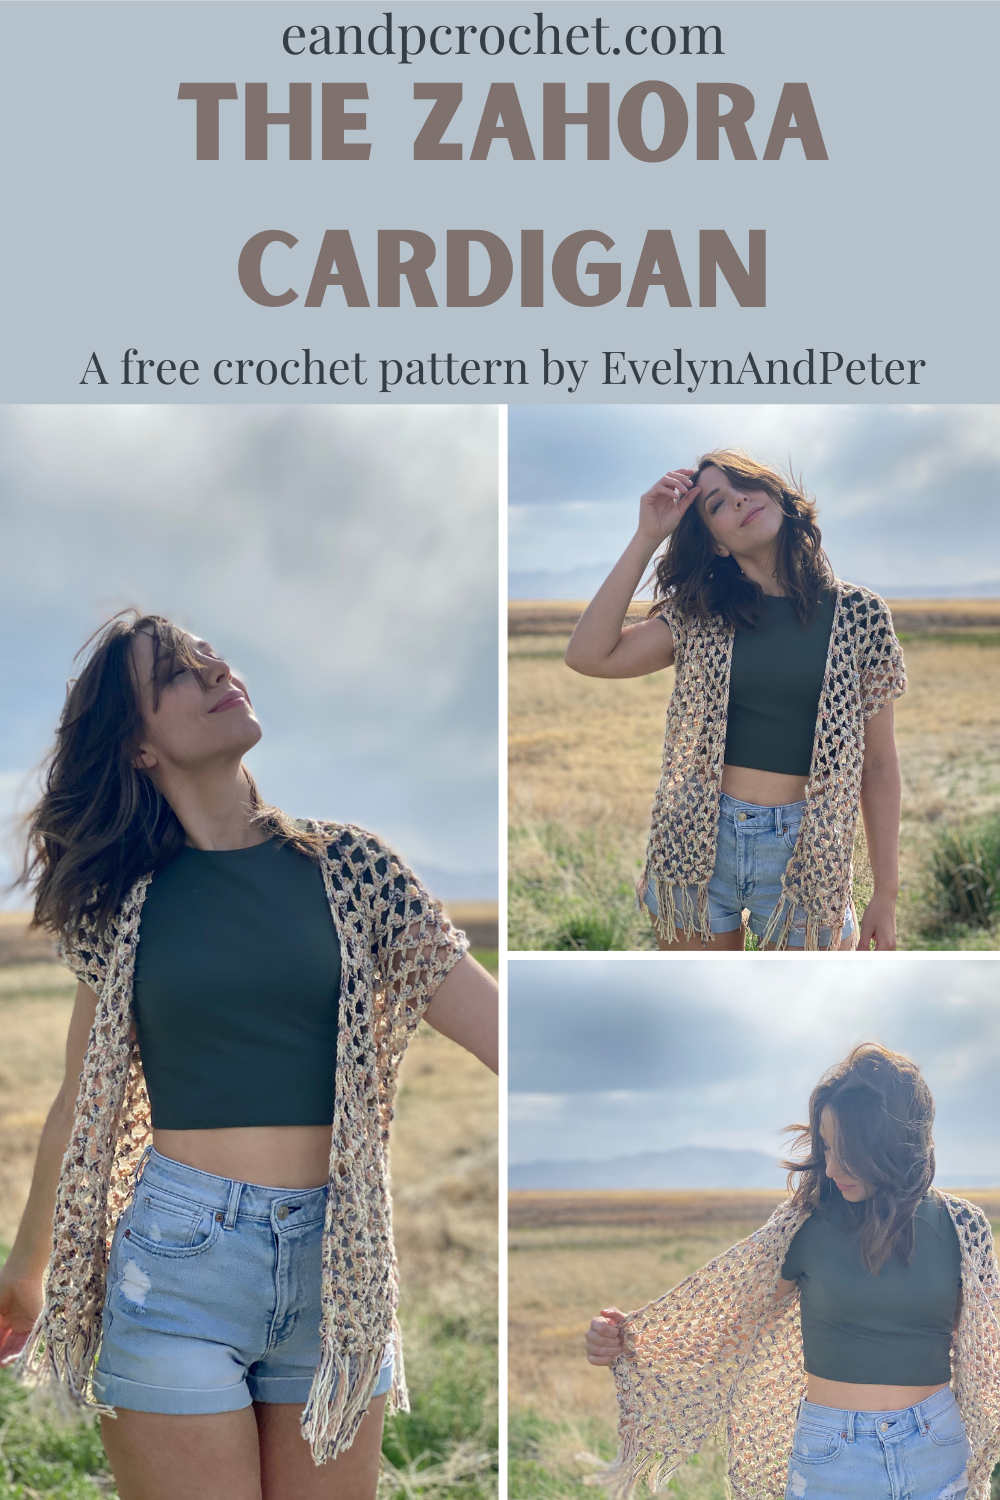
With the warm weather finally here, I’ve been wanting to make all the summer cardigans! I love working with open lace type stitches. Not only do they look super cute but they usually work up really quickly too. The Zahora Cardigan checks off both of these boxes!
I always aim for my designs to be beginner friendly and this one is no different. You will be creating 3 panels and working from the bottom up. Don’t let the picot stitches scare you! It actually goes really quickly. This cardigan is also easily customized. If you want your cardigan longer just be sure to add more rows in multiples of 2 before tying off your panel. Be sure you add the same amount of rows to each panel. If you want a more oversized look, just size up.
I love throwing on my Zahora Cardigan with any summer outfit. I think it looks super cute with jean shorts and a tee but would also be adorable over a summer dress. If I have time I’m totally going to make a longer version to wear over my bikini at the pool this summer!
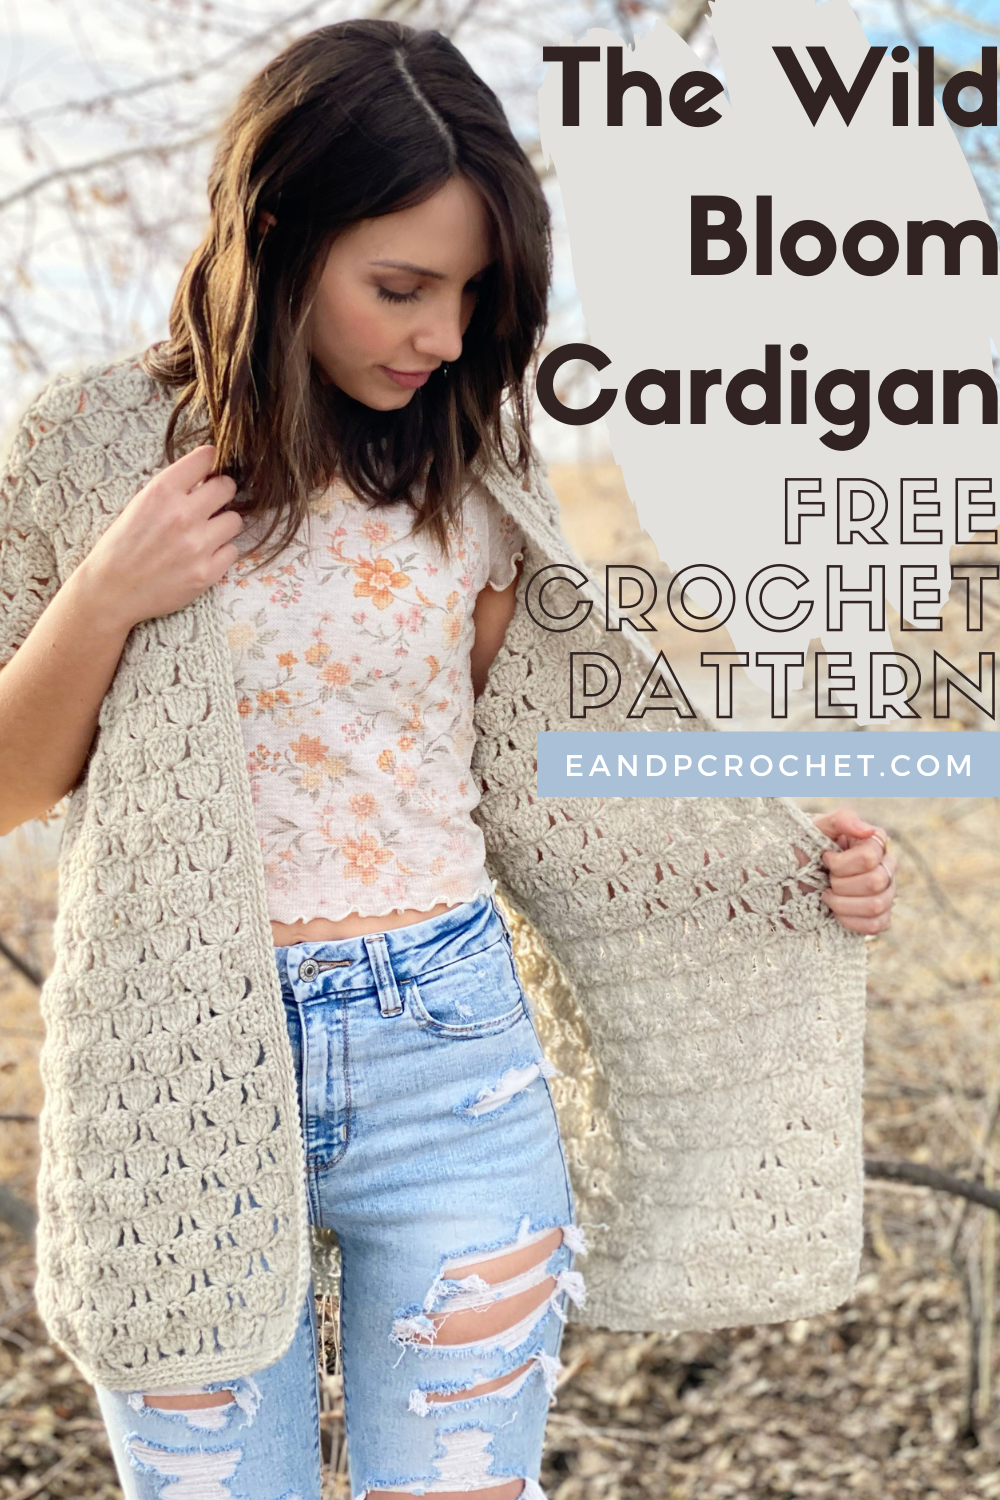
Is it Spring yet? I am so ready for warm weather! I’ve officially started working on my spring and summer designs and I’m so excited to share them with you! First up is The Wild Bloom Cardigan!
The Wild Bloom Cardigan is a fun oversized cardigan with a lace type stitch. I also was so excited to make it because it has short sleeves! No sleeve island over here!
You need worsted weight yarn for this cardigan. I used Lion Brand Wool-Ease which has some really nice color options. You can purchase the kit which includes the yarn + the PDF pattern!
And of course, I made a YouTube video tutorial to go along with this pattern! If you are confused at any point or more of just a visual learner please check out the video.
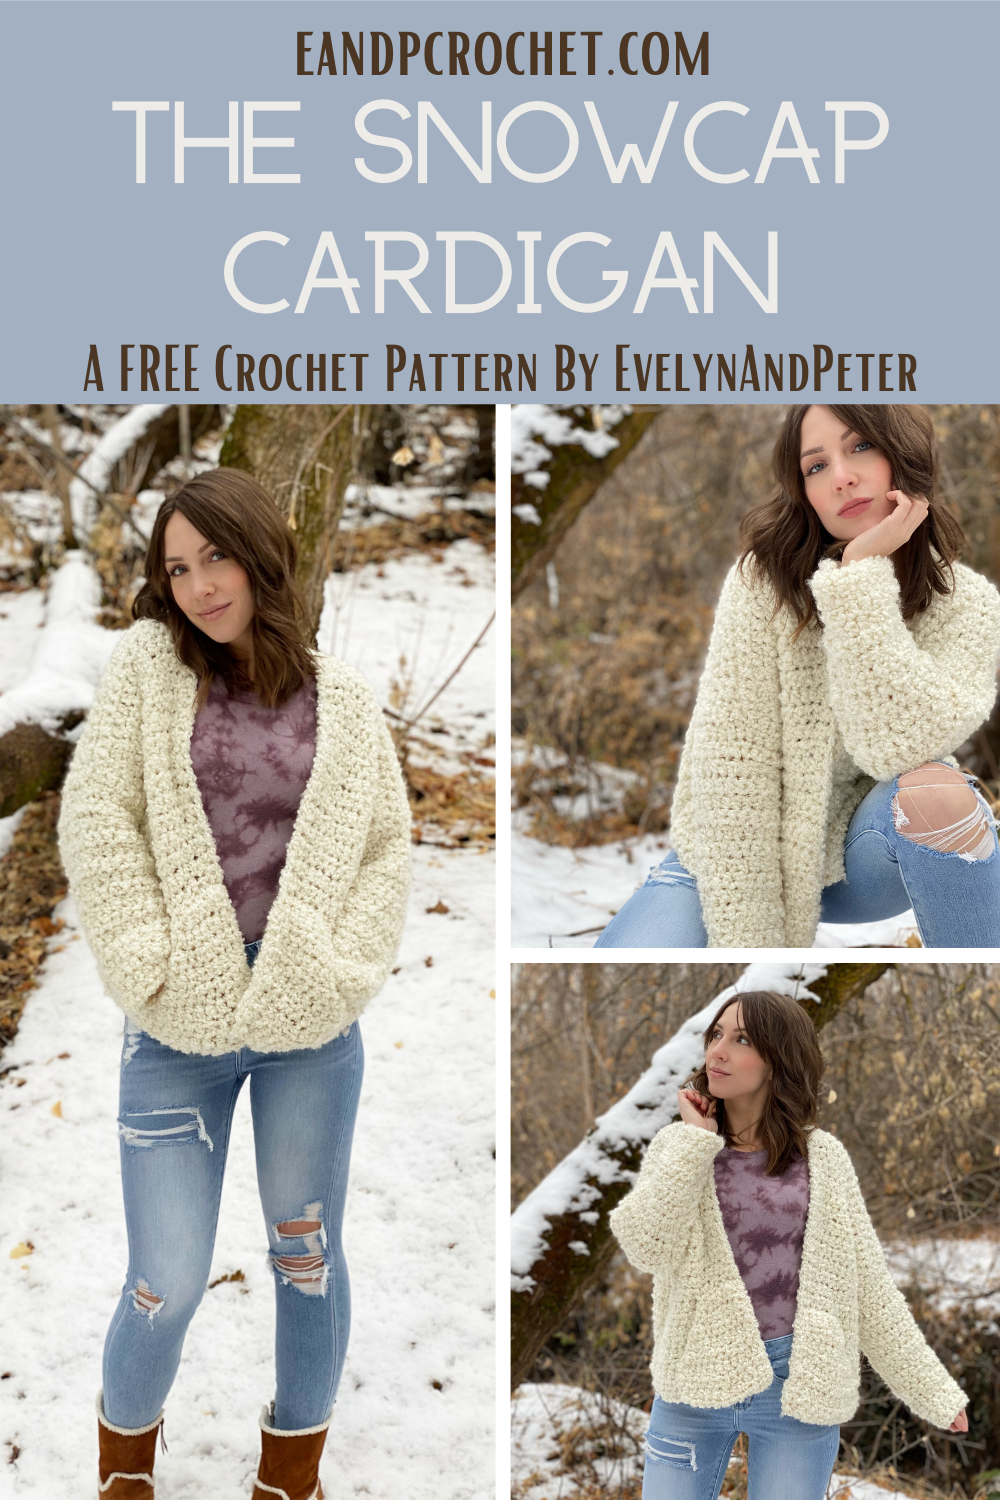
It’s a brand new year so that means it’s time for a brand new crochet pattern! The Snowcap Cardigan is my very first design of 2021 being released even though i’ve had it in my brain for at least 6 months and sitting in my blog drafts for a couple of months! I’m so excited for this one and I hope you guys love it.
I like to think of The Snowcap Cardigan as the sister sweater to The Coffeeshop Cardigan. Both of them use homespun yarn but have a completely different look to them. I used the Thick & Quick version of Homespun for The Snowcap Cardigan instead of regular homespun. The Snowcap Cardigan is also boxier, oversized and cropped compared to the slimmer and longer Coffeeshop Cardigan! You can grab all the supplies you need from my friends at JOANN!
Are you scared of Homespun yarn?? Never fear!! I have a whole video tutorial walking you through this pattern. The Thick & Quick version is even easier to use than the normal version in my opinion. I use a larger crochet hook in this pattern which helps while working with this yarn. Not only that but I use easy stitches throughout and minimal shaping! Hot tip- FEEL your stitches instead of trying to see them!!
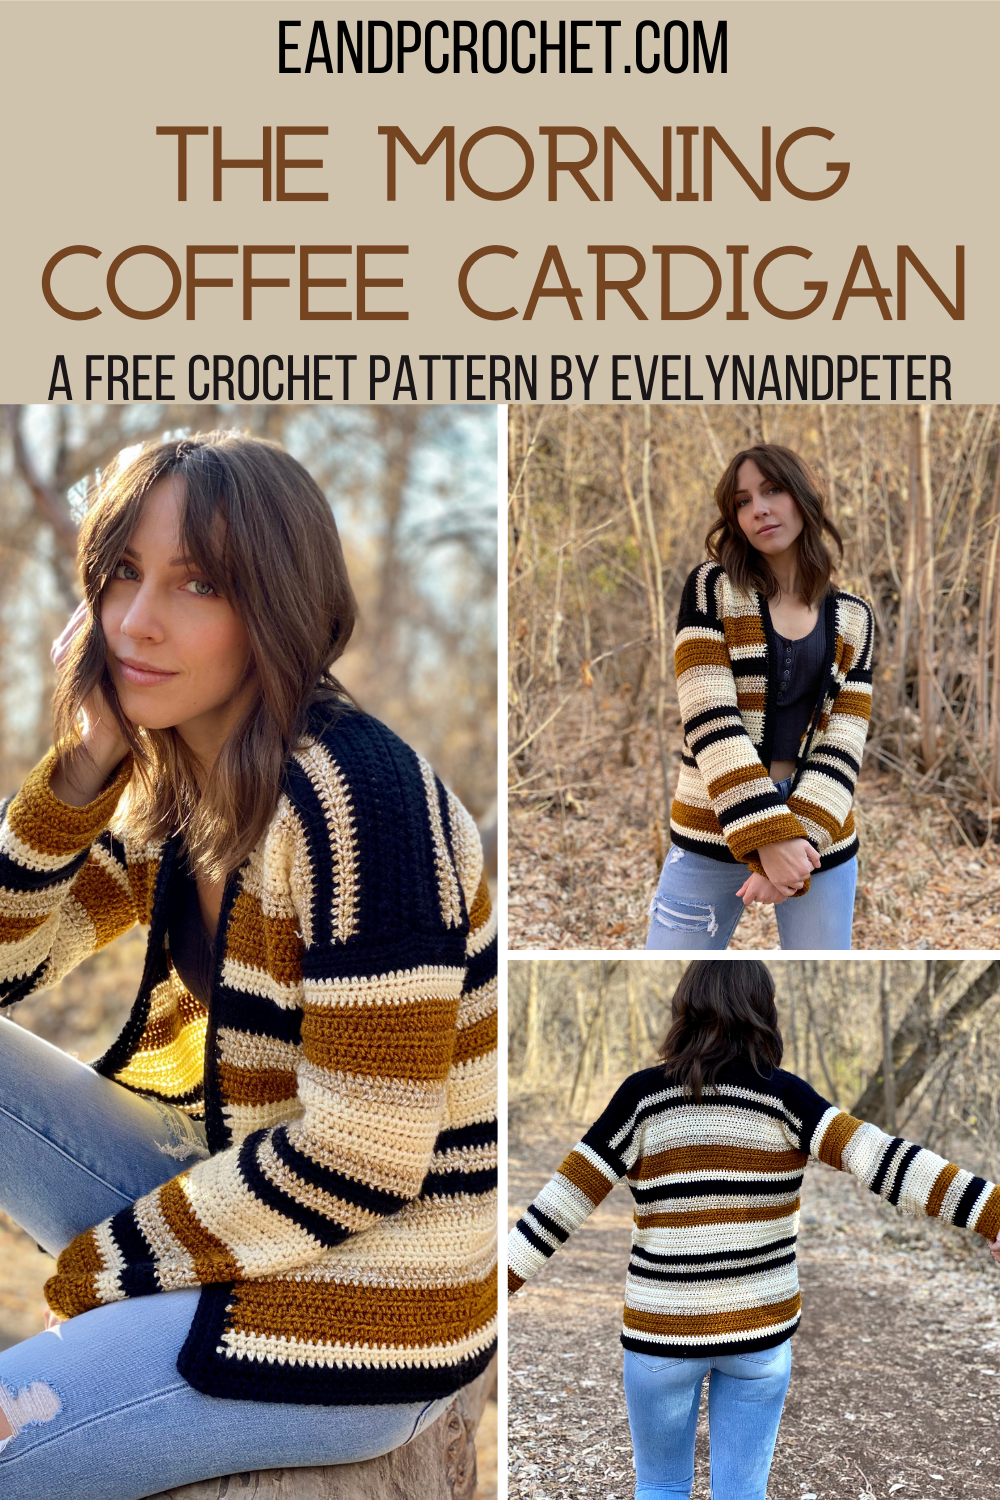
I’ve been making a lot of striped things lately if you haven’t noticed! When I saw a striped blanket at target with a similar color palette I knew I had to get my hands on some yarn and make something with it! I debated between a cardigan and a blanket for a bit but wasn’t a hard choice to go with a cardi! That’s how The Morning Coffee Cardigan came about!
The Morning Coffee Cardigan is a VERY beginner friendly pattern. It has no shaping and minimal seaming. I decided to add in some optional shaping only at the forearms. This cardigan is designed to have loose cuffs/sleeves. I know that some people prefer to have there sleeves tapered so I added that option just in case!
I also recommend leaving the tails of yarn long enough on the sides of the front/back panel so that you can use these to sew your panels together. This will help cut down on the ends you need to weave in. Another tip is when you are crocheting the trim, that you crochet directly over the ends of yarn. This way you can skip the weaving process.