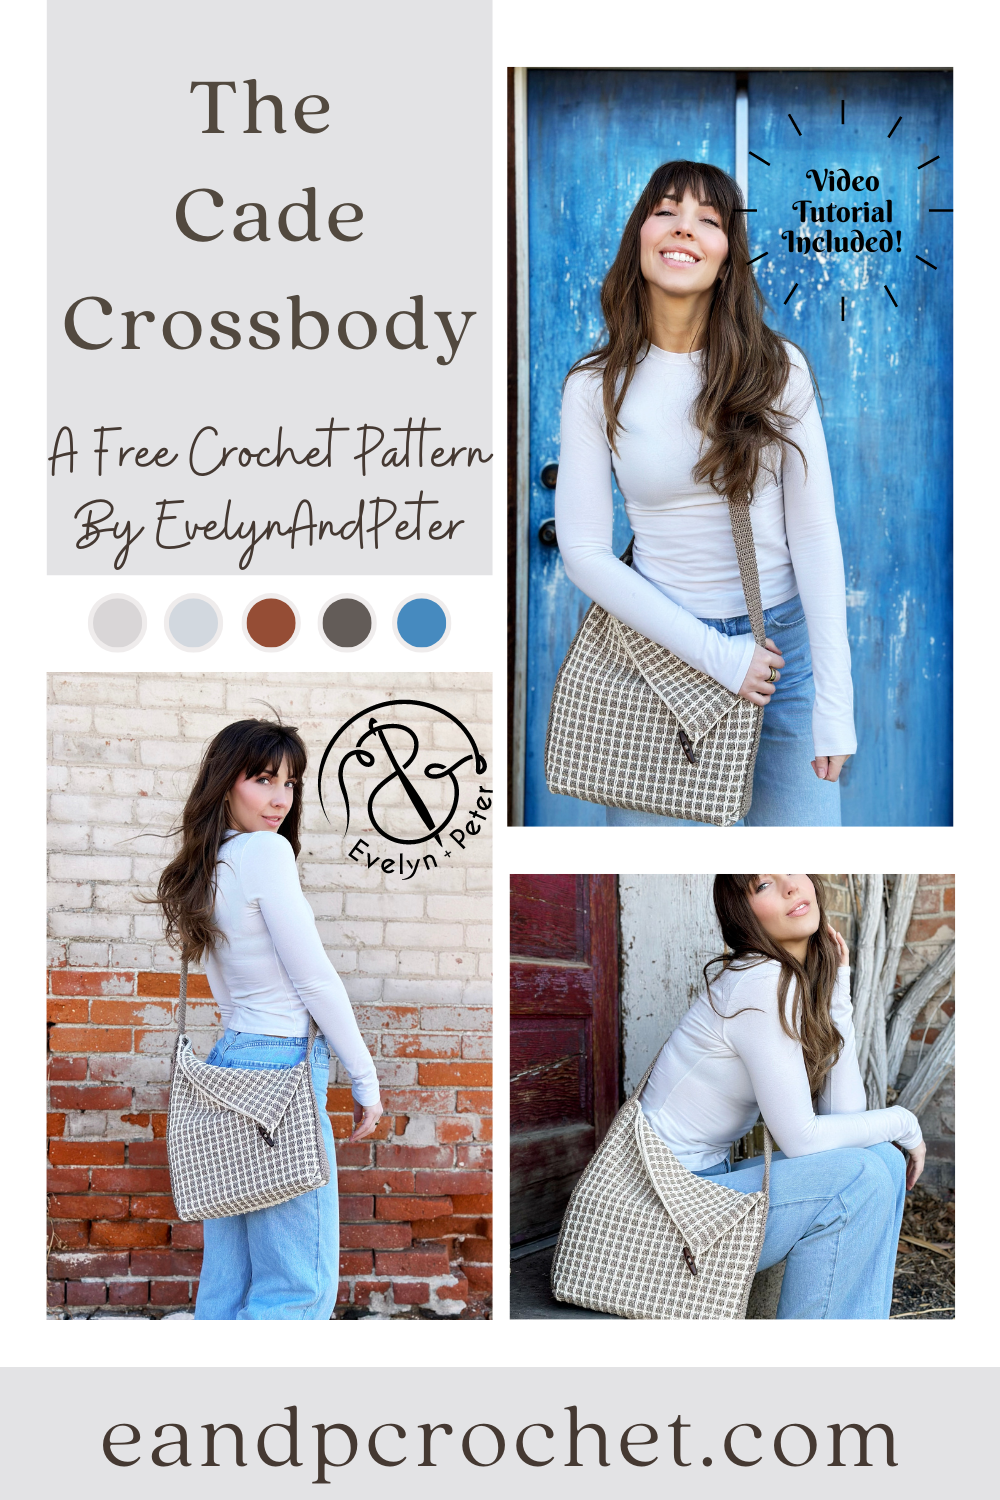
I had so much designing The Cade Crossbody. Why? Because it’s part of a collab with my yarn bestie Meghan from Meghanmakesdo! I made the crochet version and she made the knit version! It’s always nice to have options so maybe if you are seeing this but you are a knitter, than be sure to check out her blog!
The Cade Crossbody crochet pattern is actually pretty simple. It’s 2 rectangles sewn together and a long strap added last! You’ll add the strap on with a unique twist to give it the slanted fold over look. To give your bag some shape, you will be tacking/sewing the corners up into a triangle point when you add the strap. Once side is sewn further up than the other. That’s it!
When Meghan showed me the knit stitch she was going to use for her bag, I knew I would have to do some swatching and figure out how to get my crochet version looking similar! I tried a bunch of different stitch combinations. Finally I settled with a combo of Sc, Sl St and surface stitches to give the look you see here! There will be some ends on your rectangle panels. But don’t worry!! Most of them you will crochet right over, so don’t let the ends scare you! Just check out the notes section or watch the video tutorial!
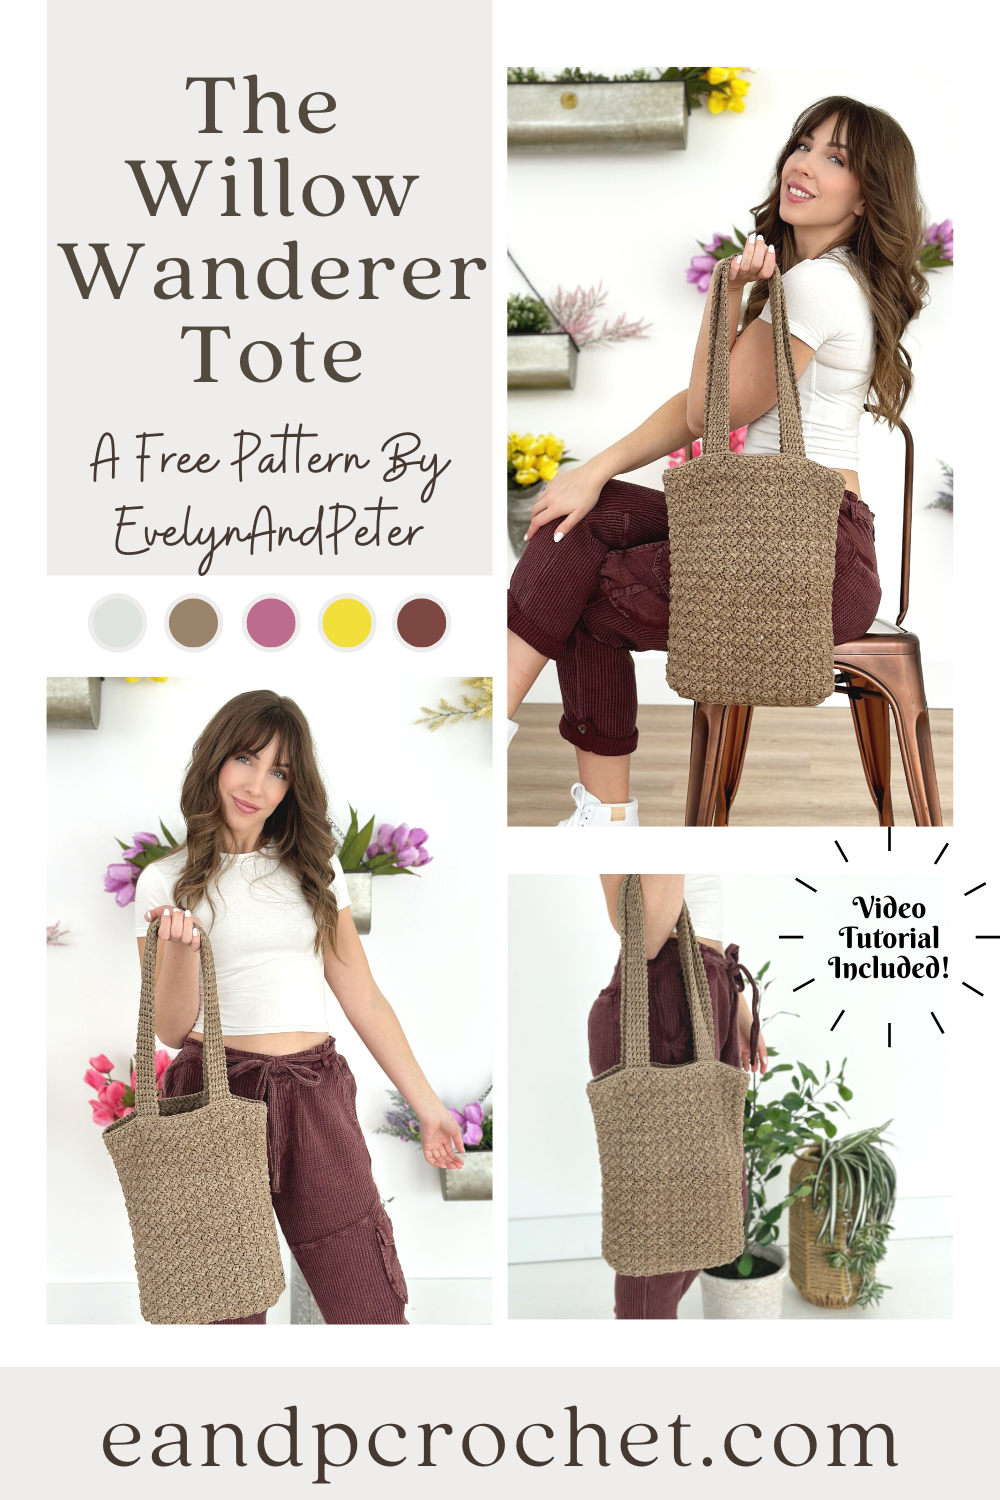
I love a good tote bag! I especially love a good tote bag when it uses Rewind yarn. The Willow Wanderer Tote uses Rewind yarn AND one of my favorite stitches!
The Willow Wanderer Tote is worked in 2 matching panels from the bottom up. Once both panels are made you’ll join them down the sides and bottom. The panels are made using the Sedge Stitch! You might recognize this stitch from my Kiah Cardigan and my Winter Moonlight Set! Overall this pattern is pretty beginner friendly. There is one spot where you will need to know how to work a Foundation Single Crochet (Fsc). It’s only a small part totaling 6 Sc in the shaping. If you don’t know how to work a Fsc, don’t worry!! I show you how to do it in my video tutorial, so be sure to check it out.
Once you have the 2 main panels made you have to make the straps! The straps are worked up in the Thermal Stitch. This is a very thick and sturdy stitch. My straps are approximately 26″ long. When you sew them onto the bag you will position it about 1.5″ down from the top of the bag on both sides. This way when you sew it on, it’s attached in a square shape and makes it extra sturdy.
I used Rewind yarn for this bag. This is such a nice yarn in my opinion. It’s super soft and a flat tape shape. There are so many nice colors too! My tote is available as a Lion Brand kit which comes with all the yarn you need to make your tote plus a FREE copy of the digital PDF pattern!