Pattern: Daffodils In The Snow Pillow
I’m excited to be participating in the 2019 Celebrate Mom Blog Hop hosted by Pattern Paradise! Each day in May, a different crochet designer will be featured and share a new free pattern with you! There are lots of fun prizes too, so come join the fun! For the list of designers and all the details, go to this post => 2019 Celebrate Mom Blog Hop & Giveaway
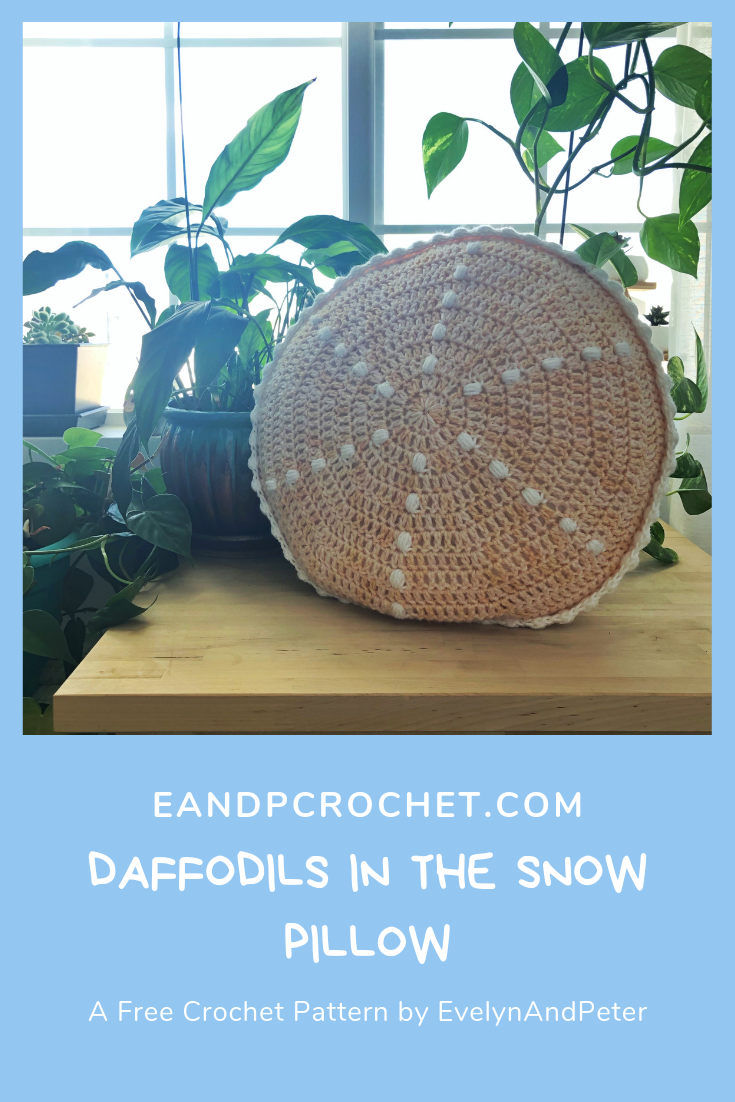
I’ll be sharing a new design called “Daffodils In The Snow” Pillow. I was sent some beautiful hand-dyed yarn from the artist Alyssa from “Yarn For The Masses”. The colorway I picked out is called Daffodils In The Snow and I thought it was the perfect name for my pillow too! If you want to check out more of the hand dyed yarn, take a look here!
I’m so excited to see everyones pillow! Be sure to tag me on Instagram so I can see. 🙂
Materials:
- Worsted (4) weight yarn. Yards needed-
- 5.00mm Crochet Hook
- Yarn Needle
- Poly-Fil Stuffing or a 16″ pillow insert.
Size: 16″
Notes:
- You will be slip stitching to the top of each Ch 2 after each round.
- You will turn your work after each round, except after round 1.
- You can make your pillow larger by following along with the row/stitch repeat until you are happy with the size.
- I used a contrasting color for my puffs and trim, have fun experimenting with color changes!
Stitches and abbreviations used:
ML- Magic Loop
Dc- Double Crochet
Puff- *YO, insert hook into indicated St, YO, pull up loop.* Repeat 3 times. YO, pull though all 7 loops on hook.
Sl St- Slip Stitch
Pattern (make 2):
ML
Round 1: Ch 2 (counts as 1 Dc here and throughout). Work 11 Dc into loop. Pull tight to close. Join to the top of the Ch 2 with a Sl St. (12 Dc)
Round 2: Ch 2. 1 Dc in same St. 2 Dc in each St around. Join. TURN. (24 Dc)
Round 3: Ch 2. 1 Dc in same St. 1 Puff in next. *2 Dc in next, 1 Dc in next,** 2 Dc in next, 1 Puff in next* Repeat from * to * around. Your last rep will end at **. Join. TURN. (36 stitches)
Round 4: Ch 2. 1 Dc in same St. 1 Dc in next two stitches. *2 Dc in next St, 1 Dc in next 2 stitches* Repeat from * to * around. Join. Turn. (48 Dc)
Round 5: Ch 2. 1 Dc in same St. 1 Dc in next 2 stitches. 1 Puff in next. *2 Dc in next, 1 Dc in next 3.** 2 Dc in next, 1 Dc in next 2 stitches, 1 Puff in next* Repeat from * to * around. Your last rep will end at **. Join. Turn. (60 stitches)
Round 6: Ch 2. 1 Dc in same St. 1 Dc in next 4 stitches. *2 Dc in next St, 1 Dc in next 4 stitches* Repeat from * to * around. Join. Turn. (72 Dc)
Round 7: Ch 2. 1 Dc in same St. 1 Dc in next 4 stitches. 1 Puff in next. *2 Dc in next, 1 Dc in next 5**, 2 Dc in next, 1 Dc in next 4, 1 Puff in next. * Repeat from * to * around. Your last rep will end at **. Join. Turn. (84 stitches)
Round 8: Ch 2. 1 Dc in same St. 1 Dc in next 6 stitches. *2 Dc in next, 1 Dc in next 6* Repeat around. Join. Turn. (96 Dc)
Round 9: Ch 2. 1 Dc in same St. 1 Dc in next 6 stitches, 1 Puff in next St. *2 Dc in next, 1 Dc in next 7.** 2 Dc in next. 1 Dc in next 6 stitches, 1 Puff in next.* Repeat from * to * around. Your last rep will end at **. Join. Turn. (108 stitches)
Round 10: Ch 2. 1 Dc in same St. 1 Dc in next 8 stitches. *2 Dc in next, 1 Dc in next 8* Repeat around. Join. Turn. (120 Dc)
Round 11: Ch 2. 1 Dc in same St. 1 Dc in next 8 stitches, 1 Puff in next St. *2 Dc in next, 1 Dc in next 9.** 2 Dc in next. 1 Dc in next 8 stitches, 1 Puff in next.* Repeat from * to * around. Your last rep will end at **. Join. Turn. (132 stitches)
Round 12: Ch 2. 1 Dc in same St. 1 Dc in next 10 stitches. *2 Dc in next, 1 Dc in next 10* Repeat around. Join. Turn. (144 Dc)
Round 13: Ch 2. 1 Dc in same St. 1 Dc in next 11 stitches. *2 Dc in next, 1 Dc in next 11* Repeat around. Join. (156 Dc)
Joining-
Once you have both the front and back made, you will be joining them together. Do not tie off after your second side is made. Place both panels together, correct side out. Insert your hook through both the front and back panel, work 1 Sc in each St around to join.
Trim-
I followed along with THIS tutorial for my Puff St trim. It was really easy and really finishes off the pillow I think. 🙂 You can play around with any type of trim, I think a ruffle would look great as well!


