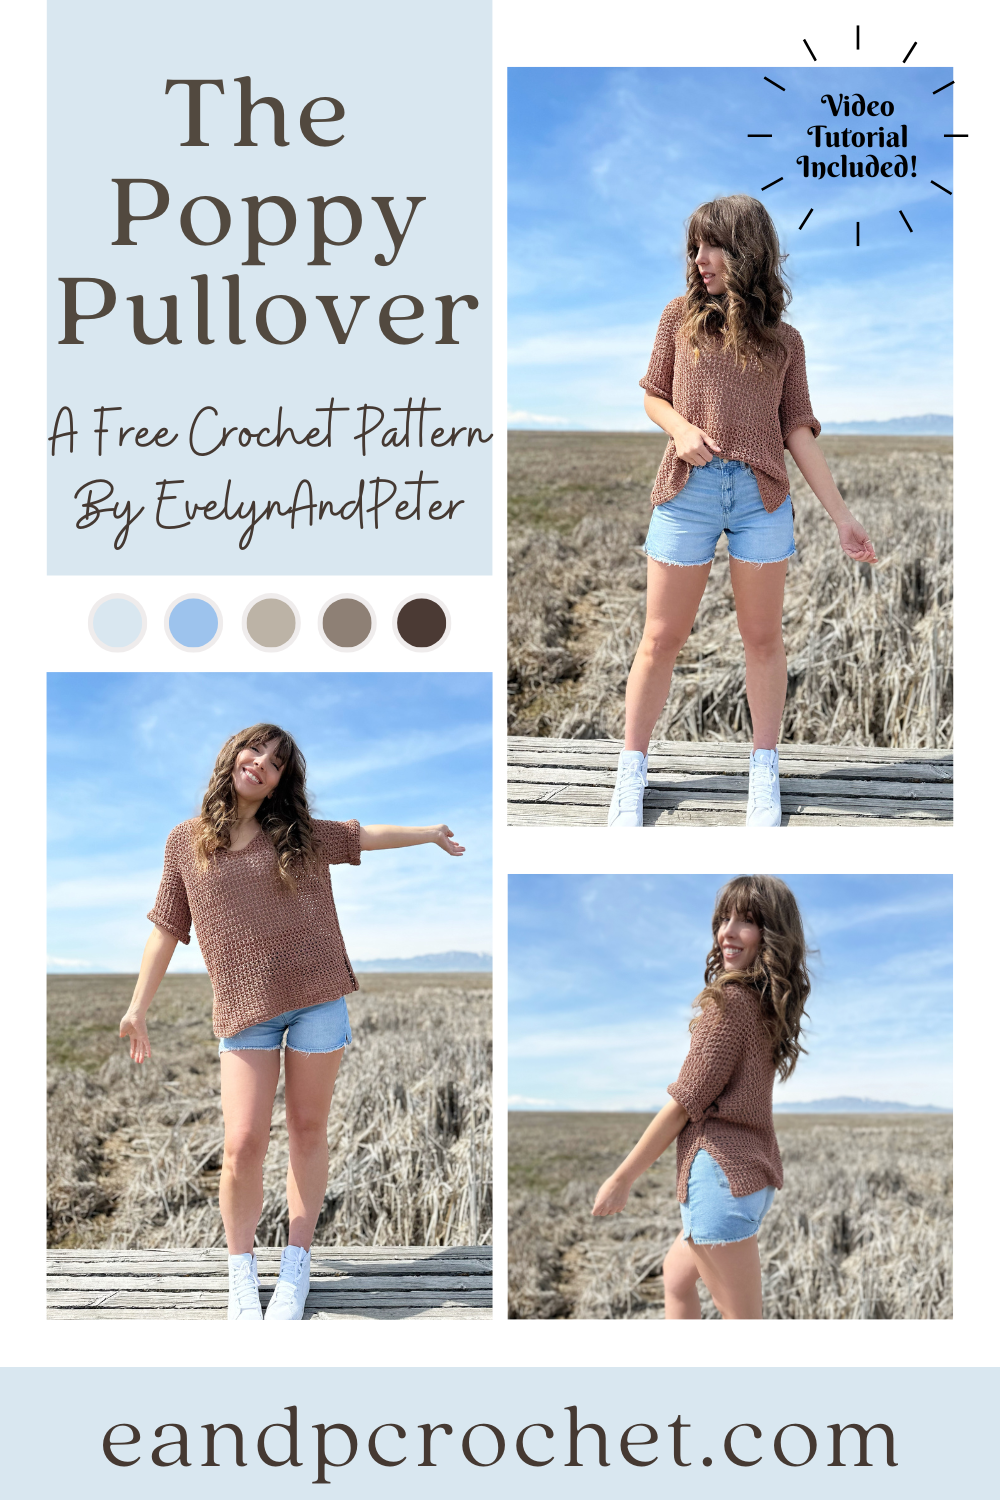
Did I just find my new favorite cotton yarn? I think I did. Be prepared for so many designs using this yarn because I am obsessed! My first make using this yarn is called The Poppy Pullover!
I used Lion Brand 24/7 cotton DK for the Poppy Pullover crochet pattern. Don’t get it confused with the worsted weight version! The DK weight is obviously thinner and much more soft. It had no splitting and no tangles as I crocheted. I’m absolutely in love with it! I used the color Cacao for mine but they have a lot of pretty choices.
The Poppy Pullover is crocheted in separate panels from the bottom up. You’ll be using a larger hook in comparison to the yarn to give it more of a mesh look. It’s important to not pull your stitches tight. You want a relaxed and even tension so you can give it the perfect drape. Feel free to go up in hook size if you normally have a tight tension and/or your gauge is off. Once you have all your panels complete you will sew them together.
The Poppy Pullover is easy to make adjustments to. You can add or takeaway as many rows as you want on the back panel to adjust the length. Just be sure to make the same adjustments on the front panel as well, right before you split the neckline.
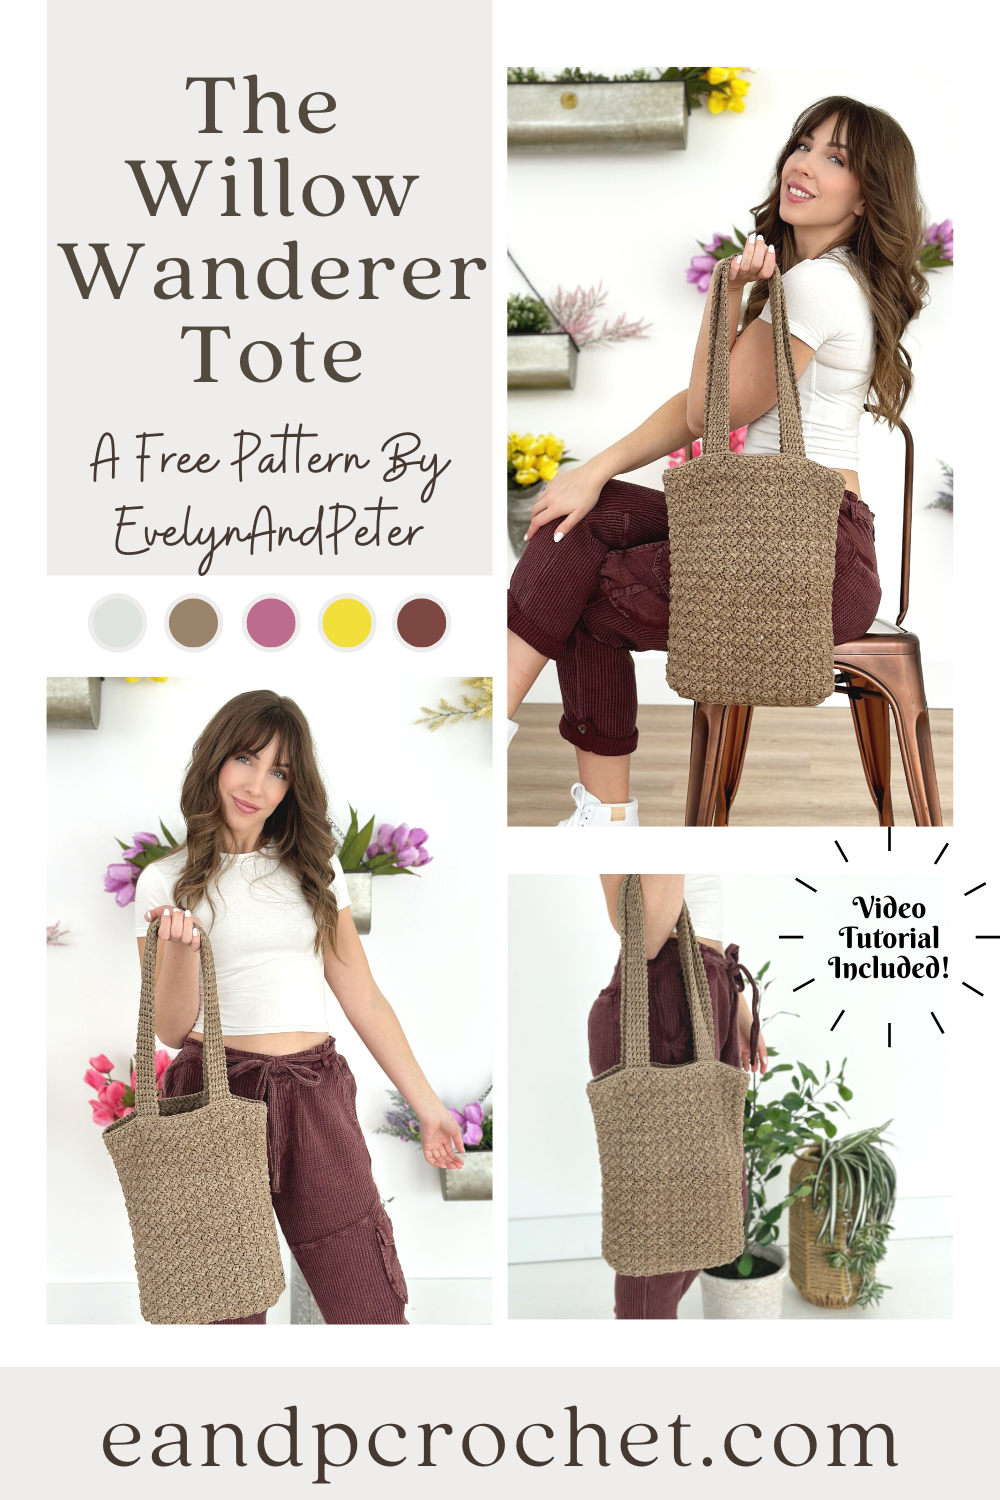
I love a good tote bag! I especially love a good tote bag when it uses Rewind yarn. The Willow Wanderer Tote uses Rewind yarn AND one of my favorite stitches!
The Willow Wanderer Tote is worked in 2 matching panels from the bottom up. Once both panels are made you’ll join them down the sides and bottom. The panels are made using the Sedge Stitch! You might recognize this stitch from my Kiah Cardigan and my Winter Moonlight Set! Overall this pattern is pretty beginner friendly. There is one spot where you will need to know how to work a Foundation Single Crochet (Fsc). It’s only a small part totaling 6 Sc in the shaping. If you don’t know how to work a Fsc, don’t worry!! I show you how to do it in my video tutorial, so be sure to check it out.
Once you have the 2 main panels made you have to make the straps! The straps are worked up in the Thermal Stitch. This is a very thick and sturdy stitch. My straps are approximately 26″ long. When you sew them onto the bag you will position it about 1.5″ down from the top of the bag on both sides. This way when you sew it on, it’s attached in a square shape and makes it extra sturdy.
I used Rewind yarn for this bag. This is such a nice yarn in my opinion. It’s super soft and a flat tape shape. There are so many nice colors too! My tote is available as a Lion Brand kit which comes with all the yarn you need to make your tote plus a FREE copy of the digital PDF pattern!

What’s better to kick off the new year than a brand new crochet cardigan?! The Kiah Cardigan is definitely in the top 5 of my favorite patterns. I hope you guys love it just as much as I do!
I used Heartland yarn for The Kiah cardigan. I love this yarn so much I try to design at least one awesome cardigan with it each year! This time I’m using the color Wolf Trap. I actually ordered this yarn a while back to make something completely different with it. When it came in the mail it had a pinker hue than what I was expecting and it didn’t go with the other colors on my project. It was absolutely beautiful though, so I shelved it for a later date. I’m so glad I kept it because I think it’s perfect for this design.
The Kiah Cardigan is worked from the bottom up in separate panels. You can easily make your cardigan longer or shorter by adding or removing as many rows as you want on the back and front panels. I think a cropped version would be super cute too! You might recognize the stitch used as the same one in my Winter Moonlight Set! I fell in love with the texture of it and knew that I had to make a cardigan!
I have a full video tutorial available if you are a beginner and need a little extra help! Be sure to check it out and subscribe so I can bring you guys more free tutorials and content!
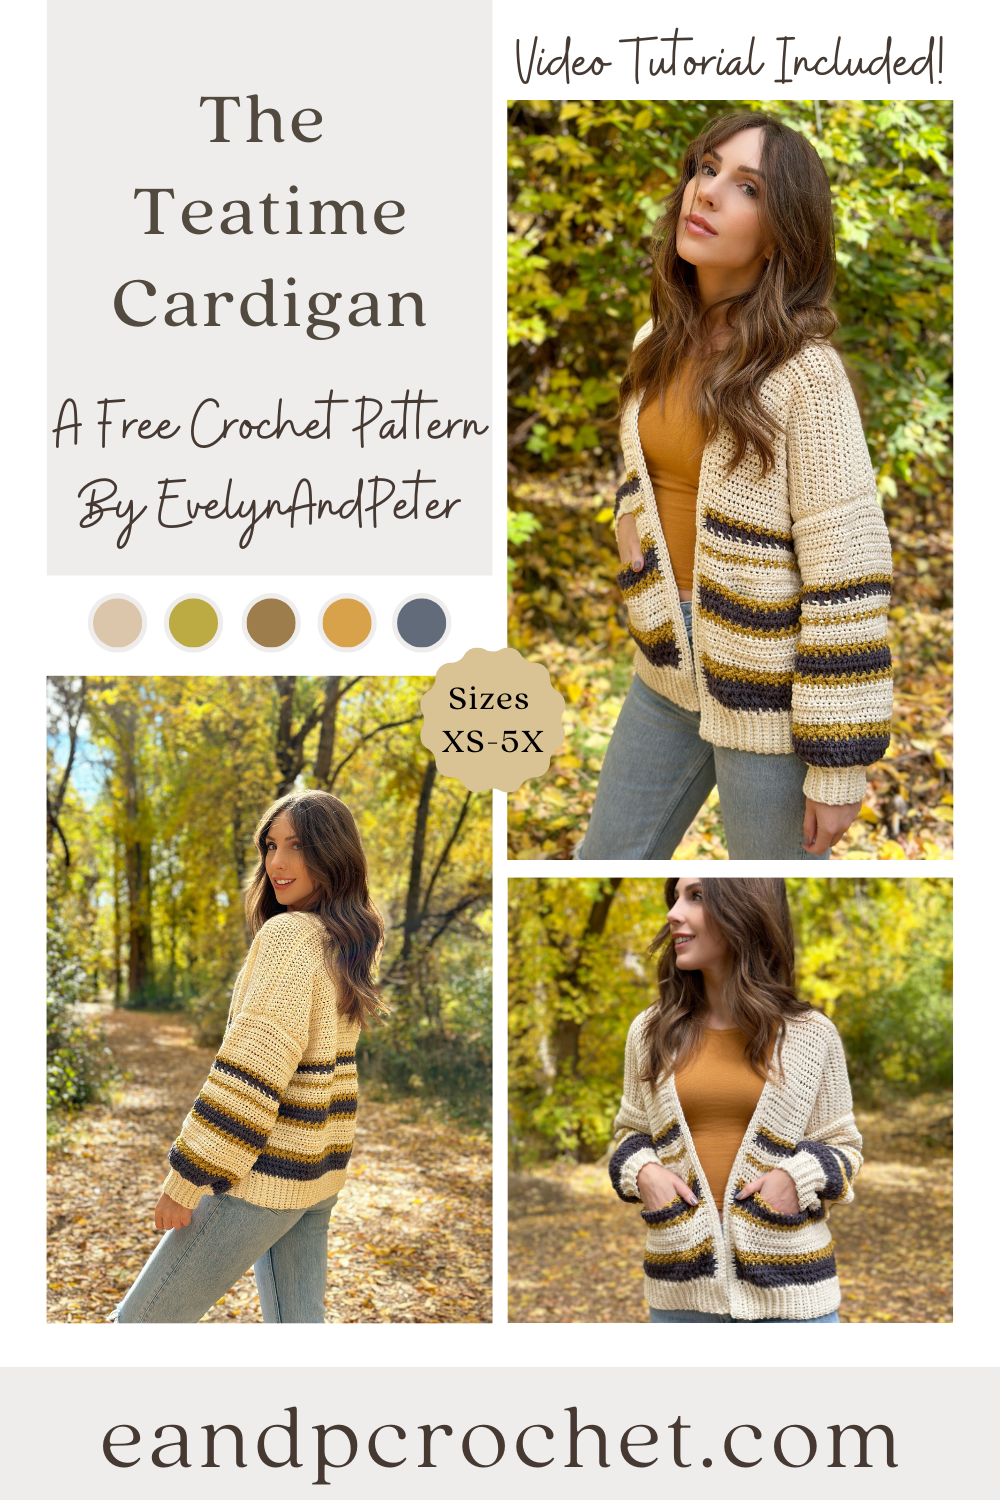
It’s Teatime! So obviously that means you need The Teatime Cardigan crochet pattern! This cardigan pattern gives all the cozy vibes. The Teatime cardigan features fun stripes using a unique blend of stitches, giving it a collegiate look. It has a slightly oversized fit with balloon style sleeves. There are so many color options to fit your style!
The construction of this cardigan is pretty beginner friendly. I do use a few different stitches for the stripes that you may have not used before but don’t be afraid! I have a full video tutorial on how to do these stitches if you need a little bit of extra help. They really are very simple to do once you get them down. The same stitch repeat is used on all of the panels.
One of the fun things about this cardigan is picking out the color combo that you want! There are so many options to do and I can’t wait to see what everyone picks! I used Color Theory yarn for my cardigan and I do have a kit available! You can customize the yarn colors if you purchase the kit. I have a couple of tips when working with stripes. When you change colors at the end of each row, you can crochet the next row directly over the tails of yarn for less ends to weave in! You can also crochet your trim directly over the tails of yarn. I like to tie my tails in a knot first before doing so.
Another great thing about The Teatime cardigan is the length is easy to adjust! You can simply add more rows to both the back and front panels if you want your cardigan longer. If you want it cropped, just remove rows. Do the same amount of rows to all 3 panels before fastening off.
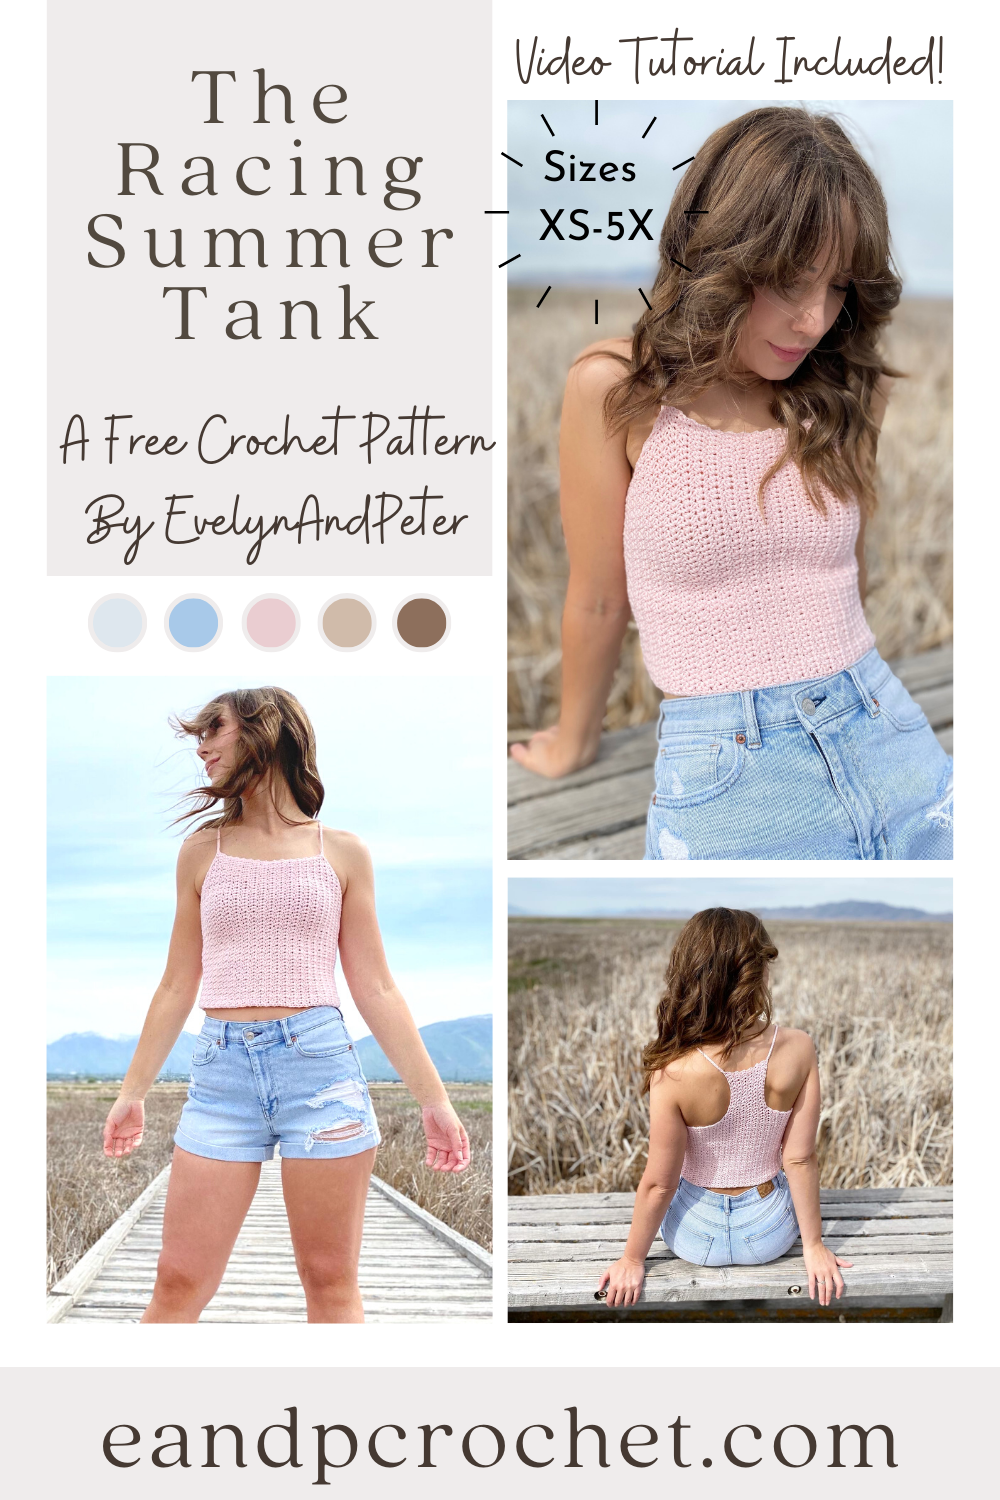
Summer is in full swing here and I knew I needed to design a comfy tank top to wear! The Racing Summer Tank crochet pattern is light weight, soft and quick to make! It has a cropped look to it but you can easily make it as long as you want! It’s racerback style on the back with spaghetti straps!
I used your typical single crochet V-St for this tank top. What’s a V Stitch? Sc, Ch 1, Sc all into the same space! You will work your V St into the V from the row below! Then just repeat throughout the pattern. Easy peasy. If you want a bit more length just repeat the V St row right before the shaping on the front panel. Be sure to add the same amount of rows to the back as well.
Pair it with some cute jean shorts or a long flowy skirt! The Coboo yarn I used comes in so many nice colors, so you have tons of options! Grabbing the kit from Lion Brand is such a good deal. Basically you are just paying for the yarn and you get the printable PDF for free! They usually have a sale or coupon code running so you can grab it even cheaper! Make sure you subscribe to my email newsletter, I frequently notify about these good deals!
Need a little bit of extra help? If you are more of a visual learner than be sure to check out my video tutorial! If you have a question about the racing summer tank crochet pattern, it will most likely be addressed in the video!
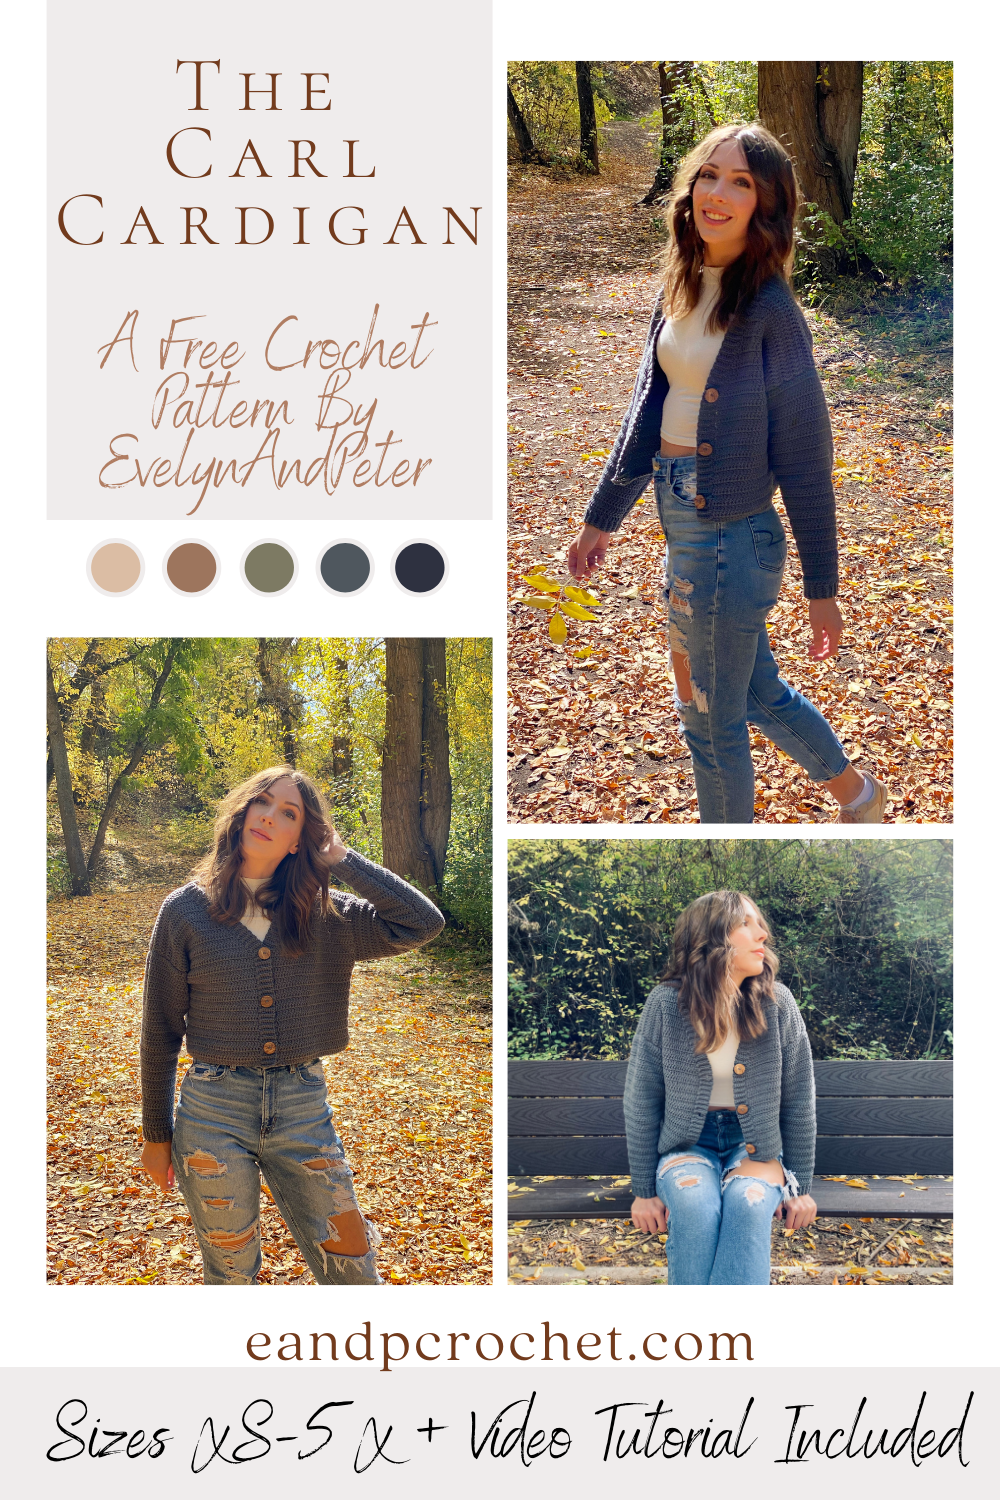
I love the look of oversized V-neck button up cardigans. There’s just something about them that I find so appealing! They give me such comforting “grandpa” vibes haha. I knew I had to make one but put my own trendy spin on it. The Carl Cardigan is my cropped and a bit more girly version of this!
The Carl Cardigan is worked in separate panels from the bottom up. When you break it down into each piece tackling this sweater is a breeze. I used the same stitch throughout and have very beginner friendly shaping. I used Feels Like Butta which is one of my favorite soft yarns. It’s very smooth to work with and frogs back easily if you make a mistake!
I know some of us prefer to have our cardigans longer instead of cropped. Good news, it is super easy to make this longer! Just add as many rows as you would like to the back panel (in multiples of 2). Then, when you make the front panels, add the same amount of rows before you start decreasing! Remember, you will need extra yarn!
You might recognize the ribbing technique around this cardigan. I did the cuffs from The Pemberly Pullover the same way! You will be working the trim of the cardigan directly off the sides of the front panel. It might look a little intimidating at first, but when it comes down to it, you are just slip stitching to the panels as you go! If you are new to this technique be sure to check out my video tutorial where I show you exactly how to do it.
So, I don’t know about you guys but I plan on staying home as much as possible this year and doing all my shopping online! I would much rather be cozied up under a squishy blanket instead of fighting the crowds to get my shopping done haha! I made the perfect blanket to do just that- The Fitzwilliam Throw Blanket!
The Fitzwilliam Throw Blanket is made with Lion Brand Cover Story yarn and Lion Brand Go For Faux Thick and Quick yarn! Both of these were the perfect combo to whip this up in record time. I think I worked on it on and off for only a few nights!
You can find all the yarn you need at JOANN stores! They had a ton of Go For Faux Thick & Quick colors to choose from. I was so excited when I came across the color “Zebra” because it reminded me of my dog- Fitzwilliam! If you’re not a fan of animal prints they also have a bunch of solid colors too.
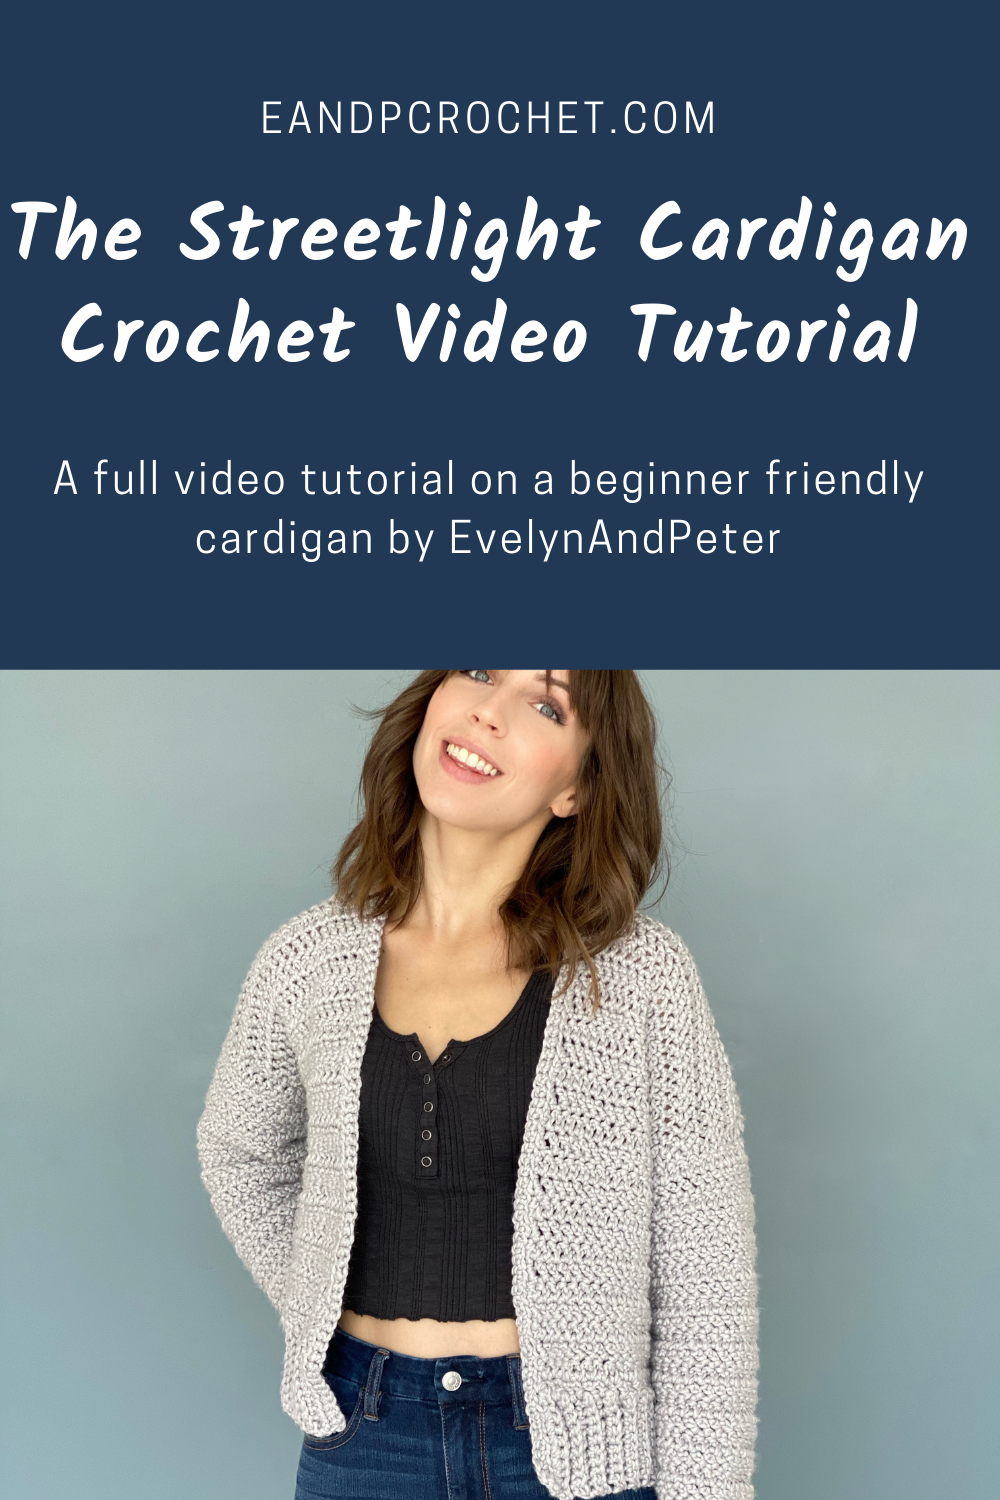
The Streetlight Cardigan pattern has been a big hit! I’ve had some requests to turn it into a video tutorial so of course I obliged.
You can find the free pattern here on my blog! It’s also available as a kit with Lion Brand! I recommend printing out the pattern and following along with my video!
The Streetlight Cardigan video tutorial will be split up into 4 parts. Part one covers the back panel. The second video covers the front panels. Part three will go over how to make the sleeves and the last video will show how to sew it together and add trim!