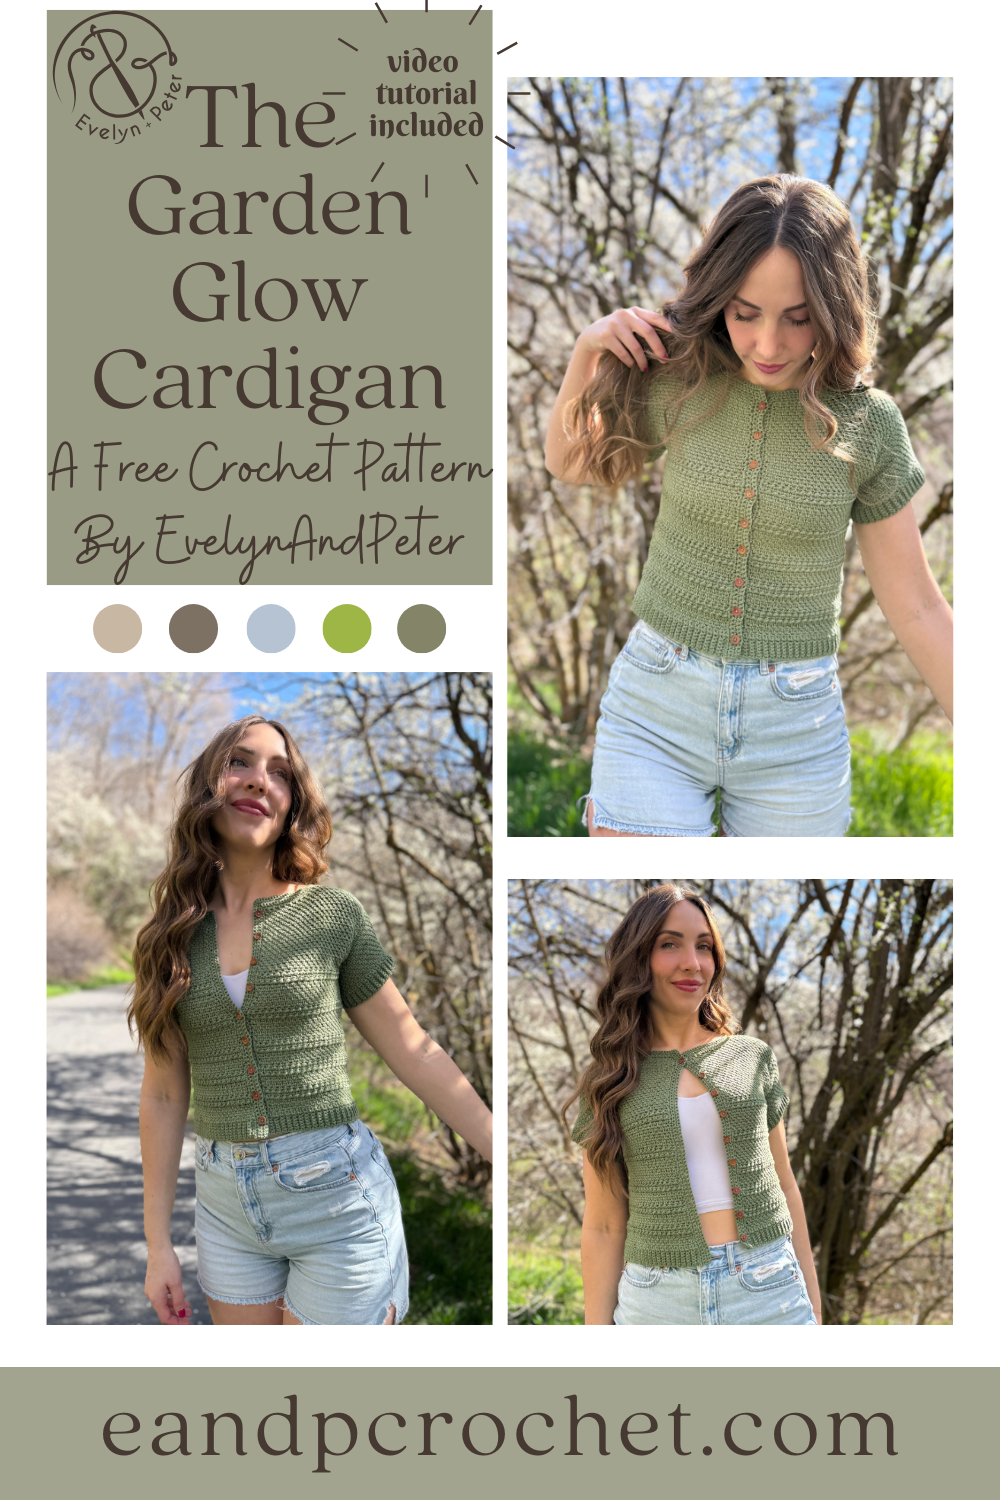
There’s something so special about a piece that feels both simple and quietly detailed, the Garden Glow Cardigan is exactly that. From the soft texture of moss stitch to the gentle rhythm of the stripes, this design came together in such a calming, satisfying way.
I wanted to create a cardigan that feels polished yet easy to wear, something you can throw on with anything and instantly feel put together. The fitted shape, classic button-up front, and short sleeves give it that effortless, everyday charm, while the texture adds just a little extra magic. A full video tutorial is on my YouTube Channel for The Garden Glow Cardigan crochet pattern. Be sure to check it out if you have questions!
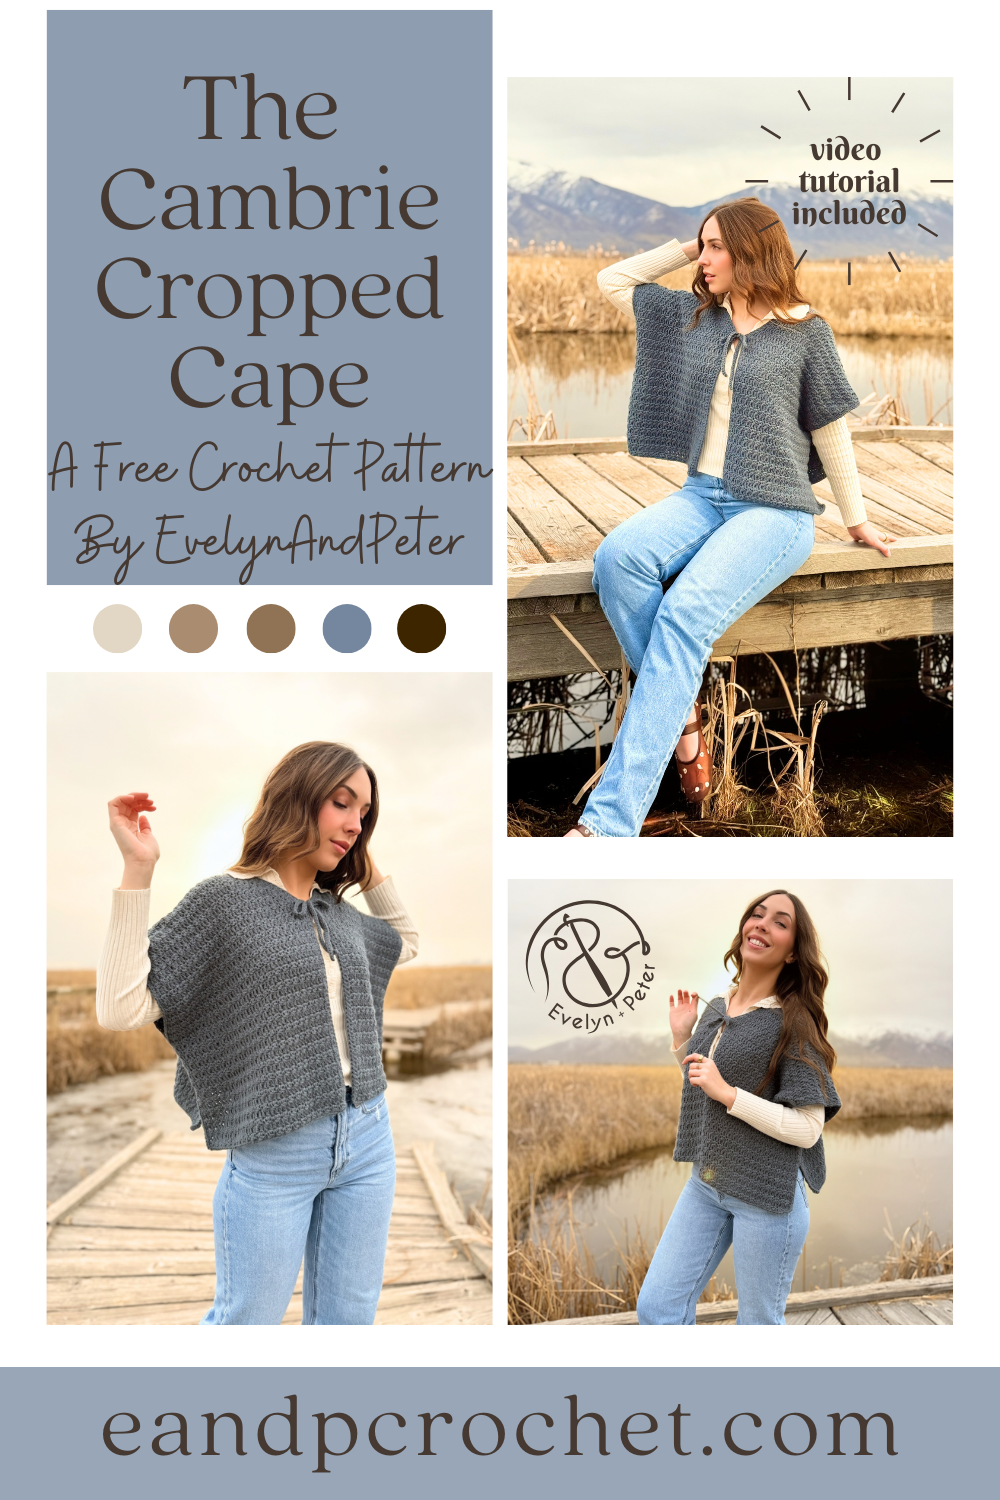
A couple of years ago I designed my Woodlands Blanket Wrap. I fell in love (and you guys too!) with the cozy, oversized feel of wearing something that almost felt like a blanket. It quickly became one of those pieces you can throw on and instantly feel warm and comfortable.
But as I kept wearing it, I started imagining a version with a similar construction that felt a little more refined and tailored for everyday layering while you are out and about. That idea eventually turned into the Cambrie Cropped Cape!
The Echoes Cardigan was one of my top patterns of 2024! I knew that I wanted to make a pullover version of it this year and I’m so glad I had time to sneak it in this winter! The Echoes Pullover is the perfect sister design to the cardigan and I hope you all love it as much as I do!
I thought about using a different Mandala color for the Echoes Pullover crochet pattern but there is just something about the “warlock” color that draws me in! I ended up going with the same color and I’m glad I did! There are however, a lot of beautiful colors to choose from! If you are purchasing the kit you can swap out your color choice and you get a free copy of the printable PDF download of the pattern.

Every once in a while you make a crochet design that just works up perfectly how you envisioned it. That was definitely the case for The Echoes Cardigan crochet pattern. I was a little nervous to make a whole sweater with Mandala because of all the different color changes. Buuuut I am absolutely obsessed with how it turned out.
I made no adjustments to the yarn colors as I worked it up. No cutting the yarn and only joining when It was time to bring in a new skein. I just let it work up naturally! I think that’s part of the fun with this design. Each cardigan will be slightly unique in their own way, as far as colors go. Once my panels were all worked up I did decide which one would look best where. Because the left and right front panels are the same, as well as the sleeves, you can place them on either side. For example, I put my front panel with lots of red in it, away from the sleeve that has lots of red in it to help “balance” the look. Feel free to play around with what looks best!

There is just something special about Mandala Ombre yarn. The beautiful color combos definitely call to me. I’ve been eyeing a couple of the colors this year and knew I needed to create a blanket with one of them. The Sunrise Surf Throw crochet pattern is exactly what I wanted!
I wanted something with a simple stitch repeat but also wanted amazing texture. Nothing too crazy because the yarn already elevates the blanket and does all the talking! Working up these rows using double post stitches ended up perfect! They are super easy and fun to do as well. It gives it just the right amount of texture without being too overwhelming.
I had just the right amount of yarn left to add on a little bit of a fancy side border as well. I played around with different waves to add to the edge until I settled on a nice repeat for the length. I also wanted to add in an extra something by creating “triple picots” to the top of each wave. Super simple to do and makes it even better! The Sunrise Surf Throw lion brand kit comes with all the yarn you need and a free copy of the printable digital download PDF. I definitely recommend it if you plan on using the mandala ombre yarn!

It’s time to add another design to the beloved Daisy Day Collection! We started off with the Daisy Day Throw, then added the Daisy Day Tote and now finally The Daisy Day Cardigan crochet pattern!
I wanted to add a little bit of a fun detail to the cardigan so I decided on granny stripes around the bottom hem and sleeves! After that, it’s all Single Crochet stitch and doing some colorwork to create the daisies! If you have already made the Daisy Day Tote and/or the throw blanket you will already be familiar with these flowers. I created a fourth size flower for this design as well. If you are new to changing color frequently and carrying yarn in your project then I recommend checking out my video tutorial or practicing with a small swatch before beginning your cardiganI ended up creating “floats” on the back of my work in the flower sections. You do have the option to crochet directly over the yarn as you carry it along the flower but the colors might peek through to the front a bit.
I used coboo yarn for this design! It’s a really soft light weight cotton yarn from lion brand. It has a bunch of beautiful color choices as well. The Daisy Day Cardigan crochet pattern is a kit with them! So if you plan on buying yarn, check out the kit here and you’ll receive a free copy of the printable pattern download as well.
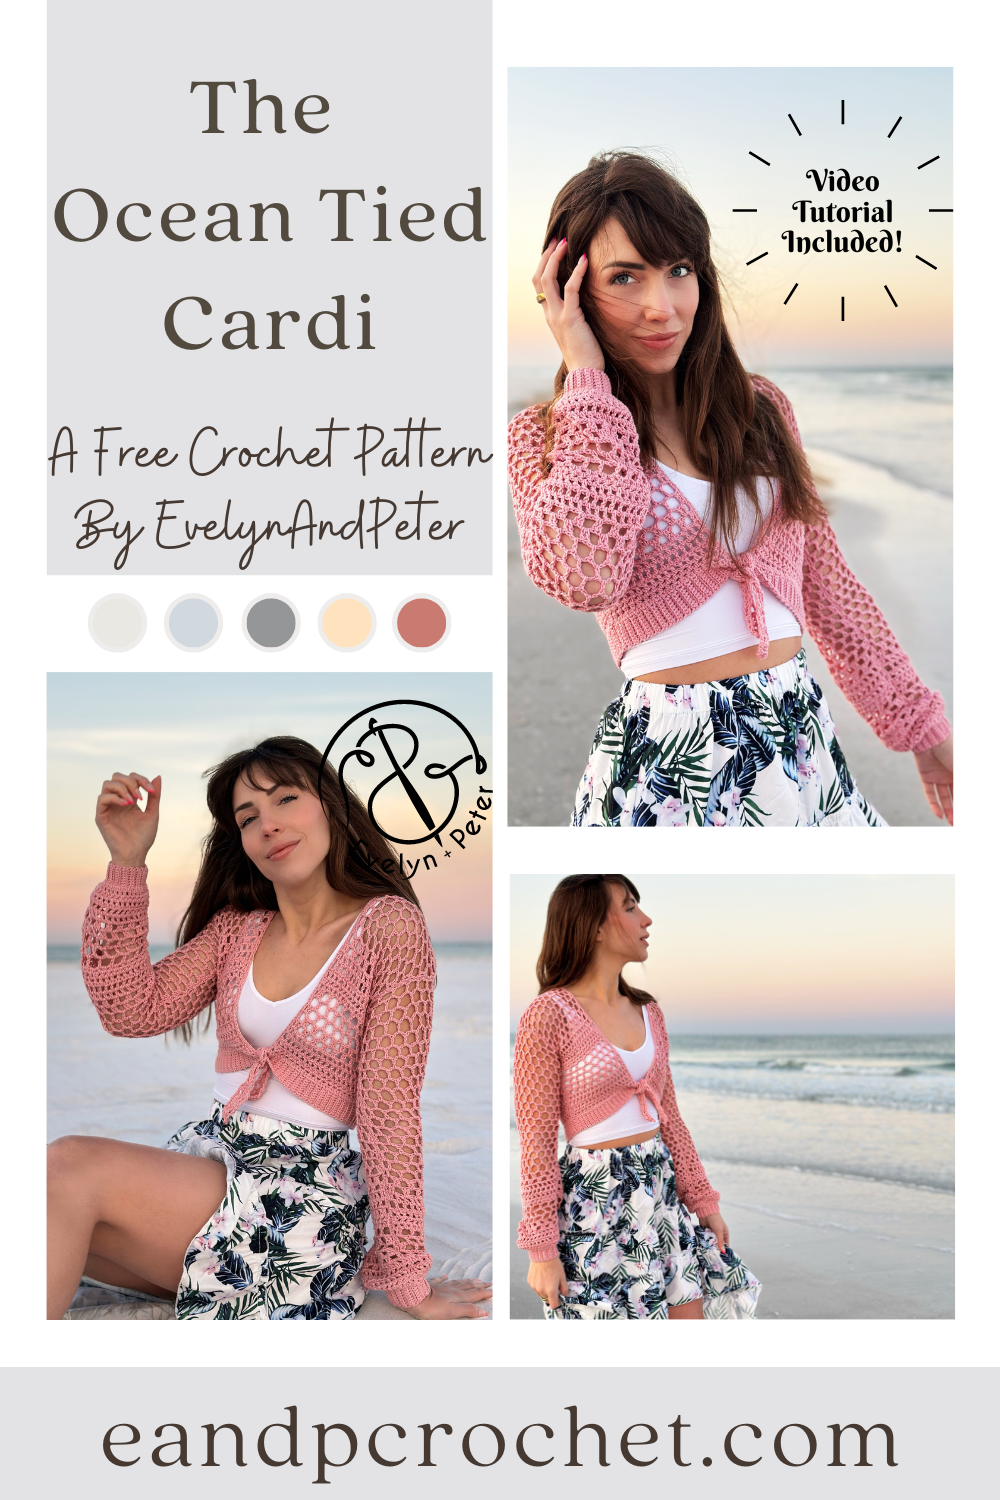
Once the sun starts shining and the blooms start to poke out I always get the urge to make a summer garment! I knew I wanted it to be meshy and airy as well as having a cute tie feature in the front. The Ocean Tied Cardi crochet pattern quickly came to life!
I played around with a bunch of different mesh stitches and decided to combine a whole bunch of them into one design! It actually came together pretty easily with very minimal swatching and frogging! It’s like it was meant to be. The majority of The Ocean Tied Cardi uses double crochet stitches and chains so it works up quickly. It’s also easily adjustable if you want yours longer or shorter. Just add or remove rows to the end of each panel before fastening off.
I think its sooo cute with the little tie in the front, it really makes the design in my opinion! However, if you want to keep it off and wear it as an open cardigan, then you can easily do that! Just add the final trim and don’t follow the instructions for the tie at the end.
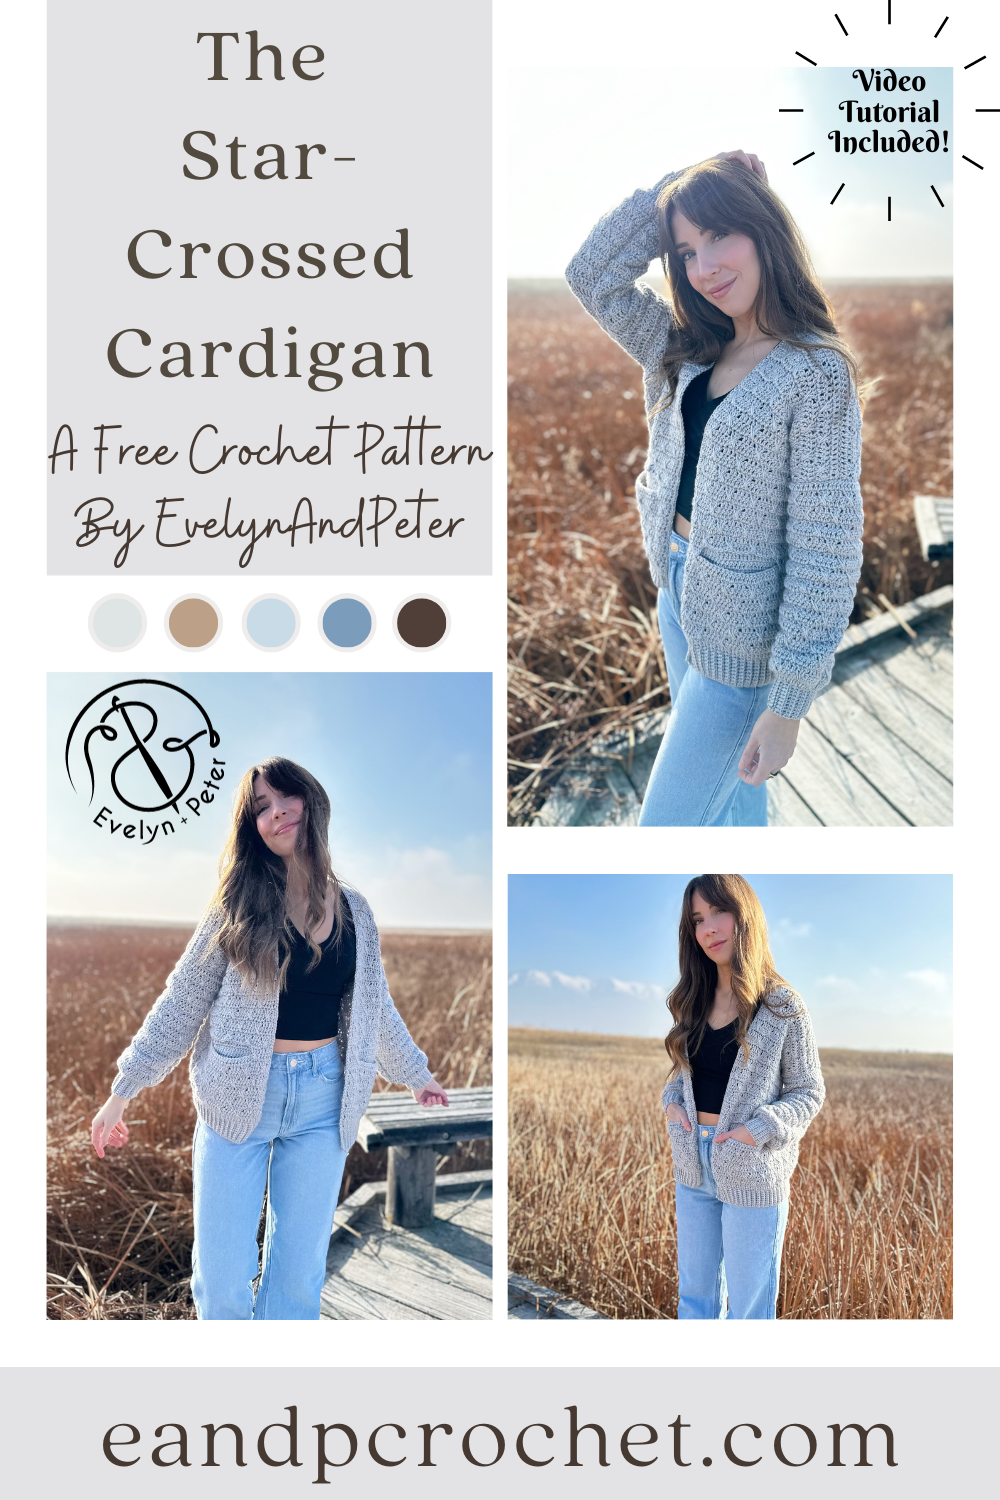
Let’s kick off the new year with a brand new crochet design, The Star-Crossed Cardigan Crochet Pattern! I wanted to start off strong with a cardigan design using Heartland yarn. You might remember my Stony Shore Cardigan and my Kiah Cardigan, both are very popular and well loved and both use Heartland yarn! I knew I needed something to add to the collection of my popular cardigans!
The Star-Crossed Cardigan crochet pattern is very beginner friendly and uses basic shapes. Once you nail the “double crosses spike” stitch you will work this cardigan up easy peasy! It’s basically a combination of all double crochet stitches with the ribbing using single crochet. You will work the panels from the bottom up and sew together.
Did you notice the Star-Crossed Cardigan crochet pattern has pockets?! The best part is that the pocket swatch is your gauge swatch. So feel free to jump ahead in the pattern and make a pocket swatch before starting. You will then use that swatch to measure 4×4″ within. Save it for later when you are required to seam to the inside of your cardigan!
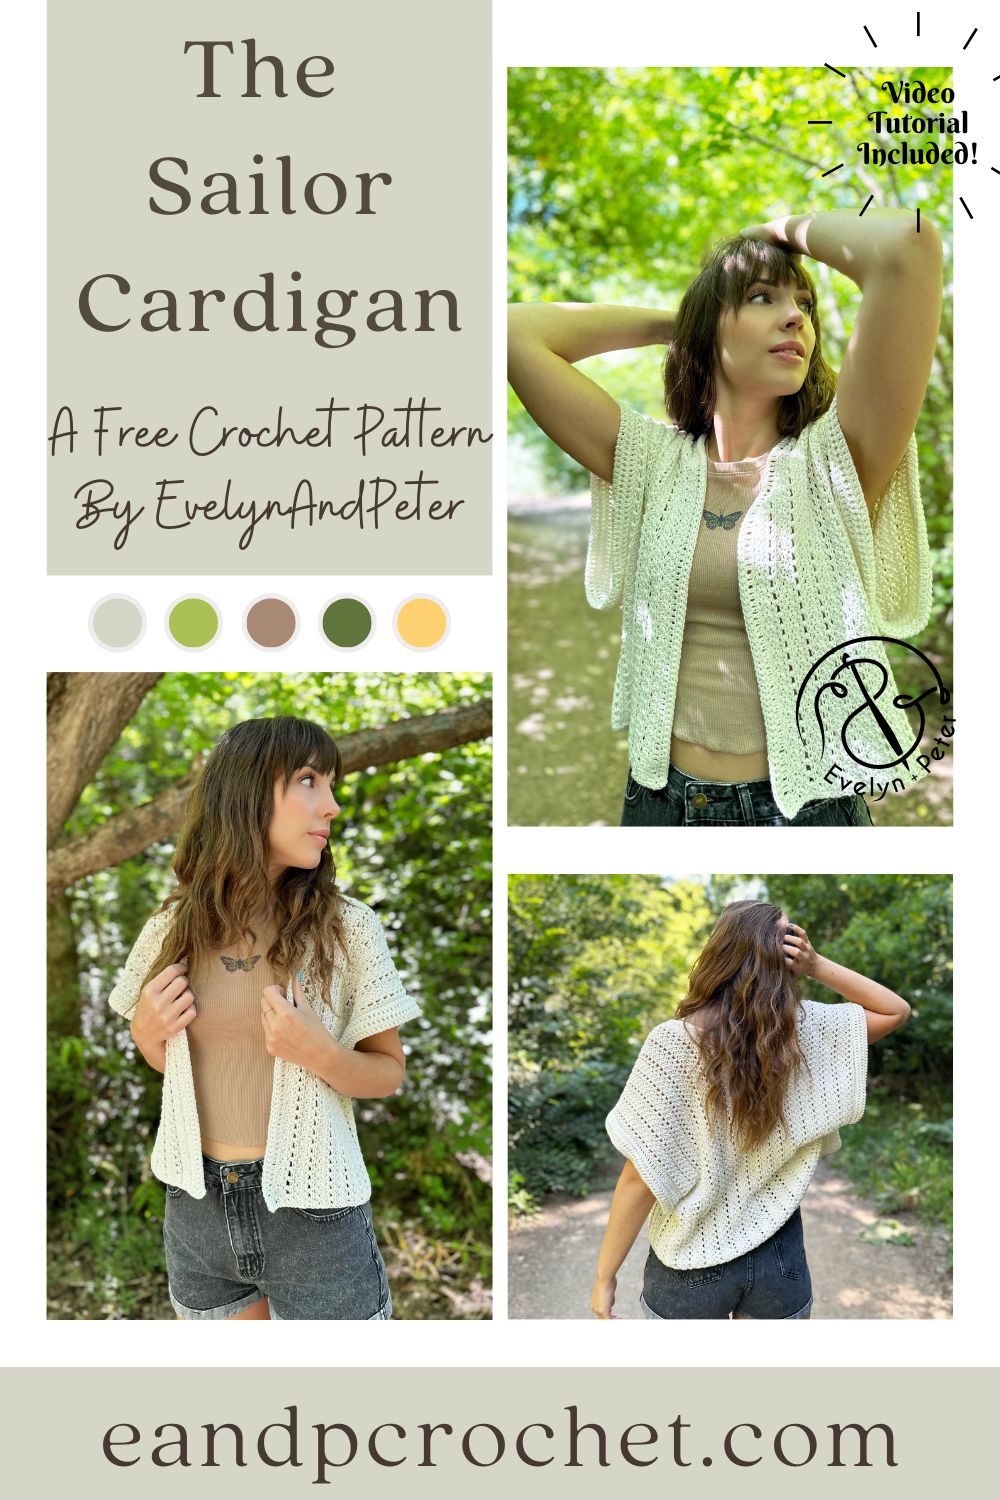
You already know I had to make ONE more summer design before the chilly weather arrives. The great thing about The Sailor Cardigan is that it’s perfect for layering! Toss it on while in the office or better yet, while relaxing out on a boat in the ocean with the cool breeze blowing in your hair…one can dream right?!
My favorite thing about The Sailor Cardigan is that it is made from side to side! It only requires one tiny section of seaming on each side of the cardigan. The vertical rows give it a really pretty striped look. The sleeves are super oversized, they remind me of a sail! See what I did there? haha!
If you are a beginner and need a little extra help or you just prefer a visual, be sure to check out my video tutorial on YouTube! I’ll walk you through step by step on how to crochet your Sailor Cardigan.
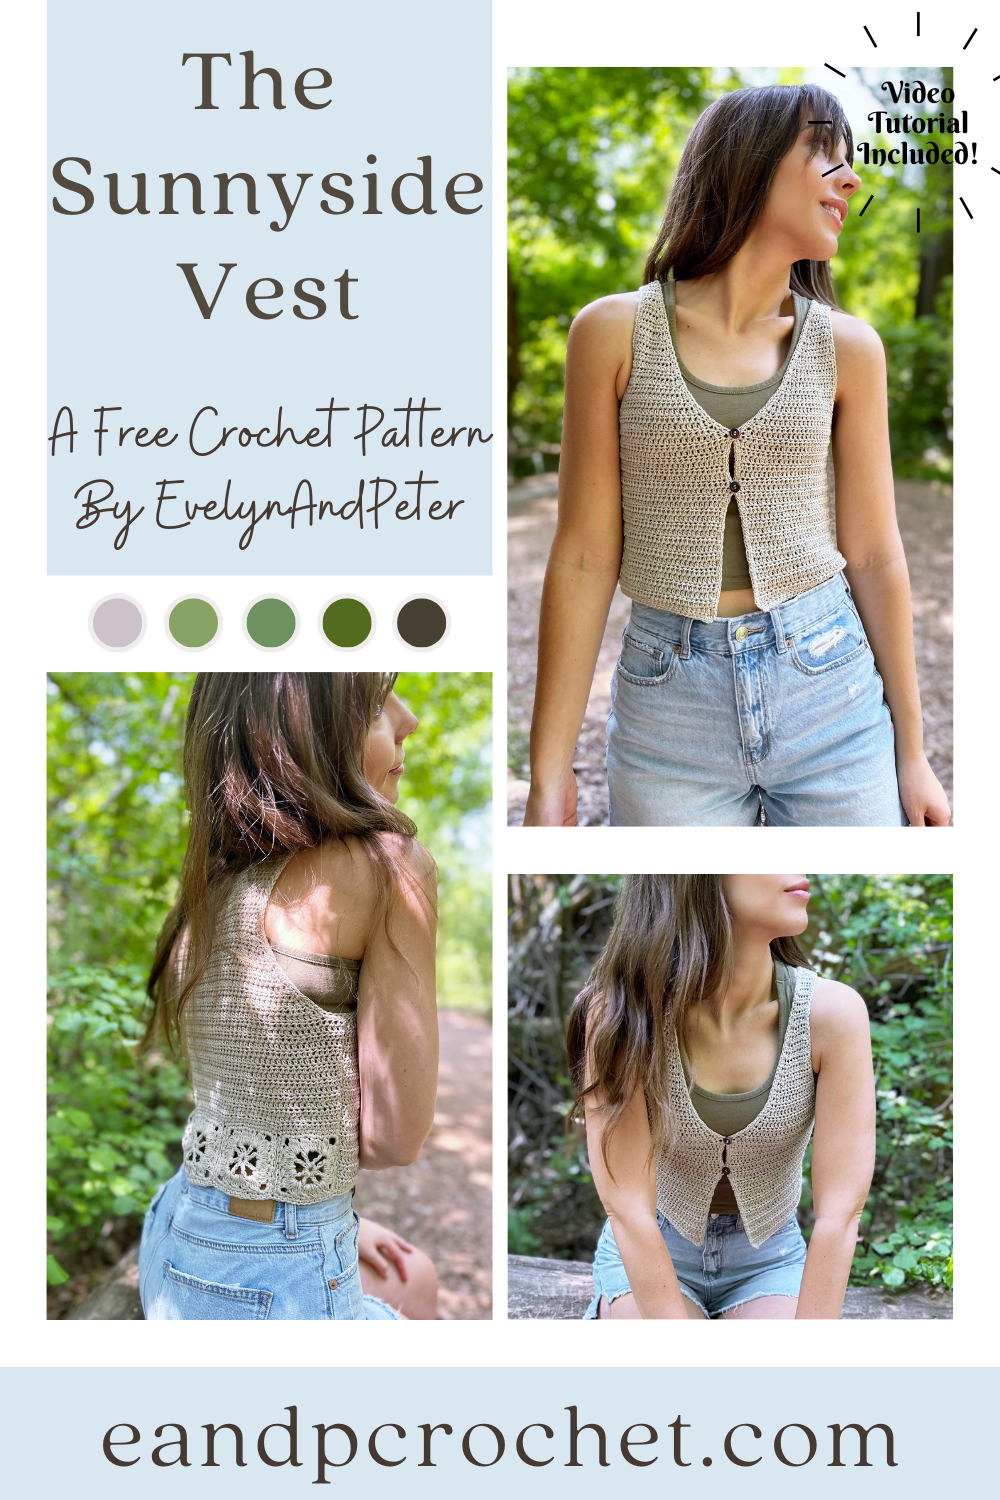
I’ve always wanted to crochet a cute little vest but I wanted to do something a little more unique than just all basic stitches. I knew I wanted to incorporate granny squares or motifs somehow after being inspired by a shower curtain with pretty motifs along the middle that reminded me of sunshine. That’s how we ended up with The Sunnyside Vest crochet pattern!
The Sunnyside Vest is worked in 3 separate panels after you get the motifs worked up. Each size will have a different amount of motifs along the back. Once you make all of your motifs you will join them together before finishing the back panel from the bottom up. The front panels are also worked from the bottom up before being joined at the shoulder and side seam.
I used Cotton Bamboo Linen yarn from Lion Brand which is a Fine (2) weight yarn. This is a newer yarn and has some lovely colors. I used Shale for my Sunnyside Vest crochet pattern. I loved the lightweight feel of this yarn and the fiber combo is perfect for a warm weather garment!
You will notice some of the sizes are combination sizes. This is due to the fact that it is a form fitting garment and the motifs along the back are all the same size. To find your size, just locate your bust size on the chart!
Usually I make a full video tutorial walkthrough for my designs. For this one I was not able to do a tutorial for the entire thing. I did make a video on how to make the motifs, join the motifs, and set up the first row for the back panel. In my opinion this might be the trickiest part for beginners so I wanted to make sure I provided a visual for you guys! After you are all set up it is just Hdc stitches throughout, with some decreasing and shaping! I had a very busy month when designing the Sunnyside Vest crochet pattern and my family was sick with the stomach bug for weeks. I hope you can forgive me for not having a full walkthrough but I am always available to help with pattern questions! Check out the video tutorial here!
If you like this crochet vest, please be sure to check out some of my other top patterns as well!