
I was sooooo excited to see that shrug and bolero style sweaters were starting to become popular again! They are one of my favorite styles so I knew I had to design one, which is exactly what I did! I’m so excited to share The Tilda Shrug crochet pattern with you all!
I stepped out of my comfort zone a bit with this one in terms of shaping. You’ll find some short rows around the opening of the shrug as well as increase shaping within the rows of the sleeves! The Tilda Shrug is worked in 2 separate mirrored panels. You will then do a small seam up the back as well as under the arms.
I used wool ease recycled yarn for this project and loved it! This was my first time using it and it worked up so well. The Tilda Shrug crochet pattern is a kit so if you need yarn I recommend checking it out! If you are intimidated with making the Tilda Shrug crochet pattern be sure to check out the video tutorial! Thank you guys so much for subscribing!
If you love this design be sure to check out some of my other cardigans and sweaters free here on my blog!
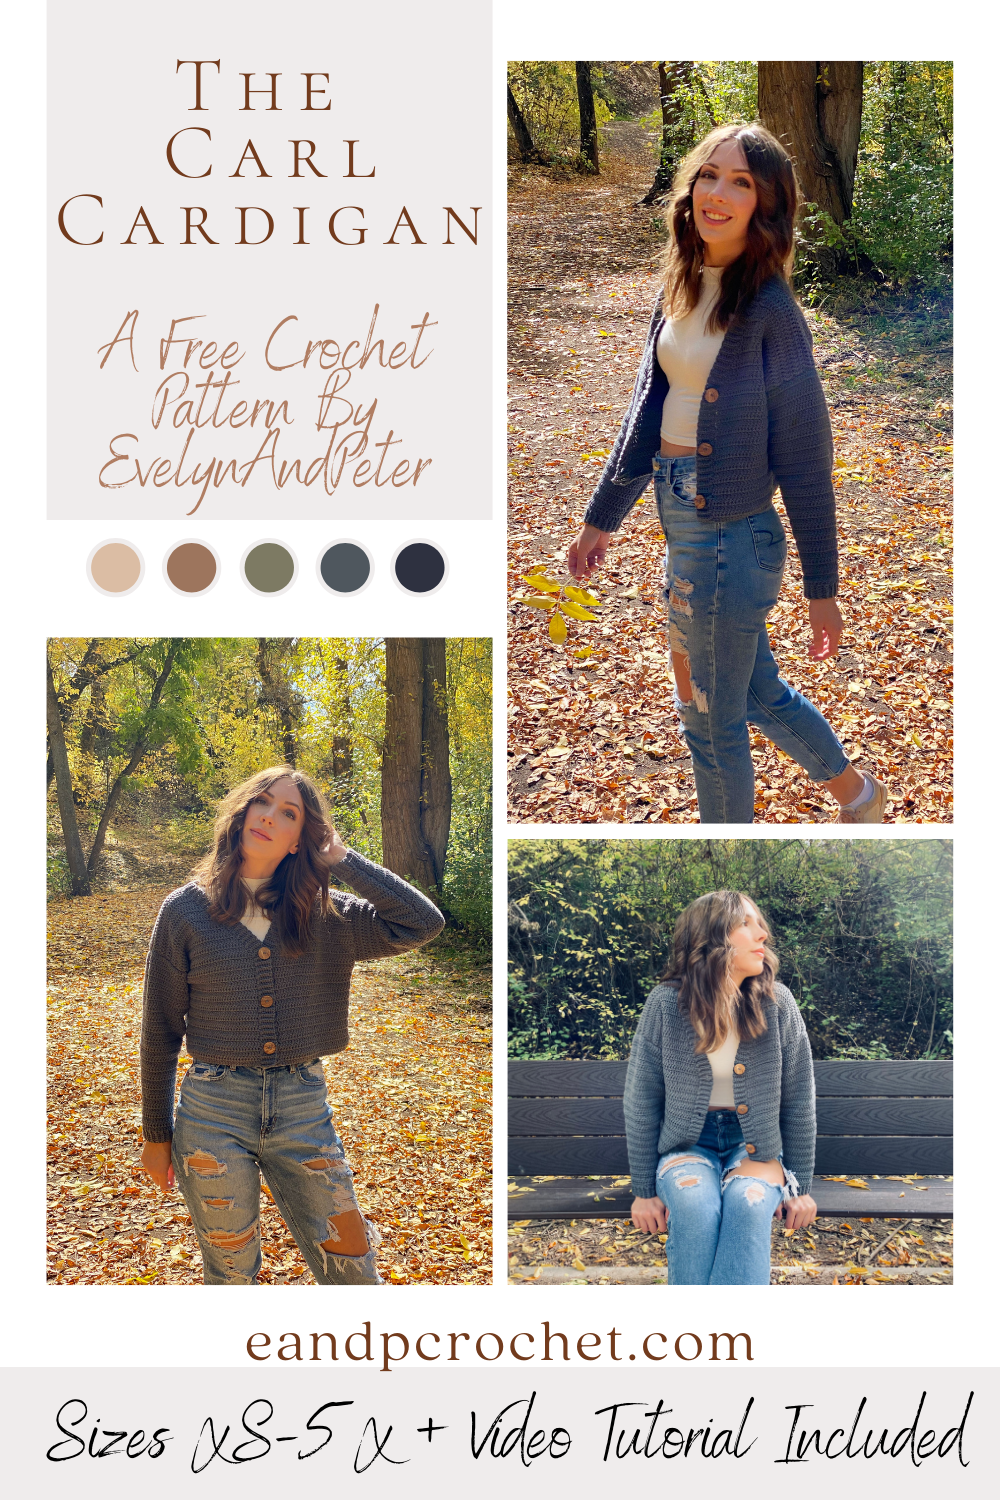
I love the look of oversized V-neck button up cardigans. There’s just something about them that I find so appealing! They give me such comforting “grandpa” vibes haha. I knew I had to make one but put my own trendy spin on it. The Carl Cardigan is my cropped and a bit more girly version of this!
The Carl Cardigan is worked in separate panels from the bottom up. When you break it down into each piece tackling this sweater is a breeze. I used the same stitch throughout and have very beginner friendly shaping. I used Feels Like Butta which is one of my favorite soft yarns. It’s very smooth to work with and frogs back easily if you make a mistake!
I know some of us prefer to have our cardigans longer instead of cropped. Good news, it is super easy to make this longer! Just add as many rows as you would like to the back panel (in multiples of 2). Then, when you make the front panels, add the same amount of rows before you start decreasing! Remember, you will need extra yarn!
You might recognize the ribbing technique around this cardigan. I did the cuffs from The Pemberly Pullover the same way! You will be working the trim of the cardigan directly off the sides of the front panel. It might look a little intimidating at first, but when it comes down to it, you are just slip stitching to the panels as you go! If you are new to this technique be sure to check out my video tutorial where I show you exactly how to do it.