search results for
sweater

I’m so excited to finally release The Wisteria Sweater! I finished this one several weeks ago and am so happy to get it out in the world! You can find the full written pattern below, along with links to the Lion Brand kit, video tutorial and printable PDF!
The front and back panels of The Wisteria Sweater are worked from the bottom up. Then, you will seam the sides and shoulders before attaching and working the sleeves top down. For a longer top, add more rows in multiples of 4 before you begin the underarm shaping. For longer or shorter sleeves, just add or remove more rounds before beginning the cuff! The great part about the sleeves being worked top down is you can try it on and adjust the sleeves before fastening off!
I used Lion Brand Re-spun yarn in the bonus bundle, color “blush”. You can find The Wisteria Sweater as a kit on the Lion Brand website, which comes with all the yarn needed to make your sweater plus a free copy of the ad-free printable PDF! You can also customize your yarn color.
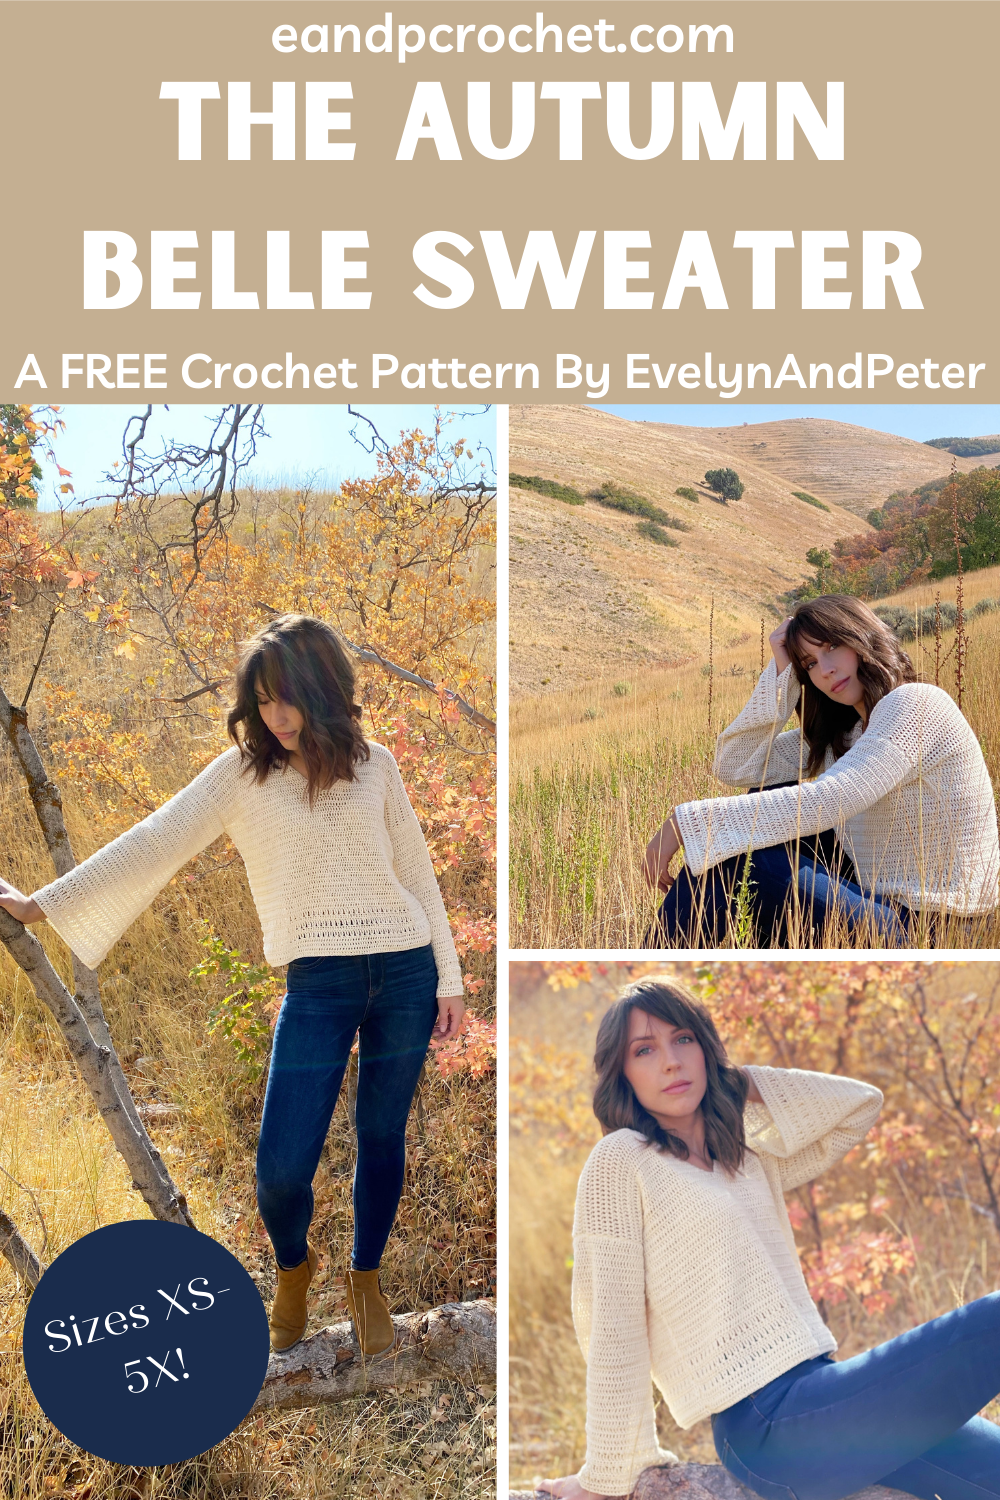
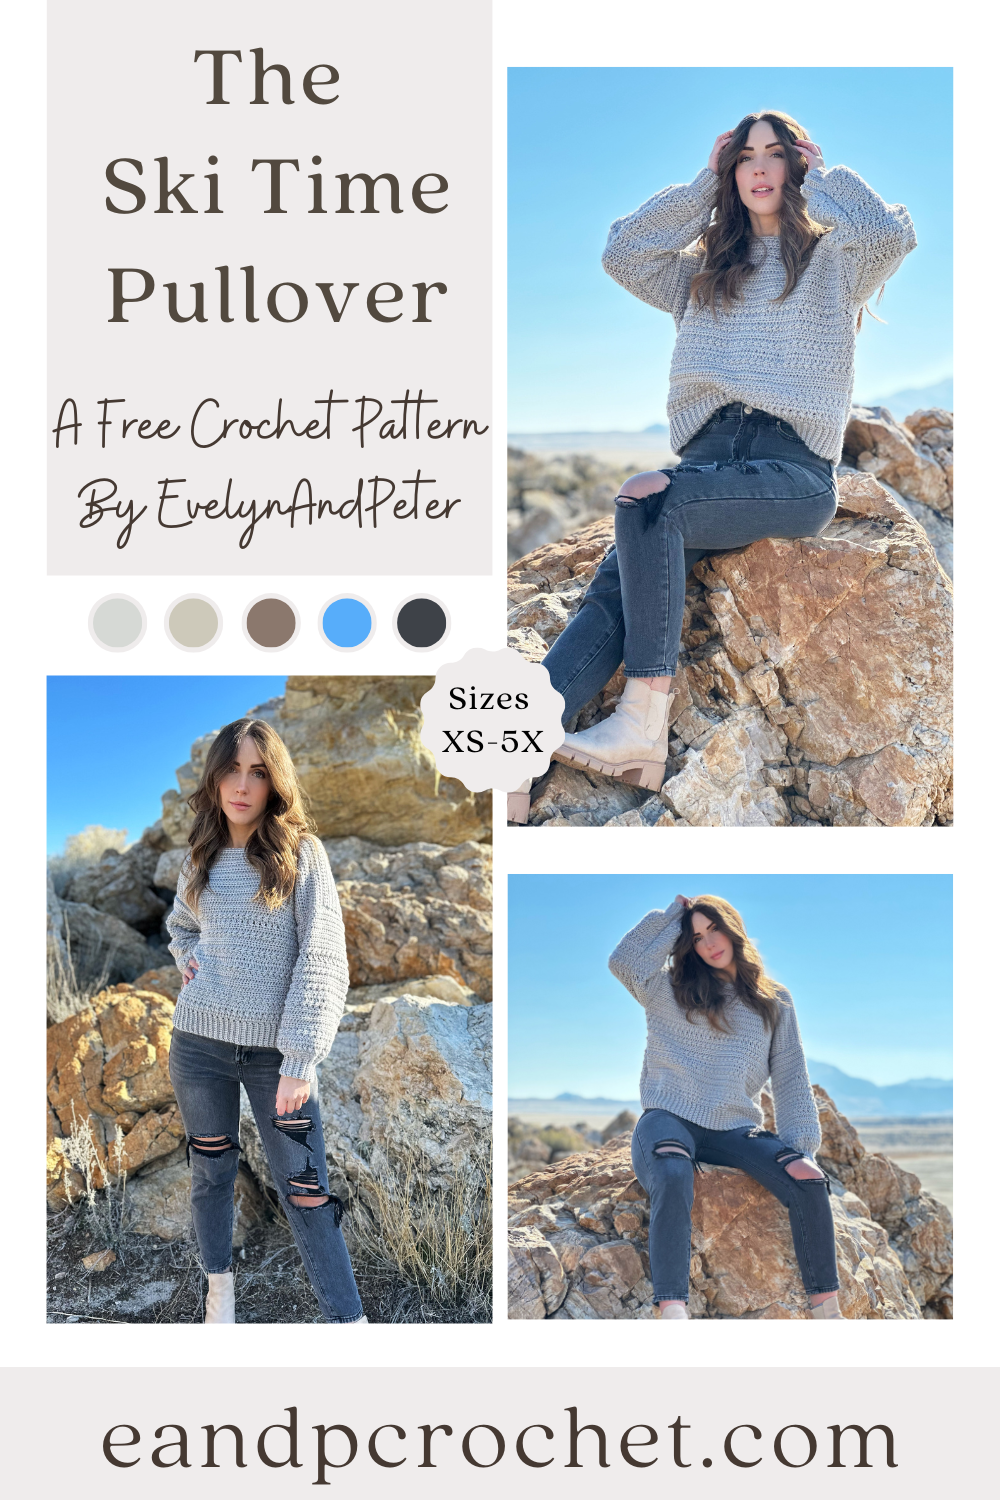
Have you ever made a bell sleeve sweater before? If not, you HAVE to make the Autumn Bell Sweater Pattern! This sweater is beginner friendly and is size inclusive with sizes XS-5X provided!
One of my favorite things about this sweater is the yarn. I used a Fine weight yarn, specifically Lion Brands’ Oh Baby Organic Cotton! Now I know, I know you’re saying “a fine weight yarn?! Won’t that take forever to make??” And the answer is NO! It actually works up pretty quickly because this sweater uses double crochet and treble crochet stitches throughout the whole thing!
I made this design in just a couple of weeks with my testers following suit and making it within 2-3 weeks! Not only is it fast for a fine weight sweater but you also get the benefit of the beautiful drape and light weight feel! If you get hot and itchy in a lot of sweaters like I do, then The Autumn Belle Sweater pattern is perfect for you!
Lightweight and beautiful drape- check! Size inclusive- check! Beginner friendly- check! If you are a beginner this is doable! I use easy stitches, minimal shaping AND include video tutorials on how to do the stitches! Perfect, right?
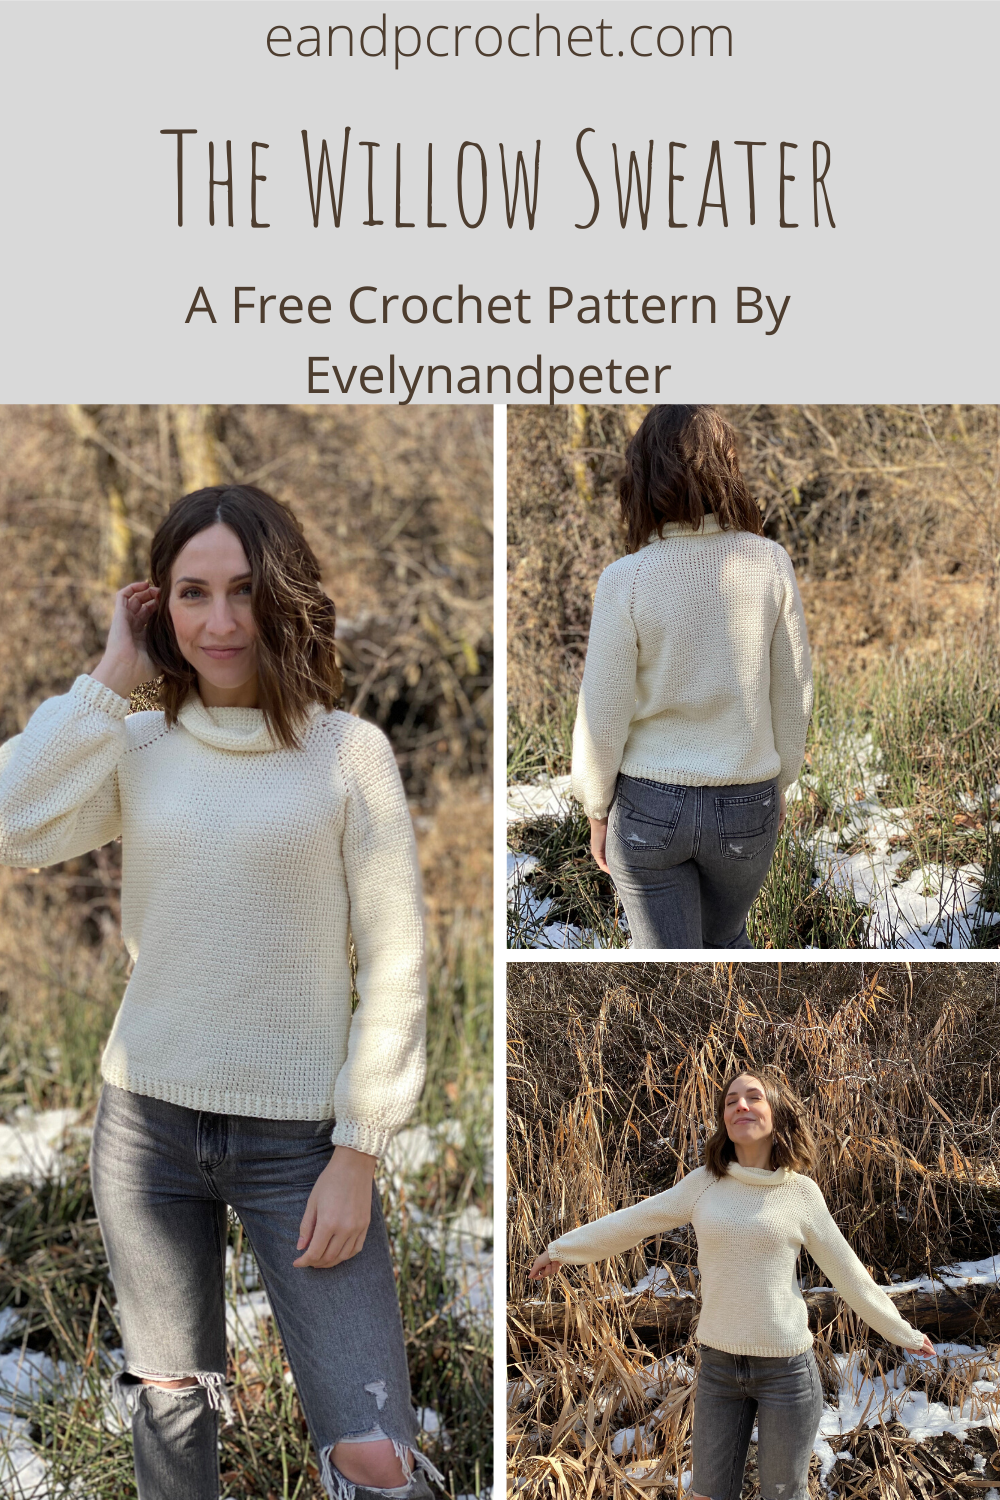
I love a good crochet raglan sweater! Are you a fan of top down designs? Or do you like working from the bottom up? The Willow Sweater is top down or “raglan” style! I haven’t really made too many crochet patterns from the top down. It was fun being able to try it on as I went!
This sweater has no seams and no sewing. Thats definitely a plus. I have to admit though, I don’t mind sewing pieces together and I think my favorite will always be bottom up sweaters in separate pieces. Each time you finish a panel it’s like checking off a task and it seems to go quicker for me!
I love the look of a cozy cowl on a crochet raglan sweater but you could also easily leave it off. It would save you yarn, time and be less bulky in the warmer months!
Sweaters are definitely my favorite thing to design. Check out these free ones on my blog! The Coffee Shop Cardigan, The Cozy Boyfriend Cardigan, and The Color Block Cape!
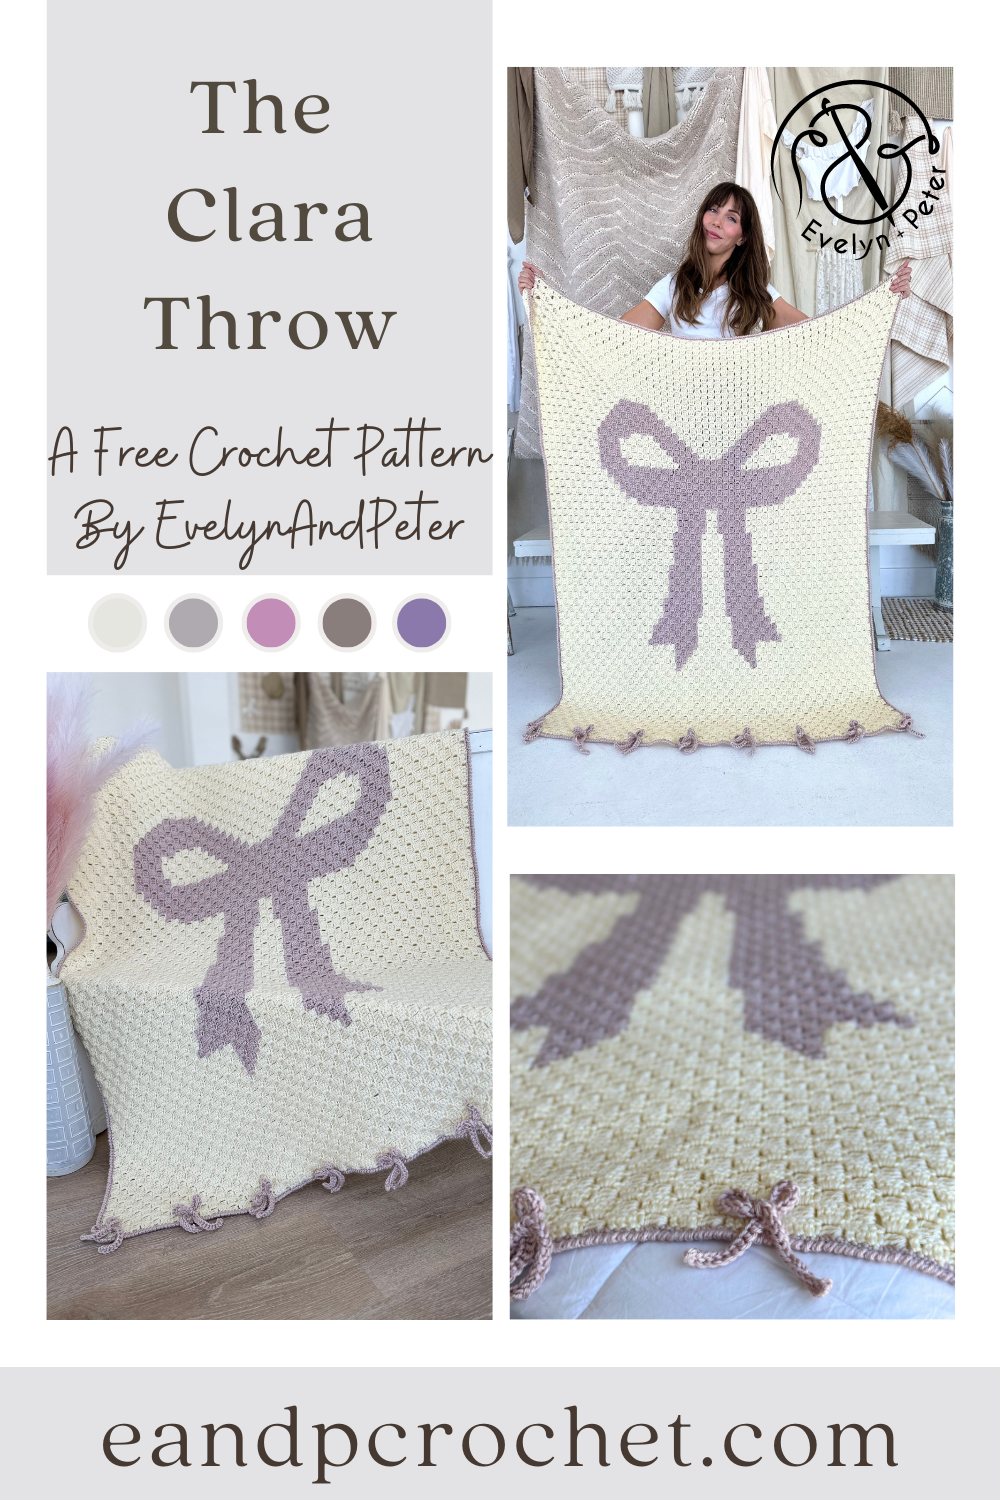
Give me all the cute little bows!! This blanket is perfect for all the girly bow fans out there! The Clara Throw crochet pattern is a C2C design and so fun to work up.
I’ve been seeing so many cute bow sweaters and beautiful bow hair clips recently and I knew I had to make a bow C2C design. The Clara Throw is worked from the bottom right corner to the top left corner. The pattern below includes both the written rows and the graph for easy stitching.
If you aren’t familiar with C2C it’s basically crocheting little squares out of Dc stitches over and over again, working diagonally! It is super addicting in my opinion and you can make so many fun things! Check out some of my past C2C designs like The Daisy Day Throw and The Mushroom Medley Throw!
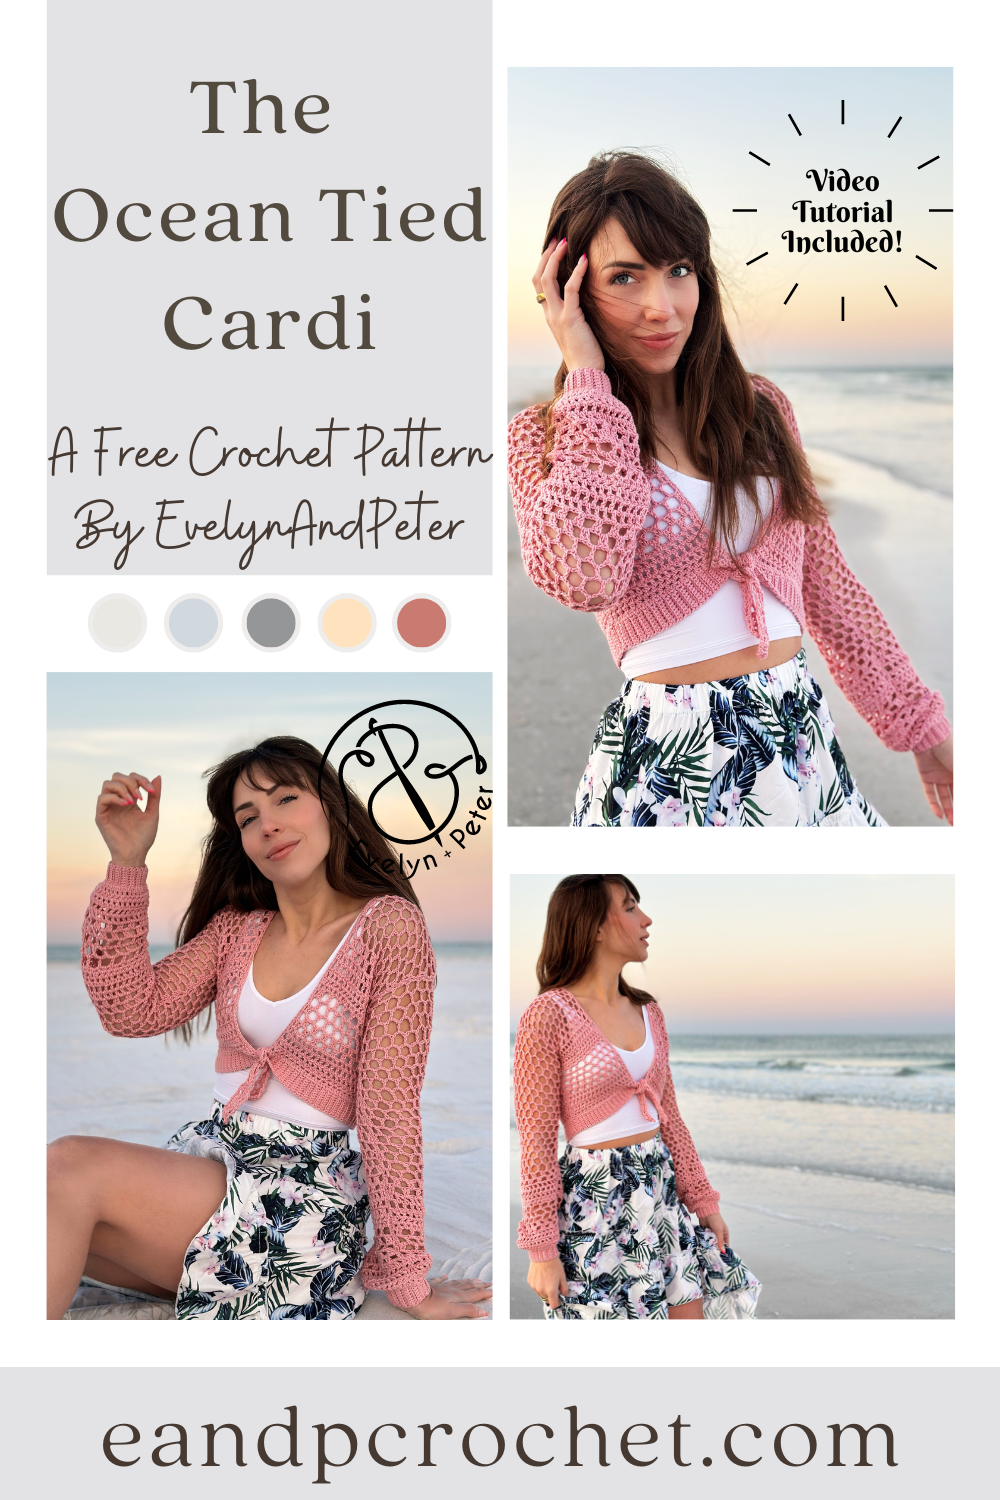
Once the sun starts shining and the blooms start to poke out I always get the urge to make a summer garment! I knew I wanted it to be meshy and airy as well as having a cute tie feature in the front. The Ocean Tied Cardi crochet pattern quickly came to life!
I played around with a bunch of different mesh stitches and decided to combine a whole bunch of them into one design! It actually came together pretty easily with very minimal swatching and frogging! It’s like it was meant to be. The majority of The Ocean Tied Cardi uses double crochet stitches and chains so it works up quickly. It’s also easily adjustable if you want yours longer or shorter. Just add or remove rows to the end of each panel before fastening off.
I think its sooo cute with the little tie in the front, it really makes the design in my opinion! However, if you want to keep it off and wear it as an open cardigan, then you can easily do that! Just add the final trim and don’t follow the instructions for the tie at the end.

I was sooooo excited to see that shrug and bolero style sweaters were starting to become popular again! They are one of my favorite styles so I knew I had to design one, which is exactly what I did! I’m so excited to share The Tilda Shrug crochet pattern with you all!
I stepped out of my comfort zone a bit with this one in terms of shaping. You’ll find some short rows around the opening of the shrug as well as increase shaping within the rows of the sleeves! The Tilda Shrug is worked in 2 separate mirrored panels. You will then do a small seam up the back as well as under the arms.
I used wool ease recycled yarn for this project and loved it! This was my first time using it and it worked up so well. The Tilda Shrug crochet pattern is a kit so if you need yarn I recommend checking it out! If you are intimidated with making the Tilda Shrug crochet pattern be sure to check out the video tutorial! Thank you guys so much for subscribing!
If you love this design be sure to check out some of my other cardigans and sweaters free here on my blog!
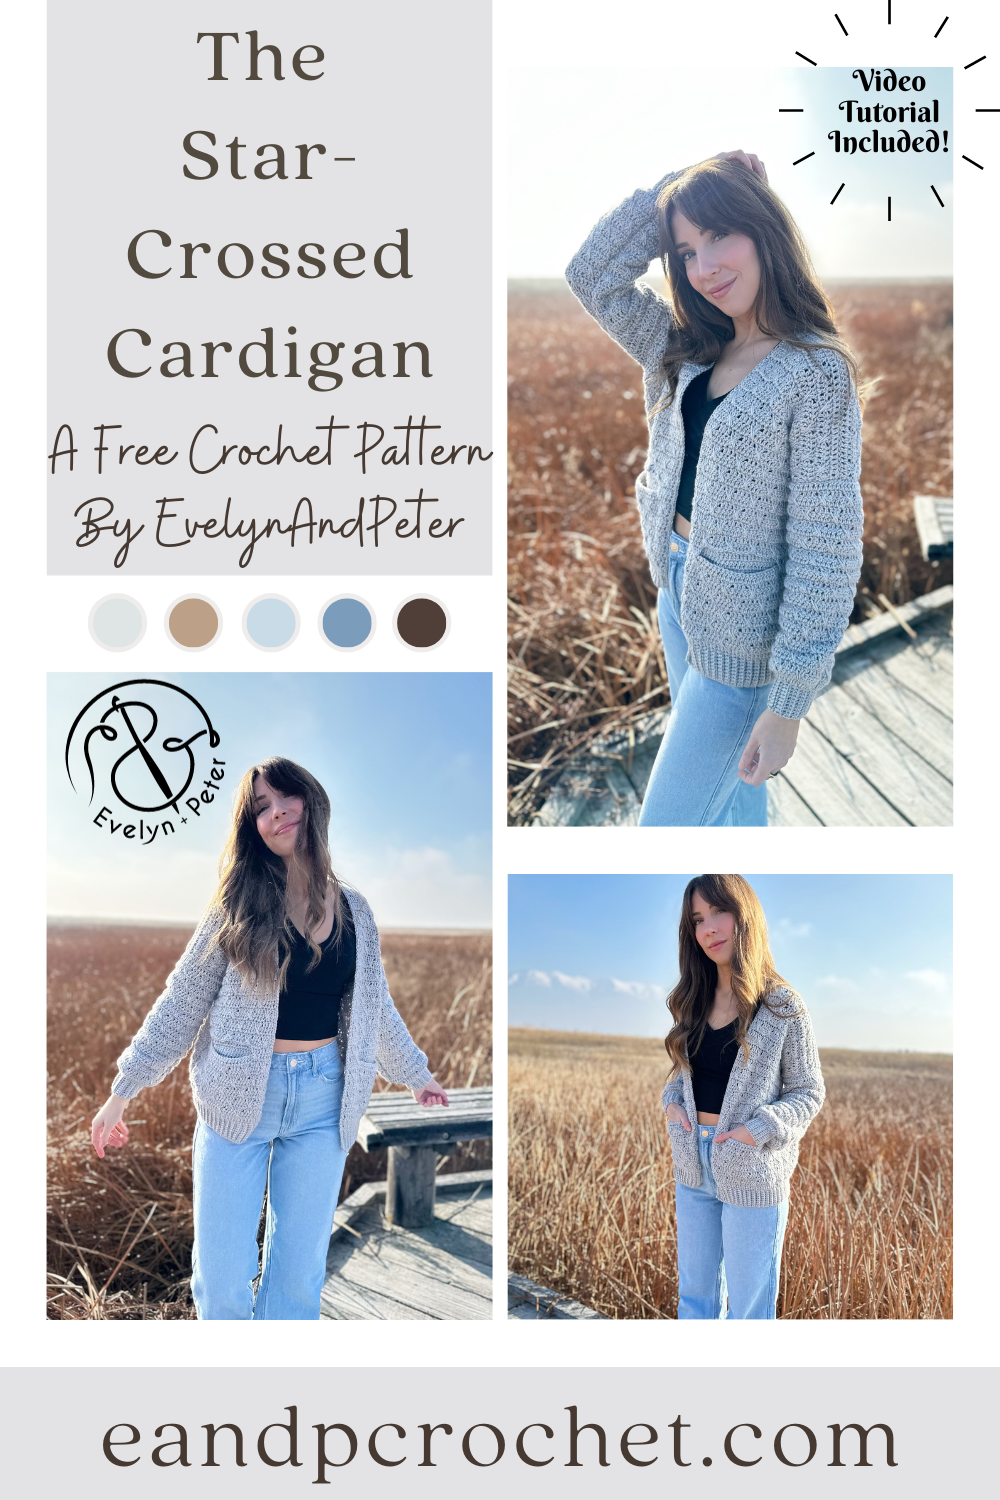
Let’s kick off the new year with a brand new crochet design, The Star-Crossed Cardigan Crochet Pattern! I wanted to start off strong with a cardigan design using Heartland yarn. You might remember my Stony Shore Cardigan and my Kiah Cardigan, both are very popular and well loved and both use Heartland yarn! I knew I needed something to add to the collection of my popular cardigans!
The Star-Crossed Cardigan crochet pattern is very beginner friendly and uses basic shapes. Once you nail the “double crosses spike” stitch you will work this cardigan up easy peasy! It’s basically a combination of all double crochet stitches with the ribbing using single crochet. You will work the panels from the bottom up and sew together.
Did you notice the Star-Crossed Cardigan crochet pattern has pockets?! The best part is that the pocket swatch is your gauge swatch. So feel free to jump ahead in the pattern and make a pocket swatch before starting. You will then use that swatch to measure 4×4″ within. Save it for later when you are required to seam to the inside of your cardigan!
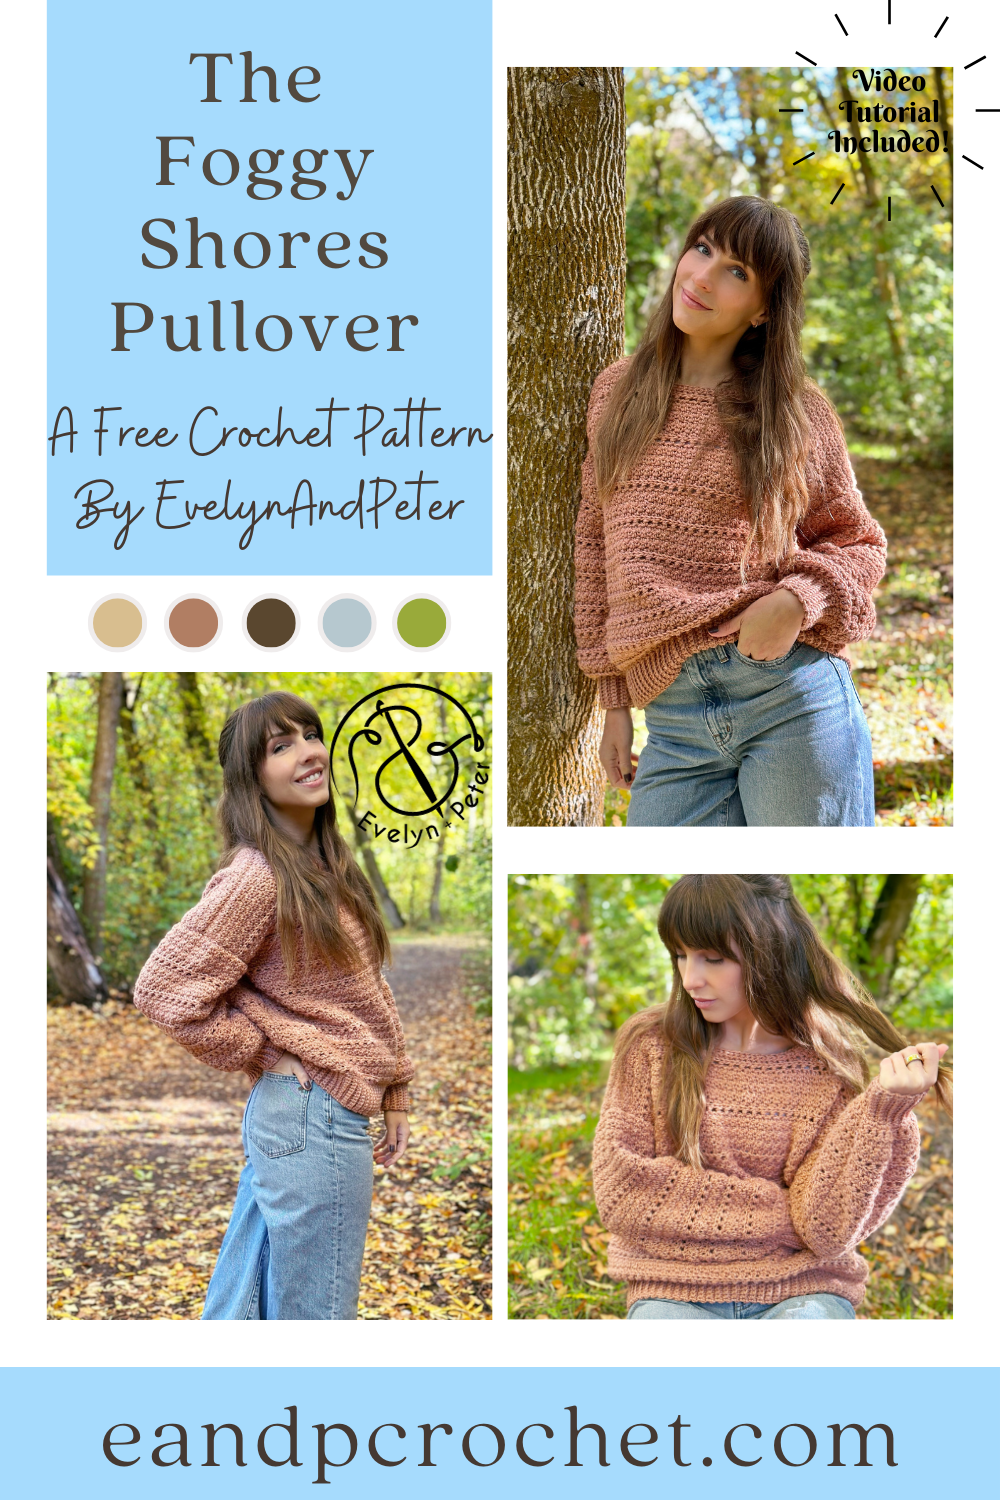
You know I wasn’t going to leave you hanging! The Foggy Shores Pullover crochet pattern is here! One of my biggest requests I get when I make a popular cardigan design is to make a pullover version or vice versa. So when I released The Foggy Shores Cardigan a couple weeks ago I already had the pullover ready and waiting!
I did use a different yarn for the pullover version, Lion Brands Basic Stitch Anti-Microbial! It has some really cute colors and was very easy to work with! This is an Anti-Allergen yarn which I thought was pretty cool. It has long-lasting freshness for your projects while preventing odor, bacteria and allergens. You can grab this yarn as part of the kit with Lion Brand! The kit comes with all the yarn you need to make your Foggy Shores Pullover plus a FREE copy of the printable PDF pattern! You can also swap out your yarn colors.
The Foggy Shores Pullover crochet pattern is worked in separate panels from the bottom up. You can easily adjust the length of your pullover by adding or removing rows to the front and back panel. If you made the cardigan than you should already have the easy row repeat memorized! You’ll be using a mix of lemon peel stitch and hdc stitches!
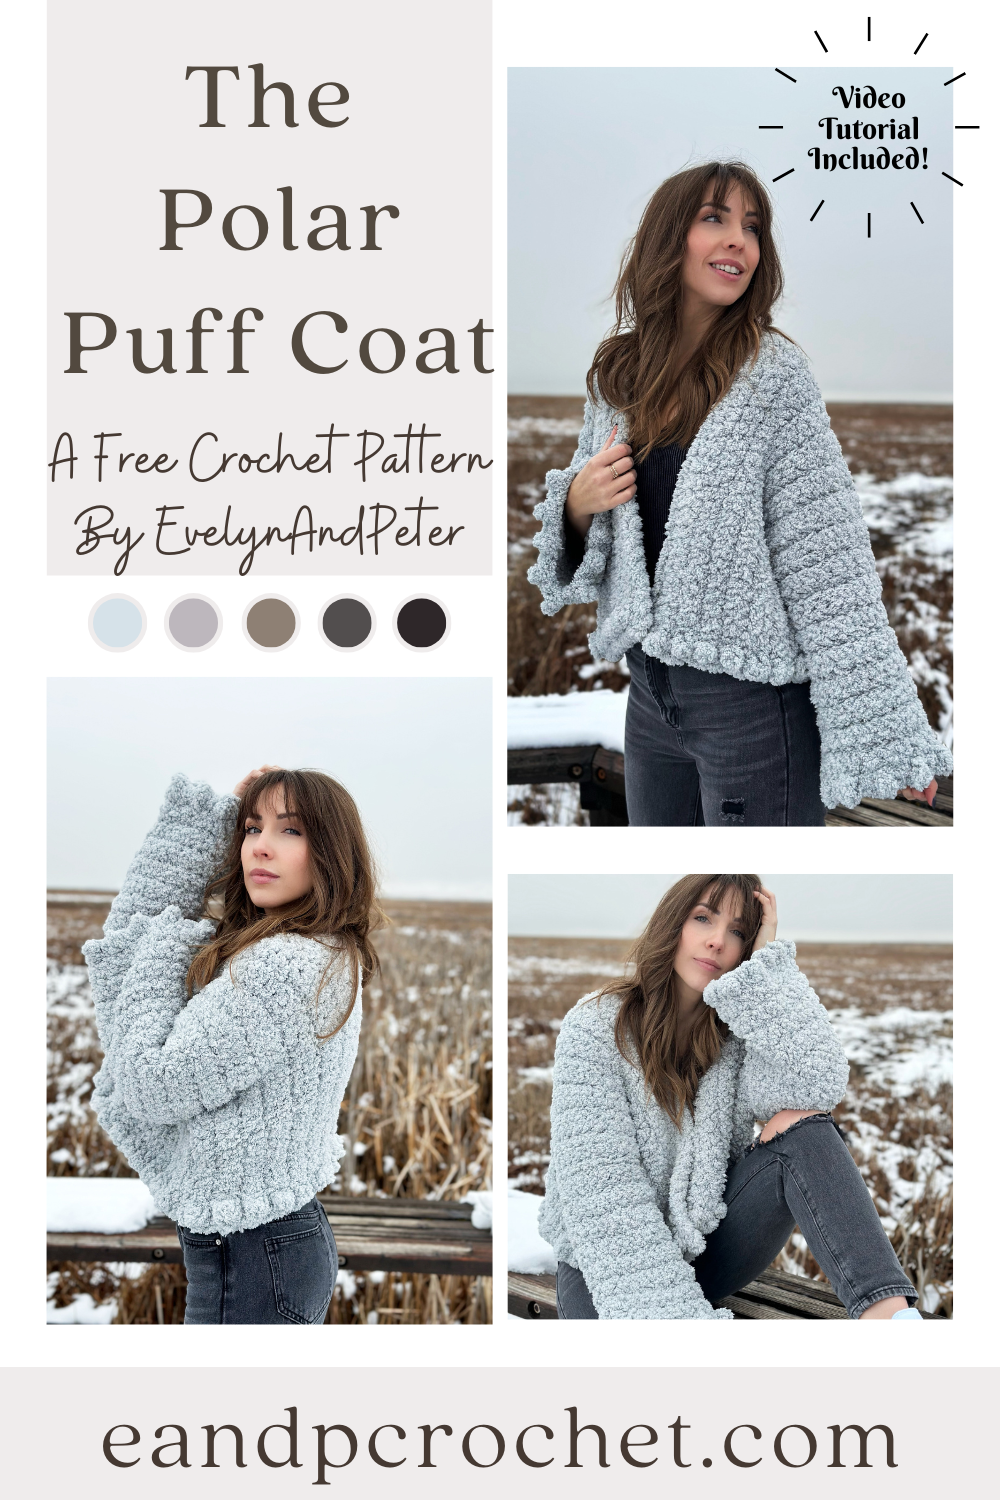
There is nothing like a warm and cozy coat/cardigan on those chilly days. The Polar Puff Coat is like a giant warm hug and I can’t get enough of it. I’ve been wrapped up in it at home while working and it goes perfectly with a warm cup of tea. 🙂 It has a fun and flirty fit as well as oversized sleeves featuring cute little puffs!
Let’s talk about the yarn I used. Lion Brand Go For Fleece Sherpa is probably one of the softest yarns you will come across. It’s jumbo weight so it works up very quickly and the fleece yarn gives your piece a beautiful sherpa look. I know what you are thinking…that this yarn is hard to use! It really isn’t though and it only takes a bit of practice, I promise. You will want to feel your stitches as you crochet, not try and see them. I use Sc throughout most of this pattern and designed it in a way so you can easily count your rows by using the little puff at the ends as a marker. Once you have the correct St count down for the starting row it should be easy from there on out. Don’t forget, this yarn is very forgiving and hides mistakes well! Count your Sts after your rows to make sure you are on track. Stitch markers are helpful as well.
I love the fit of The Polar Puff Coat. I wanted something very oversized as well as cropped. It has a short rectangular fit to it. If you want your coat to be more fitted, you can follow a size smaller than normal. If you want it even smaller than what is listed, you can remove rows in multiples of 2 on both sides of the front panels. If you want it longer, you can make your foundation row or starting Ch longer by adding Sts in multiples of 2.
Need a little bit of extra help? I have a video tutorial available! Be sure to check it out if you have any questions.