
Cardigans and pullovers are definitely my favorite thing to design but bags are not far behind! You can never have too many cute bags right? The Sunny Cinch Satchel just might be your next favorite!
I love a good cotton yarn for crochet bags and purses. Pima Cotton has always been one of my favorites so I decided to use it for my bag but wanted to hold the yarn double stranded for extra sturdiness! Let me tell ya, I am obsessed with how it turned out! The yarn is soft and so nice to work with! Plus, this bag works up even faster with the double thickness!
If you plan on buying yarn I recommend checking out my lion brand kit! It comes with a free copy of the ad-free printable pattern and you can customize your yarn color. Subscribe to my newsletter to find out about 30% off sales!
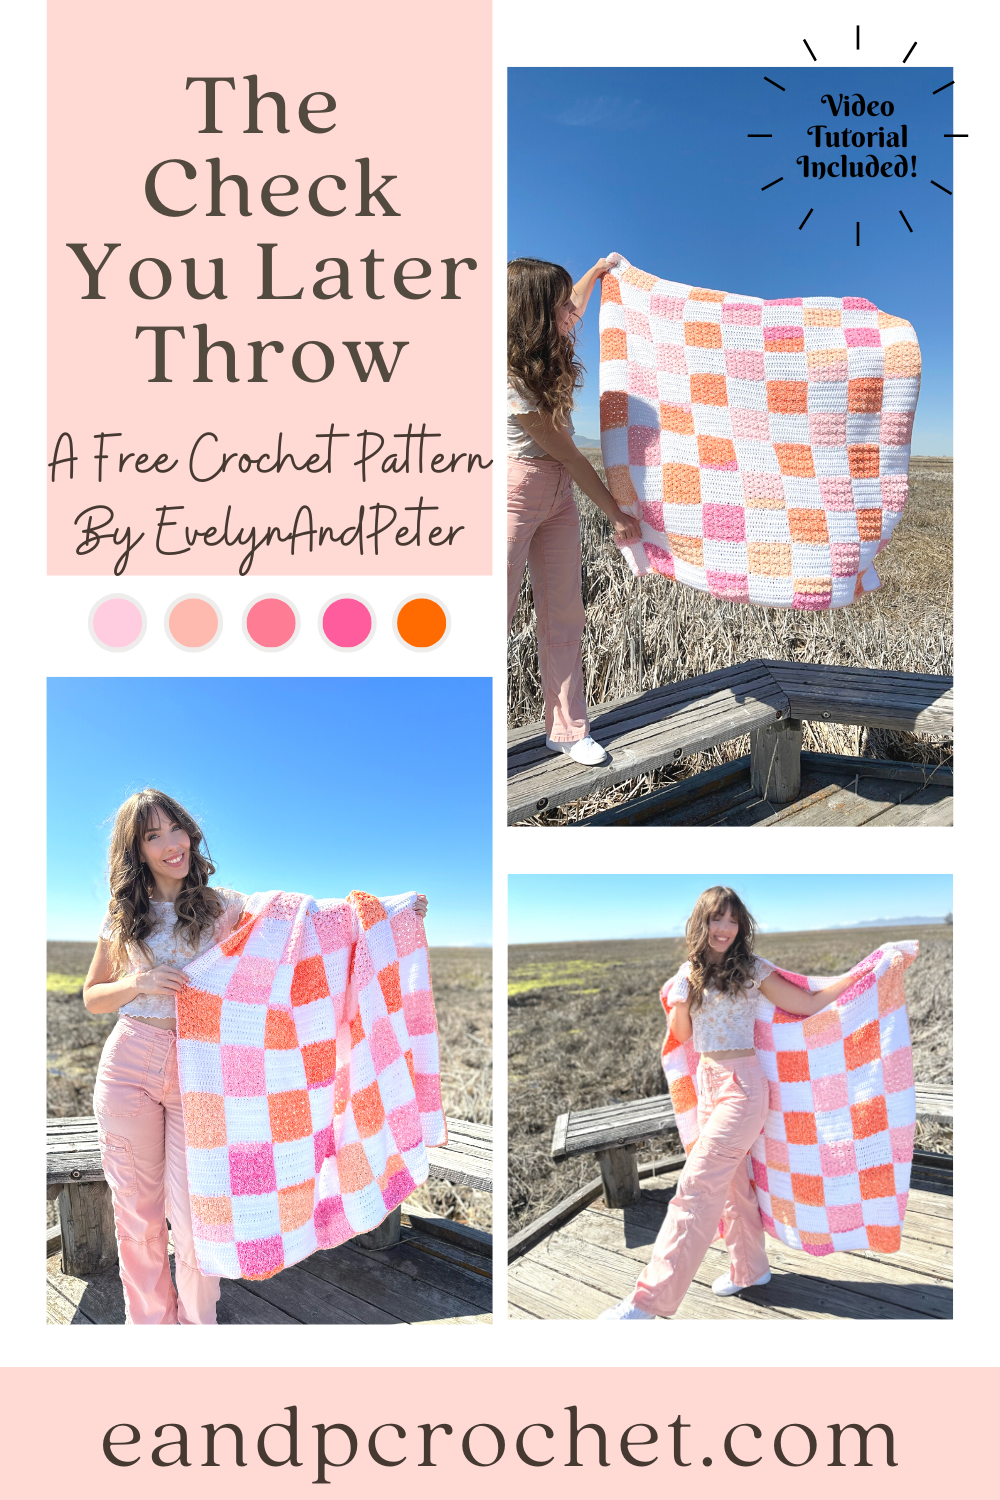
I don’t know about you but I’ve been seeing checkers everywhere this season! On shirts, shoes, hats, rugs, bags and of course, blankets!! I wanted to put my own spin on the trend and came up with The Check You Later Throw!
After testing out different ways to make a checkered design I finally settled on working it up in strips. I know doing separate squares is more time consuming and can be intimidating so I got rid of that idea. I swatched a bit with C2C but ultimately decided that there would be too many skeins of yarn going at once for the amount of squares I wanted. I also thought about working in rows but that would still require too many balls of yarn at once for me. I wanted something a bit easier for a beginner to do! After I did a test working it from the bottom up in separate strips I knew I found the winner!!
There are 2 separate strip patterns, Panel A and Panel B. You will be making 5 Panel A and 4 of Panel B. They are made from the bottom up. You will have to cut and join yarn each time you change colors for the squares but don’t worry! Tie the tails together in a secure knot. Then, you can crochet over the tails for less ends to weave. I only did this when changing from color B to Color A. I would work my Dc stitches over half the tail. Then after I was done I weaved them back the other way to make it extra secure. I did not crochet over the tails when making the Color B square. I found that because of the stitch I used it didn’t hide the tails well enough and you could see it peaking through. I save those to weave in at the end.
When I made my strips, I kept my colors in order as they came. I did not do any special cutting and rearranging of yarn colors. I worked my panels from let to right starting with the first Panel A and picked up each skein where I left off in the previous square. That does not mean you have to do the same though! You can join in your colors from the Mandala however you would like.
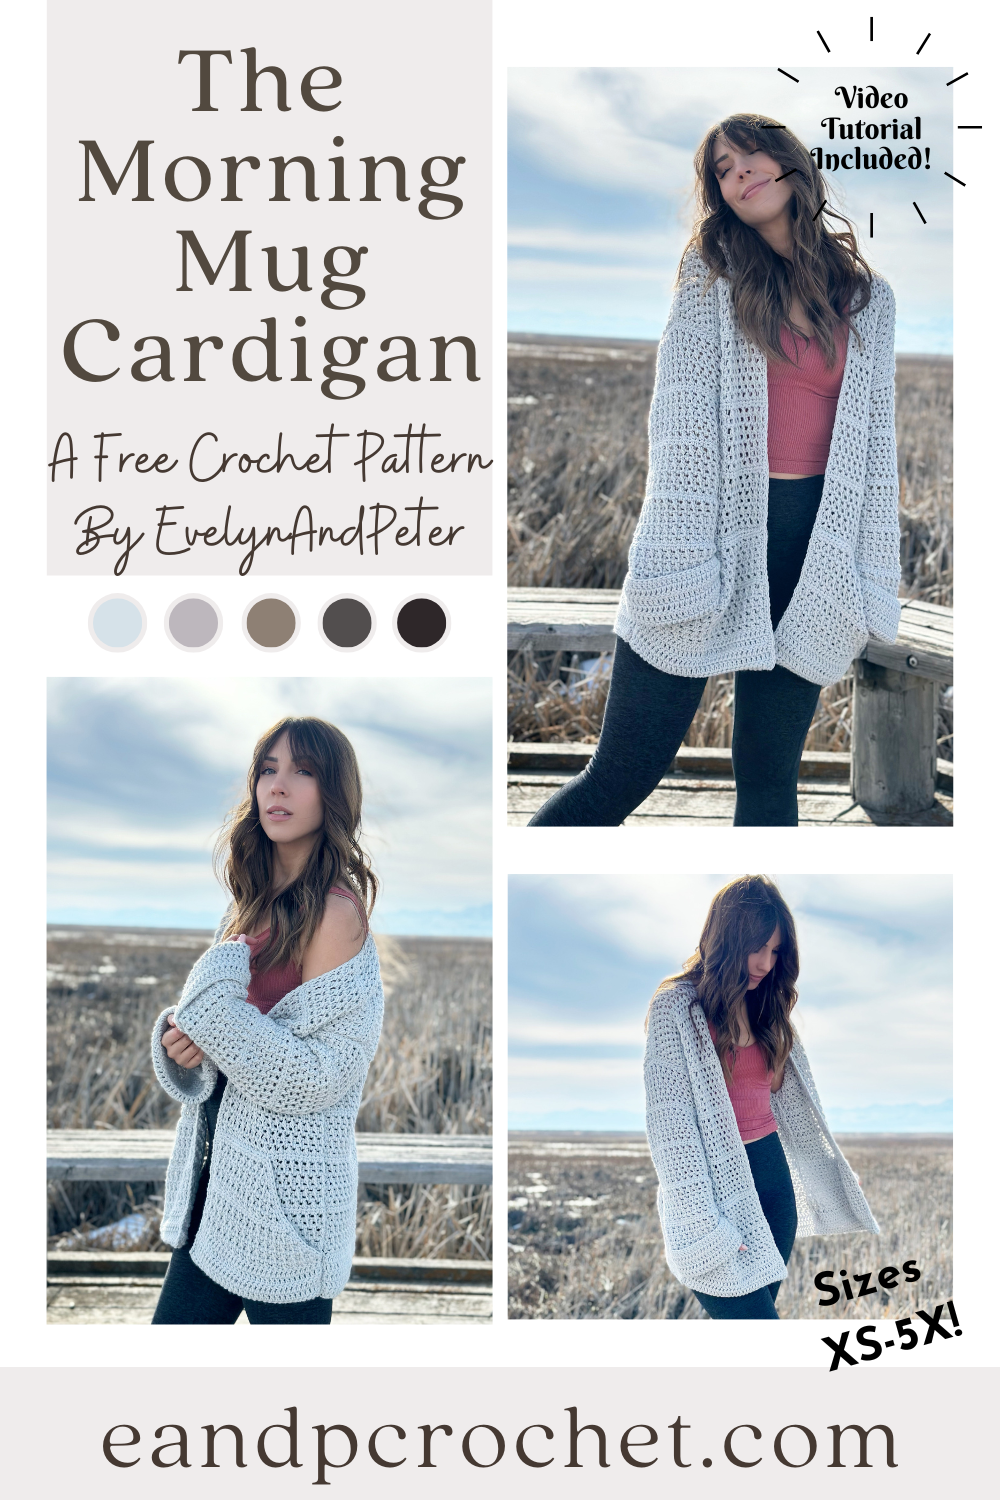
I’ve been wanting to design a longer style cardigan so that I can wear it over leggings for extra coziness. The Morning Mug Cardigan is long, with oversized cuffed sleeves and deep pockets!
The Fit- This cardigan is long and written with plenty of positive ease for a loose comfy fit. The stitch that I use in it is super stretchy. Once you work up your cardigan and put it on, it stretches another 6-8″ than what is listed in the chart below. The sleeves are extra long so that you can do a large cuff at the end. The large pockets are as wide as the front panel and are added last so you can always keep them off if you want to!
The Yarn- I used Lion Brand Pound Of Love for this design. I feel like this yarn doesn’t get the love it deserves. A lot of times, it is looked over for garments because the skein is SO big and you don’t think you need that much. For this cardigan you will use between 2-3 skeins depending on the size you make. It was actually really nice not having to join in a bunch of skeins while crocheting! It’s also a soft and sturdy yarn which holds up nicely. Another plus is all the color options that are available! I used Elephant Grey for mine but there is a bunch to choose from! Be sure to check out my kit, it comes with the yarn and a FREE copy of my printable pattern!
The How- This cardigan is worked in separate panels from the bottom up. You can easily adjust length by adding or removing the 8 row repeat on the back and front panels. Keep in mind the cardigan uses a stretchy stitch and will stretch down with the weight of the cardigan when worn! The chart below does not include the 6-8″ that the cardi will stretch. The sleeves are long and oversized so that you can cuff them. You will notice that the larger sizes have shorter sleeves. This is because it is a drop shoulder design! If you need to adjust sleeve length you can add or remove rows as well. The pockets are wide and deep. They are the width of your front panel with some decreases on one side. If you don’t want pockets just skip over the instructions and move on to the trim!
Don’t forget I have a full video tutorial available if you need some extra help or have a question! Be sure to subscribe to my channel for more free patterns and content!
If you like this cardigan pattern, be sure to check out some of my others! I have a ton to choose from!
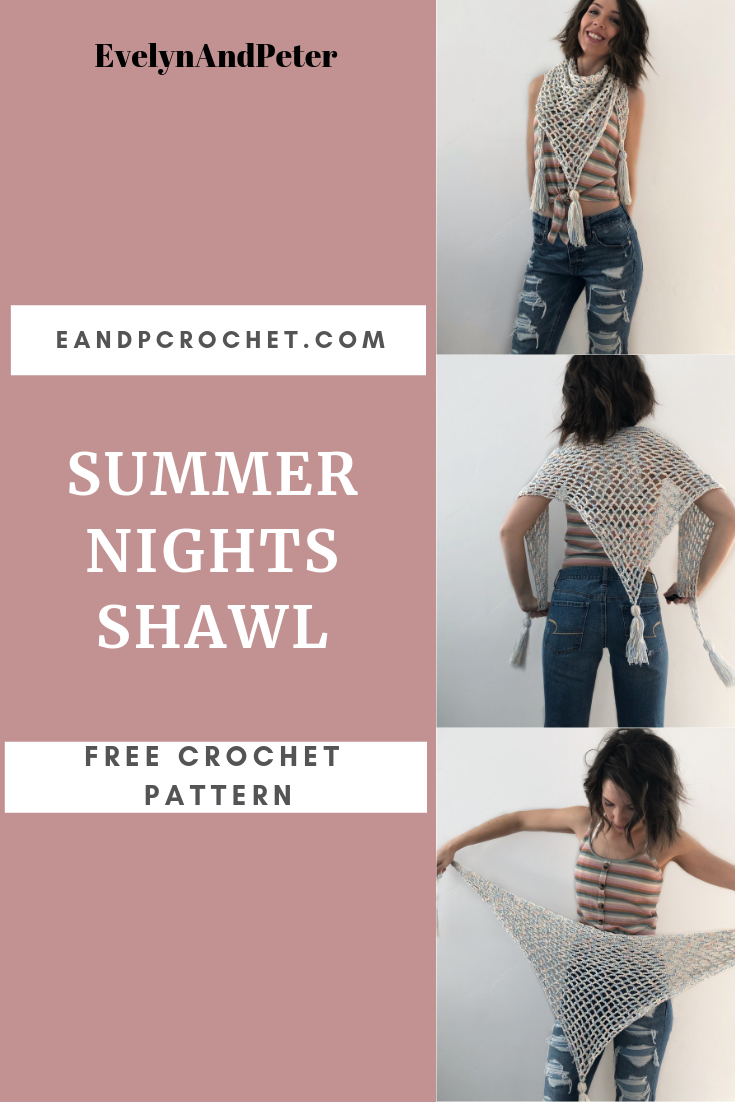
Is it summer yet?! Nope, it’s not even spring yet. lol. I’m hoping that if I make all of the warm weather things it will force the sunshine to come. Let’s see if it works. 🙂 The Summer Nights Shawl is a super fun and quick make to work up while you’re netflixing. It’s a very easy mesh stitch with a simple repeat row. It’s worked up double stranded with the light and superfine yarn. If you don’t have both yarns available, I recommend using just a basic worsted weight yarn!
Be sure to follow me on Instagram and tag me with your finished shawl! I love to share your work with my followers. 🙂
Materials:
- Light (3) weight cotton yarn. Pattern uses Lion Brand Comfy Cotton in “whipped Cream”. 200 yards.
- Superfine (1) weight yarn. Pattern uses Lion Brand Summer Nights in “blue Lagoon”. 215 yards.
- 5.00mm Crochet Hook
- Optional- If you add tassels or fringe, you will need more yarn then noted above.