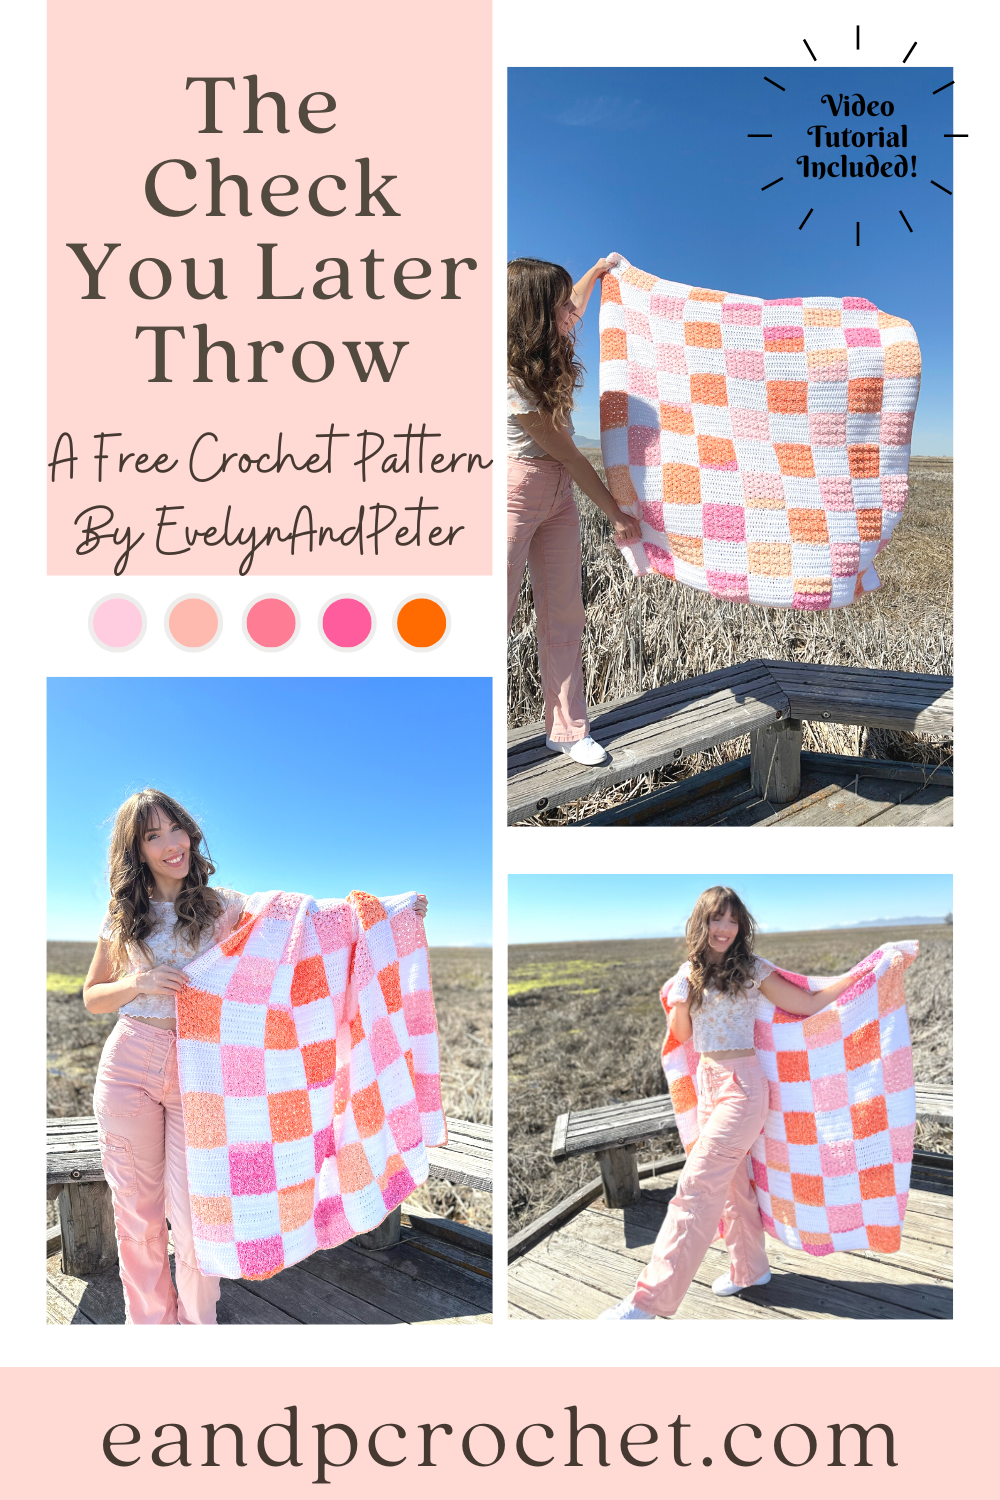
I don’t know about you but I’ve been seeing checkers everywhere this season! On shirts, shoes, hats, rugs, bags and of course, blankets!! I wanted to put my own spin on the trend and came up with The Check You Later Throw!
After testing out different ways to make a checkered design I finally settled on working it up in strips. I know doing separate squares is more time consuming and can be intimidating so I got rid of that idea. I swatched a bit with C2C but ultimately decided that there would be too many skeins of yarn going at once for the amount of squares I wanted. I also thought about working in rows but that would still require too many balls of yarn at once for me. I wanted something a bit easier for a beginner to do! After I did a test working it from the bottom up in separate strips I knew I found the winner!!
There are 2 separate strip patterns, Panel A and Panel B. You will be making 5 Panel A and 4 of Panel B. They are made from the bottom up. You will have to cut and join yarn each time you change colors for the squares but don’t worry! Tie the tails together in a secure knot. Then, you can crochet over the tails for less ends to weave. I only did this when changing from color B to Color A. I would work my Dc stitches over half the tail. Then after I was done I weaved them back the other way to make it extra secure. I did not crochet over the tails when making the Color B square. I found that because of the stitch I used it didn’t hide the tails well enough and you could see it peaking through. I save those to weave in at the end.
When I made my strips, I kept my colors in order as they came. I did not do any special cutting and rearranging of yarn colors. I worked my panels from let to right starting with the first Panel A and picked up each skein where I left off in the previous square. That does not mean you have to do the same though! You can join in your colors from the Mandala however you would like.
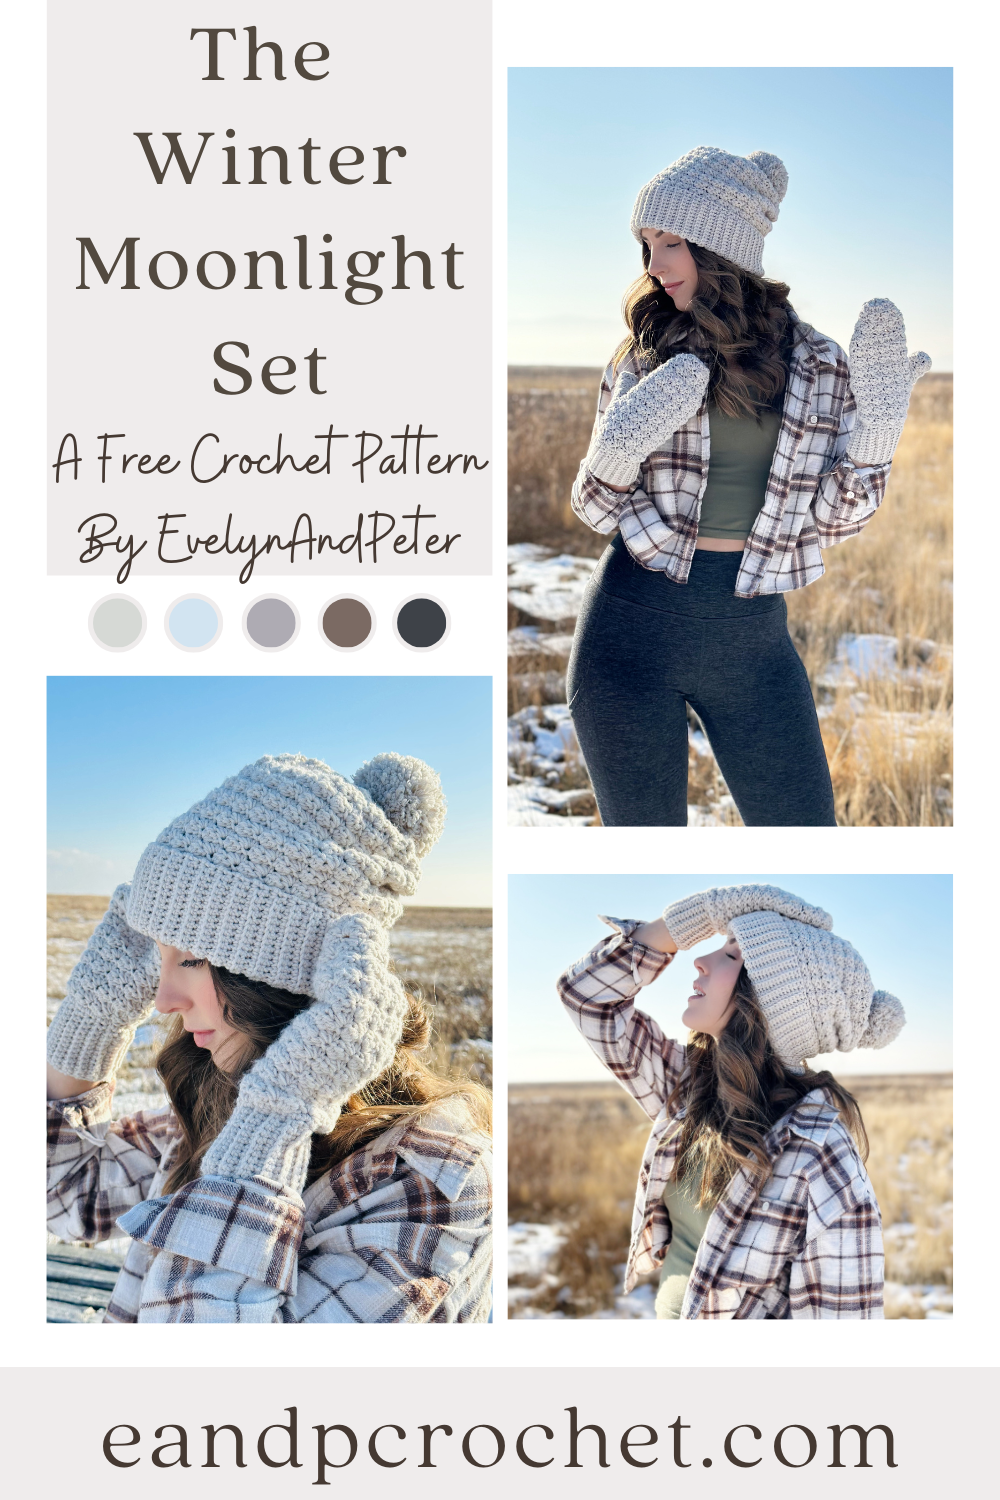
I have to crochet a beanie and mitt/scarf set at least once a year. Making these cute little sets is definitely one of my favorite things to crochet! This year I decided to go with something solid and neutral colored. The Winter Moonlight Set has to be my new fave so far!
I new exactly what stitch I wanted to use for this set from the get go. I’ve only ever worked this stitch in rows so it was fun to design with it in the round and a bit of a challenge to figure out how I wanted to decrease it since technically there is no easy way to do that with this stitch repeat. I think it worked out beautifully though and I’m happy with the result. Both the mittens and the beanie are worked from the bottom up. You will begin with the ribbing before moving onto the main body of the pattern. Once you get past the ribbing you will be working the rounds in turned rounds. SO join with a Sl St, Ch 1 and don’t forget to TURN! Very important to the integrity of the stitch!
I used Lion Brand Color Theory yarn. If you haven’t tried it yet, you should! Lots of pretty colors and the texture is nice and soft. I used the color Moonbeam for mine but there are a bunch to chose from! You can check them out here. The Winter Moonlight Set is available as a kit with Lion Brand as well. You get all the yarn you need plus a free copy of the PDF digital download. Be sure to grab one for the best deal!
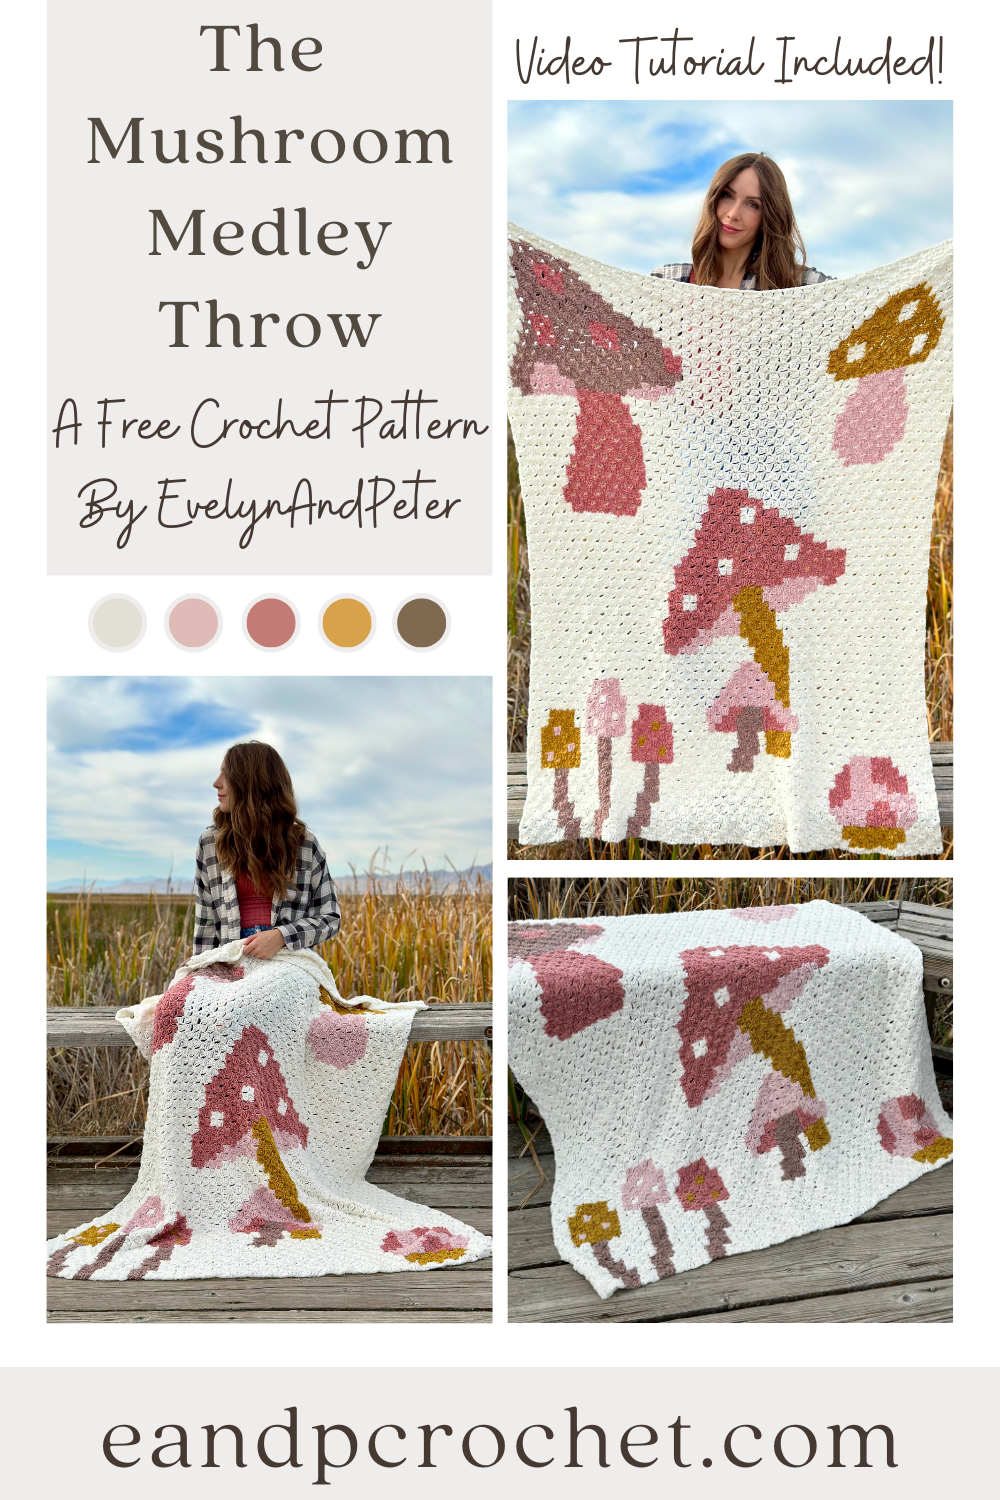
I know I’m not the only mushroom fan around here. If you’ve been to literally any store in the past year I’m sure you’ve seen cute little mushrooms on mugs, wall decor, pillows… I could go on and on! Who doesn’t love a cute whimsical mushroom?! The Mushroom Medley Throw is perfect to add to your mushroom collection or give to a mushroom fan! (how many times can I say mushroom haha)
If you guys have been following me for a while you know that I am a C2C crochet fan. I like to make at least 2 c2c crochet blankets every year. The Mushroom Medley Throw is my third this year! I designed The Daisy Day, The Squeeze The Day and now The Mushroom Medley! Be sure to check out all my other c2c patterns if you’re a fan too!
If you are new to C2C I recommend practicing with a smaller swatch before beginning a blanket! Once you understand how to make the basic squares it really is easy! You just repeat squares to grow your blanket, and decrease when you reach the corners!
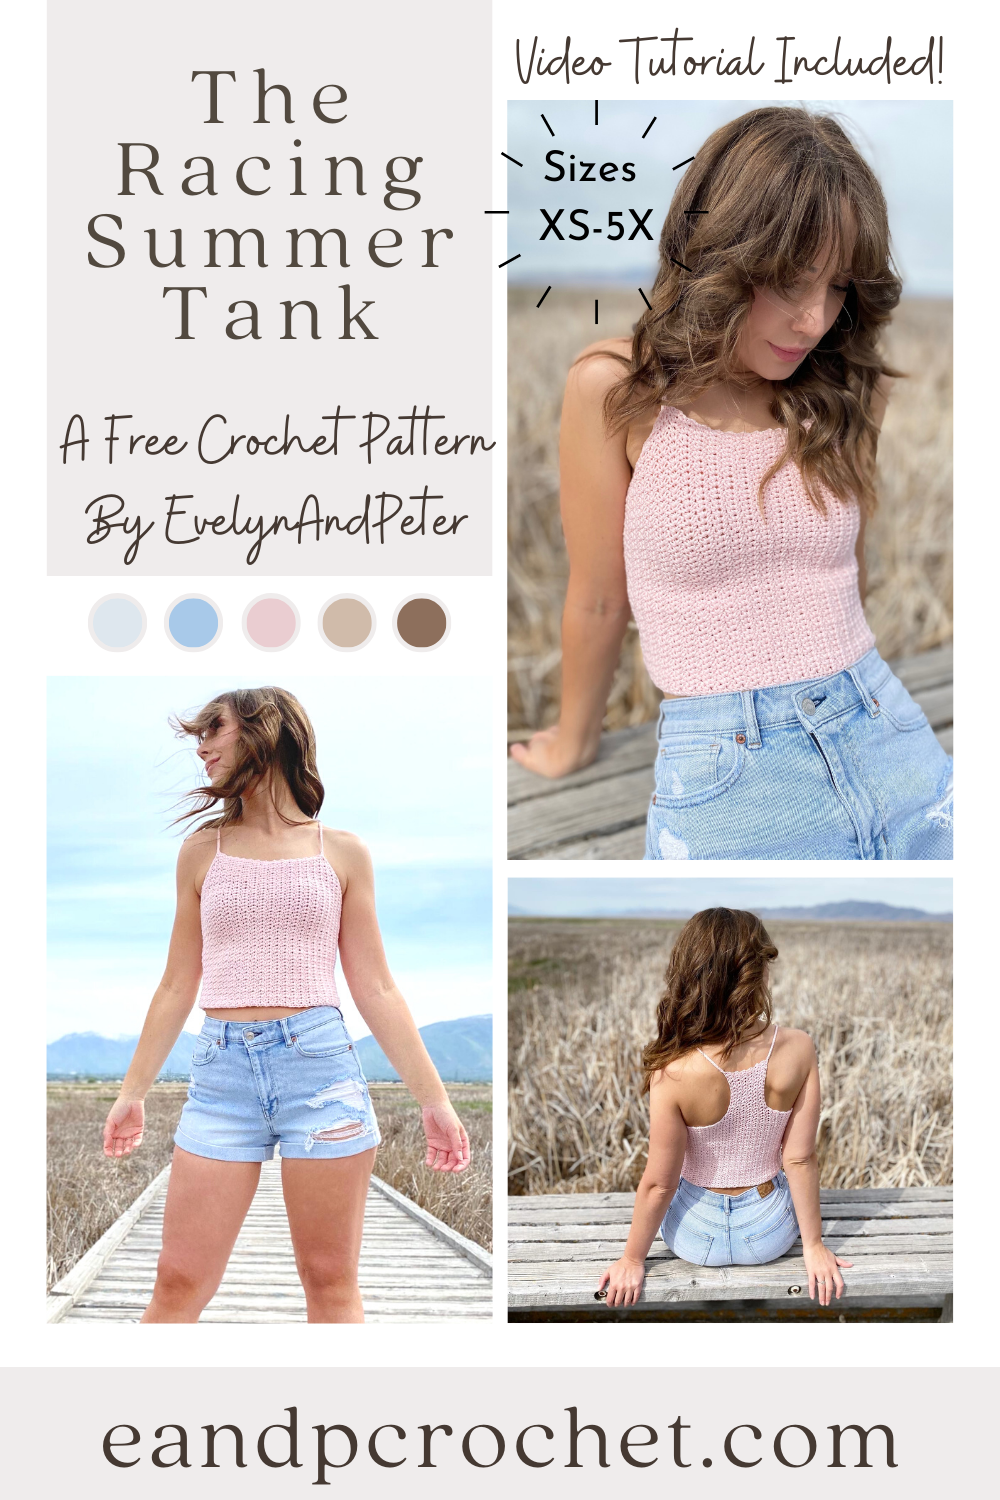
Summer is in full swing here and I knew I needed to design a comfy tank top to wear! The Racing Summer Tank crochet pattern is light weight, soft and quick to make! It has a cropped look to it but you can easily make it as long as you want! It’s racerback style on the back with spaghetti straps!
I used your typical single crochet V-St for this tank top. What’s a V Stitch? Sc, Ch 1, Sc all into the same space! You will work your V St into the V from the row below! Then just repeat throughout the pattern. Easy peasy. If you want a bit more length just repeat the V St row right before the shaping on the front panel. Be sure to add the same amount of rows to the back as well.
Pair it with some cute jean shorts or a long flowy skirt! The Coboo yarn I used comes in so many nice colors, so you have tons of options! Grabbing the kit from Lion Brand is such a good deal. Basically you are just paying for the yarn and you get the printable PDF for free! They usually have a sale or coupon code running so you can grab it even cheaper! Make sure you subscribe to my email newsletter, I frequently notify about these good deals!
Need a little bit of extra help? If you are more of a visual learner than be sure to check out my video tutorial! If you have a question about the racing summer tank crochet pattern, it will most likely be addressed in the video!
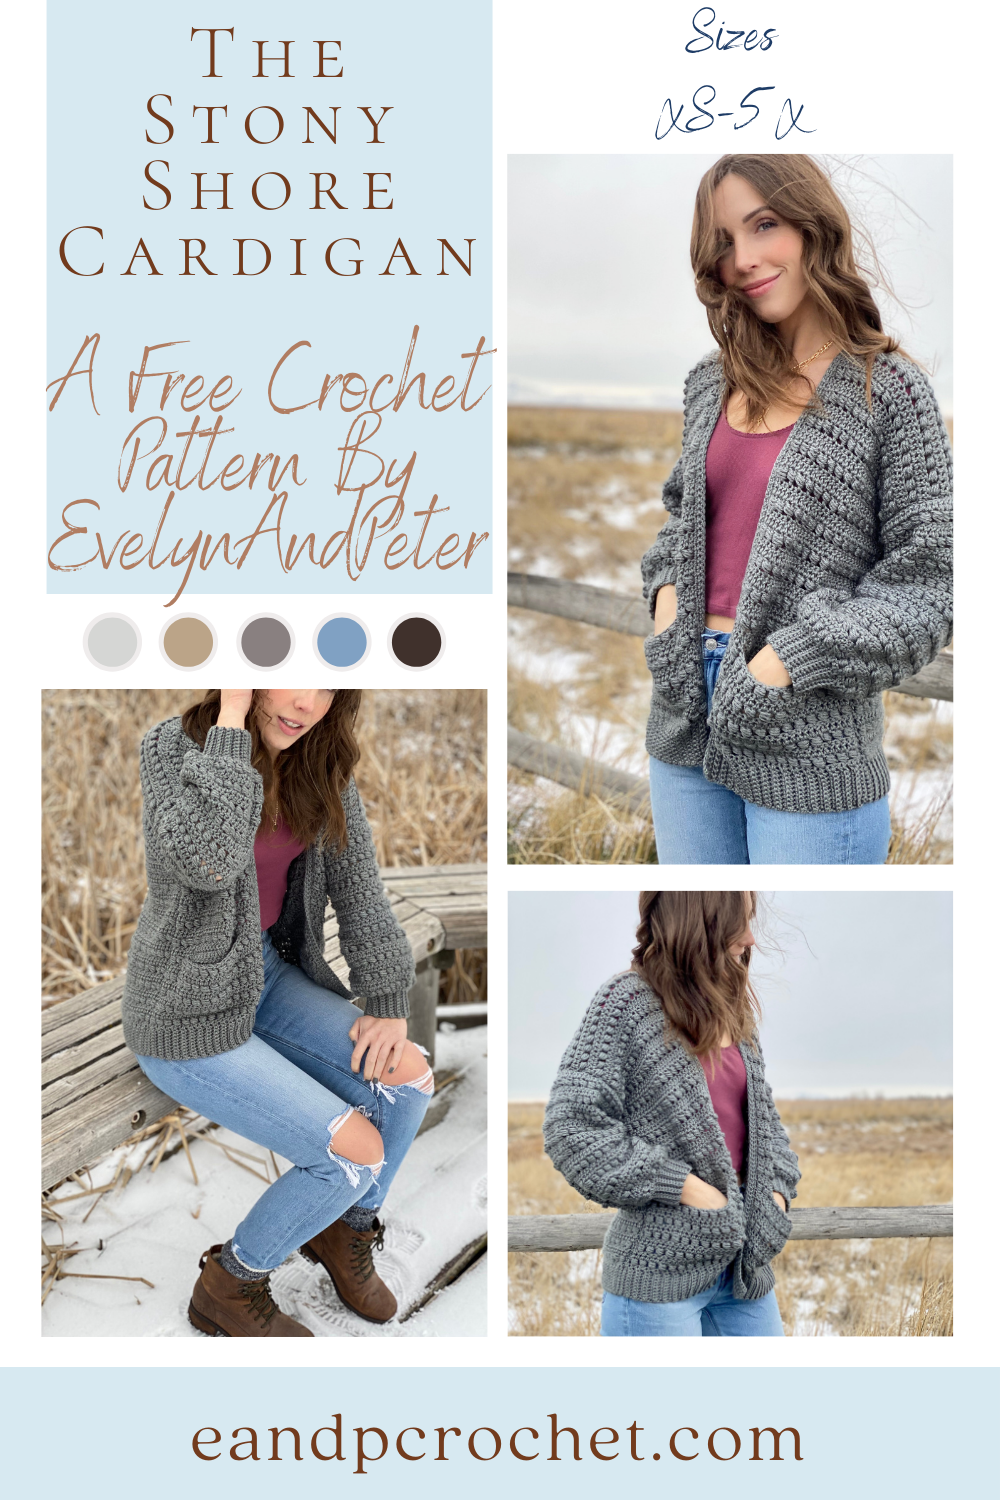
The Stony Shore Cardigan Crochet Pattern is here! I’ve been wanting to make something with this stitch for a long time and I’m glad I finally did it! I also knew immediately I would be doing a loose balloon style sleeve. I actually attempted it on my Sunset Bomber but it just didn’t go with the style. I’m sooooo happy that it worked out that way because they look AMAZING on this cardigan.
I’ve been posting sneak peeks of this sweater on TikTok and Instagram. The amount of crocheters that told me they couldn’t wait for this pattern was kind of insane. I can’t even begin to tell you all how much I appreciate the love and support on this design. It’s also a bit nerve wracking because I hope it lives up to the hype. I just want you all to love it as much as I do. Even my husband said this was his favorite sweater of mine and he is my toughest critic when it comes to crochet!! lol.
The Stony Shore Cardigan Crochet Pattern is worked in separate panels from the bottom up and is beginner friendly. Once you get the bead stitch nailed down it’s a breeze to make. You will alternate bead stitch rows and double crochet rows throughout. You can easily make your sweater longer or shorter by adding/taking away rows in multiples of 2 before tying off. Same with the sleeves!
If you are a complete beginner and need a little extra help then be sure to check out my full video tutorial!
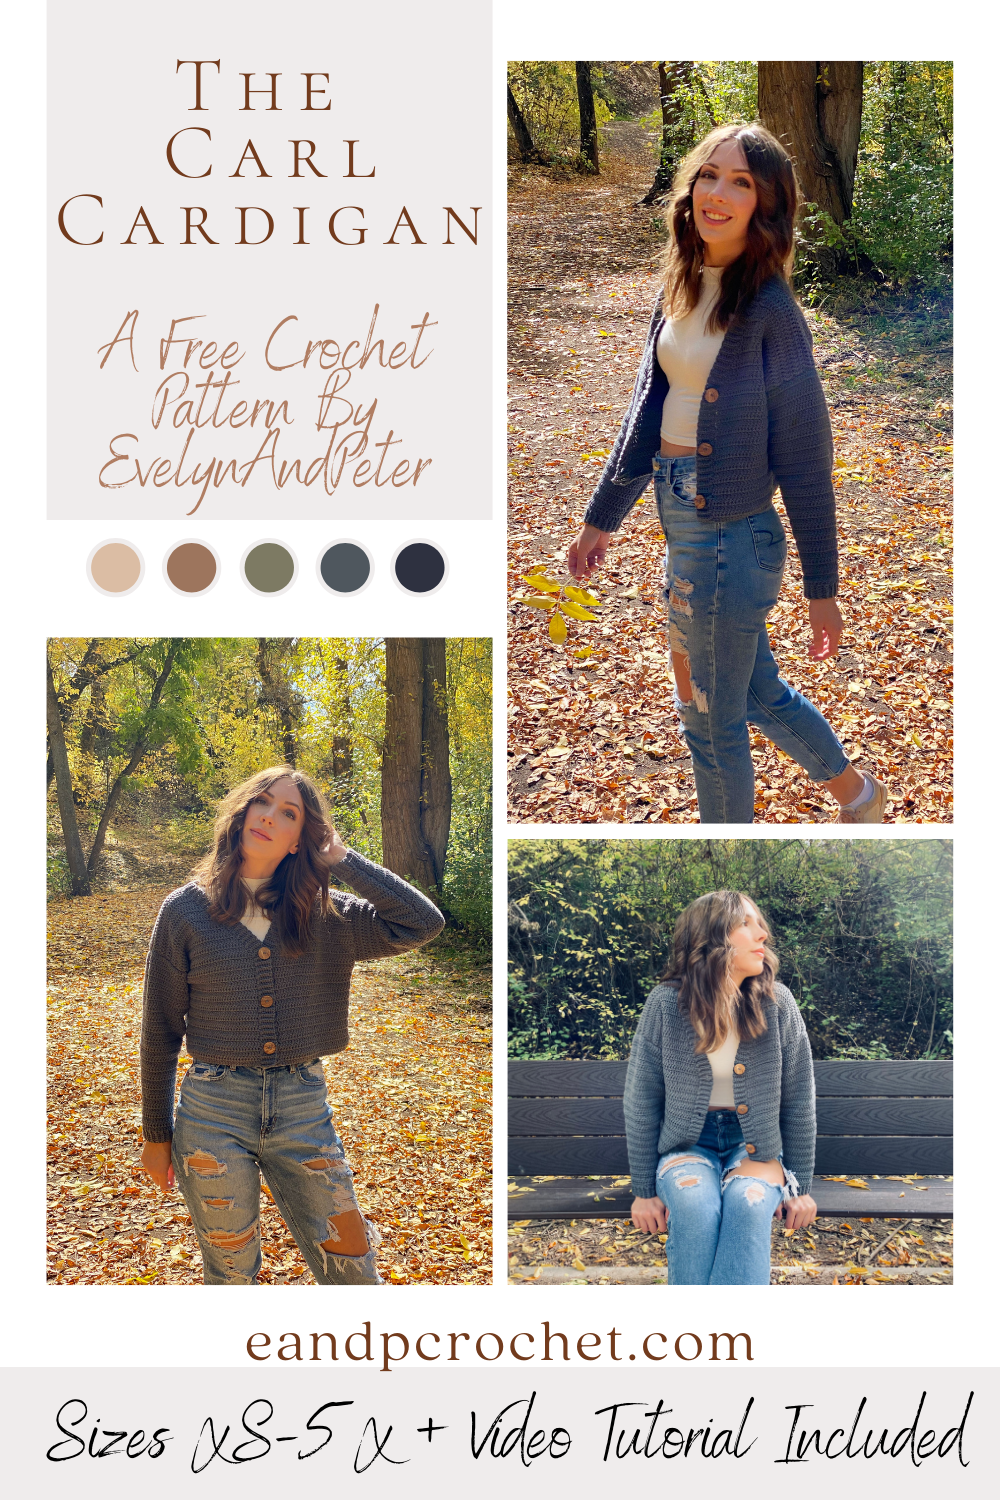
I love the look of oversized V-neck button up cardigans. There’s just something about them that I find so appealing! They give me such comforting “grandpa” vibes haha. I knew I had to make one but put my own trendy spin on it. The Carl Cardigan is my cropped and a bit more girly version of this!
The Carl Cardigan is worked in separate panels from the bottom up. When you break it down into each piece tackling this sweater is a breeze. I used the same stitch throughout and have very beginner friendly shaping. I used Feels Like Butta which is one of my favorite soft yarns. It’s very smooth to work with and frogs back easily if you make a mistake!
I know some of us prefer to have our cardigans longer instead of cropped. Good news, it is super easy to make this longer! Just add as many rows as you would like to the back panel (in multiples of 2). Then, when you make the front panels, add the same amount of rows before you start decreasing! Remember, you will need extra yarn!
You might recognize the ribbing technique around this cardigan. I did the cuffs from The Pemberly Pullover the same way! You will be working the trim of the cardigan directly off the sides of the front panel. It might look a little intimidating at first, but when it comes down to it, you are just slip stitching to the panels as you go! If you are new to this technique be sure to check out my video tutorial where I show you exactly how to do it.
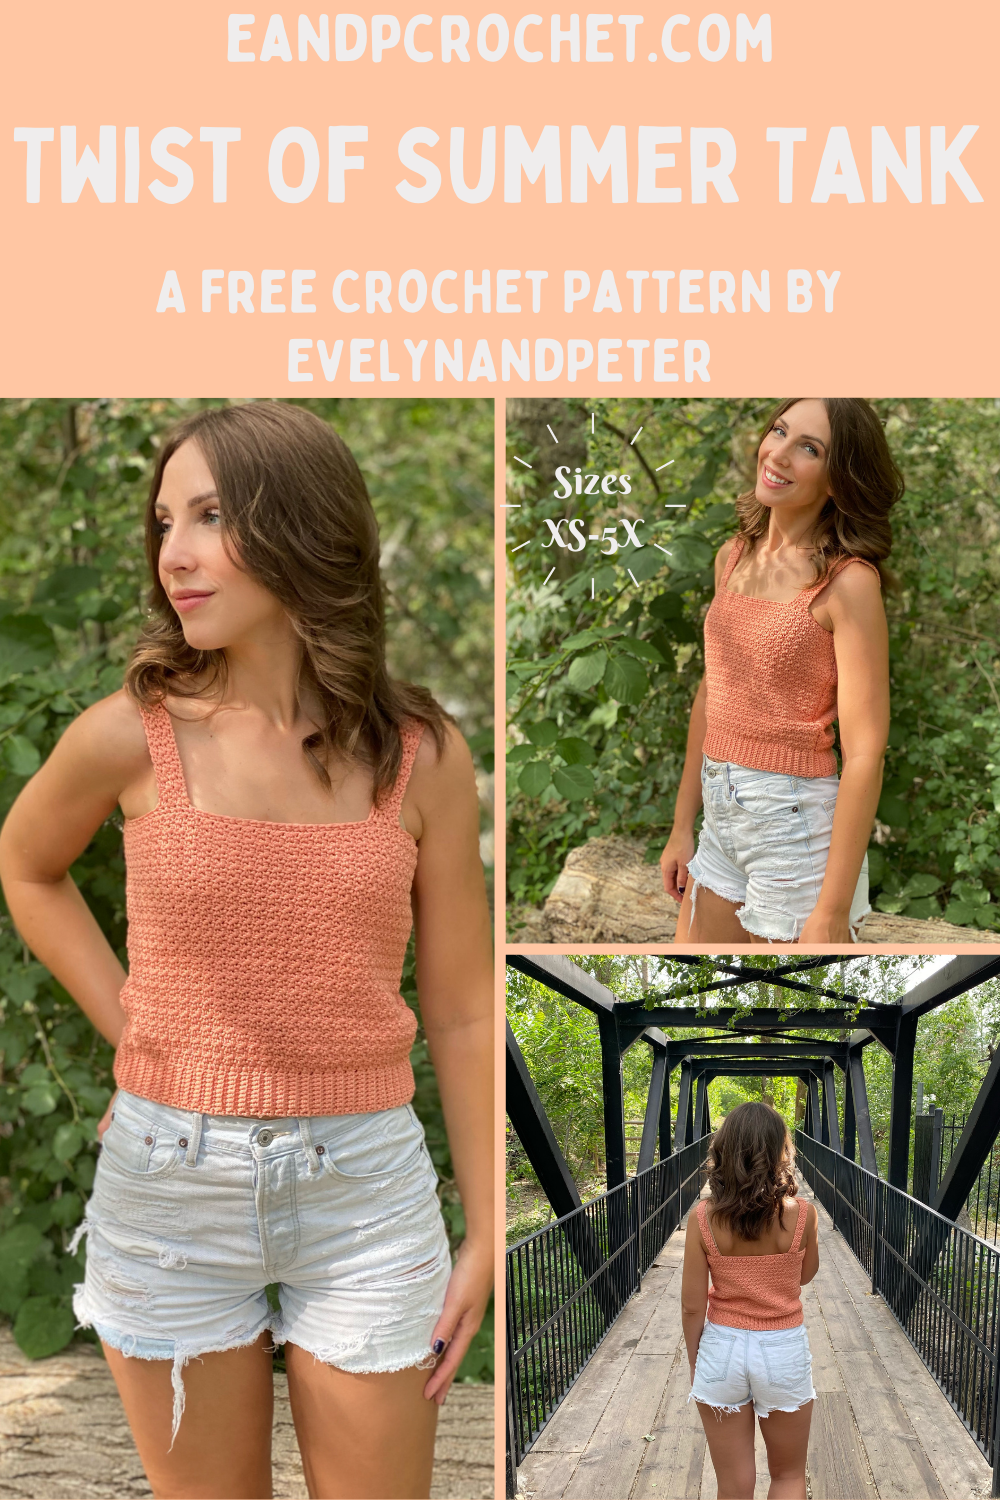
I’m back again with another summer design! This time I made a square neck style tank top with Coboo yarn called The Twist Of Summer Tank! This design is definitely beginner friendly and a very easy make. I used the Lemon Peel stitch to work up the main body of this top. I love the beautiful texture this stitch creates, it’s one of my all time favorites! You might recognize it from my Harvest Pullover!
The Twist Of Summer Tank is worked up in 2 panels from the bottom up. You will create the ribbing first and then rotate to work the main body. Each panel is exactly the same. Next we will sew the panels together, add a quick trim and then crochet the straps!
It’s also super customizable. You can easily add some rows to make it a longer length top or remove rows for a more cropped look! Just adjust the length before tying off your panels.
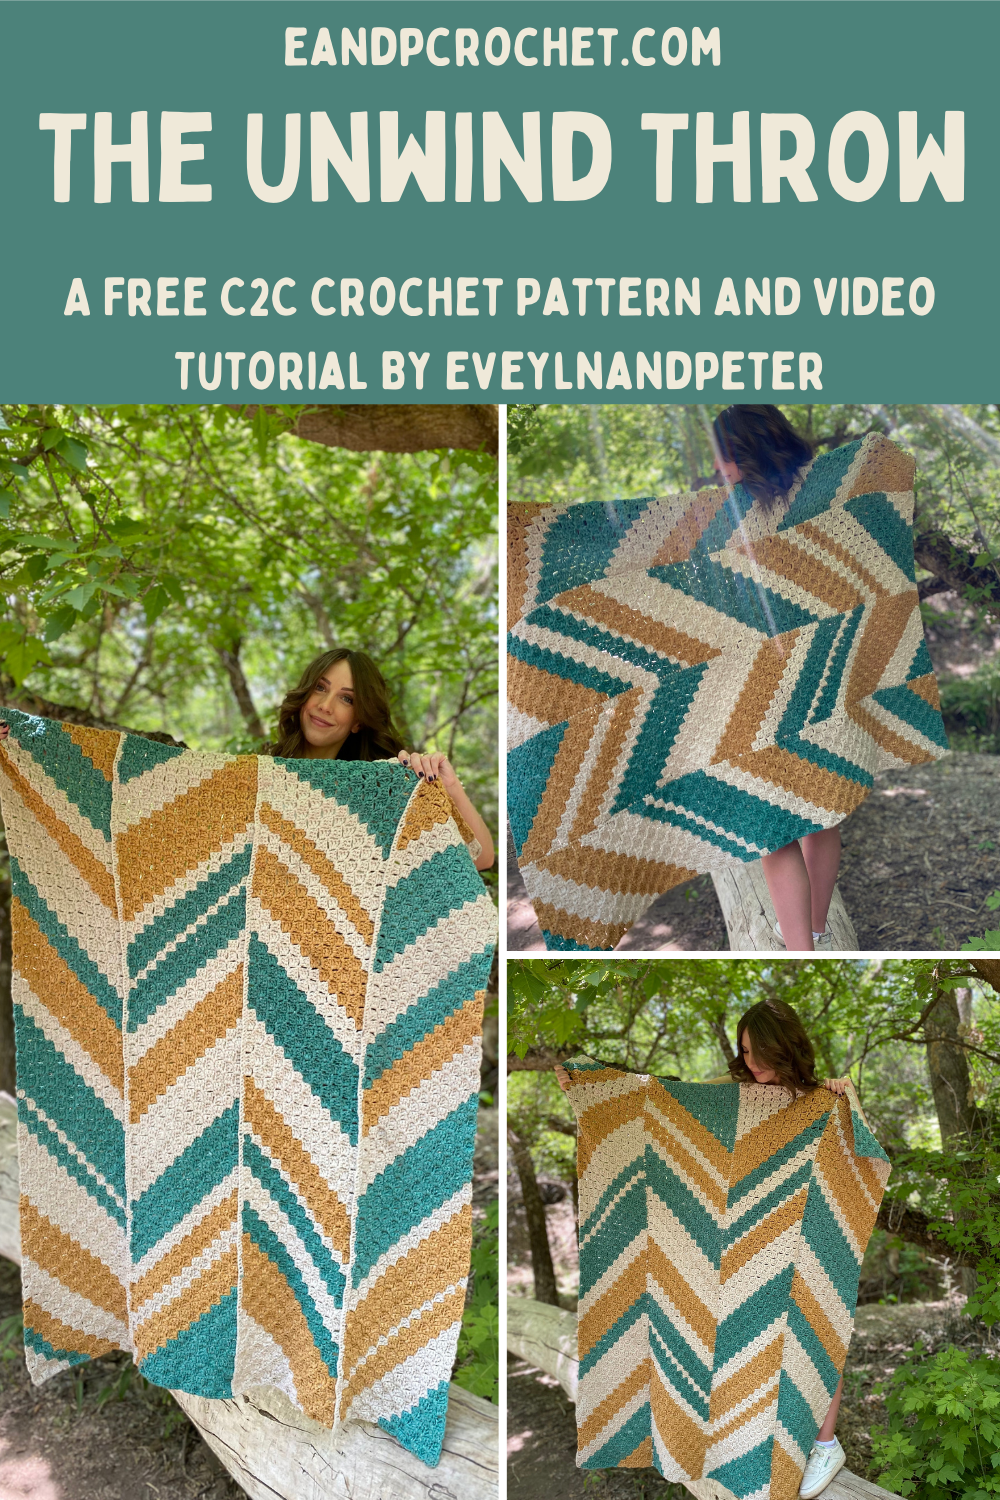
A while back I was browsing wayfair for home decor ideas (as one does) and came across the wallpaper section. One of them immediately caught my eye. Not to actually wallpaper my house with…but as a crochet project, obviously! I’m constantly on the lookout for inspiration and this one came easily!
Right away I knew I was going to do a C2C blanket design- The Unwind Throw blanket! Usually I make my C2C blankets in one large piece. For this design I split it into 4 separate rectangular panels. It actually made it feel like the crocheting went by a lot quicker! Breaking it up into easily manageable sections worked out great.
I know what your thinking… look at all those ends to weave in!! Well, it actually wasn’t very many at all! When you crochet the 4 panels together, you crochet right over the knotted tails! So the only ends to weave in on The Unwind Throw Blanket were from some of the color changes on the outside perimeter of the blanket. You could make it even easier on yourself and crochet a border too and not have a single end to weave!
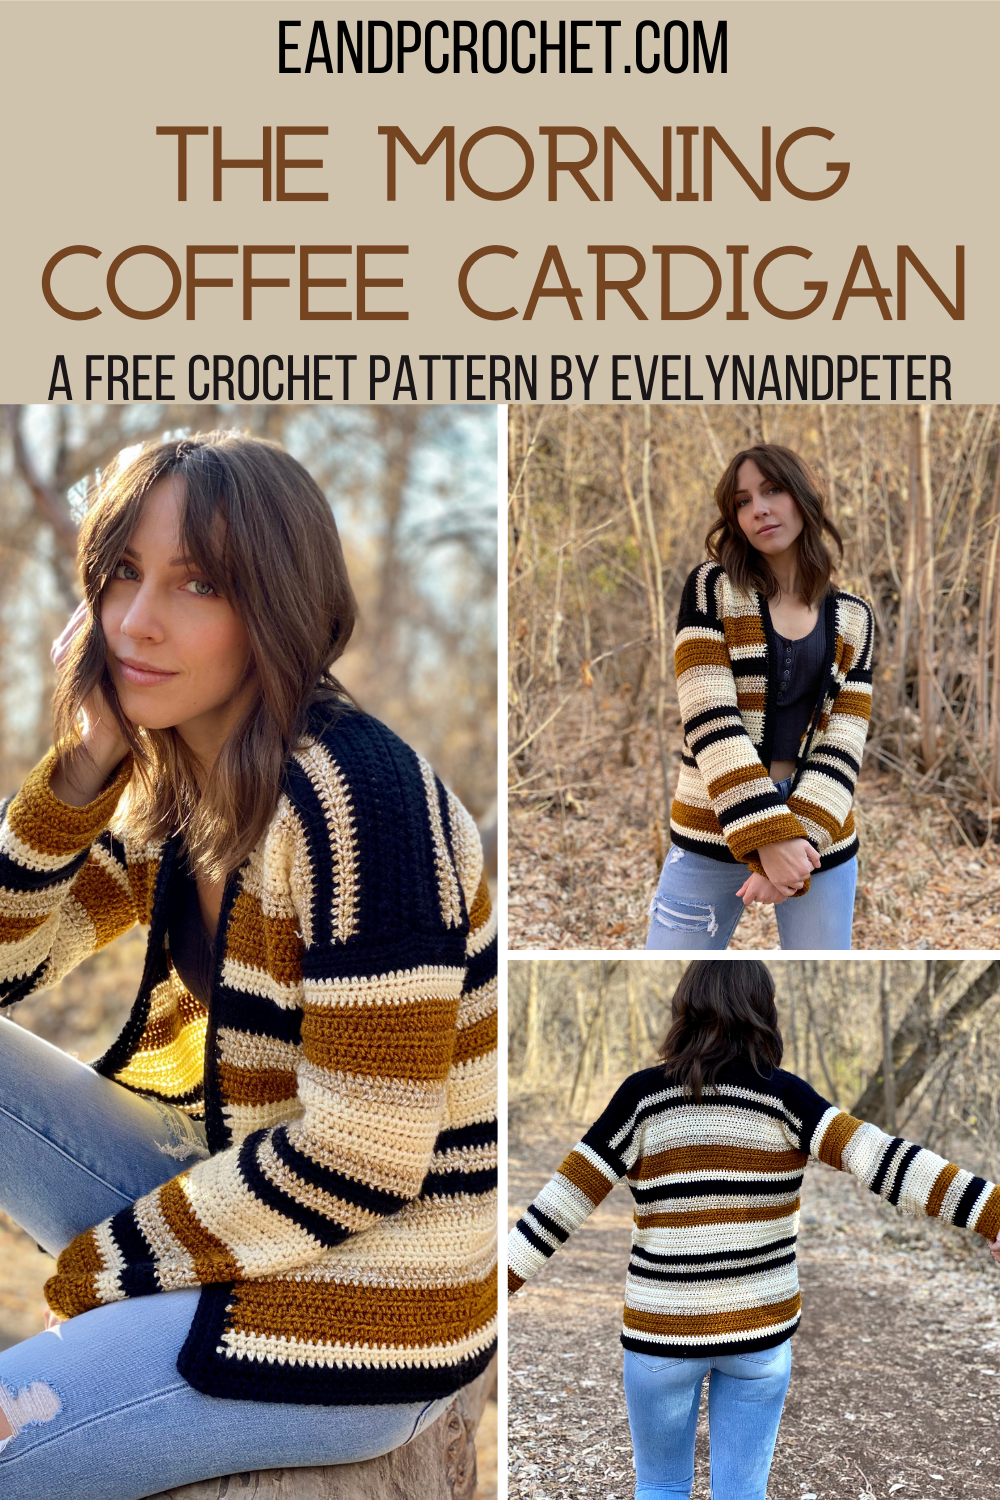
I’ve been making a lot of striped things lately if you haven’t noticed! When I saw a striped blanket at target with a similar color palette I knew I had to get my hands on some yarn and make something with it! I debated between a cardigan and a blanket for a bit but wasn’t a hard choice to go with a cardi! That’s how The Morning Coffee Cardigan came about!
The Morning Coffee Cardigan is a VERY beginner friendly pattern. It has no shaping and minimal seaming. I decided to add in some optional shaping only at the forearms. This cardigan is designed to have loose cuffs/sleeves. I know that some people prefer to have there sleeves tapered so I added that option just in case!
I also recommend leaving the tails of yarn long enough on the sides of the front/back panel so that you can use these to sew your panels together. This will help cut down on the ends you need to weave in. Another tip is when you are crocheting the trim, that you crochet directly over the ends of yarn. This way you can skip the weaving process.
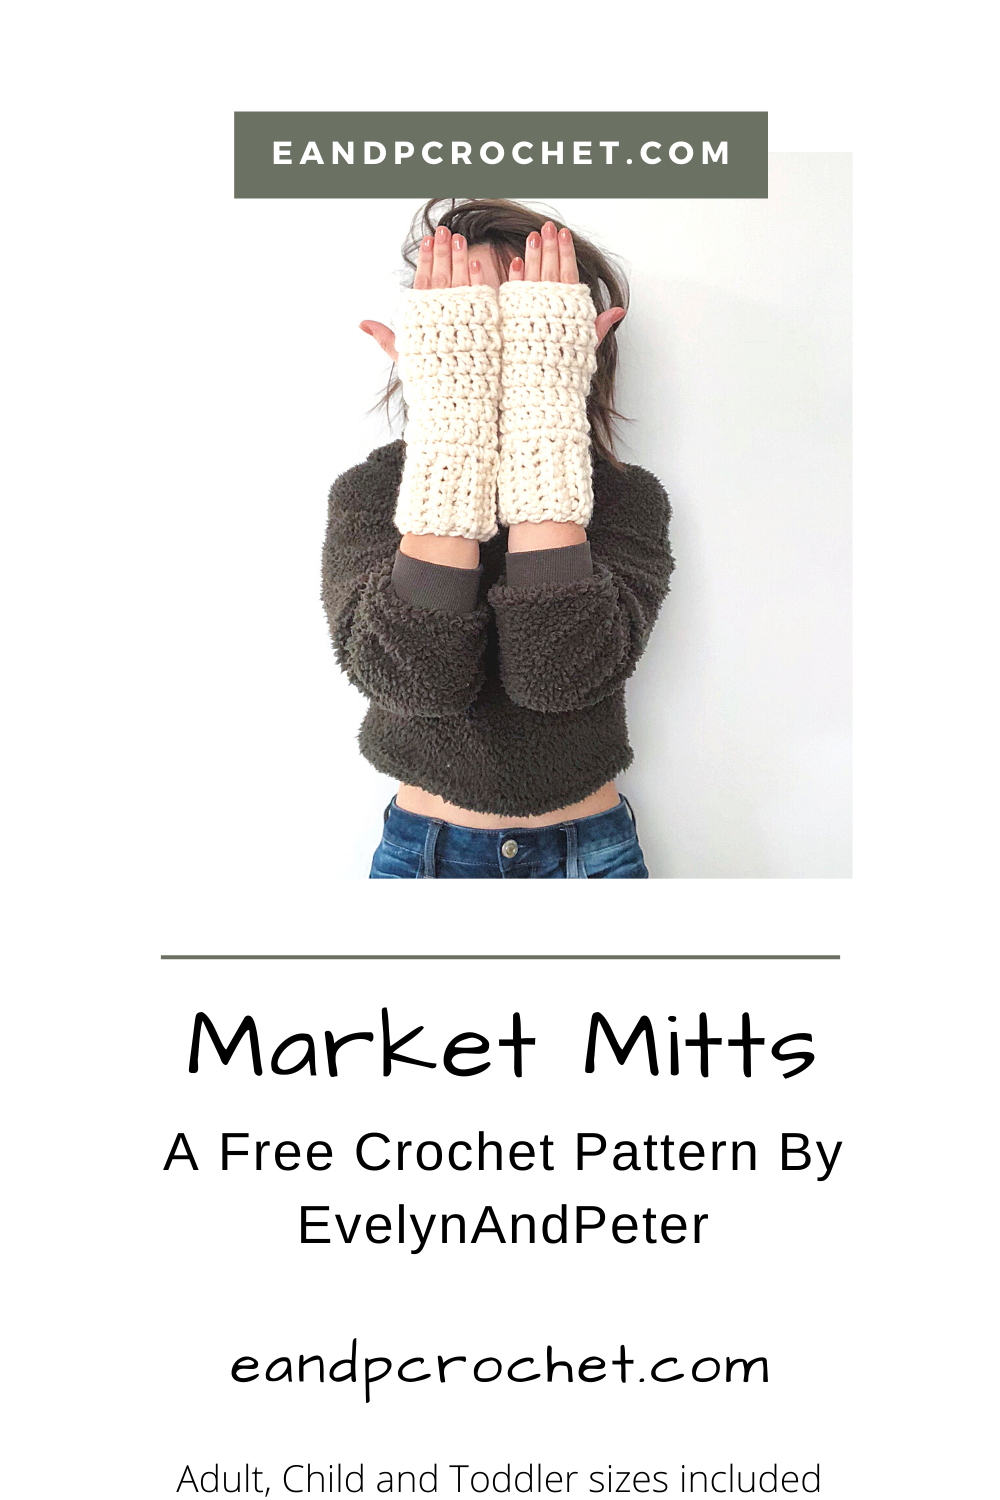
The Market Mitts crochet pattern is actually an older pattern of mine. I designed these for crocheters who sell lots of crochet items at markets and need to make things in bulk! These things work up sooooo fast let me tell you! You can make a pair of these in adult size in less than half an hour. It also takes less than 1 skein of WET&Q so you can make multiple gloves from one skein!
I’ve been wanting to work on building my YouTube channel for a while now and I’m so excited to announce that I have a tutorial video available for the Market Mitts Crochet Pattern! I hope you will check it out and give it a thumbs up. I plan on adding more tutorials to my channel so you might as well subscribe too! 😉
Save it to your Ravelry queue here! Or purchase the low cost ad-free printable PDF.