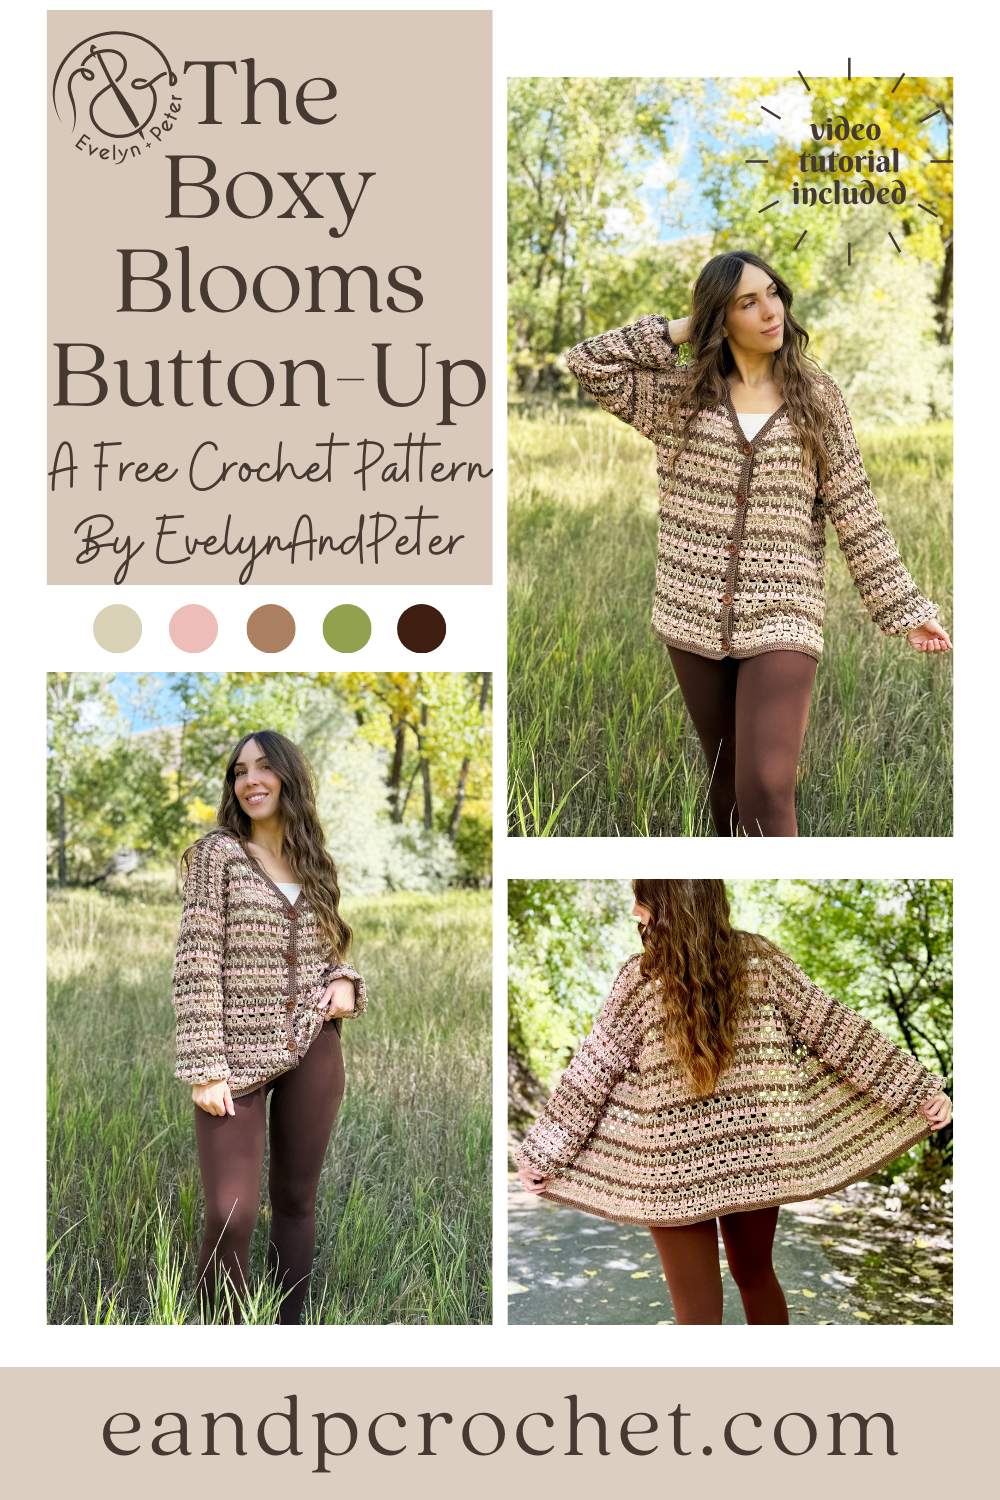
I’ve been keeping a secret. I was able to get a preview of the brand new Cottino yarn from Lion Brand and Two Of wands last year. I got to try it out and design a brand new cardigan- The Boxy Blooms Button-Up crochet pattern!
If you’ve been following along with me for a while then you most likely can recognize that name! I’m so excited to add another design to The Boxy Blooms Collection. 🙂 This one is worked up in 3 different colors! Plus the best part, no cutting and joining yarn! All you have to do is float the yarn up the side to change colors! So simple and way less work than cutting yarn. I show you how in my full video tutorial so be sure to check it out!
I’ve been so excited to try the “Scarfie Lite” yarn from Lion Brand for months! I knew I had to wait until I had the perfect project idea. What could be better than my annual hat/scarf set! The Boxy Blooms Bonnet Set ended up working perfectly with it.
Bonnets are so “in” this year. Funny enough, I have a bonnet style hat that I released a couple years ago, The Stonebridge Set. I love the look and fit of it so I knew a Boxy Blooms Bonnet was meant to be. And it wouldn’t be complete without a long and cozy scarf, would it?!
The Boxy Blooms Cardigan quickly became a summer favorite and before I even released it I knew I would be making a pullover version. The Boxy Blooms Pullover is here to join it’s sister design!
It’s been on my list to make a collared shirt and I knew The Boxy Blooms Pullover would be perfect for it. It’s the same beautiful stitch repeat throughout. The neckline has a small V opening combined with the cute little collar. It’s hard to decide which one I like better, the cardigan or the pullover!
I love trying out new yarns so of course I was excited to stitch up something with this new Re-Make yarn from Lion Brand! The Towhee Cardigan crochet pattern might just be one of my new faves! It’s available in a kit (yarn and pattern) with Lion Brand!
The girls helped me name this cardigan, which I think is so fun. It was a beautiful sunny day and finally starting to warm up after lots of bad weather. We went on a family outing to a local trail for the cardigan photoshoot! Along the trail they have signs and photos talking about the local nature and wildlife. The last one we stopped at was for the Towhee bird! The girls were reading the sign when it popped into my head that it would be the perfect name!
This yarn was really nice to work with. It has such a soft texture making it super cozy. Because it’s starting to become spring time I wanted to go with a more open lace stitch for this design. It makes it the perfect cardigan for layering and transitioning into warm weather!

Every once in a while you make a crochet design that just works up perfectly how you envisioned it. That was definitely the case for The Echoes Cardigan crochet pattern. I was a little nervous to make a whole sweater with Mandala because of all the different color changes. Buuuut I am absolutely obsessed with how it turned out.
I made no adjustments to the yarn colors as I worked it up. No cutting the yarn and only joining when It was time to bring in a new skein. I just let it work up naturally! I think that’s part of the fun with this design. Each cardigan will be slightly unique in their own way, as far as colors go. Once my panels were all worked up I did decide which one would look best where. Because the left and right front panels are the same, as well as the sleeves, you can place them on either side. For example, I put my front panel with lots of red in it, away from the sleeve that has lots of red in it to help “balance” the look. Feel free to play around with what looks best!
There’s just something about stripes and fall that go together… at least I think so! 🙂 I knew I wanted to make some sort of striped sweater this season and that’s how we ended up with The Fall Fable Pullover!
I went back and fourth with deciding what kind of neckline to do and i’m so glad I went with a simple V-neck! I also went back and fourth with what colors I wanted to use. I was soooo close to using a forest green and cream color but I absolutely love how the nutmeg and cream turned out! Luckily there are so many color options with the kit! I can’t wait to see what colors everyone uses.
I’m so excited to announce The Maeve And Marigold Make Along! I designed The Maeve Cardigan (crochet) and Meghan of “MeghanMakesDo” designed The Marigold Cardigan (knit)! If you follow us on Instagram then you might have already seen our announcement and entered the giveaway to win the knit or crochet Lion Brand kit! If you missed out, don’t worry, we have a lot more giveaways/prizes coming your way!
Have you ever participated in a crochet or knit along? If not, here is a little rundown on how it all works. For this MAL we wanted something more laid back and simple. Below is the MAL schedule where you can see all the info. You can decide to follow the schedule or go at your own pace! Every week, take a photo of your progress and use the hashtag #MaeveAndMarigoldMAL on facebook or Instagram. We will check in under the hashtag and pick winners for the weekly prize! We will be posting to our stories throughout the MAL! Easy peasy!
Do you ever crochet something and just know it’s going to be one of your new favorite projects? That was me with The Whimsy Willow Cardigan crochet pattern! I had several skeins of the Khaki color in my stash and knew I had to make some sort of layering piece with it!
The Whimsy Willow Cardigan crochet pattern is created in 3 separate panels from the top down. You can easily adjust the placement of the tie and/or the length of the cardigan. Simply add or remove rows in multiples of 2 just before the tie section under the bust. If you want a longer or shorter cardigan, just add or remove rows in multiples of 2 before fastening off on each panel.
Cardigans and pullovers are definitely my favorite thing to design but bags are not far behind! You can never have too many cute bags right? The Sunny Cinch Satchel just might be your next favorite!
I love a good cotton yarn for crochet bags and purses. Pima Cotton has always been one of my favorites so I decided to use it for my bag but wanted to hold the yarn double stranded for extra sturdiness! Let me tell ya, I am obsessed with how it turned out! The yarn is soft and so nice to work with! Plus, this bag works up even faster with the double thickness!
If you plan on buying yarn I recommend checking out my lion brand kit! It comes with a free copy of the ad-free printable pattern and you can customize your yarn color. Subscribe to my newsletter to find out about 30% off sales!
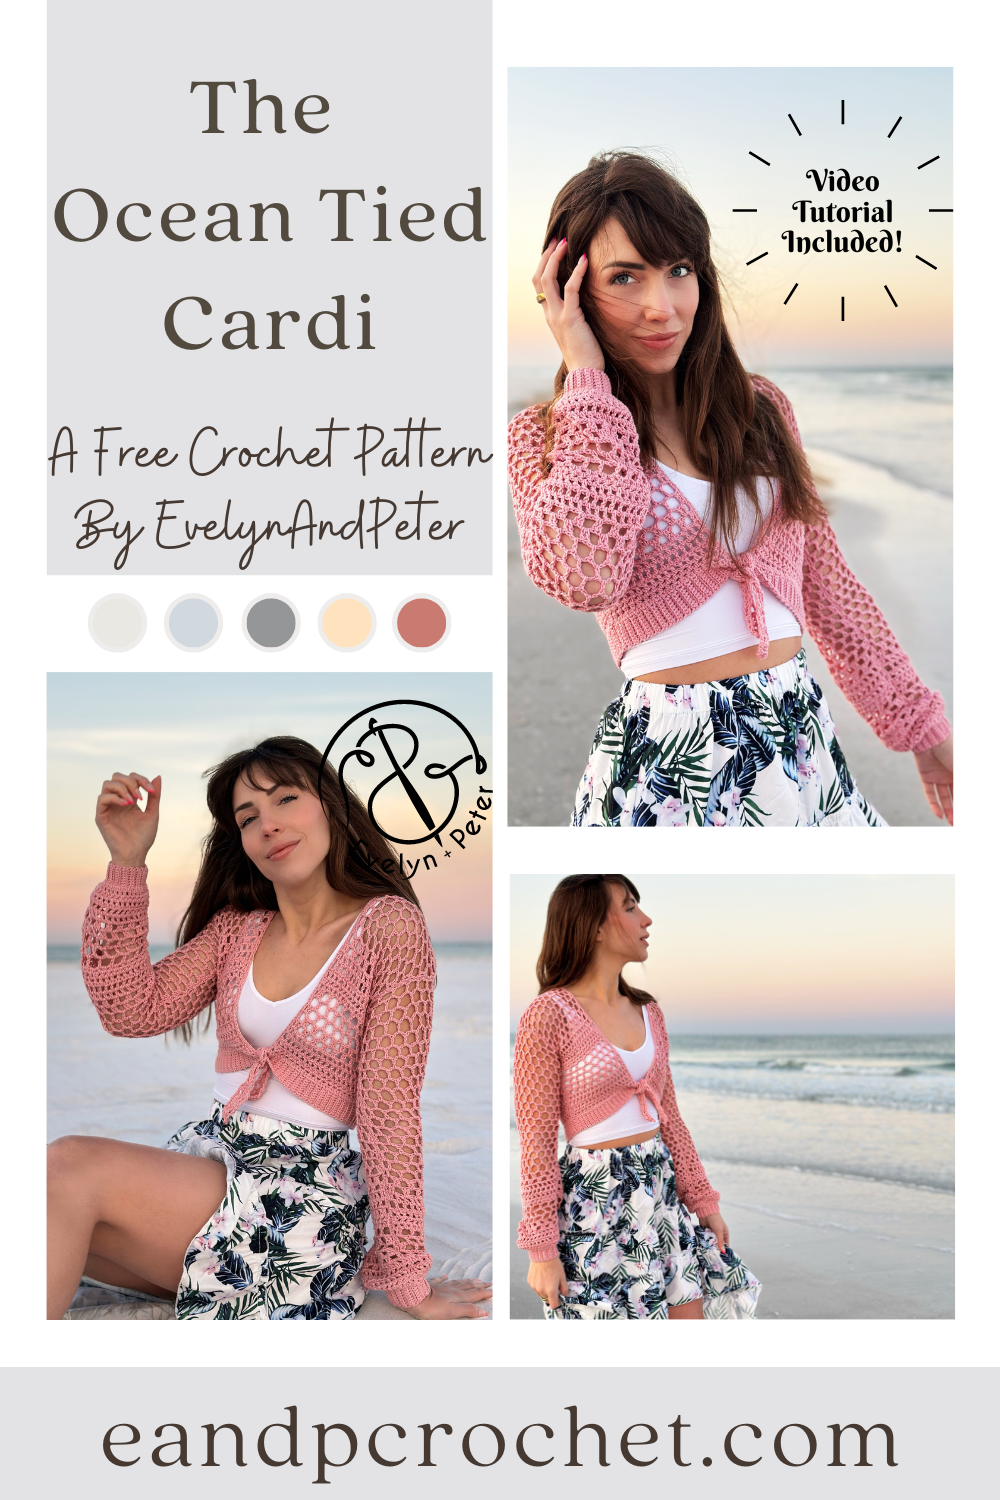
Once the sun starts shining and the blooms start to poke out I always get the urge to make a summer garment! I knew I wanted it to be meshy and airy as well as having a cute tie feature in the front. The Ocean Tied Cardi crochet pattern quickly came to life!
I played around with a bunch of different mesh stitches and decided to combine a whole bunch of them into one design! It actually came together pretty easily with very minimal swatching and frogging! It’s like it was meant to be. The majority of The Ocean Tied Cardi uses double crochet stitches and chains so it works up quickly. It’s also easily adjustable if you want yours longer or shorter. Just add or remove rows to the end of each panel before fastening off.
I think its sooo cute with the little tie in the front, it really makes the design in my opinion! However, if you want to keep it off and wear it as an open cardigan, then you can easily do that! Just add the final trim and don’t follow the instructions for the tie at the end.