There’s just something about stripes and fall that go together… at least I think so! 🙂 I knew I wanted to make some sort of striped sweater this season and that’s how we ended up with The Fall Fable Pullover!
I went back and fourth with deciding what kind of neckline to do and i’m so glad I went with a simple V-neck! I also went back and fourth with what colors I wanted to use. I was soooo close to using a forest green and cream color but I absolutely love how the nutmeg and cream turned out! Luckily there are so many color options with the kit! I can’t wait to see what colors everyone uses.
I’m so excited to announce The Maeve And Marigold Make Along! I designed The Maeve Cardigan (crochet) and Meghan of “MeghanMakesDo” designed The Marigold Cardigan (knit)! If you follow us on Instagram then you might have already seen our announcement and entered the giveaway to win the knit or crochet Lion Brand kit! If you missed out, don’t worry, we have a lot more giveaways/prizes coming your way!
Have you ever participated in a crochet or knit along? If not, here is a little rundown on how it all works. For this MAL we wanted something more laid back and simple. Below is the MAL schedule where you can see all the info. You can decide to follow the schedule or go at your own pace! Every week, take a photo of your progress and use the hashtag #MaeveAndMarigoldMAL on facebook or Instagram. We will check in under the hashtag and pick winners for the weekly prize! We will be posting to our stories throughout the MAL! Easy peasy!

When I saw Lion Brands new Botanic yarn I knew I had to design something summery, delicate and romantic. I wanted some sort of lace stitches incorporated but also wanted this top to be functional. I ended up with The Summer Blush Tank Crochet Pattern!
This was such a blast to make. My favorite part is the neckline. I was a little worried when I started the design on how to achieve the cinched in sweetheart look for it. But surprisingly, it came together almost immediately with only 1 rework to get it right. It’s kind of amazing what can be done with just a few minor adjustments!
It’s also crocheted from the top down and is very easy to customize to your liking. You can add or remove as many rows to the upper half of your top. Every body is different so you may need a little more or less coverage than the suggested amount in the pattern. Once you move onto the lace rows you can also add or remove as many rows in multiples of 2 that you would like. So if you want a longer tank just add more! If you want a cute cropped look, remove some rows! You can’t mess it up!
I have a full video tutorial available if you are a visual learner and a lion brand kit if you plan on purchasing yarn. The botanic yarn has a bunch of pretty colors available.

It’s time to add another design to the beloved Daisy Day Collection! We started off with the Daisy Day Throw, then added the Daisy Day Tote and now finally The Daisy Day Cardigan crochet pattern!
I wanted to add a little bit of a fun detail to the cardigan so I decided on granny stripes around the bottom hem and sleeves! After that, it’s all Single Crochet stitch and doing some colorwork to create the daisies! If you have already made the Daisy Day Tote and/or the throw blanket you will already be familiar with these flowers. I created a fourth size flower for this design as well. If you are new to changing color frequently and carrying yarn in your project then I recommend checking out my video tutorial or practicing with a small swatch before beginning your cardiganI ended up creating “floats” on the back of my work in the flower sections. You do have the option to crochet directly over the yarn as you carry it along the flower but the colors might peek through to the front a bit.
I used coboo yarn for this design! It’s a really soft light weight cotton yarn from lion brand. It has a bunch of beautiful color choices as well. The Daisy Day Cardigan crochet pattern is a kit with them! So if you plan on buying yarn, check out the kit here and you’ll receive a free copy of the printable pattern download as well.

I love when a new yarn is released! I was so excited to try the Lazy Days yarn when I first saw it. I was able to feel it in store and noticed how squishy it was! Something about the name being lazy days and the color Bluebell screamed summer to me so I knew I had to make a summer design. I also wanted you to be able to wear it year round with layering and that’s how The Coastal Belle Crop crochet pattern was born!
Because the yarn is so squishy with amazing bounce I wanted to use an open lace style stitch for my design. I ended up using V-sts but decided to use Tr sts in them instead of the typical single or double crochet. Every other row I popped a picot St in the V Sts instead of a Ch 1. I think it adds such a cute little extra detail!
The Coastal Belle Crop crochet pattern is worked from side to side. If you want to have a longer top be sure to check my notes and adjust your starting row. If you want your top wider or more fitting you can add less rows to the main panels! The sleeves are worked top down so they are easy to adjust as well. If you need them longer or shorter just add or remove rows in multiples of 2. This is a drop shoulder style top so the bigger the size you are making the shorter the sleeves will be because the seam hits lower on the bicep.
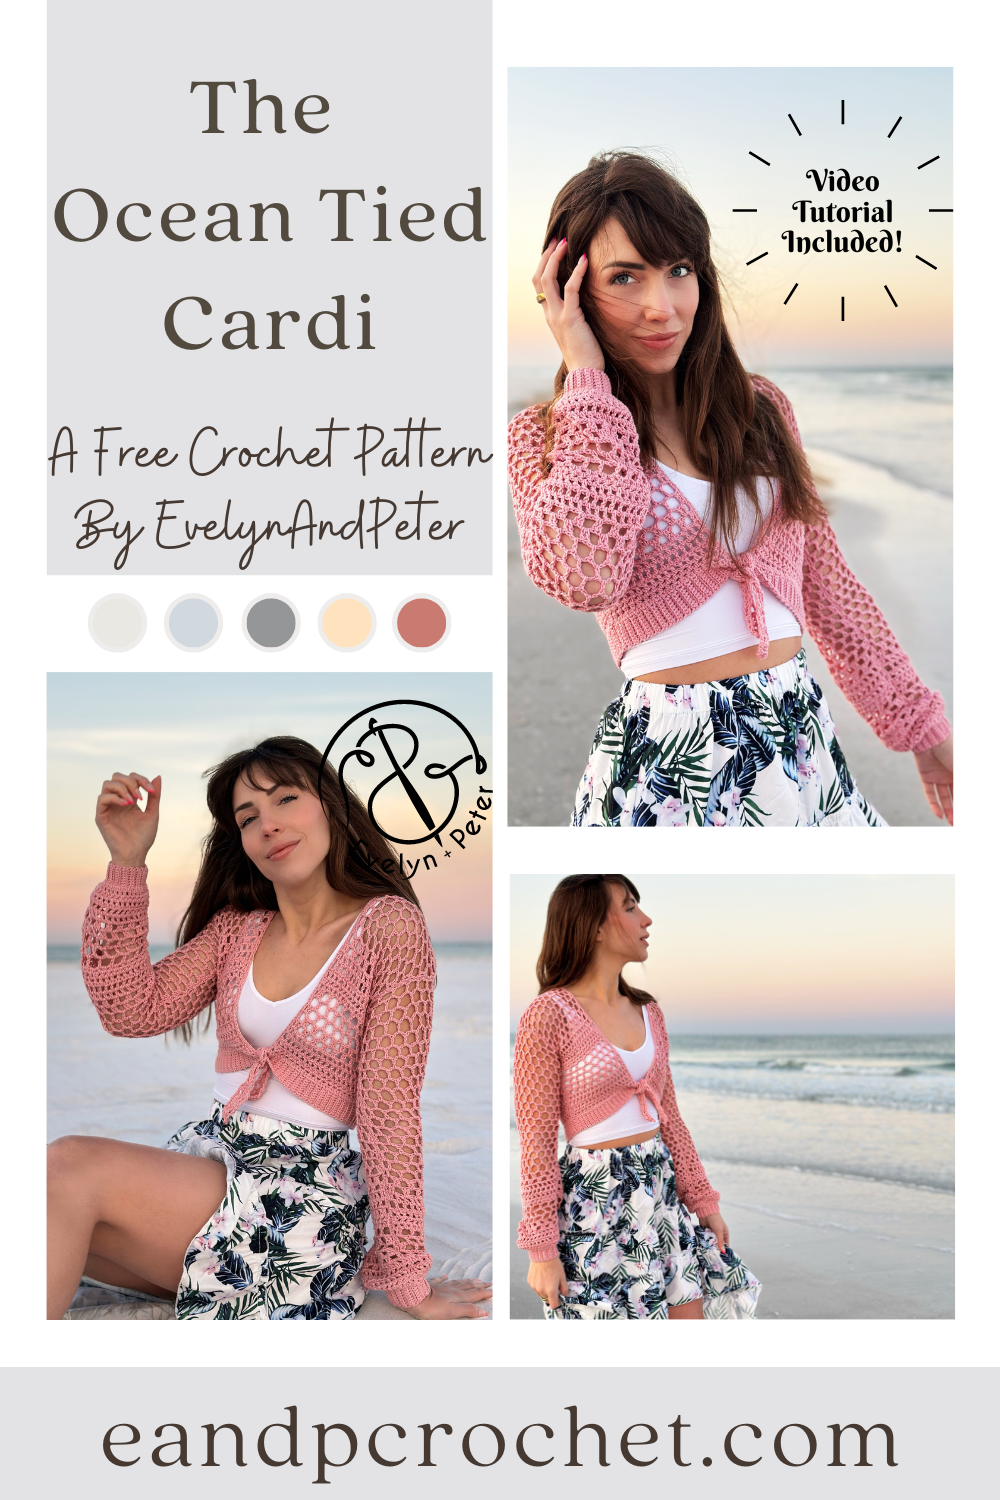
Once the sun starts shining and the blooms start to poke out I always get the urge to make a summer garment! I knew I wanted it to be meshy and airy as well as having a cute tie feature in the front. The Ocean Tied Cardi crochet pattern quickly came to life!
I played around with a bunch of different mesh stitches and decided to combine a whole bunch of them into one design! It actually came together pretty easily with very minimal swatching and frogging! It’s like it was meant to be. The majority of The Ocean Tied Cardi uses double crochet stitches and chains so it works up quickly. It’s also easily adjustable if you want yours longer or shorter. Just add or remove rows to the end of each panel before fastening off.
I think its sooo cute with the little tie in the front, it really makes the design in my opinion! However, if you want to keep it off and wear it as an open cardigan, then you can easily do that! Just add the final trim and don’t follow the instructions for the tie at the end.
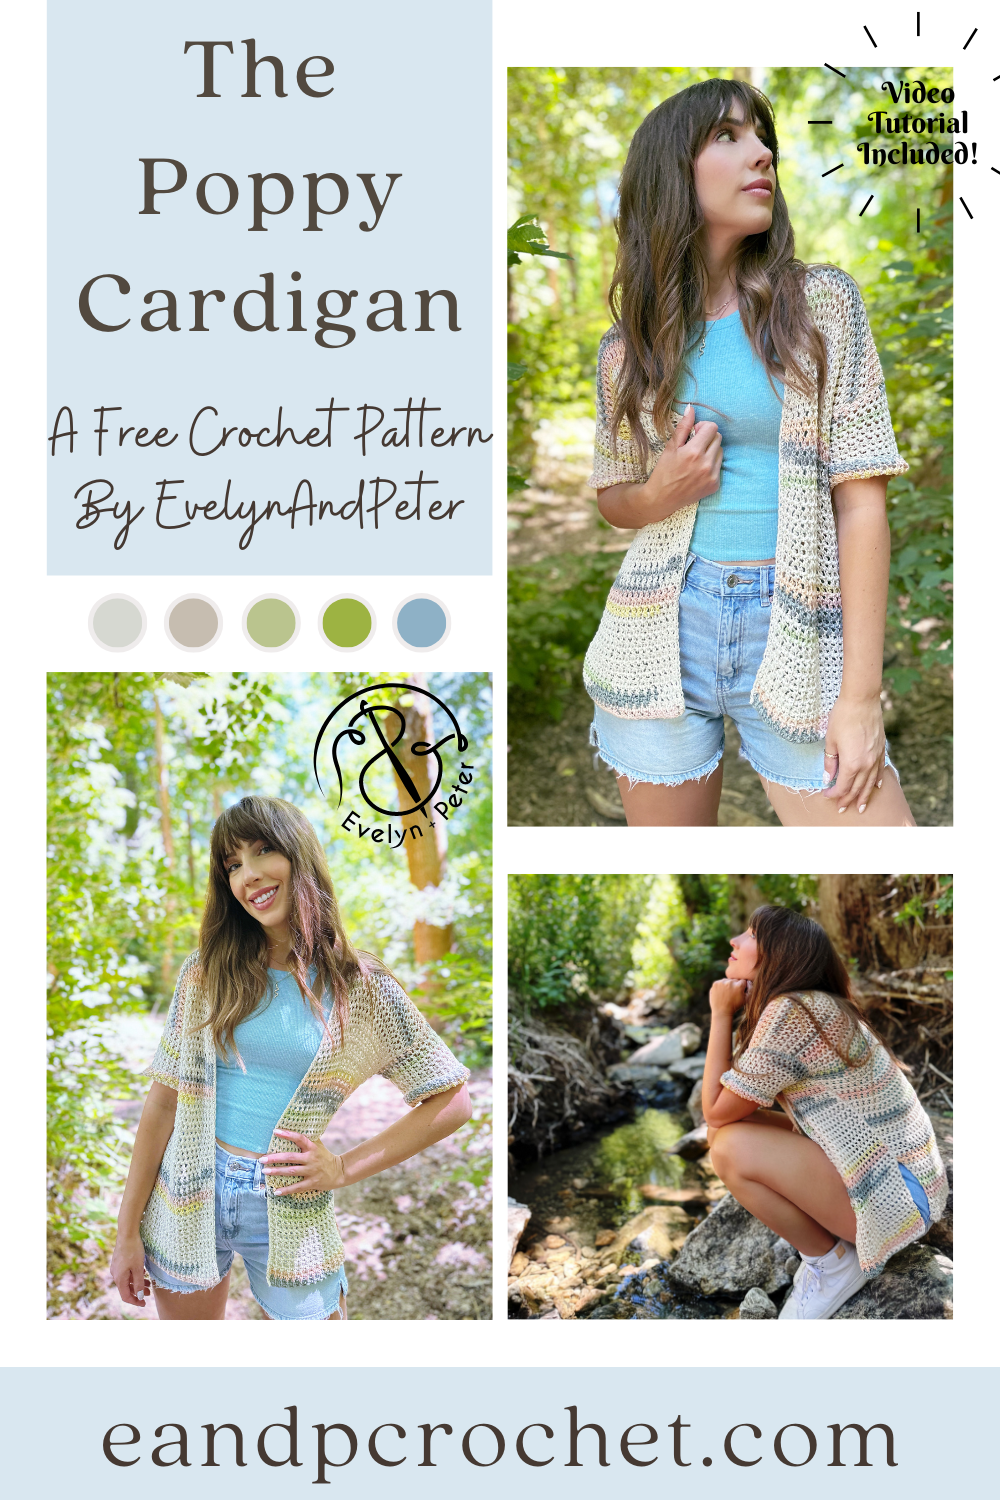
I couldn’t make a Poppy Pullover without making a Poppy Cardigan crochet pattern! The Poppy Pullover was a fan favorite and the Poppy Cardigan has the same design details so I hope you like this one too!
I used the same type of yarn for The Poppy Cardigan- 24/7 Cotton DK, except this time, I used the “prints” version instead of a solid color! I think the prints are so pretty and give it a little bit more pop of color and detail. I wasn’t sure how the yarn was going to work up with the distribution of color but I am loving the result! If you are more of a solid color kind of crocheter you can totally substitute out the yarn, they have lots of options! I used the Seaglass color for mine.
The Poppy Cardigan is worked up the same way as the pullover, from the bottom up. Again, we are using a larger hook than what you normally would use for a DK yarn to give it that loose, mesh look. When you are crocheting, make sure you don’t tug down too tightly on your stitches! If you are prone to a tight tension just make sure to pay attention to that. This is also a really stretchy stitch so when you wear the cardigan it will stretch and has great drape! Once all your panels are made you will give a light block ( I like to steam block mine) and sew together!
If you want to use the same yarn as me make sure you get the Lion Brand kit! It comes with a free copy of my printable pattern and you can choose your yarn color! They also frequently have very good sales! My Poppy Pullover is available on my blog here as well as a Lion Brand kit!
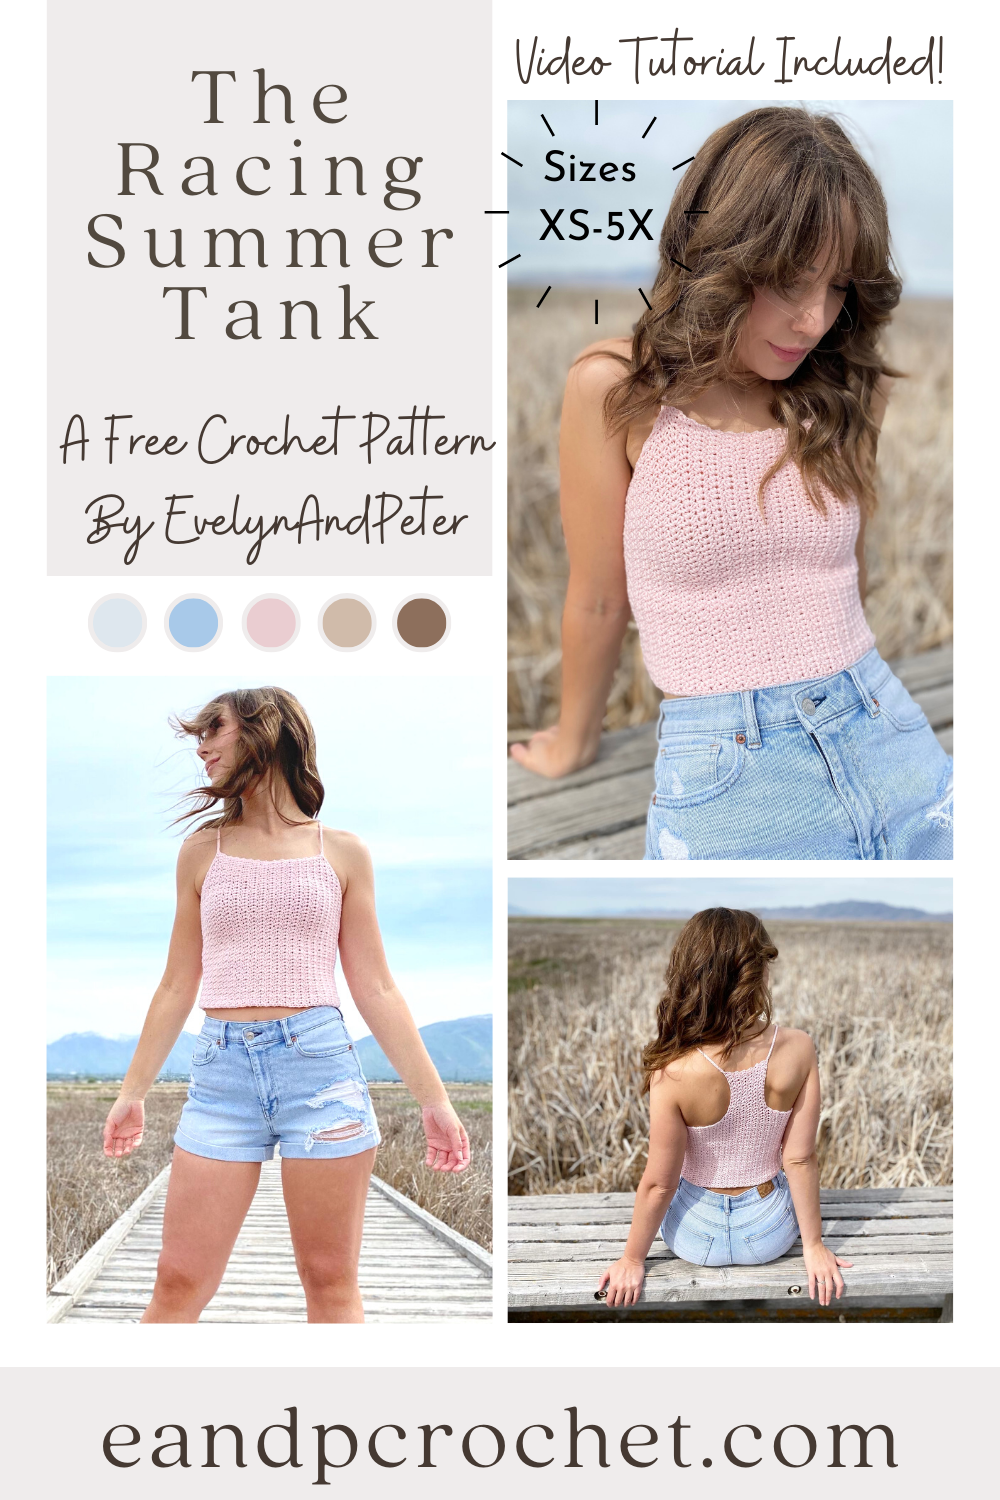
Summer is in full swing here and I knew I needed to design a comfy tank top to wear! The Racing Summer Tank crochet pattern is light weight, soft and quick to make! It has a cropped look to it but you can easily make it as long as you want! It’s racerback style on the back with spaghetti straps!
I used your typical single crochet V-St for this tank top. What’s a V Stitch? Sc, Ch 1, Sc all into the same space! You will work your V St into the V from the row below! Then just repeat throughout the pattern. Easy peasy. If you want a bit more length just repeat the V St row right before the shaping on the front panel. Be sure to add the same amount of rows to the back as well.
Pair it with some cute jean shorts or a long flowy skirt! The Coboo yarn I used comes in so many nice colors, so you have tons of options! Grabbing the kit from Lion Brand is such a good deal. Basically you are just paying for the yarn and you get the printable PDF for free! They usually have a sale or coupon code running so you can grab it even cheaper! Make sure you subscribe to my email newsletter, I frequently notify about these good deals!
Need a little bit of extra help? If you are more of a visual learner than be sure to check out my video tutorial! If you have a question about the racing summer tank crochet pattern, it will most likely be addressed in the video!

