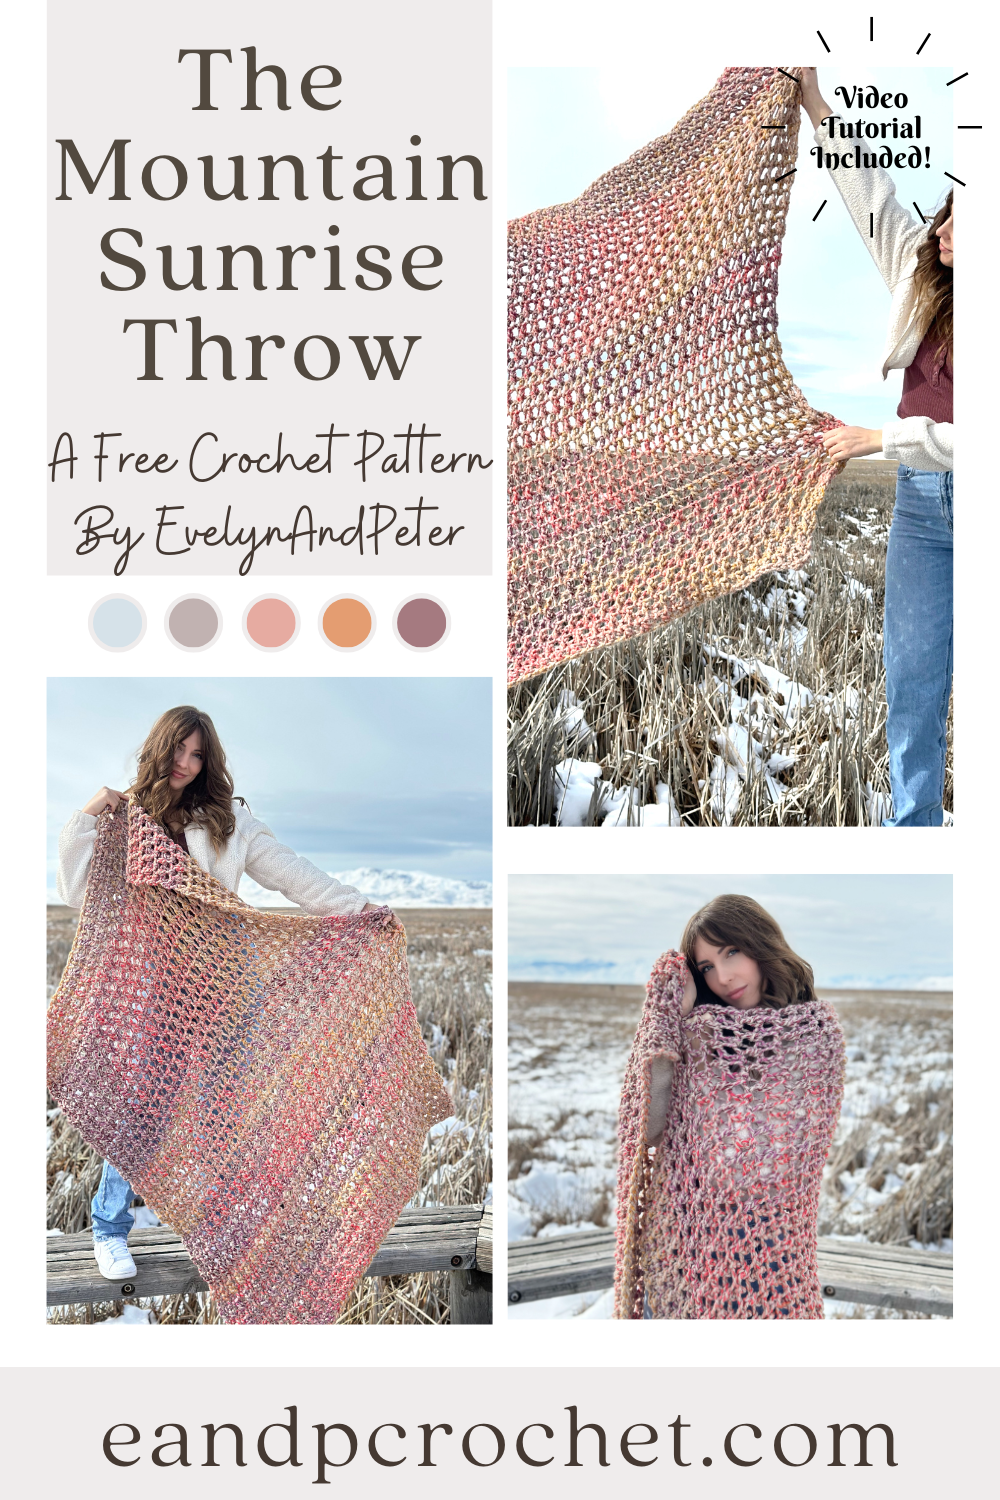
I’m hosting a Crochet Along! I’m so excited you guys, it’s been a while since i’ve done a CAL and I’m pumped to be hosting one for The Mountain Sunrise Throw! Keep reading for all the info you need on where to join the CAL and the next steps to get started!
The Mountain Sunrise Throw is easy breezy to work up, beginner friendly, has bouncy stitches, amazing drape and is FUN to crochet!! I hope you guys are excited to crochet along with me!
What do I do first?
The CAL officially starts on March 20th 2023! I wanted to give you guys plenty of time to get all of the materials before we start.
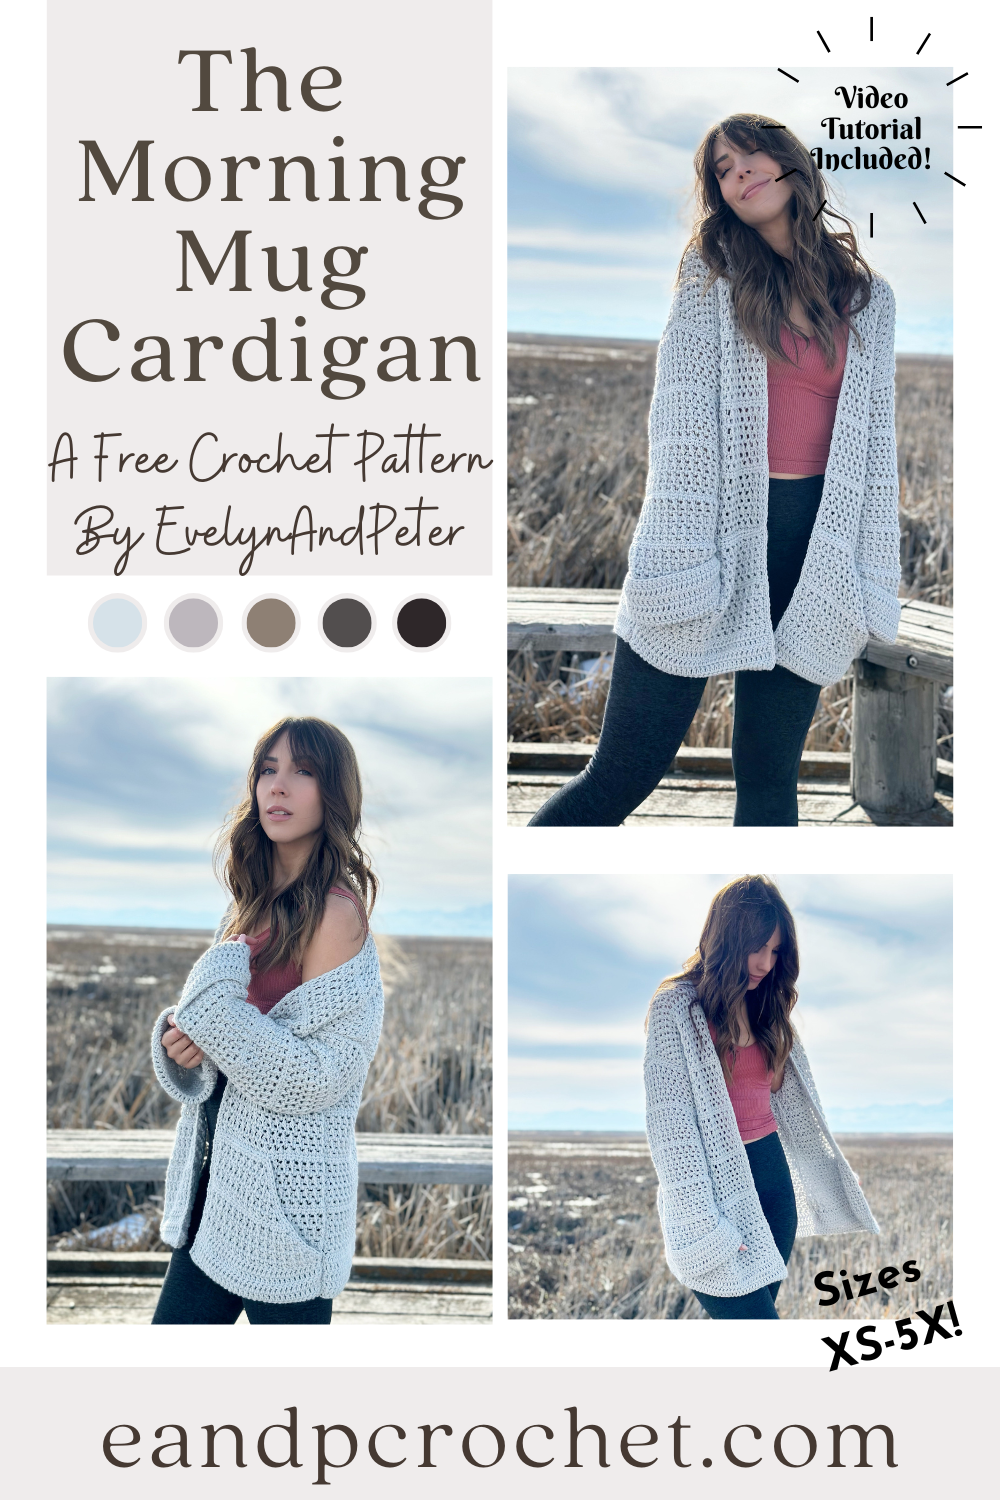
I’ve been wanting to design a longer style cardigan so that I can wear it over leggings for extra coziness. The Morning Mug Cardigan is long, with oversized cuffed sleeves and deep pockets!
The Fit- This cardigan is long and written with plenty of positive ease for a loose comfy fit. The stitch that I use in it is super stretchy. Once you work up your cardigan and put it on, it stretches another 6-8″ than what is listed in the chart below. The sleeves are extra long so that you can do a large cuff at the end. The large pockets are as wide as the front panel and are added last so you can always keep them off if you want to!
The Yarn- I used Lion Brand Pound Of Love for this design. I feel like this yarn doesn’t get the love it deserves. A lot of times, it is looked over for garments because the skein is SO big and you don’t think you need that much. For this cardigan you will use between 2-3 skeins depending on the size you make. It was actually really nice not having to join in a bunch of skeins while crocheting! It’s also a soft and sturdy yarn which holds up nicely. Another plus is all the color options that are available! I used Elephant Grey for mine but there is a bunch to choose from! Be sure to check out my kit, it comes with the yarn and a FREE copy of my printable pattern!
The How- This cardigan is worked in separate panels from the bottom up. You can easily adjust length by adding or removing the 8 row repeat on the back and front panels. Keep in mind the cardigan uses a stretchy stitch and will stretch down with the weight of the cardigan when worn! The chart below does not include the 6-8″ that the cardi will stretch. The sleeves are long and oversized so that you can cuff them. You will notice that the larger sizes have shorter sleeves. This is because it is a drop shoulder design! If you need to adjust sleeve length you can add or remove rows as well. The pockets are wide and deep. They are the width of your front panel with some decreases on one side. If you don’t want pockets just skip over the instructions and move on to the trim!
Don’t forget I have a full video tutorial available if you need some extra help or have a question! Be sure to subscribe to my channel for more free patterns and content!
If you like this cardigan pattern, be sure to check out some of my others! I have a ton to choose from!
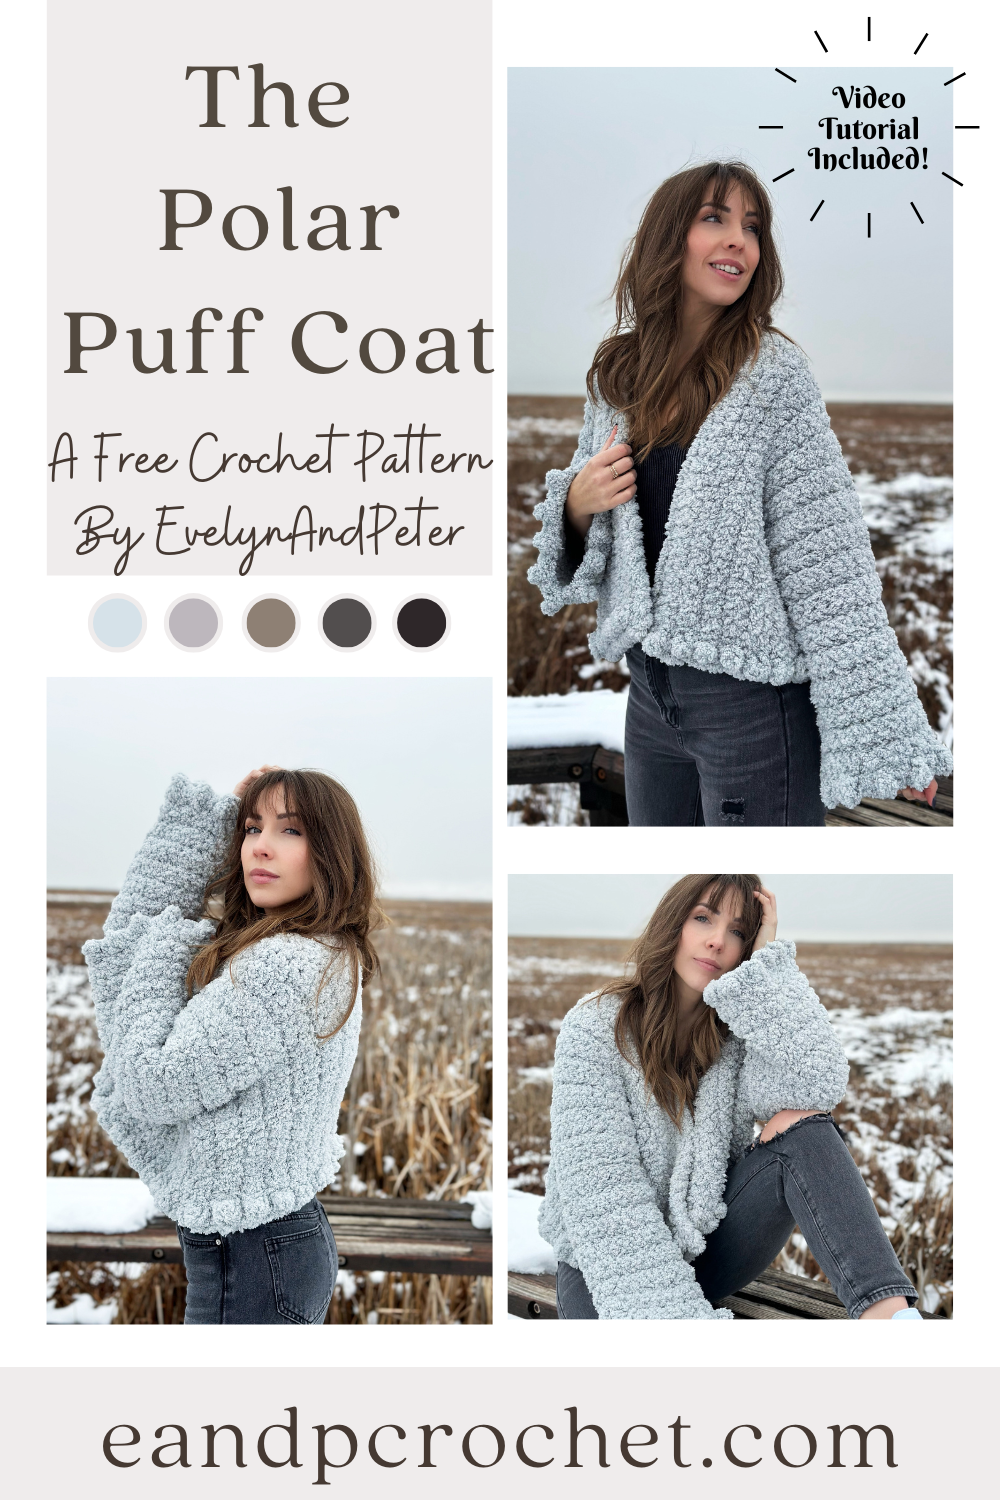
There is nothing like a warm and cozy coat/cardigan on those chilly days. The Polar Puff Coat is like a giant warm hug and I can’t get enough of it. I’ve been wrapped up in it at home while working and it goes perfectly with a warm cup of tea. 🙂 It has a fun and flirty fit as well as oversized sleeves featuring cute little puffs!
Let’s talk about the yarn I used. Lion Brand Go For Fleece Sherpa is probably one of the softest yarns you will come across. It’s jumbo weight so it works up very quickly and the fleece yarn gives your piece a beautiful sherpa look. I know what you are thinking…that this yarn is hard to use! It really isn’t though and it only takes a bit of practice, I promise. You will want to feel your stitches as you crochet, not try and see them. I use Sc throughout most of this pattern and designed it in a way so you can easily count your rows by using the little puff at the ends as a marker. Once you have the correct St count down for the starting row it should be easy from there on out. Don’t forget, this yarn is very forgiving and hides mistakes well! Count your Sts after your rows to make sure you are on track. Stitch markers are helpful as well.
I love the fit of The Polar Puff Coat. I wanted something very oversized as well as cropped. It has a short rectangular fit to it. If you want your coat to be more fitted, you can follow a size smaller than normal. If you want it even smaller than what is listed, you can remove rows in multiples of 2 on both sides of the front panels. If you want it longer, you can make your foundation row or starting Ch longer by adding Sts in multiples of 2.
Need a little bit of extra help? I have a video tutorial available! Be sure to check it out if you have any questions.
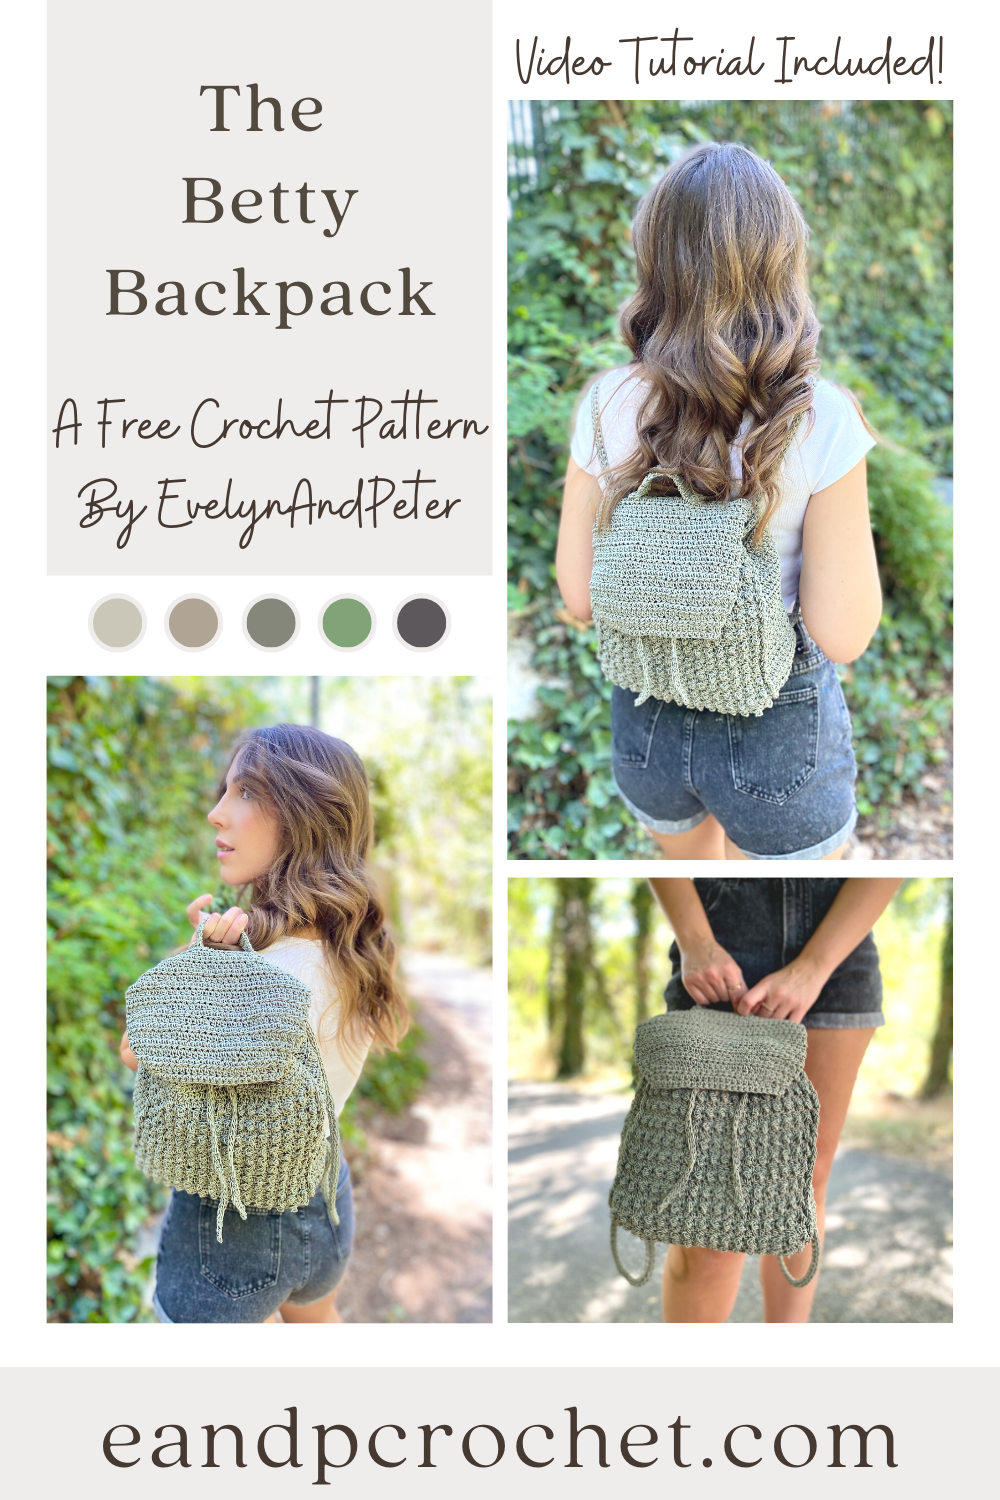
Have you tried out the new For The Home Cording by Lion Brand? I saw it and immediately knew I had to create some sort of bag with it. The Betty Backpack was the perfect outcome!
The Betty Backpack is worked flat and all in one piece! If you’ve made my Aspen Loop Bag, then you will be familiar with this construction. Once you get the main body of the backpack done, you fold it together and join on both sides. After that, you will add the upper trim in the round (don’t forget to join and turn!) and add the flap! Finally, the straps, drawstring and handle are added last.
The stitches used in this backpack are so simple but they create such a beautiful texture! You will use a combination of Hdc stitches throughout and alternating Tr/Sc stitches! Doesn’t it look like tiny puffs or bobbles? Well they aren’t! It’s just the Tr St being pushed to the front of your work! So simple and so cute.
I highly recommend using the yarn I used for this pattern or something similar. This is a cording yarn so it is very sturdy and has no stretch. It might feel a little strange and stiff to work with at first but I promise it’s worth it! If you don’t want to use a cording yarn then make sure you get a sturdy cotton or something with no stretch. The cording helps keep the shape of the backpack and is more secure for heavier weight.
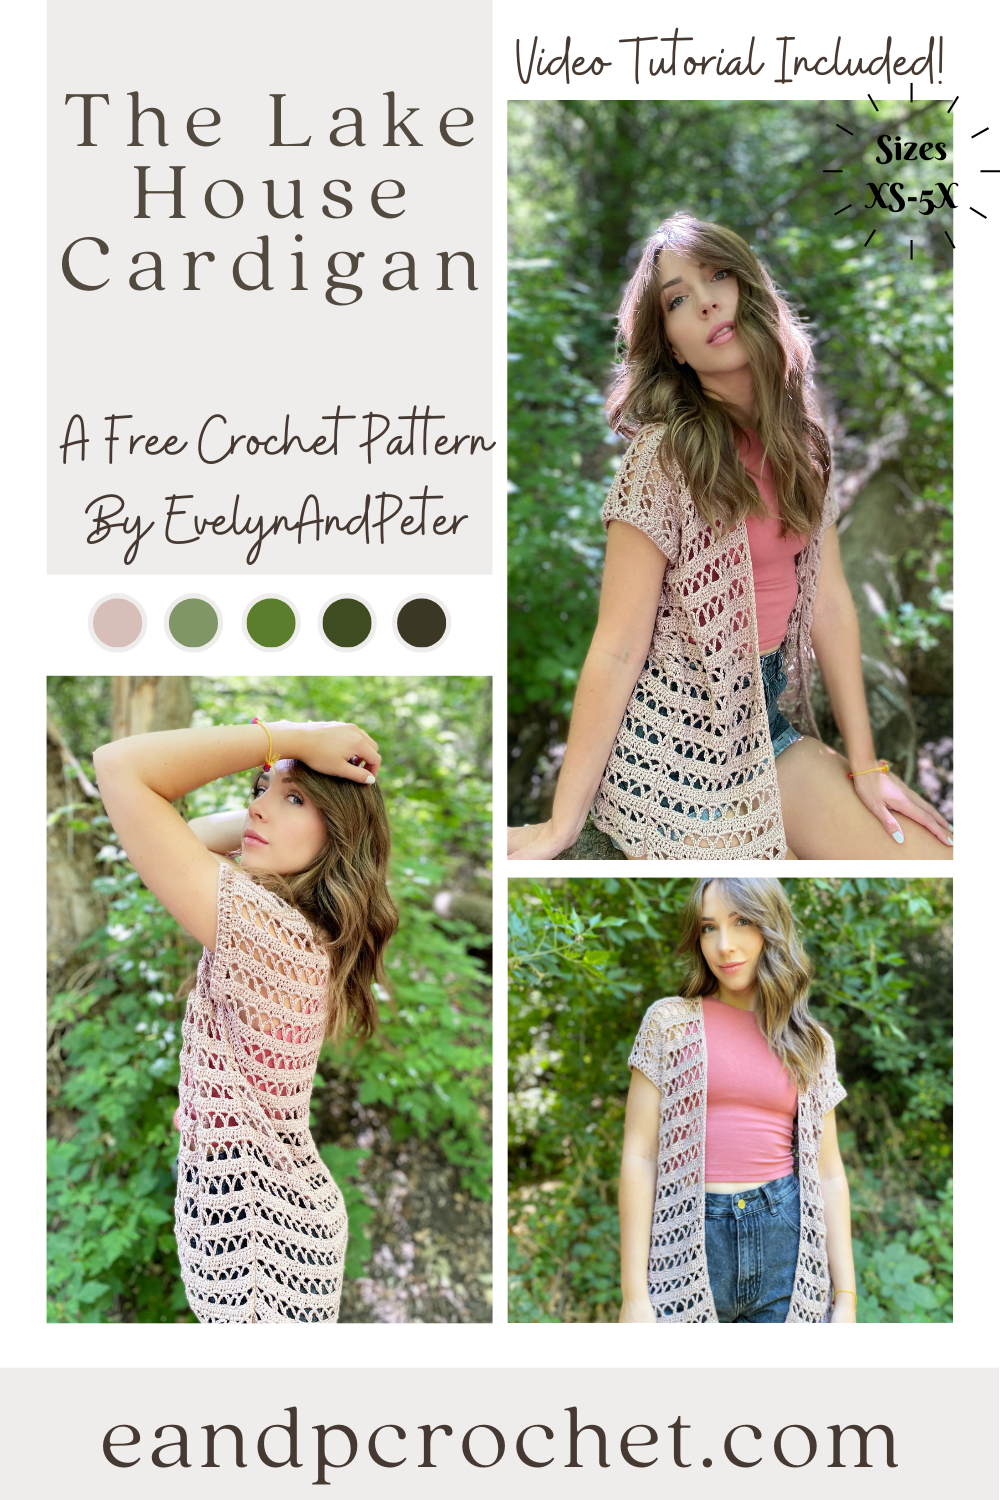
Total lake house vibes with my new cardigan crochet pattern! When I heard that name suggestion it was definitely a no brainer. The Lake House Cardigan is the perfect layering piece in the summer. Or really anytime of the year! It has a long flowy fit with an open lace stitch repeat. Plus, the Truboo yarn makes it extra silky. I can totally picture myself wandering around a summer house on the lake, sipping a glass of wine and crocheting by the water. Can’t you?
The construction of The Lake House Cardigan is very simple. 3 long rectangles, worked as long or as short as you want them! It’s super easy to adjust the length of this cardigan to your liking. After that, we just seam the shoulders together, then seam the sides together leaving a hole for our arms! Then the sleeves and the trim are added last.
Of course if you are a beginner or need a little extra help, I have a full video tutorial available for you! I go over step by step how to make your cardigan. I’m making a size small in the video so be sure to follow along with the written pattern, especially if your making a different size!
If you are using Truboo yarn like me, then you’ll notice it does stretch a bit with the weight of the cardigan as you go. The gauge listed below is a blocked gauge. So when you make your gauge swatch you’ll want to be just slightly under gauge. When you block your swatch it stretches to meet the correct gauge listed. I pinned mine and did a steam block. If you want to make your gauge unblocked it will be closer to 19 Dc by 11 rows for 4×4″
I hope you guys enjoy working up this cardigan! It was so fun to make and I love the finished piece! I have lots of other cardigan patterns available so be sure to check them out!
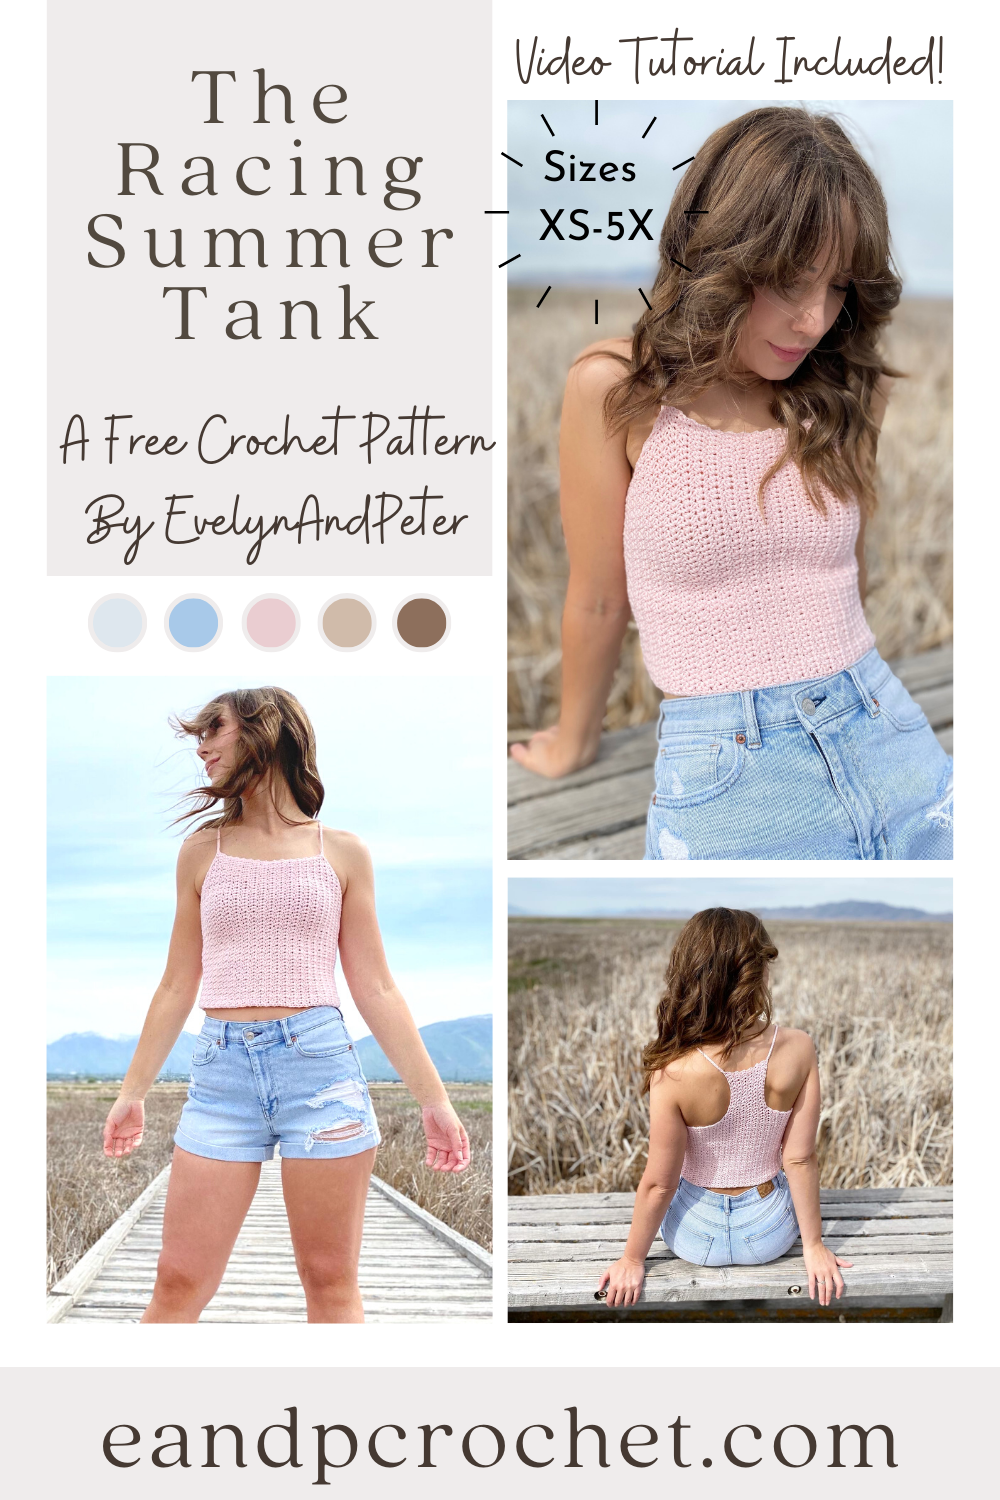
Summer is in full swing here and I knew I needed to design a comfy tank top to wear! The Racing Summer Tank crochet pattern is light weight, soft and quick to make! It has a cropped look to it but you can easily make it as long as you want! It’s racerback style on the back with spaghetti straps!
I used your typical single crochet V-St for this tank top. What’s a V Stitch? Sc, Ch 1, Sc all into the same space! You will work your V St into the V from the row below! Then just repeat throughout the pattern. Easy peasy. If you want a bit more length just repeat the V St row right before the shaping on the front panel. Be sure to add the same amount of rows to the back as well.
Pair it with some cute jean shorts or a long flowy skirt! The Coboo yarn I used comes in so many nice colors, so you have tons of options! Grabbing the kit from Lion Brand is such a good deal. Basically you are just paying for the yarn and you get the printable PDF for free! They usually have a sale or coupon code running so you can grab it even cheaper! Make sure you subscribe to my email newsletter, I frequently notify about these good deals!
Need a little bit of extra help? If you are more of a visual learner than be sure to check out my video tutorial! If you have a question about the racing summer tank crochet pattern, it will most likely be addressed in the video!
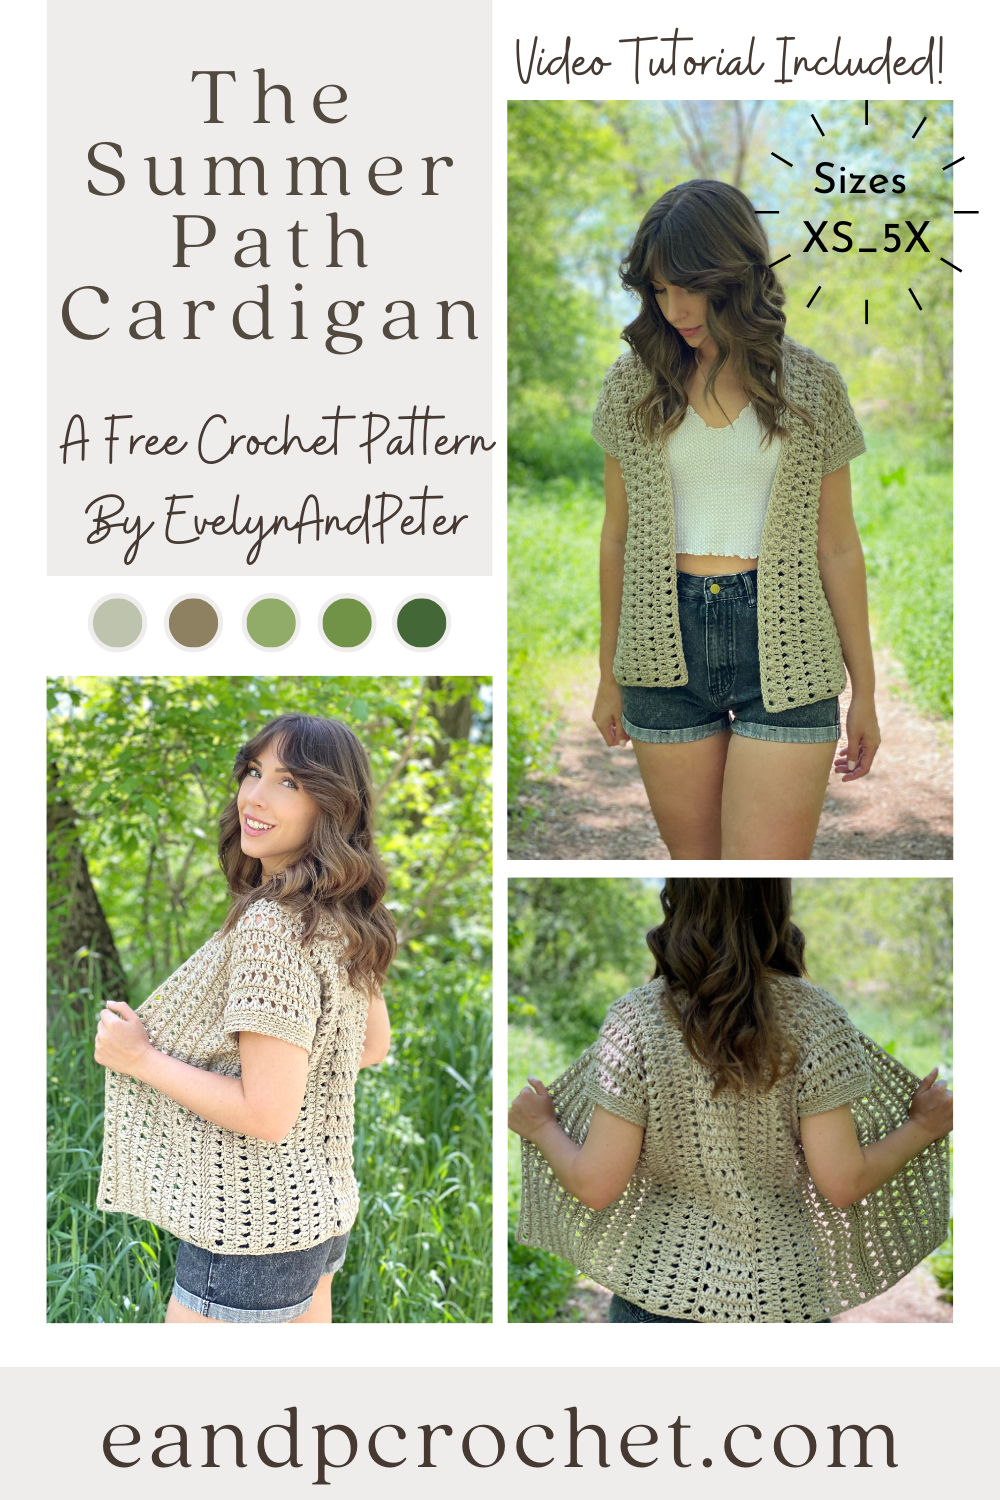
Is there anything better than exploring the woods on a warm summer day? It’s quiet and peaceful, nowhere to be and no responsibilities. You can hear the birds chirping and the creek trickling. That’s what I picture when I wear The Summer Path cardigan at least. 🙂
This cardigan is worked in 3 separate panels. The 2 main panels are worked side to side and the last one is worked bottom up. The one that is worked from the bottom up is the back detail of the cardigan that will be sewn in between the 2 main panels half way up. I’ve made a couple other things are worked side to side. Check them out here and here!
I absolutely love the Triad Stitch that I used in this design! It works up quickly and gives it an open stitch look, perfect for summer! Make sure you pay close attention to where you are sticking your hook for the Triad! I have a video tutorial available for those that need a little extra help. Be sure to check it out!

Looking for an easy tote bag pattern? Then The Lucy Tote crochet pattern is perfect for you! This tote bag is worked from the bottom up, in the round. It comes together quickly since you will be using bulky weight tape yarn!
If you haven’t used Lionbrand Rewind yarn yet, then you are in for a treat! It’s sooo soft and creates a sturdy fabric when worked up! There is no snagging because of the flat tape style and it’s super easy to frog if needed! I used under 2 skeins in the Elm color and 1 in Willow! They have several different really pretty color options though if you want to check it out!
I also wanted to point out that the straps can totally be made longer if you want! I put a little note within the pattern on where and how to do this. When designing the bag I was going back and forth with the strap length. When I asked TikTok what I should to the majority of people said to keep the straps the length I had them! But I wanted to make sure those who prefer longer straps would have that option as well!
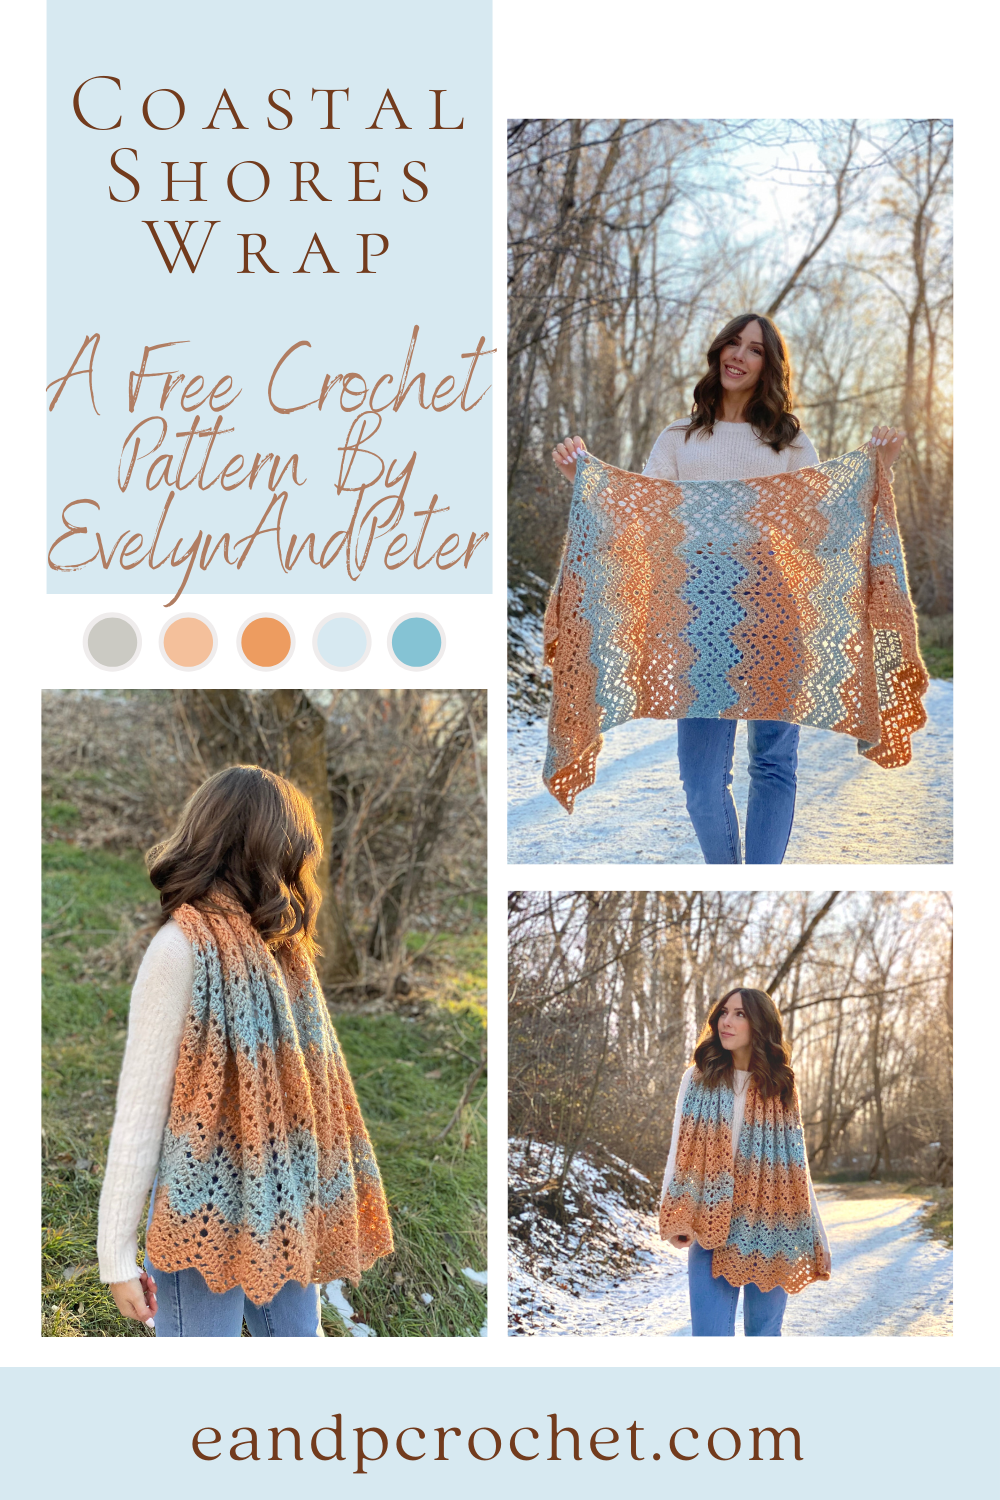
Have you seen the beautiful Scarfie yarn colors that Lion Brand has? When I saw the Seafoam/Clay color I totally fell in love. I got some and decided to use it for a future project. That future project turned into the Coastal Shores Wrap! I actually worked on this design while I was visiting family at the beach. I played around with a few different stitch ideas but ultimately settled on a beautiful ripple stitch because it reminded me of the sunrise/sunset on the coast!
The way that the colors changed so perfectly in this project made me so happy. It really did give me warm, beachy sunset vibes. There is a ton of different color options in this yarn that I think would look so great!!
Once you get the stitch repeat down the Coastal Shores Wrap is a really relaxing project. It worked up so quickly for me and was really fun to do. If you need any extra help be sure to check out my video tutorial!
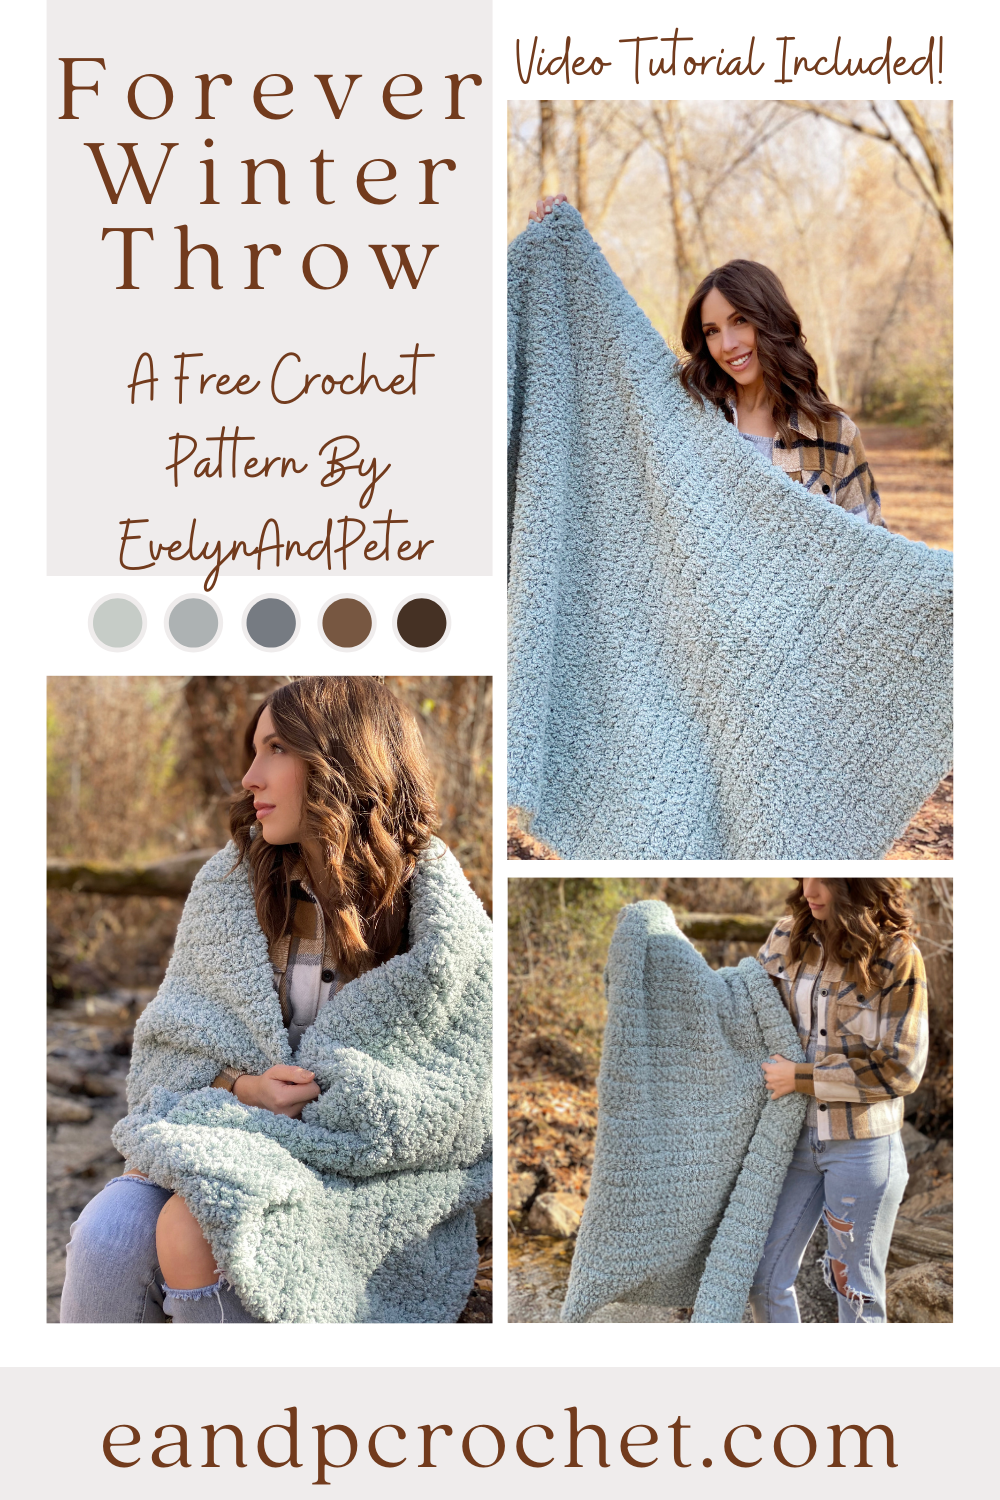
I had to do it. I just couldn’t help myself. After making The Luna Cardigan using Lion Brand Go For Fleece Sherpa I KNEW I had to make a blanket. The Forever Winter Throw is here and definitely my coziest blanket pattern! Not only is it the coziest but it’s also the easiest.
Even a beginner can do this project! The entire blanket is worked up in single crochet stitches. You can easily feel your stitches as you go and I even made a video tutorial to help you out!
If you want your Forever Winter Throw to be bigger just add more chains to the starting chain and add more rows until you are happy with the size! I only used 7 skeins for mine.