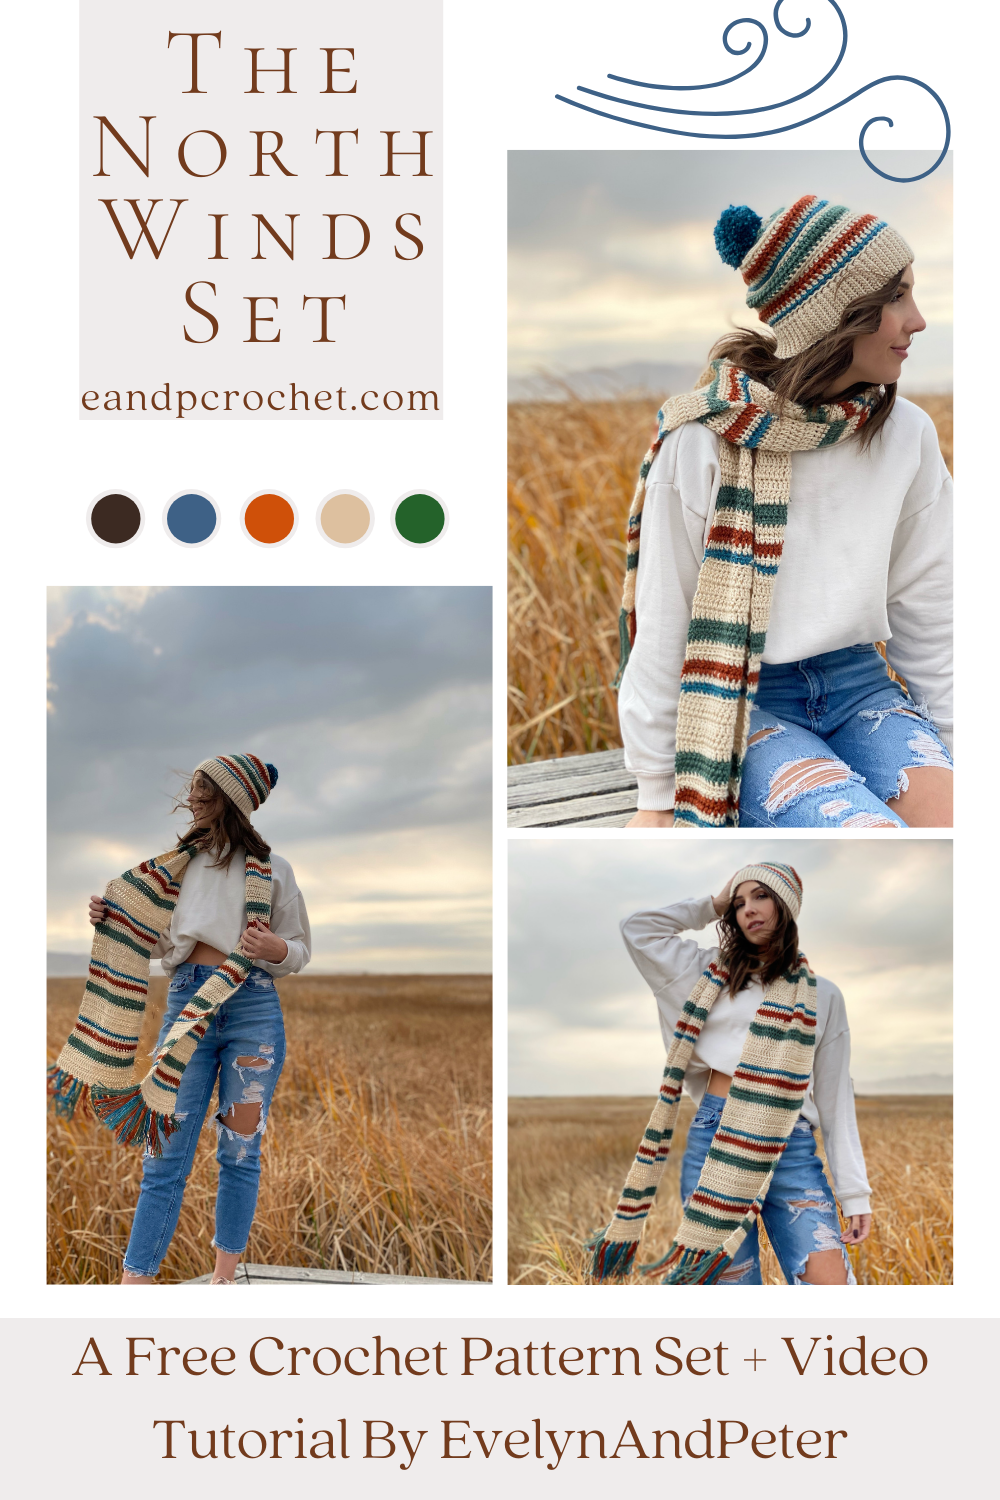
The North Winds Set is here! I’m thinking It’s going to be great for Christmas gifts this year. Beginner friendly and fast to make but also kept my interest throughout with the subtle stitch changes!
The striping on the scarf and beanie are my favorite part. And believe it or not, I had almost no ends to weave in when I was finished! Every time I had a color change for the scarf I cut the yarn, tied a knot and worked my stitches directly over the ends. This worked out amazingly and I’m so glad I did it so I had wayyy less ends to weave when I was done!
Heartland yarn is one of my favorites and It’s what I used for both patterns! The yardage listed below is enough to make at least 1 hat and 1 beanie, including a pom and fringe!
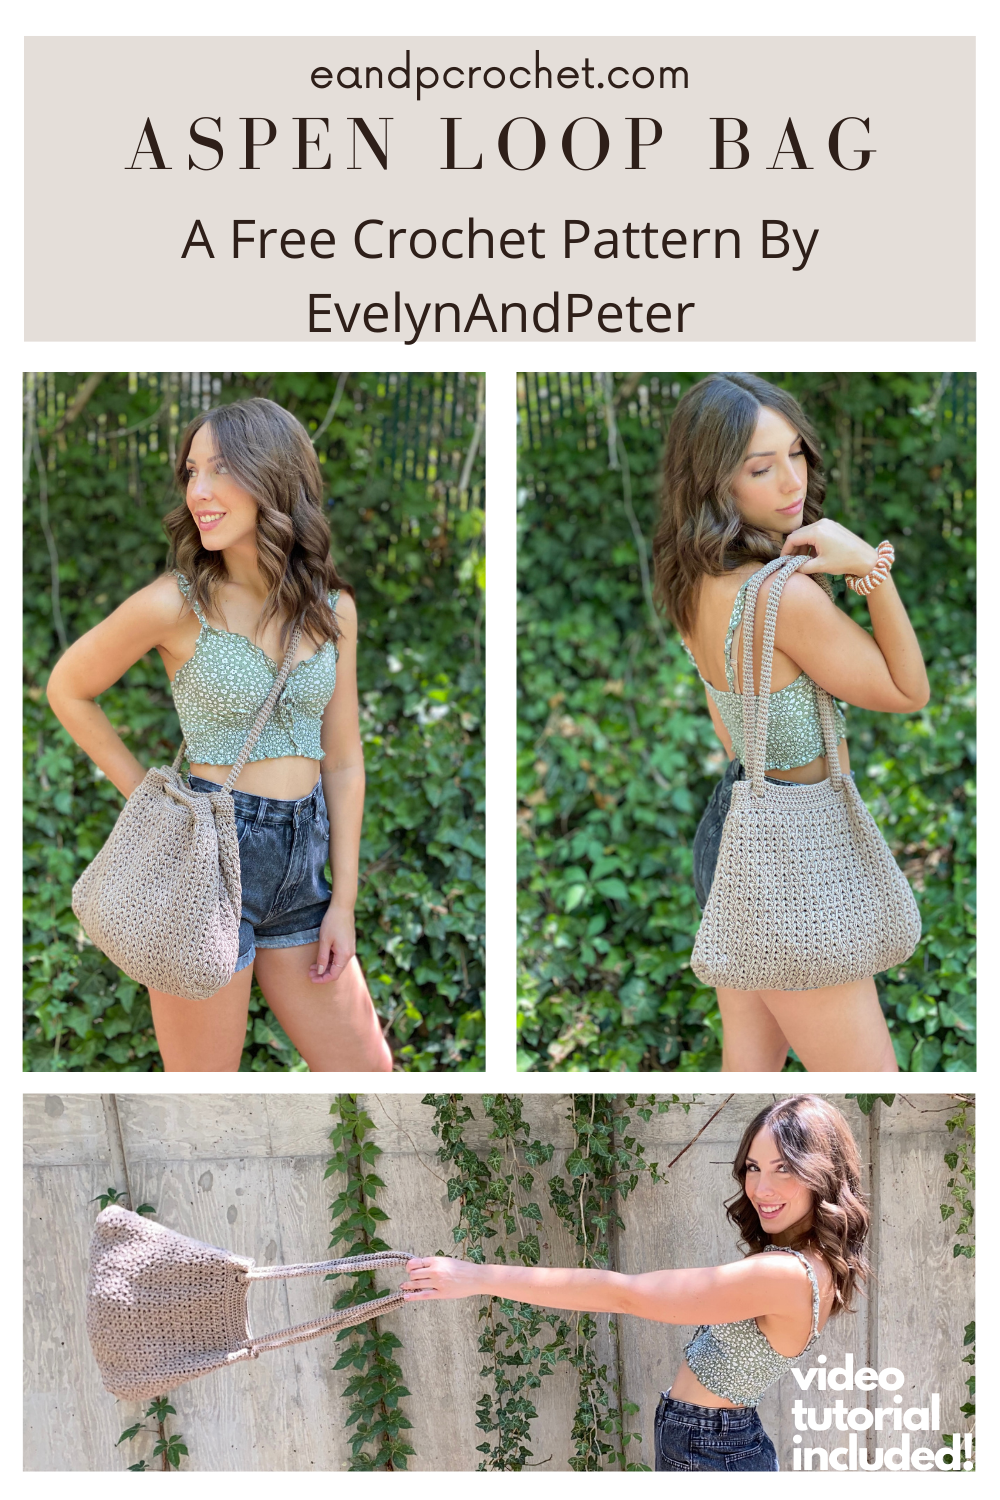
Did I just make my favorite crochet bag ever?? Yup! The Aspen Loop Bag crochet pattern is here! It’s worked up in one large piece and then seamed up the sides to form the bag! The trim and loop handle are added last.
I used the Feather stitch for The Aspen Loop Bag! I saw this stitch a while back and have been keeping it in the back of my mind for the perfect project. I’m so glad I decided to use it for this bag! Once you get the stitch down this pattern is a breeze. You’ll just be repeating the Feather stitch over and over! I know this stitch is probably a new one for most of you so I even made a full VIDEO tutorial! I’ll walk you through step by step on making your bag!
24/7 Cotton is the perfect yarn for this project. Nice and sturdy but not rough on the hands! There is also so many different color options for it. If you switch out the yarn I still recommend trying to use some sort of sturdy cotton!
If you like this bag pattern be sure to check out some of my others here! Don’t forget to pin this pattern to save for later!
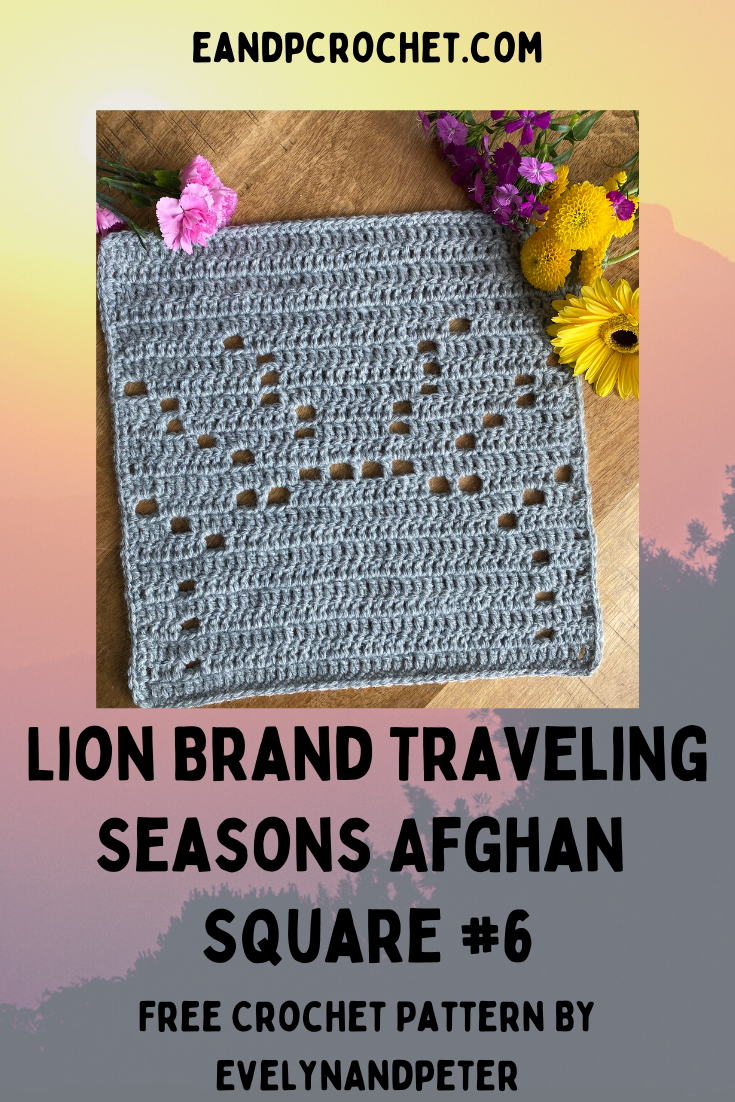
 The year-long project sponsored by Lion Brand Yarn called the “Traveling Seasons
Afghan” is now ready for my square! This has been a collaborative effort between 13
designers and bloggers from across the U.S. and Canada!
Starting in January, the first Seasons Afghan square was started by Whistle and Wool,
and then began its seasonal journey to a new designer every month. Each designer
created a 13″x 13″ square with their seasonal memory. These are published free online
so everyone can follow along with us and create your own crochet Afghan! The
year-long collaborative effort connects us with one another through the things we love
and with memories built in. Each Square created has been designed with a passion
behind that season.
*My square is # 6 and all the materials needed are below in my pattern.
**You can also select a PDF version of this pattern in my Ravelry shop for
$1.
Visit the master list of this year’s designers from Lionbrand Yarn below and links to their
sites as the link below for the itinerary of the Afghan. Follow along with the squares and
the route as they travel around for each season.
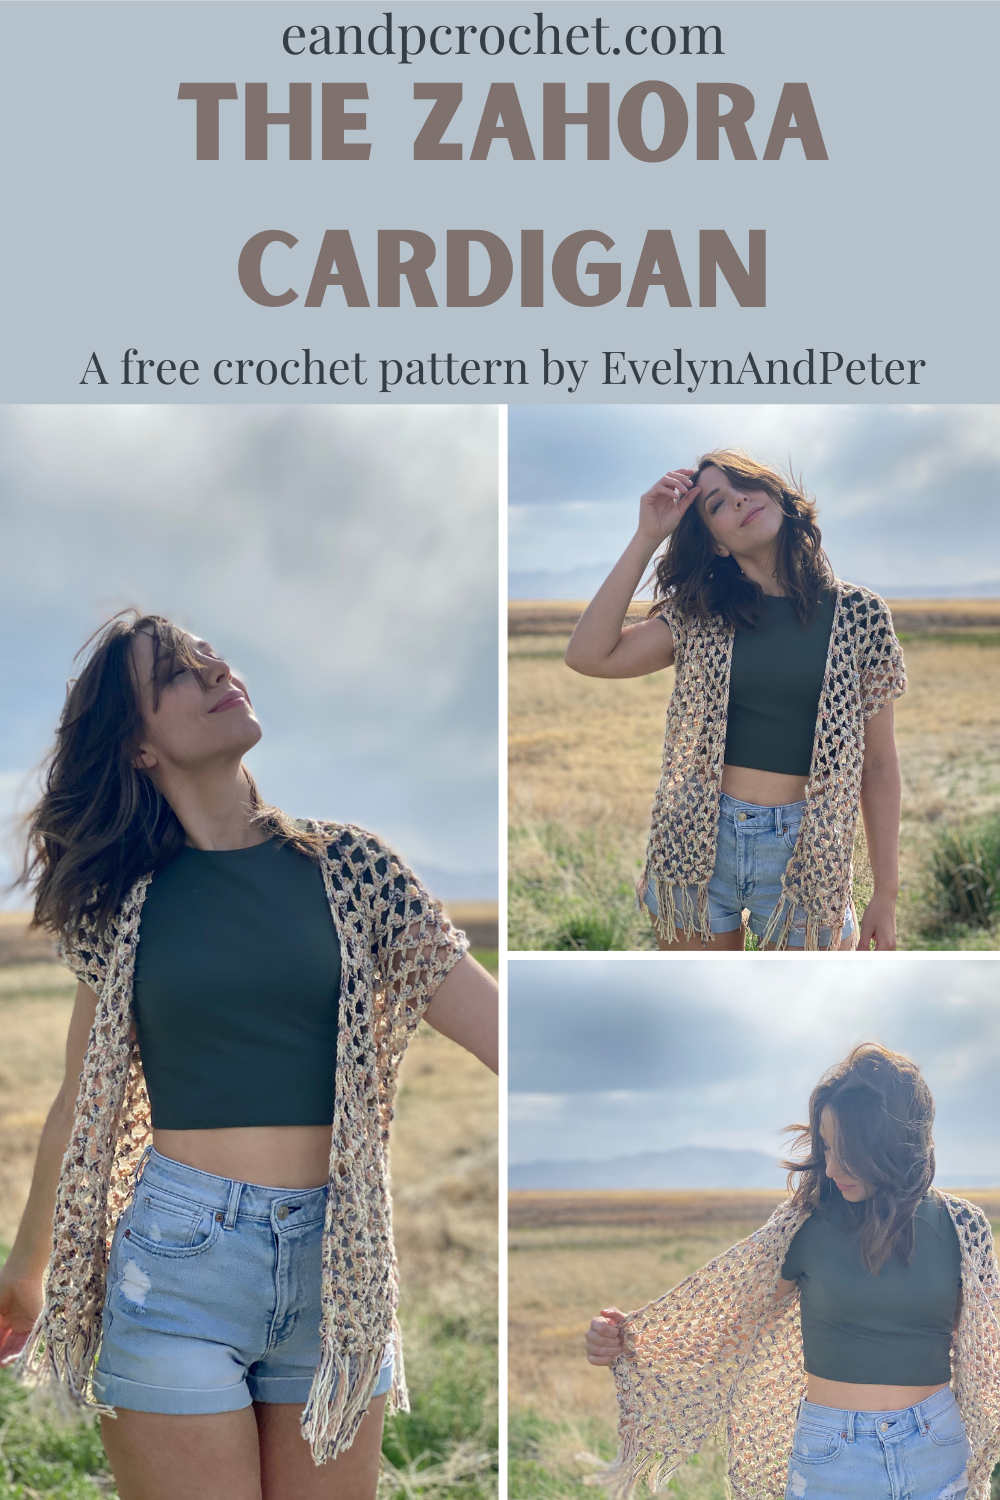
With the warm weather finally here, I’ve been wanting to make all the summer cardigans! I love working with open lace type stitches. Not only do they look super cute but they usually work up really quickly too. The Zahora Cardigan checks off both of these boxes!
I always aim for my designs to be beginner friendly and this one is no different. You will be creating 3 panels and working from the bottom up. Don’t let the picot stitches scare you! It actually goes really quickly. This cardigan is also easily customized. If you want your cardigan longer just be sure to add more rows in multiples of 2 before tying off your panel. Be sure you add the same amount of rows to each panel. If you want a more oversized look, just size up.
I love throwing on my Zahora Cardigan with any summer outfit. I think it looks super cute with jean shorts and a tee but would also be adorable over a summer dress. If I have time I’m totally going to make a longer version to wear over my bikini at the pool this summer!
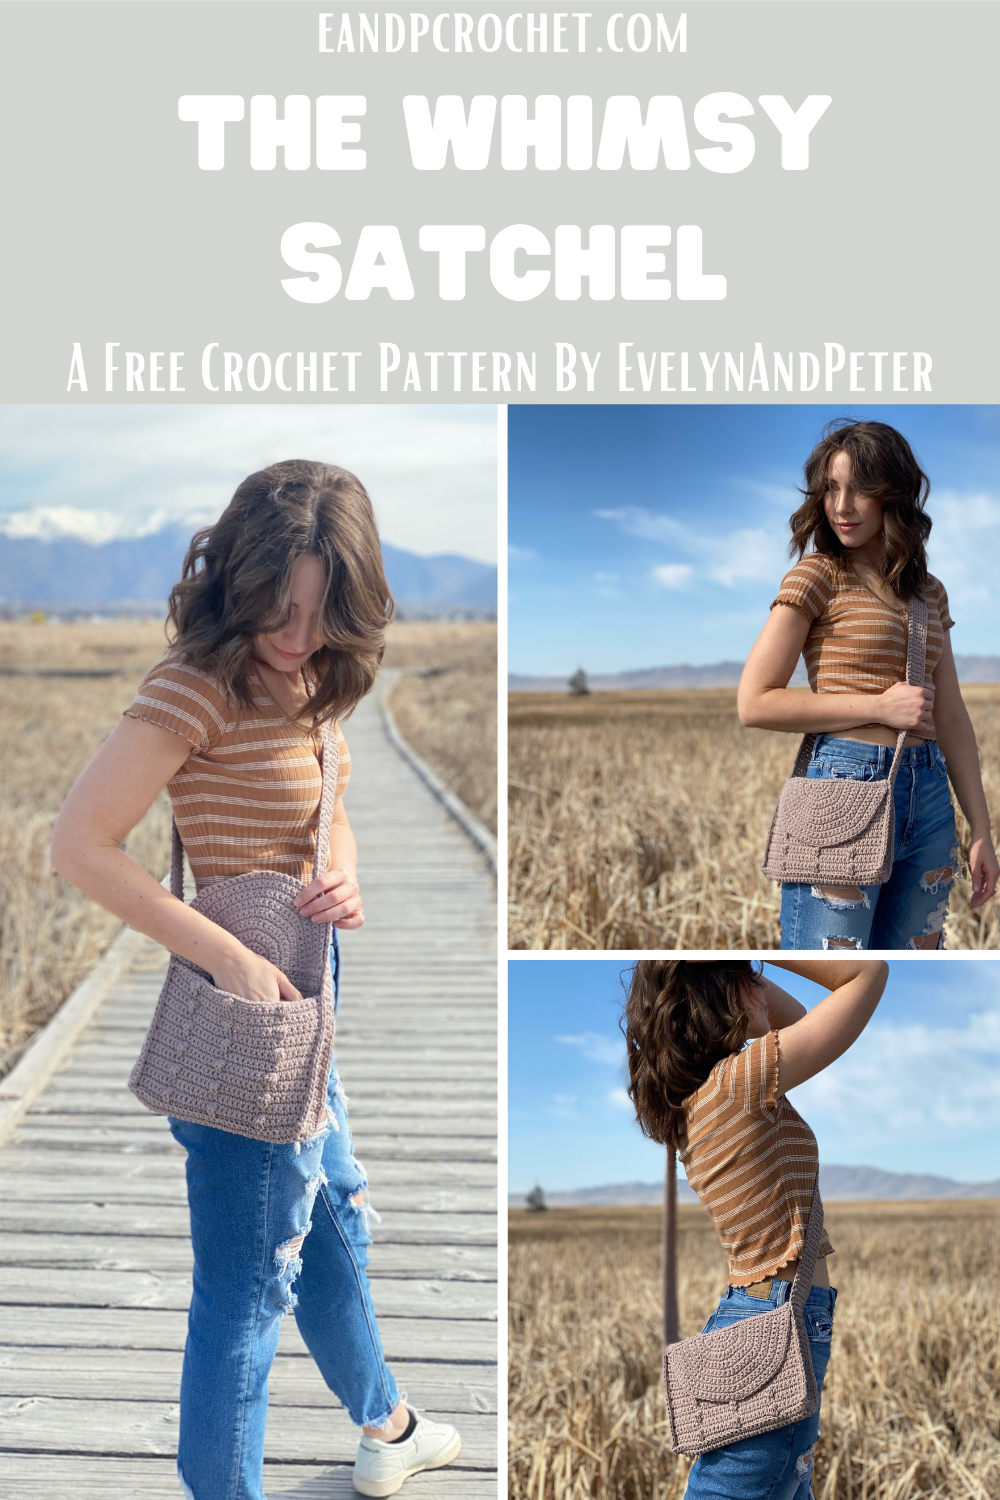
It’s been a while since I’ve made a crochet bag. The Whimsy Satchel is definitely a new favorite of mine! It’s perfect for quick trips out when you don’t want to carry a ton of stuff. It also works up super quickly!
I used a new yarn from Lion Brand called “Just Hemp”. This is a sturdy bulky weight yarn. It’s definitely the type of yarn I would recommend for bags/placemats/baskets over garments and blankets!
The Whimsy Satchel is worked almost entirely in one piece. You will start in the center of the front flap and make your half circle in rows. The front flap, top, back, bottom and front panel are all worked in one piece. The strap and sides are worked in one piece as well and then everything is sewn together. Make sure you check out the available photos if you get confused!
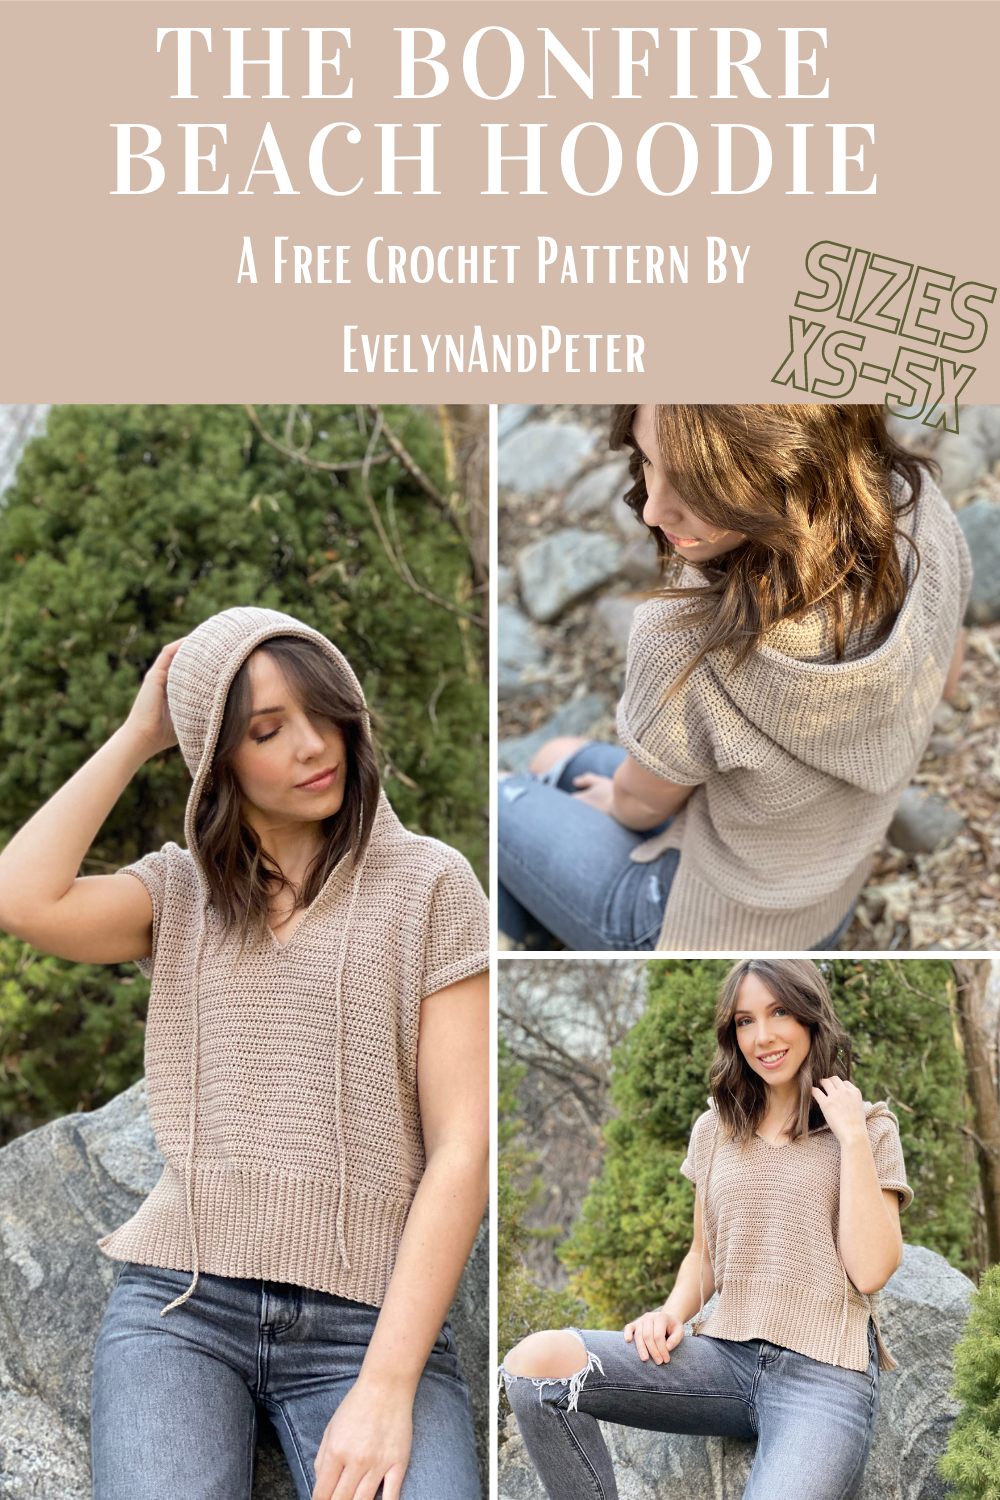
Coming at ya on the first weekend of spring… The Bonfire Beach Hoodie! You might be thinking that this design looks a little bit familiar. Well it should because it’s the sister design to The Happy At Home Hoodie!
The Bonfire Beach Hoodie is shorter and lighter in comparison to The Happy At Home Hoodie. It’s also not quite as oversized. I use the same stitches and the same basic construction for this top.
I left side slits on my Bonfire Beach Hoodie but you can easily sew those up when making your top if you would rather not have them!
You can find this pattern as a full video tutorial on my YouTube channel as well! It is split into 4 parts and walks you through the entire pattern.
Description: The Bonfire Beach Hoodie is perfect to throw on during a warm summer day. It uses Hdc throughout for an easy make. The slightly oversized boxy fit makes it extra comfy to wear all day.
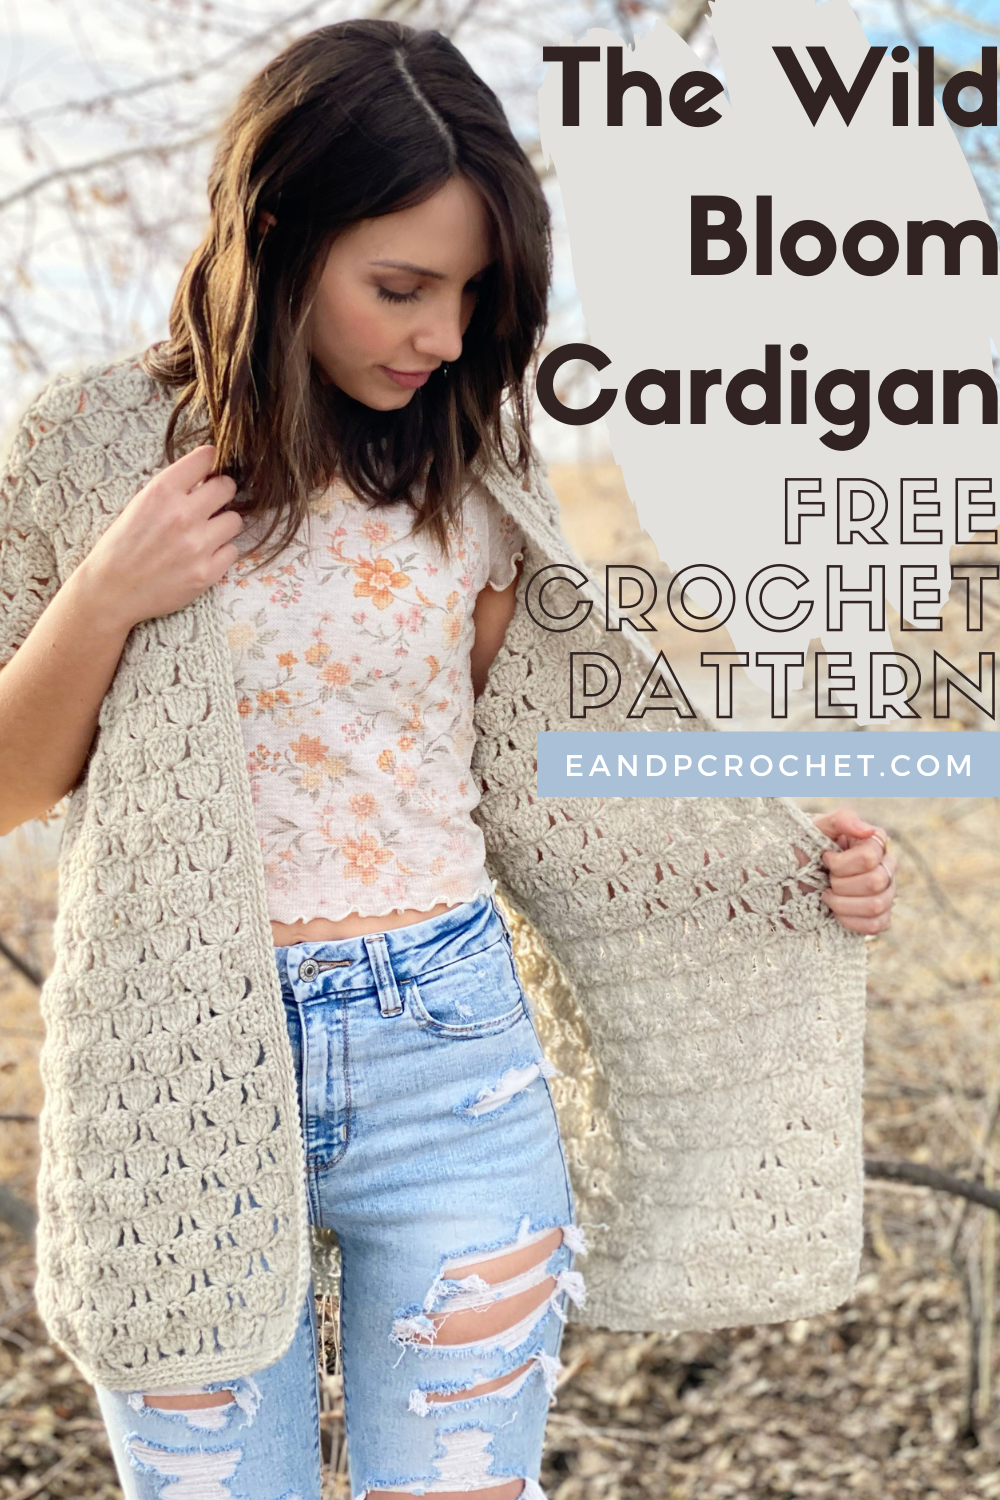
Is it Spring yet? I am so ready for warm weather! I’ve officially started working on my spring and summer designs and I’m so excited to share them with you! First up is The Wild Bloom Cardigan!
The Wild Bloom Cardigan is a fun oversized cardigan with a lace type stitch. I also was so excited to make it because it has short sleeves! No sleeve island over here!
You need worsted weight yarn for this cardigan. I used Lion Brand Wool-Ease which has some really nice color options. You can purchase the kit which includes the yarn + the PDF pattern!
And of course, I made a YouTube video tutorial to go along with this pattern! If you are confused at any point or more of just a visual learner please check out the video.
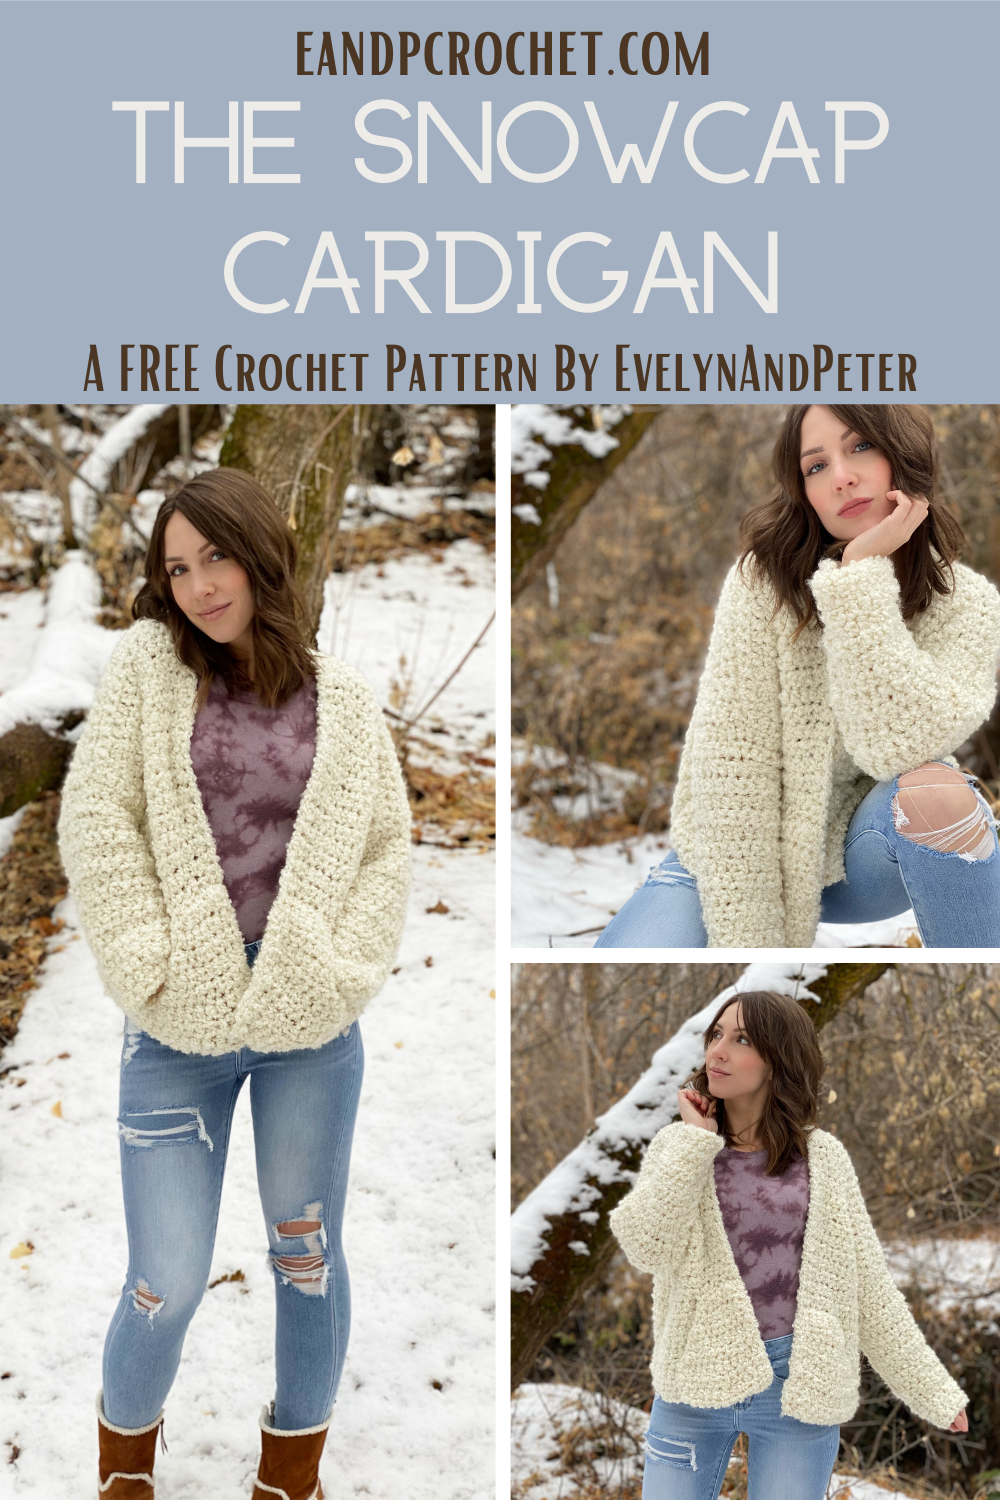
It’s a brand new year so that means it’s time for a brand new crochet pattern! The Snowcap Cardigan is my very first design of 2021 being released even though i’ve had it in my brain for at least 6 months and sitting in my blog drafts for a couple of months! I’m so excited for this one and I hope you guys love it.
I like to think of The Snowcap Cardigan as the sister sweater to The Coffeeshop Cardigan. Both of them use homespun yarn but have a completely different look to them. I used the Thick & Quick version of Homespun for The Snowcap Cardigan instead of regular homespun. The Snowcap Cardigan is also boxier, oversized and cropped compared to the slimmer and longer Coffeeshop Cardigan! You can grab all the supplies you need from my friends at JOANN!
Are you scared of Homespun yarn?? Never fear!! I have a whole video tutorial walking you through this pattern. The Thick & Quick version is even easier to use than the normal version in my opinion. I use a larger crochet hook in this pattern which helps while working with this yarn. Not only that but I use easy stitches throughout and minimal shaping! Hot tip- FEEL your stitches instead of trying to see them!!
So, I don’t know about you guys but I plan on staying home as much as possible this year and doing all my shopping online! I would much rather be cozied up under a squishy blanket instead of fighting the crowds to get my shopping done haha! I made the perfect blanket to do just that- The Fitzwilliam Throw Blanket!
The Fitzwilliam Throw Blanket is made with Lion Brand Cover Story yarn and Lion Brand Go For Faux Thick and Quick yarn! Both of these were the perfect combo to whip this up in record time. I think I worked on it on and off for only a few nights!
You can find all the yarn you need at JOANN stores! They had a ton of Go For Faux Thick & Quick colors to choose from. I was so excited when I came across the color “Zebra” because it reminded me of my dog- Fitzwilliam! If you’re not a fan of animal prints they also have a bunch of solid colors too.
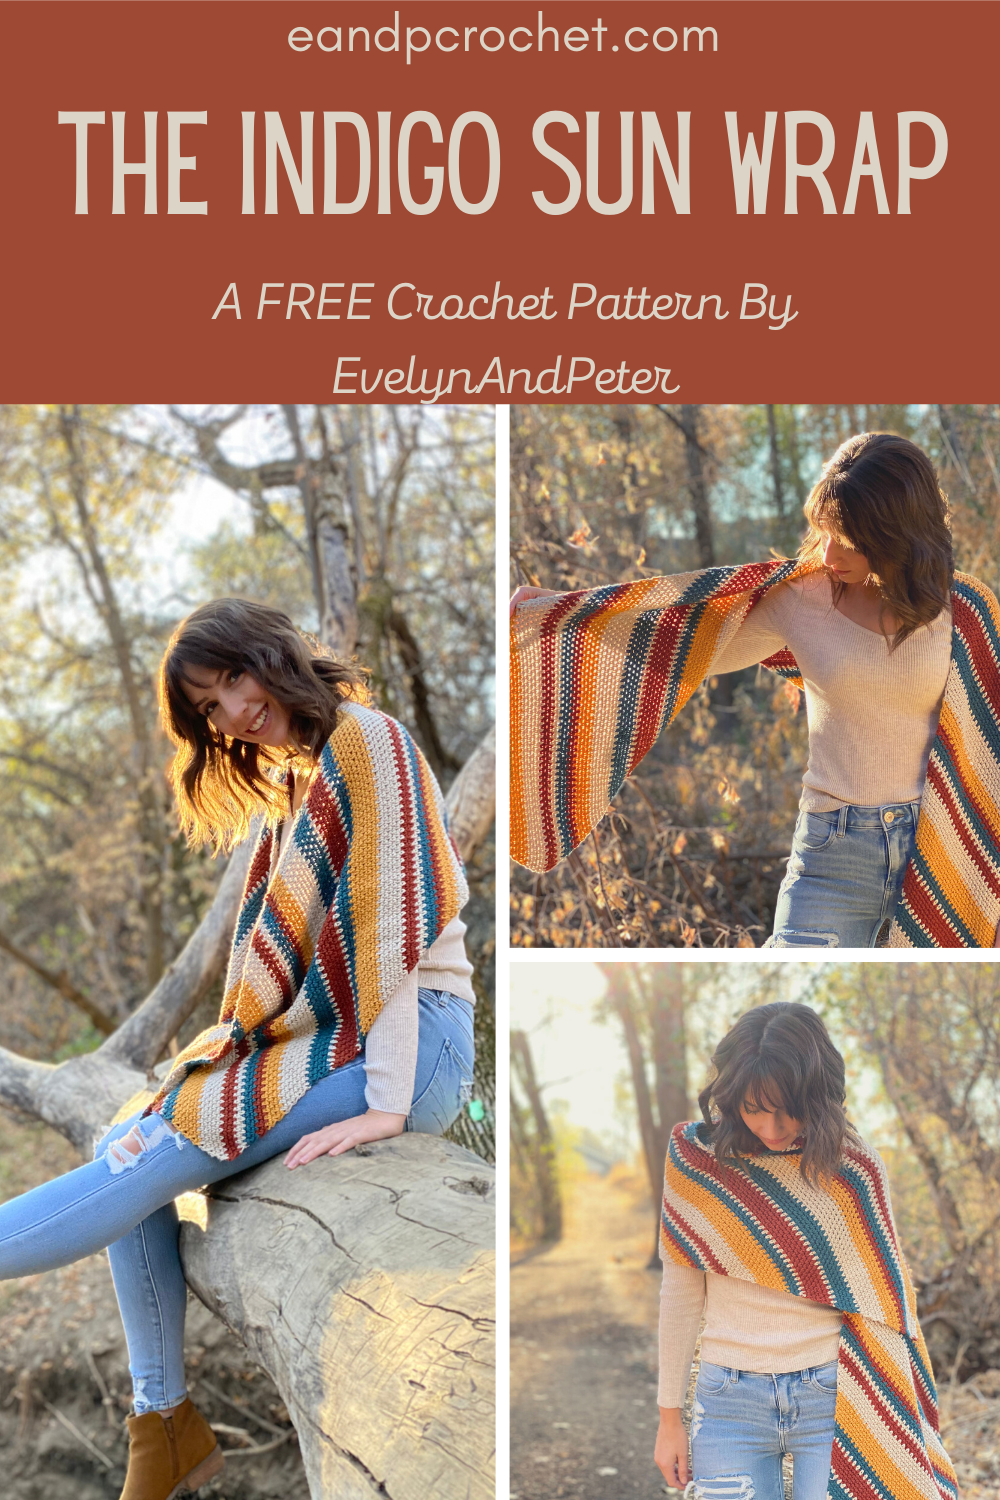
I ordered some Lion Brand Pima Cotton on a whim a couple of months ago. I had no plans on what I wanted to make but I couldn’t say no to these colors. After picking out 4 favorites for my color palette I knew I would end up doing something with stripes. And that’s how the Indigo Sun Wrap was born!
The Indigo Sun Wrap was so relaxing and fun to make. All you need to do is crochet 2 rectangles and make one short seam to join them together! The pattern uses moss stitch. Moss stitch is one of my absolute favorites! This one is not worked in a way you are probably used to though. It’s actually worked up corner to corner instead of horizontal!
Im a huge fan of all things corner 2 corner. So when I found out you could make the moss stitch corner 2 corner I knew I had to design something with it! You can check out a couple of my previous normal C2C designs here and here.
I also made a full video tutorial on the Indigo Sun Wrap as well! If you want a visual on how to make the moss c2c then this video will be perfect for you! View it here or scroll down to check it out!
Description:
If you love the moss stitch then this pattern is for you! Learn a new way to use this stitch by working it corner to corner. The gorgeous striping and bold colors make this wrap a statement piece.