If you’re looking for your next cozy project, the Moonblush Throw is it. This bulky, textured blanket is made with super soft yarn for the ultimate plush feel, and it works up into a warm, inviting piece that’s perfect for everyday use.
I based my Moonblush Throw crochet pattern off of my Moonblush Pullover! I loved all the stitches and textures that I combined in the pullover so much that I knew I needed to make a blanket version. You’ll find a bunch of different variations of Hdc throughout to give it the ultimate cozy and textured look. You’ll notice that a lot of the stitches repeat through the blanket so it’s easy peasy to remember how to do it and your blanket will work up in no time!
Not sure how I am already releasing my last crochet pattern of the year…but here we are! The Cottage Lattice Throw crochet pattern is a quick and easy blanket if you are looking for one final project to complete. It’s mindless and perfect to work up in between all the chaos of the holidays!
The entire blanket is worked up in double crochet and chain stitches. Super easy and beginner friendly. The layout of the shell stitches in combination with the mesh gives it a subtle checkered look which I love. A simple post stitch border is worked around to give it a finished and complete look.
Another addition to the Boxy Blooms collection is here- The Boxy Blooms Blanket! I knew as soon as I worked that last stitch of my Boxy Blooms Cardigan that I would be adding more designs to this collection. The pullover quickly followed and now the blanket is out in the world!
It features the same beautiful stitches throughout. I did however, do something just different compared to the cardigan and pullover. I decided to use 2 different color yarns and switch them out every 2 rows! It turned into a colorful and stunning blanket with NO ends to weave in from the color changes! You simply leave the yarn and pick it up every 2 rows, creating little floats as you go. When you work your border, you just crochet directly over them.
I remember working with Landscapes yarn many years ago, so when Lion Brand released Landscapes Renewed, I knew I had to try it! Dare I say I like this one better than normal Landscapes?! I immediately got to work on The Strata Sunrise Throw crochet pattern.
I gravitated towards the orange color right away. It reminds me of southern Utah and all the beautiful rock formations in the deep reds and oranges you see! If you have ever been, you know exactly what I am talking about! I knew I had to get it.

Am I really posting my first crochet pattern of 2025?! That is just crazy to me! I am so grateful to have you all here with me at the start of the new year. 🙂 First up, The Adagio Throw crochet pattern!
When I like the stitch/stitches of one of my previous designs I like to try and use it in multiple other patterns. First was the Echoes Cardigan which was one of my top patterns this past fall. I knew I wanted to make a beanie/scarf set that was similar but used 2 yarns instead of one for a striped look- The Arpeggio Set. I’ve known since making the Echoes that I was going to make a blanket as well, haha! I decided to keep the 2 yarn look for this one as well. You also just might be seeing an Echoes Pullover here in the near future, stay tuned!
A little bit about the blanket- It’s worked from the bottom up. You will be switching yarn colors every 2 rows. However, you do NOT need to cut that yarn. We will be creating small floats on the left side of the blanket which we will later crochet the border over to hide. Which means, you only have a few ends to weave in instead of a million! Simply leave your yarn color at the end of the row without cutting, when you come back to it, pick it back up and drop the other yarn! Be sure to check out my video tutorial if you need a visual of this. I walk you through the whole thing from start to finish!
There is something just so magical about combining 2 different yarns together to create something new! It’s one of my favorite ways to make blankets. I think The Starlight View Throw crochet pattern might be my new fave!
I took a super bulky weight (respun thick & quick) plus a worsted weight (landscapes breeze) and combined them by weaving the landscapes yarn and carrying it throughout! This was SO much fun to do. It was a nice change than just doing normal stitches. It took a couple of rows to get my fingers used to it but after that, this blanket basically flew off my hook. It took just about 1 week from start to finish.
You’ll be using an offset double crochet V-St throughout the entirety of the blanket. The part that makes it so special is carrying the second yarn along while you go. There is a very specific way on how you carry the yarn so be sure to read the info below or check out the video tutorial for a quick rundown before you get started!

There is just something special about Mandala Ombre yarn. The beautiful color combos definitely call to me. I’ve been eyeing a couple of the colors this year and knew I needed to create a blanket with one of them. The Sunrise Surf Throw crochet pattern is exactly what I wanted!
I wanted something with a simple stitch repeat but also wanted amazing texture. Nothing too crazy because the yarn already elevates the blanket and does all the talking! Working up these rows using double post stitches ended up perfect! They are super easy and fun to do as well. It gives it just the right amount of texture without being too overwhelming.
I had just the right amount of yarn left to add on a little bit of a fancy side border as well. I played around with different waves to add to the edge until I settled on a nice repeat for the length. I also wanted to add in an extra something by creating “triple picots” to the top of each wave. Super simple to do and makes it even better! The Sunrise Surf Throw lion brand kit comes with all the yarn you need and a free copy of the printable digital download PDF. I definitely recommend it if you plan on using the mandala ombre yarn!
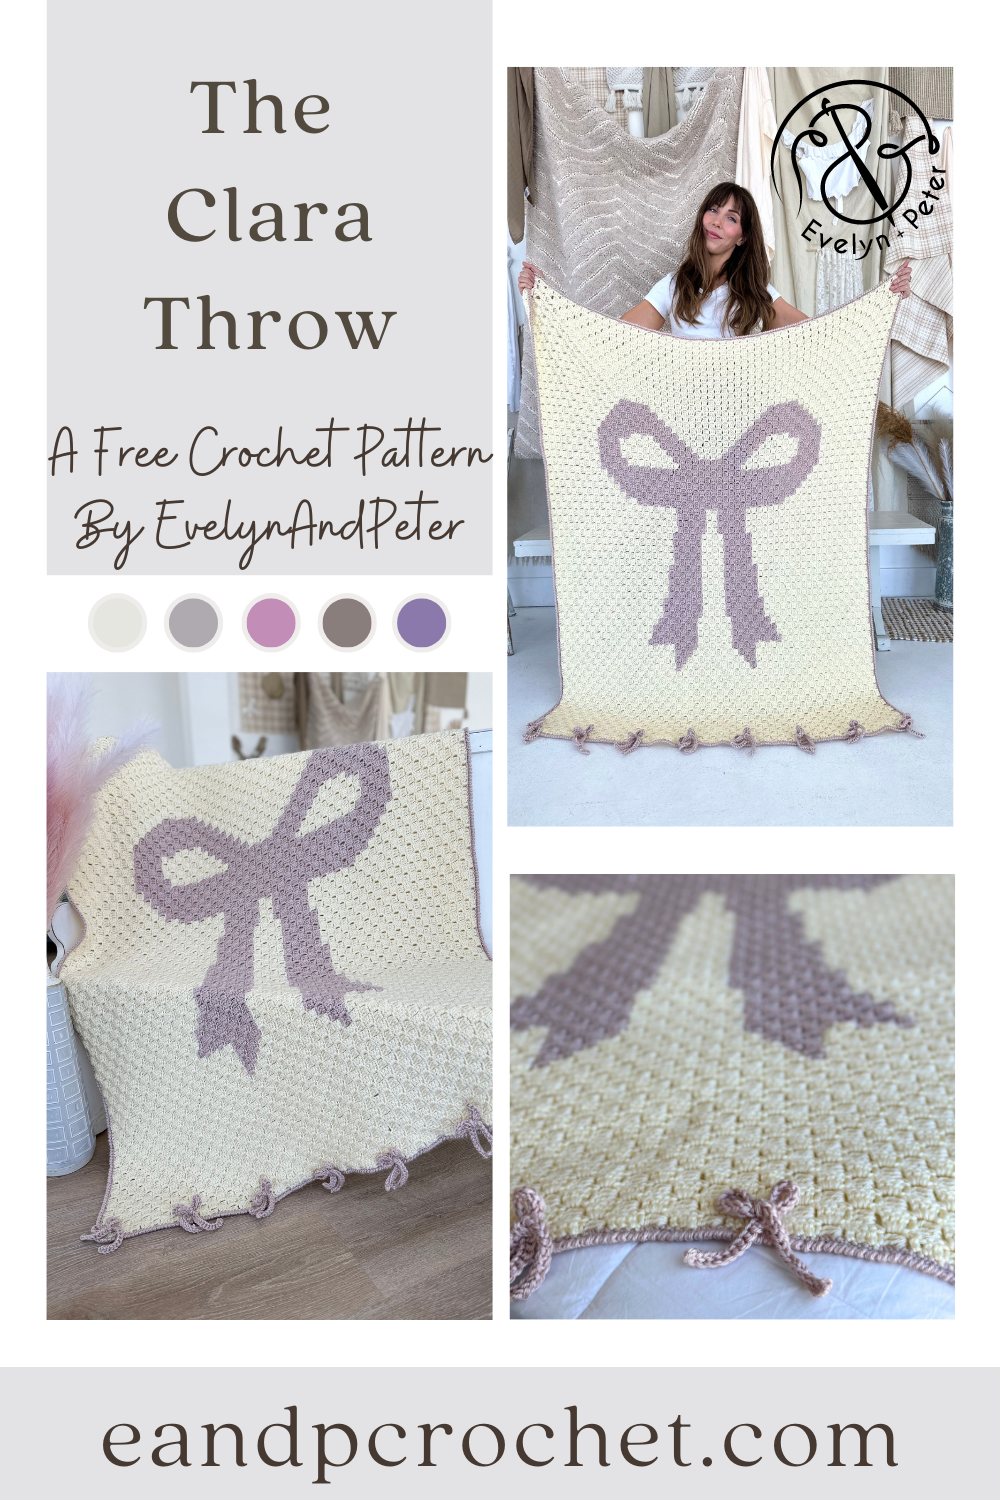
Give me all the cute little bows!! This blanket is perfect for all the girly bow fans out there! The Clara Throw crochet pattern is a C2C design and so fun to work up.
I’ve been seeing so many cute bow sweaters and beautiful bow hair clips recently and I knew I had to make a bow C2C design. The Clara Throw is worked from the bottom right corner to the top left corner. The pattern below includes both the written rows and the graph for easy stitching.
If you aren’t familiar with C2C it’s basically crocheting little squares out of Dc stitches over and over again, working diagonally! It is super addicting in my opinion and you can make so many fun things! Check out some of my past C2C designs like The Daisy Day Throw and The Mushroom Medley Throw!
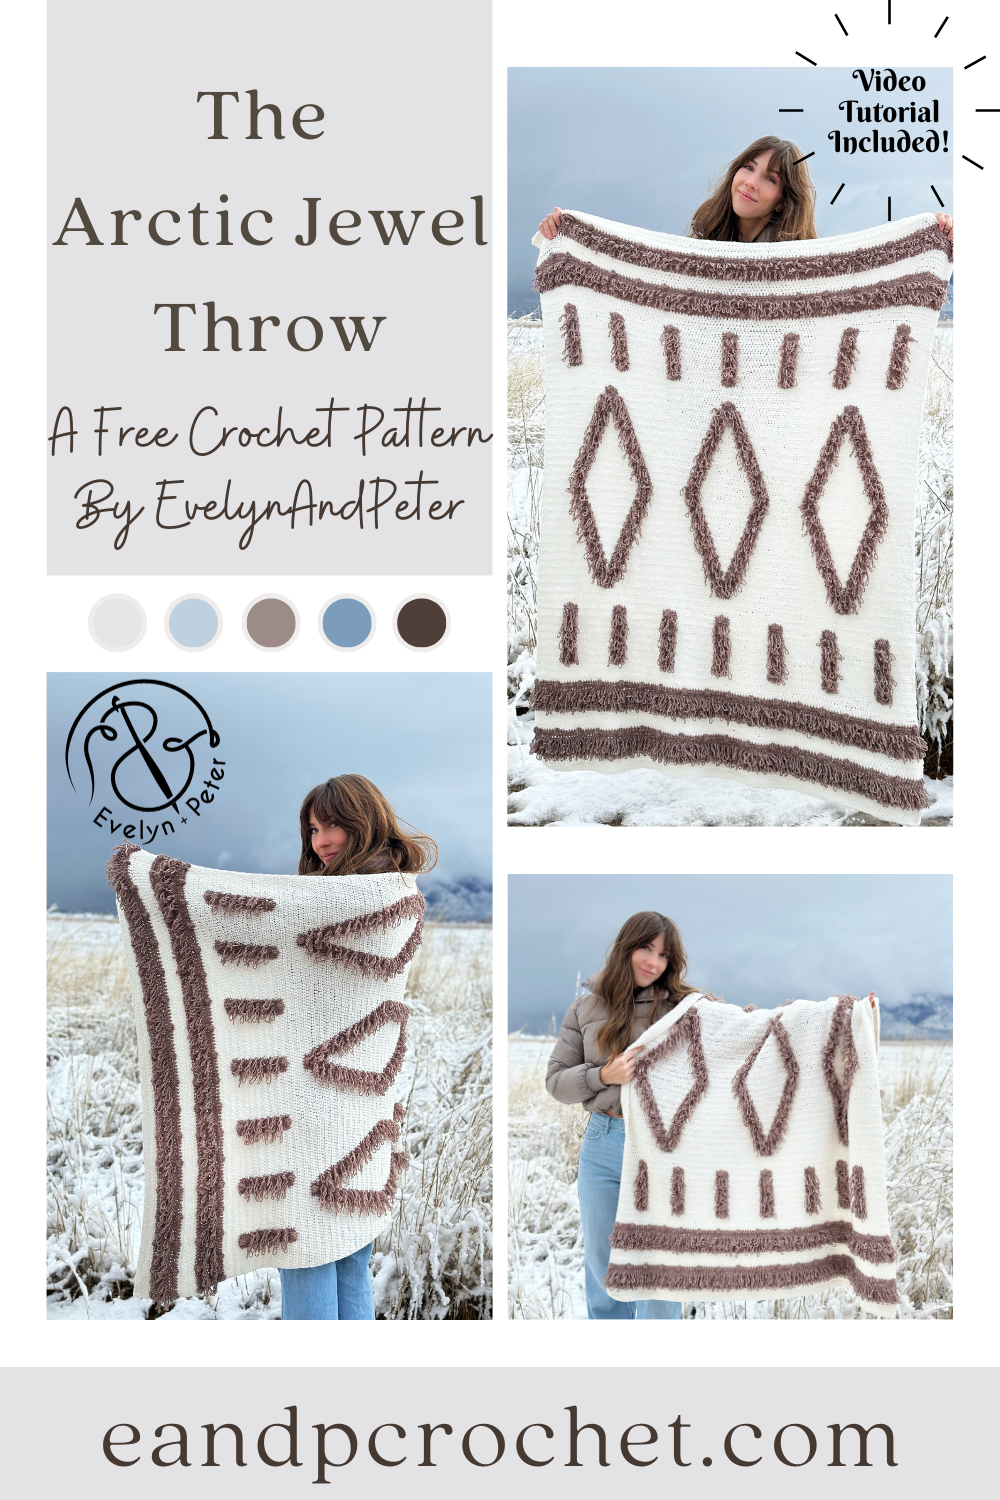
It’s finally time for my last crochet design of the year, The Arctic Jewel Throw! I’m very excited to share this blanket pattern with you guys and I hope you love it just as much as I do!
I was vacuuming my dining room rug one day and instantly got inspired for this project! My rug has different textures where the design is fluffier and sticks out more than the main portion of it. I tried different stitches to achieve a similar look and finally settled on doing a loop stitch. I knew I wanted to do this blanket in Hdc so I ended up altering your typical single crochet loop stitch into a Hdc Loop St. It worked out perfectly after some swatching and I went right into designing what I wanted the blanket to look like.
The Hdc loop St in this blanket takes a tiny bit of practice but I know you can do it! Take a look at my video tutorial where I show you exactly what you need to do! Once you have that stitch down the only other stitches you will be doing are regular Hdc and a small bobble! You do need to know how to change colors at the end of a row, as well as mid row. I show this in my video too!
The best way to make this blanket is to separate your CC (contrasting color- stucco) into multiple balls. That way, you don’t have to cut and join your yarn a million times. You don’t need to worry about doing this until you reach the vertical stripes and diamond portion of the blanket. Once you reach this area you will use 7 separate balls of the brown color. Do not cut and join these, simply work your stitches needed, then drop the color and leave it there for when you need it in the next row, then just pick back up!
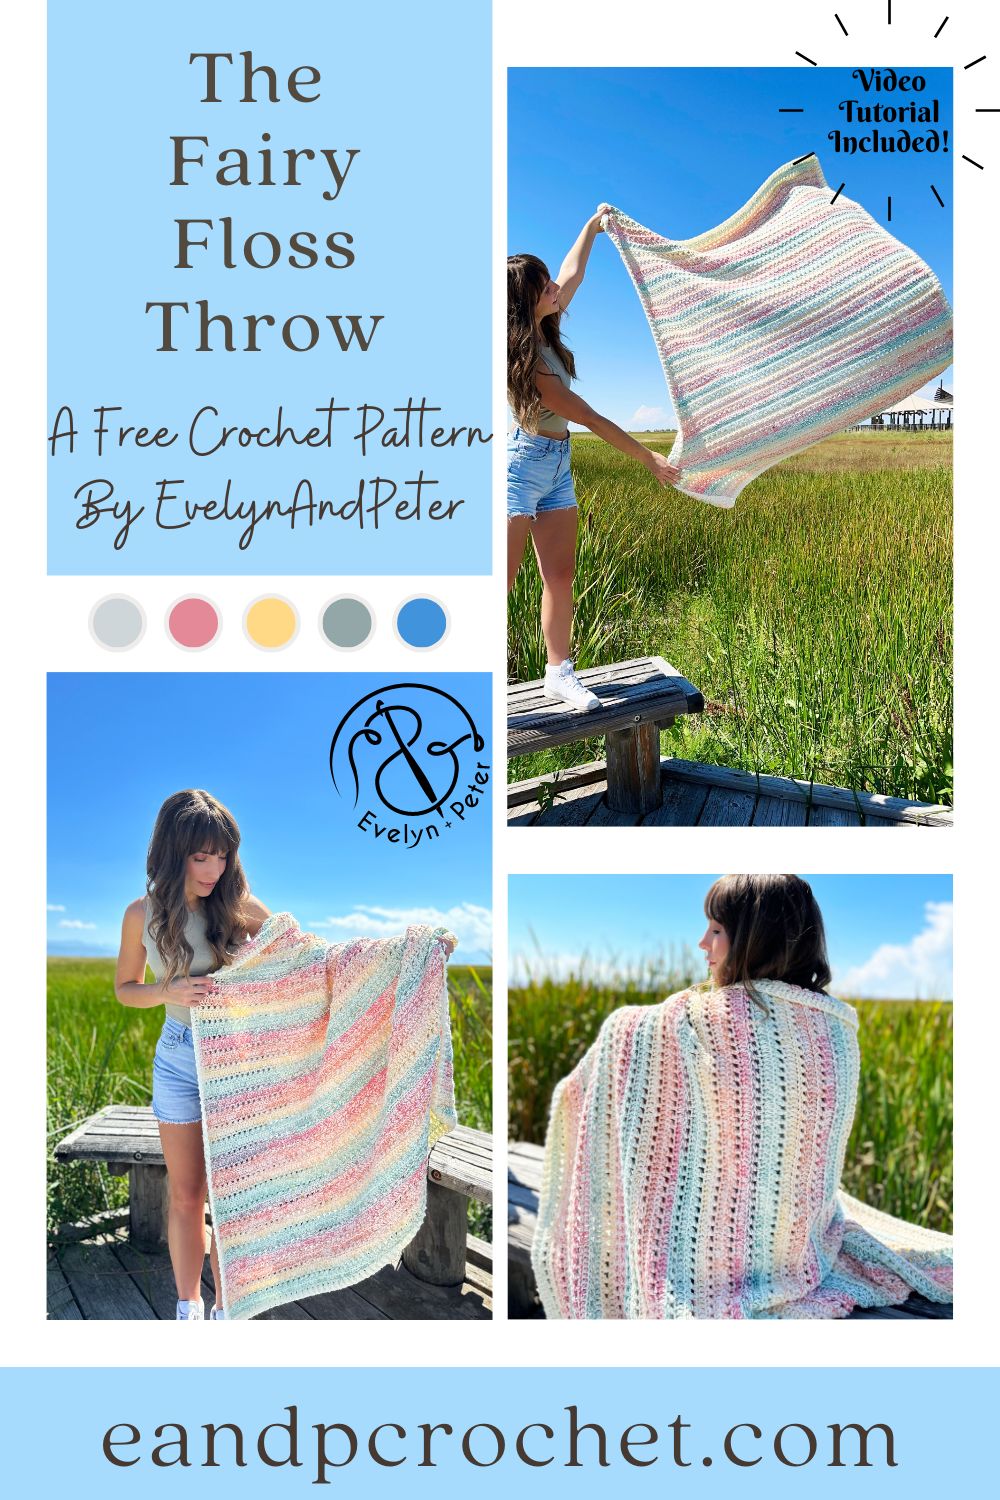
I love a good blanket project that is mindless, don’t you? There is just something about being able to curl up with it, put on whatever current binge worthy show and crochet without having to think about what i’m doing! Even better, The Fairy Floss Throw uses yarn held double. So not only does it work up quicker, it gives a beautiful but effortless look!
The Fairy Floss Throw uses two different yarns, both of them Lion Brand. First is Pound Of Love which is a worsted weight and the second one is Mandala String which is a super fine weight. The Mandala String yarn does allllll the talking in this pattern. It creates a beautiful stripe effect with zero effort on your part.
There are so many different color combinations for this blanket. I used vintage white (but you can also use Vanilla or White for the same look) and Jazz for the mandala yarn. I wanted to see what it would look like with a darker yarn and I totally love it just as much!! Check it out below! You can use Charcoal or Black to achieve this look.
If you want more of a neutral look you can swap out the Jazz color for the color Ballad. I think this would look amazing! I’m so excited to see everyones blankets! If you plan on getting yarn I recommend grabbing the kit from lion brand which comes with a free copy of the printable pattern!