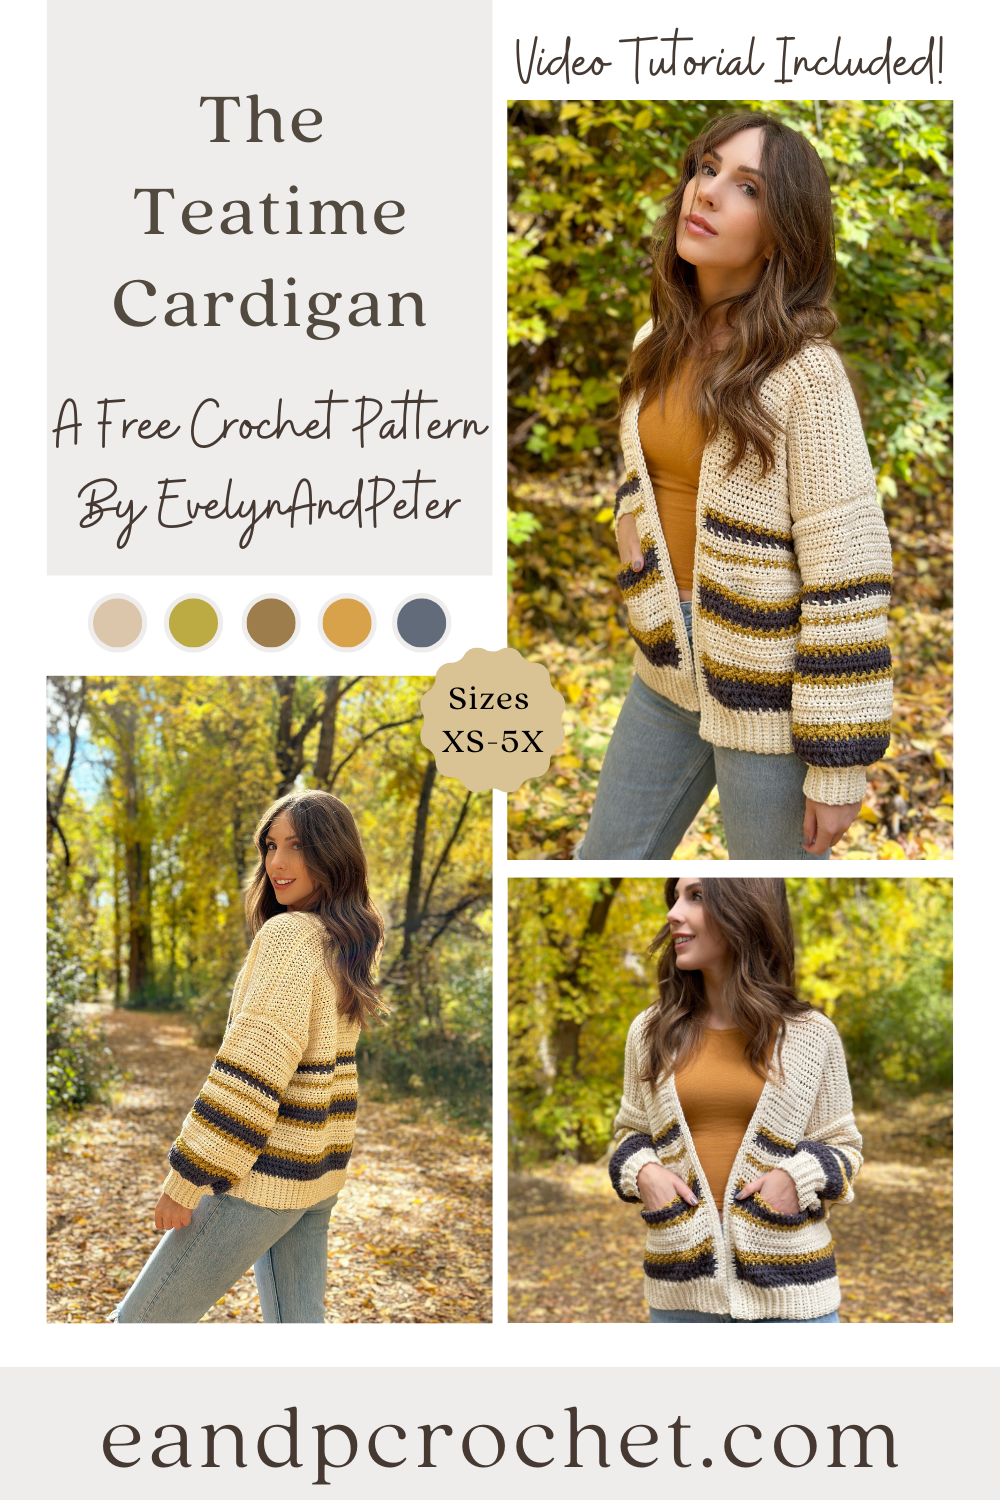
It’s Teatime! So obviously that means you need The Teatime Cardigan crochet pattern! This cardigan pattern gives all the cozy vibes. The Teatime cardigan features fun stripes using a unique blend of stitches, giving it a collegiate look. It has a slightly oversized fit with balloon style sleeves. There are so many color options to fit your style!
The construction of this cardigan is pretty beginner friendly. I do use a few different stitches for the stripes that you may have not used before but don’t be afraid! I have a full video tutorial on how to do these stitches if you need a little bit of extra help. They really are very simple to do once you get them down. The same stitch repeat is used on all of the panels.
One of the fun things about this cardigan is picking out the color combo that you want! There are so many options to do and I can’t wait to see what everyone picks! I used Color Theory yarn for my cardigan and I do have a kit available! You can customize the yarn colors if you purchase the kit. I have a couple of tips when working with stripes. When you change colors at the end of each row, you can crochet the next row directly over the tails of yarn for less ends to weave in! You can also crochet your trim directly over the tails of yarn. I like to tie my tails in a knot first before doing so.
Another great thing about The Teatime cardigan is the length is easy to adjust! You can simply add more rows to both the back and front panels if you want your cardigan longer. If you want it cropped, just remove rows. Do the same amount of rows to all 3 panels before fastening off.
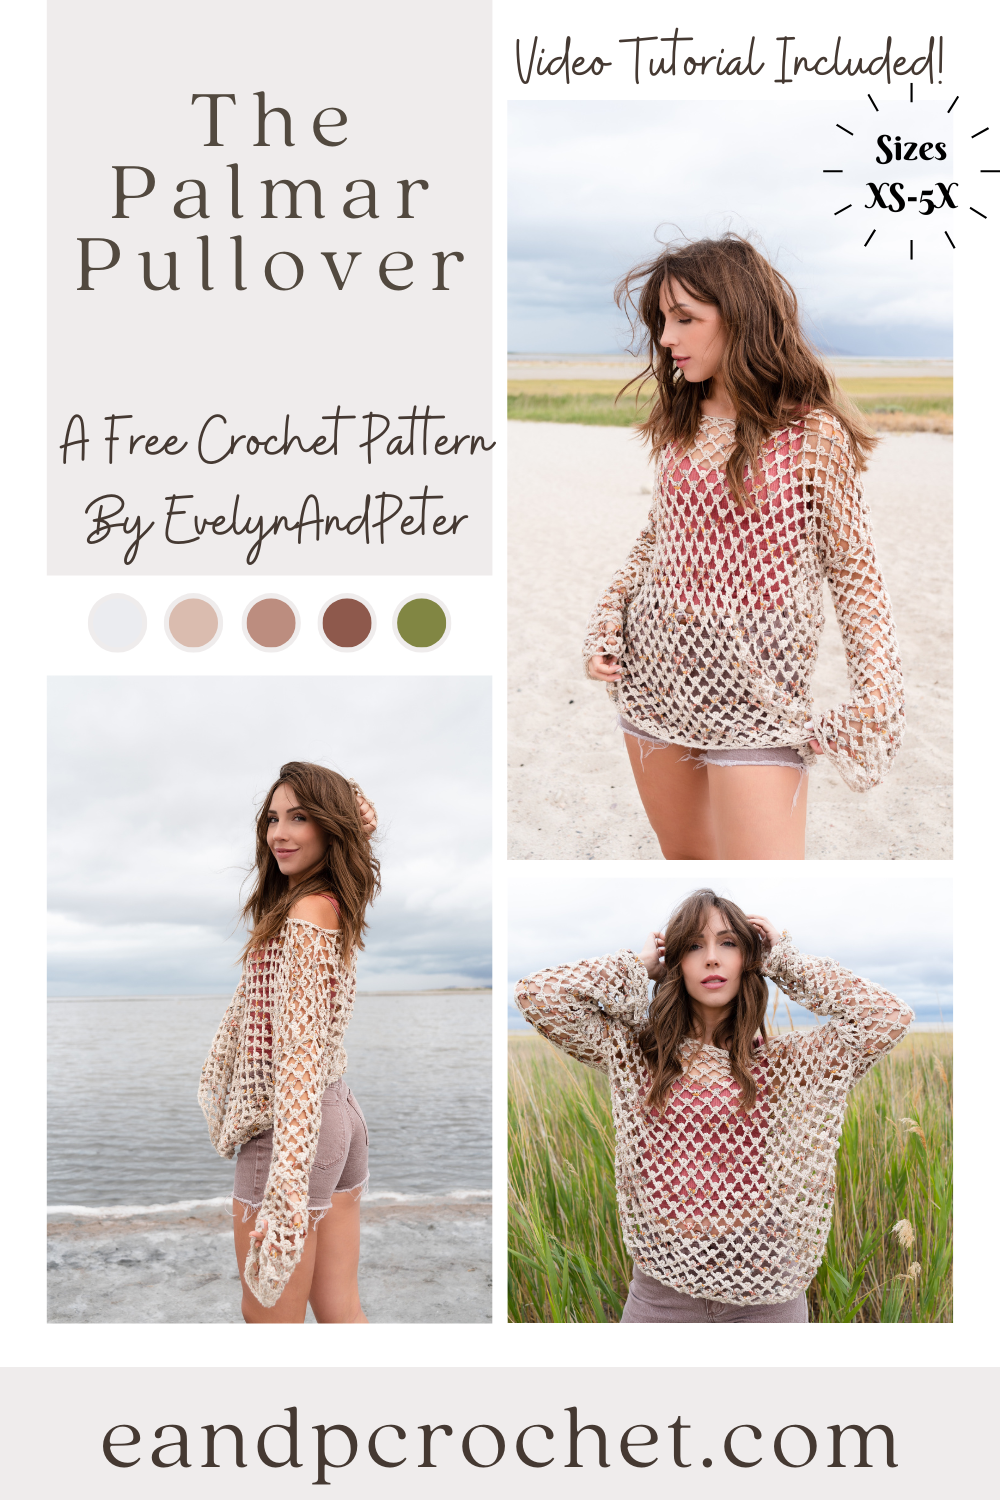
How are we already in this weird in between stage of summer and fall?! The end of summer is looming so that means my summer designs are also coming to an end. Luckily, The Palmar Pullover is perfect for this in between time!
The Picot Mesh stitch is one of my all time favorites for warmer makes! I think it’s one of yours too since The Zahora Cardigan was so loved! I used the Picot Mesh stitch for the Zahora and fell in love with the drape and comfy fit! After a few requests here and there for a pullover version I decided it was time to make one using Pima Cotton yarn! The Zahora used Lion Brand Comfy Cotton which is very similar to the Pima that I used here!
I wanted to give The Palmar Pullover a similar look to the Zahora with the speckled colors throughout a neutral base. Luckily, there is a few super cute options for the Pima yarn! I didn’t want it to be too overwhelming with color so I grabbed a neutral vintage and paired it with a colorful Seaglass! You might not even be able to see the striping, it’s so subtle! If you want to stick to solid stripes you can easily do that by picking 2 solid colors. Or, if you aren’t a fan of the stripes you can even make it in one solid color throughout! I definitely recommend grabbing the Lion Brand yarn kit so you can customize your look!
Looking for an easy tote bag pattern? Then The Lucy Tote crochet pattern is perfect for you! This tote bag is worked from the bottom up, in the round. It comes together quickly since you will be using bulky weight tape yarn!
If you haven’t used Lionbrand Rewind yarn yet, then you are in for a treat! It’s sooo soft and creates a sturdy fabric when worked up! There is no snagging because of the flat tape style and it’s super easy to frog if needed! I used under 2 skeins in the Elm color and 1 in Willow! They have several different really pretty color options though if you want to check it out!
I also wanted to point out that the straps can totally be made longer if you want! I put a little note within the pattern on where and how to do this. When designing the bag I was going back and forth with the strap length. When I asked TikTok what I should to the majority of people said to keep the straps the length I had them! But I wanted to make sure those who prefer longer straps would have that option as well!
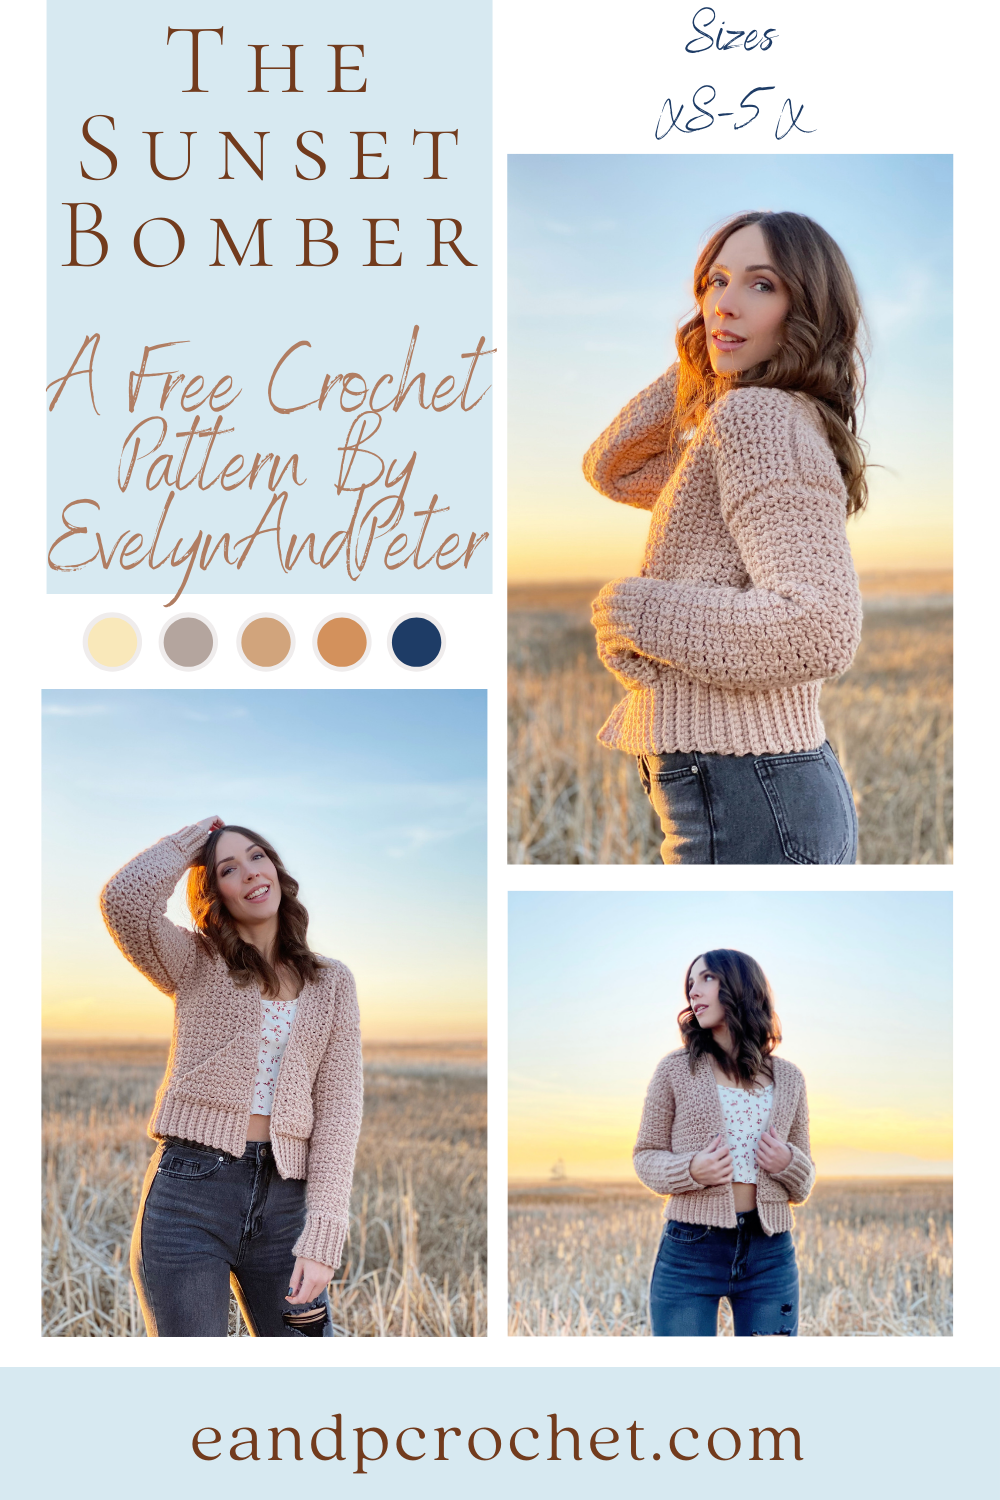
My last pattern of the year is here! The Sunset Bomber is a fun make using bulky yarn with a beautiful outcome! I love when a pattern works up quickly and this one does just that! I wanted more of a jacket look for this design and am super happy how it turned out!
The Sunset Bomber is worked in separate panels from the bottom up. Now, you will be using 2 different sized hooks for this pattern so make sure you switch when you are supposed to! The smaller hook is used in the ribbing and the larger hook is used in the main body of all the panels.
The stitch repeat in this pattern is very simple. Just single crochet, Ch 1, Sk 1! Your single crochets will be worked in the single crochet from the row below and you will always ch 1 and Sk 1 over the Ch from the row below!
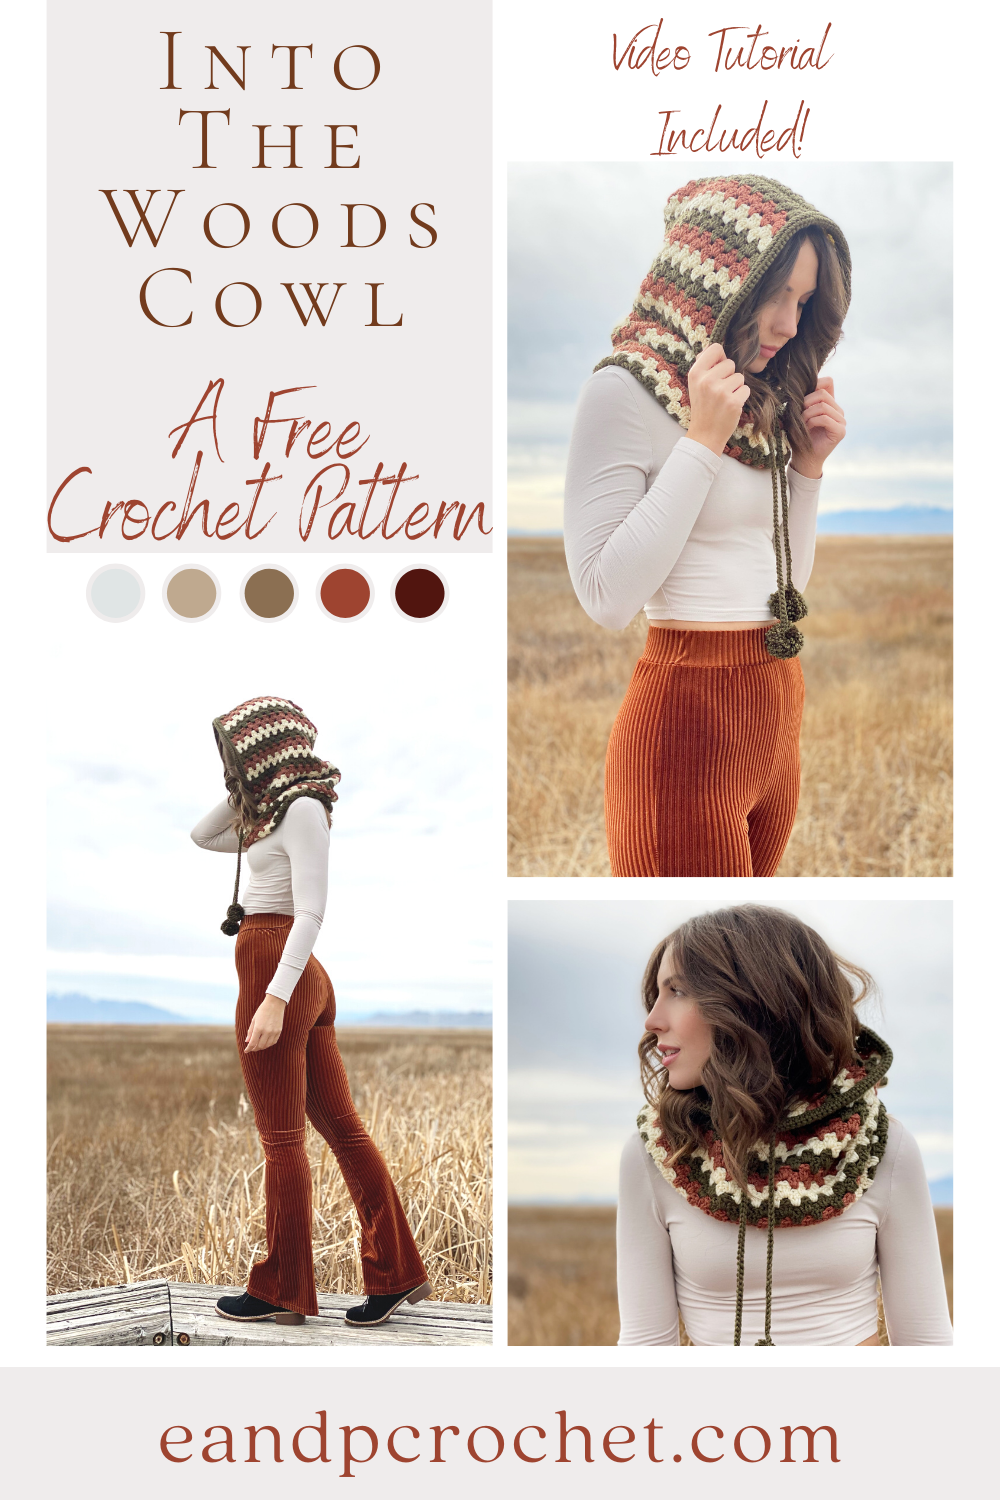
This is a new one for me and I hope you guys like it as much as I do! I’ve never made a hooded cowl before but it has definitely always been something on my “must design” list. I drew some inspo from the classic granny stitch and combined it with some retro looking colors! It’ll keep you super warm and cozy that’s for sure!
This design is worked from the bottom up! For the cowl portion you will work in turned rounds using the granny stripe stitch. Once you reach the hood portion you will work in turned rows. I recommend cutting and joining your yarn for the cowl. When you reach the hood, no need to cut your yarn. Just pick it up the side when you need to switch colors. The trim to the hood is added last. Make sure you thread your drawstring as you go to make it easier on yourself!
I used Basic Stitch Anti-Pilling yarn for my Into The Woods Cowl. They have some really nice color options too! If you purchase the Lion Brand kit you can switch out your color choices! The kit also comes with a complimentary digital download of my pattern!
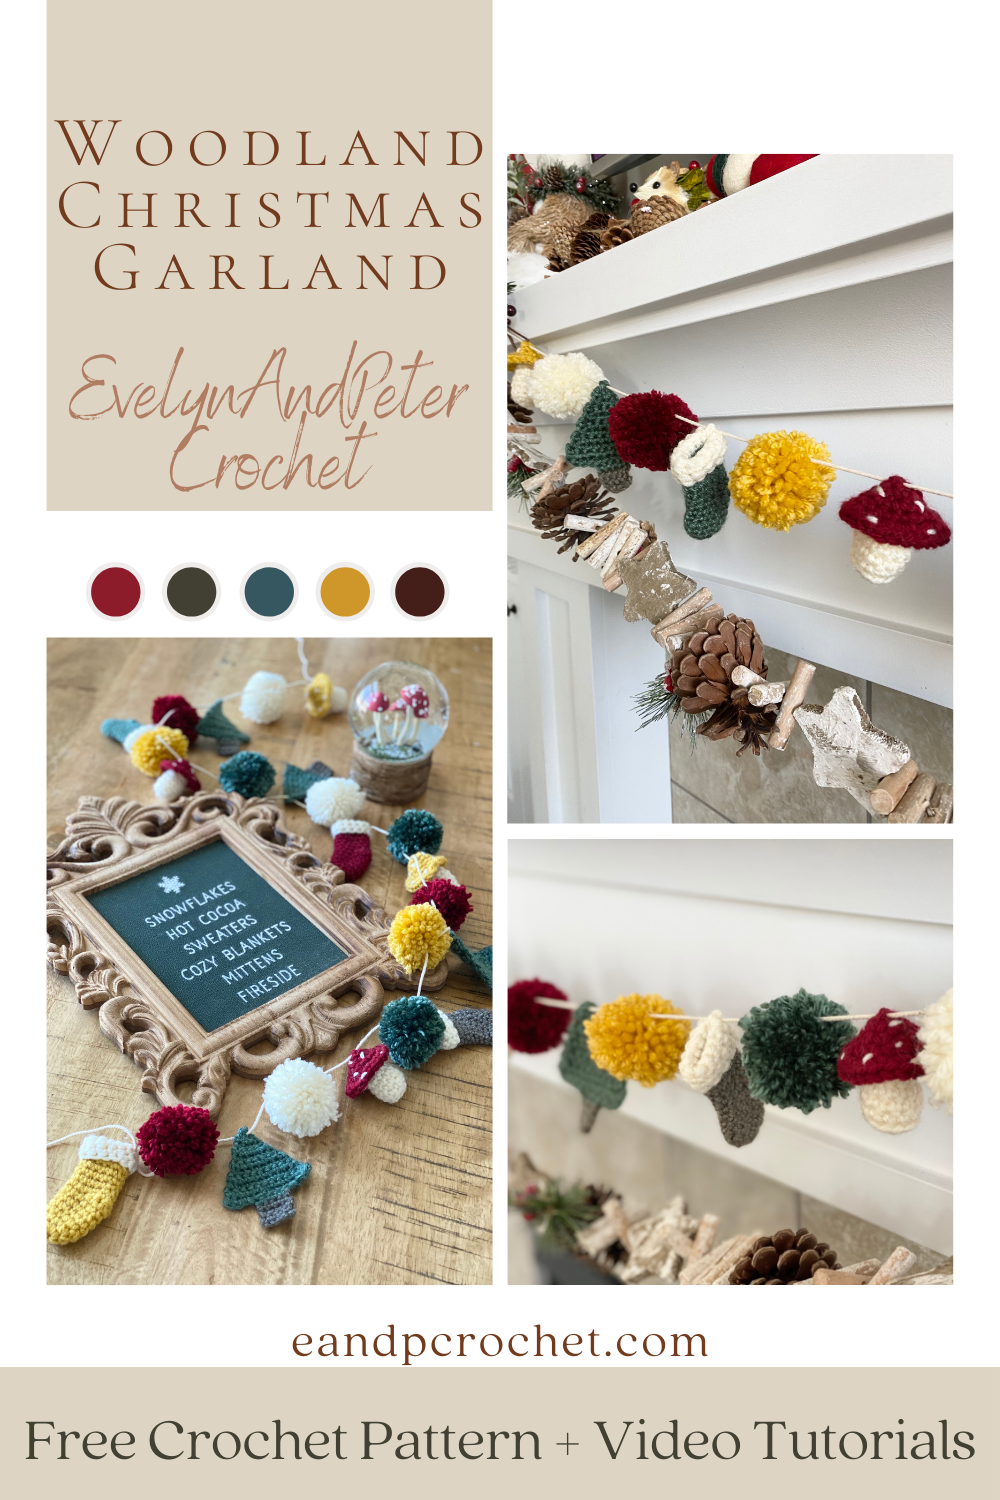
It’s the most wonderful time of year! Well…almost!! But you can never start preparing too early! I don’t know about you guys but I love having a bit of handmade Christmas in my home. I always wanted to make a garland for my fireplace so I thought The Woodland Christmas Garland would be the perfect project to share with you all!
The Woodland Christmas Garland is a combination of mushrooms, trees, stockings and pompoms! I’ve been seeing mushroom decor all over the place lately so that is kind of what inspired this theme for my garland! I added some really cute woodland animals from JOANN, a cute mushroom snowglobe, some floral picks, and a really cute sign too! Along with that I draped a second garland from JOANN on my mantle with my crochet version for a double garland look!
Making the garland is really simple. You can mix and match any worsted weight yarn colors that you like. I went with the classic red, green, cream, brown and a pop of mustard! You only need small amounts of yarn for each pattern. Be sure to check out my video tutorials linked below if you need some extra help!
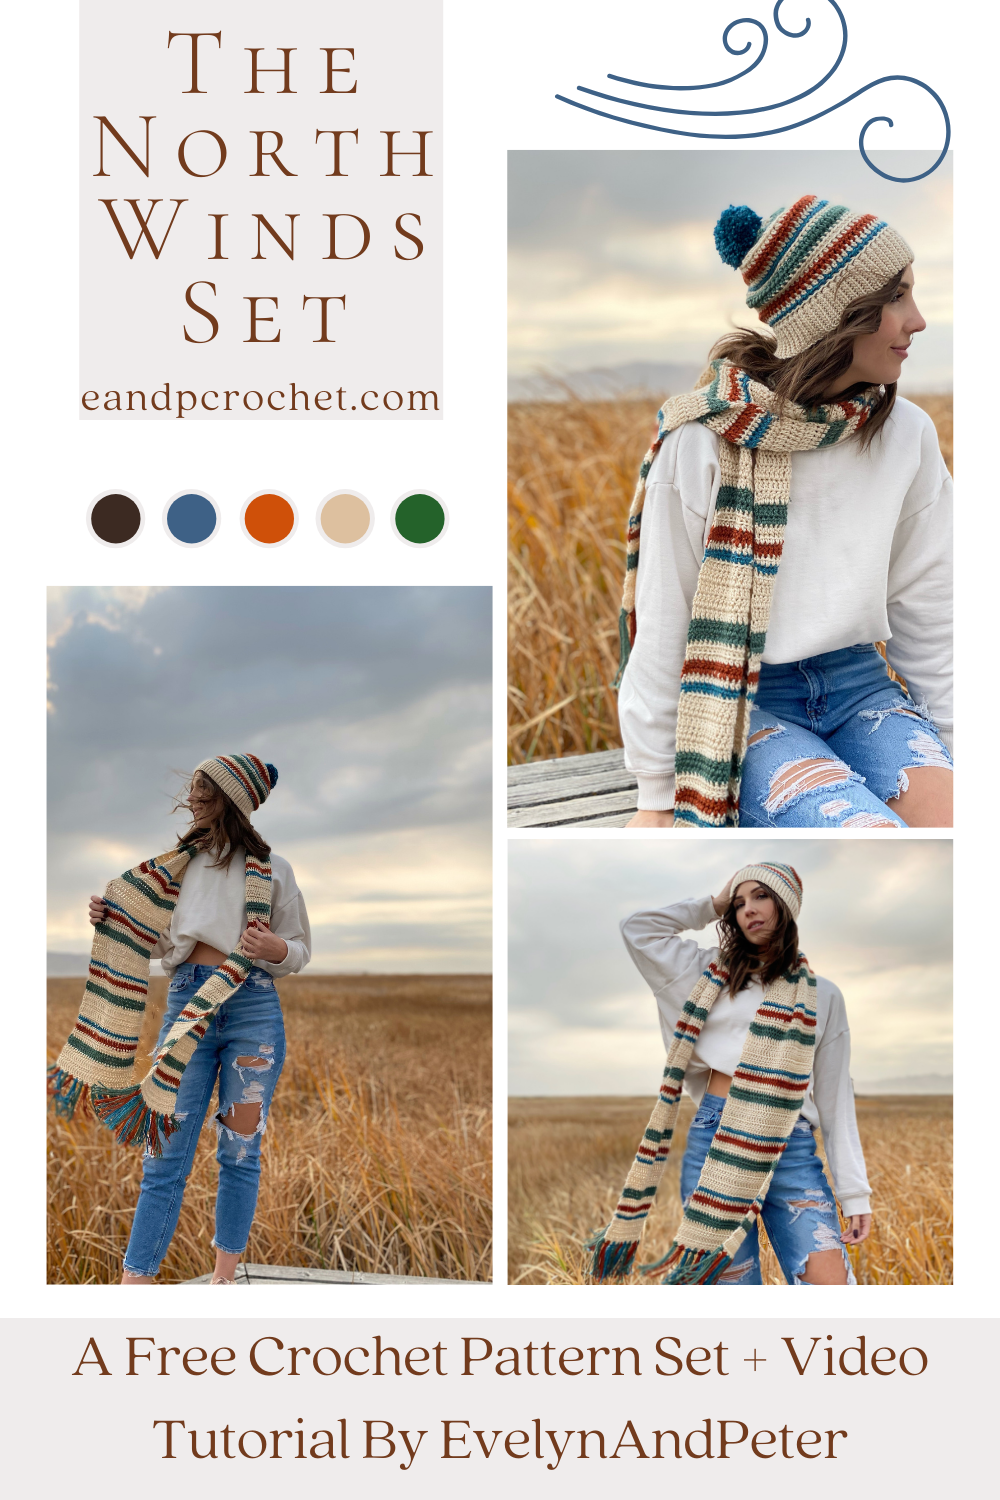
The North Winds Set is here! I’m thinking It’s going to be great for Christmas gifts this year. Beginner friendly and fast to make but also kept my interest throughout with the subtle stitch changes!
The striping on the scarf and beanie are my favorite part. And believe it or not, I had almost no ends to weave in when I was finished! Every time I had a color change for the scarf I cut the yarn, tied a knot and worked my stitches directly over the ends. This worked out amazingly and I’m so glad I did it so I had wayyy less ends to weave when I was done!
Heartland yarn is one of my favorites and It’s what I used for both patterns! The yardage listed below is enough to make at least 1 hat and 1 beanie, including a pom and fringe!
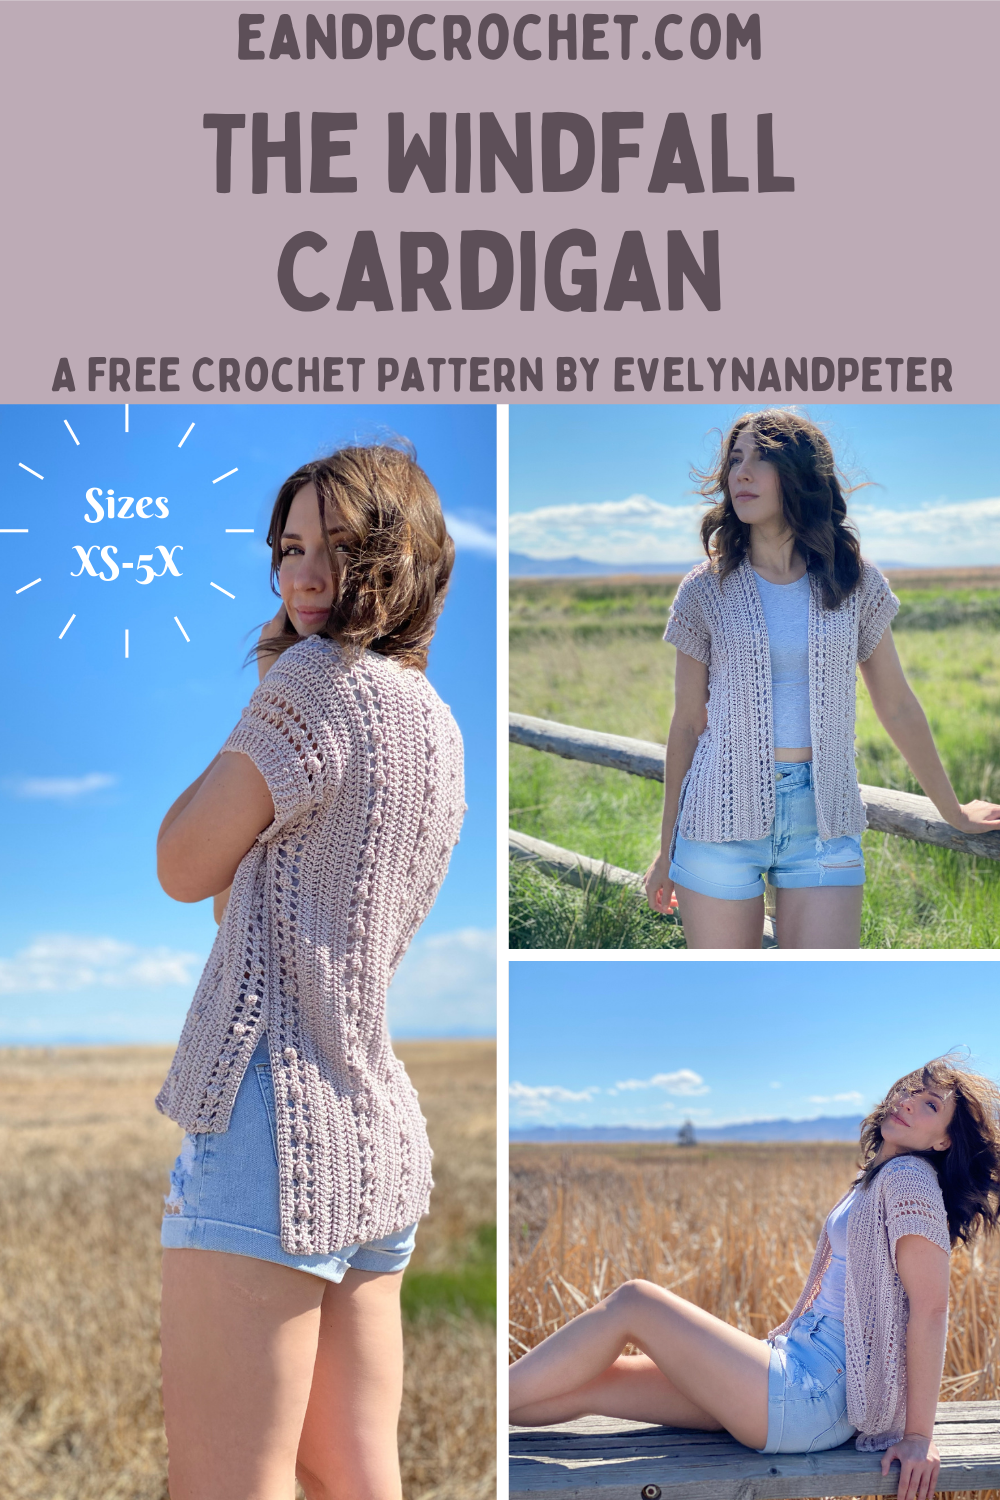
Have you ever crocheted a cardigan in one piece from side to side before? I’ve done a few different designs like this and I’m super excited to introduce The Windfall Cardigan which is made the same way! One of the great things about it is very minimal seaming. There is only one small section on both sides of the cardigan that you need to seam!
I used Lion Brand Nuboo yarn to make this cardigan but I think it would also look great in a cotton yarn! The Nuboo is very silky and smooth. It is similar to Truboo with a bit more of a bounce and a little bit thicker! Can’t find any Nuboo or want to use a different yarn? Check out Yarnsub.com and enter in “Nuboo” in the search. It will bring up a ton of different yarn substitutions for you to choose from.
I have a full video tutorial available for this cardigan. If at any point you get confused or stuck I recommend checking out the video to see if I answer your question there! If you find it helpful I would be so grateful for a thumbs up and subscribe!
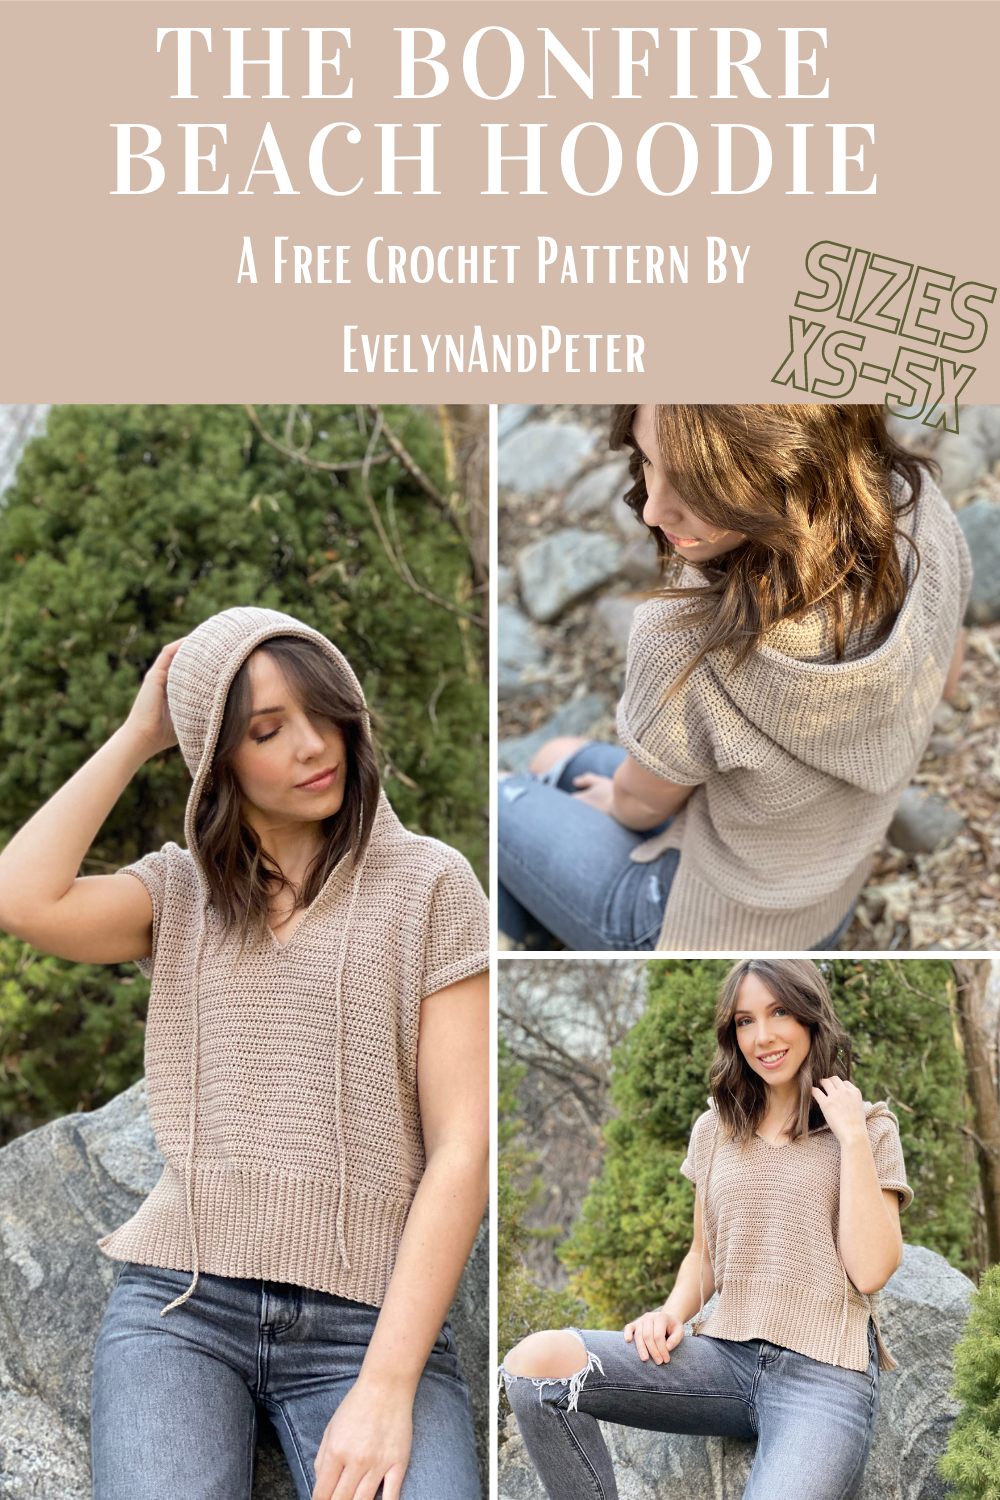
Coming at ya on the first weekend of spring… The Bonfire Beach Hoodie! You might be thinking that this design looks a little bit familiar. Well it should because it’s the sister design to The Happy At Home Hoodie!
The Bonfire Beach Hoodie is shorter and lighter in comparison to The Happy At Home Hoodie. It’s also not quite as oversized. I use the same stitches and the same basic construction for this top.
I left side slits on my Bonfire Beach Hoodie but you can easily sew those up when making your top if you would rather not have them!
Description: The Bonfire Beach Hoodie is perfect to throw on during a warm summer day. It uses Hdc throughout for an easy make. The slightly oversized boxy fit makes it extra comfy to wear all day.
So, I don’t know about you guys but I plan on staying home as much as possible this year and doing all my shopping online! I would much rather be cozied up under a squishy blanket instead of fighting the crowds to get my shopping done haha! I made the perfect blanket to do just that- The Fitzwilliam Throw Blanket!
The Fitzwilliam Throw Blanket is made with Lion Brand Cover Story yarn and Lion Brand Go For Faux Thick and Quick yarn! Both of these were the perfect combo to whip this up in record time. I think I worked on it on and off for only a few nights!
You can find all the yarn you need at JOANN stores! They had a ton of Go For Faux Thick & Quick colors to choose from. I was so excited when I came across the color “Zebra” because it reminded me of my dog- Fitzwilliam! If you’re not a fan of animal prints they also have a bunch of solid colors too.