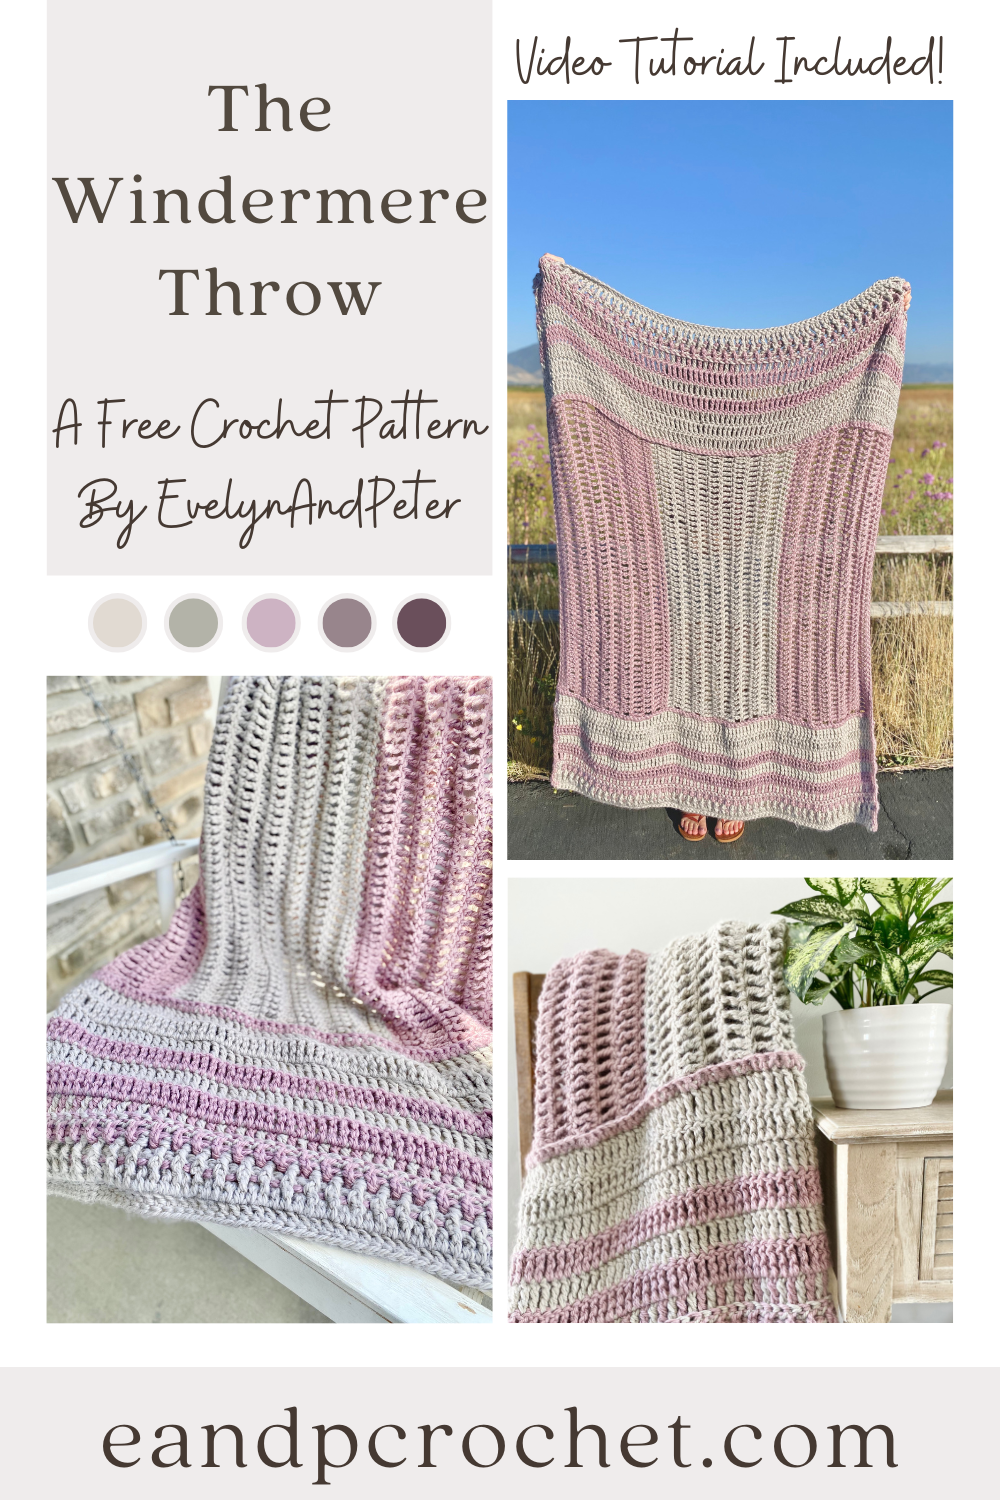
At least once a year I try and design a throw blanket that uses a Super Bulky yarn and works up quickly. There is just something so satisfying about crocheting a big comfy blanket in a week! The Windermere Throw crochet pattern is the perfect pattern for that!
I used Lion Brand Re-Spun Thick & Quick in the colors Pumice and Wisteria. You only need 3 skeins of each color to make this big blanket! This yarn is part of the sustainable stitching line at Lion Brand. Its 100% recycled polyester and is made from recycled plastic, keeping bottles and other waste out of our oceans and landfills! It’s super soft and easy to work with and you are doing good for our planet when you use it!
There are so many different cute color combos you can use in this pattern. I think a black and white, or a cream and blue would look so pretty! Be sure to check out the different colors of the Re-Spun yarn if you are purchasing the kit! If you grab the kit, you get a free digital copy of the printable pattern! Lion Brand frequently has sales so you can get the kit at a discounted price! Be sure you are following me on Instagram and subscribe to my email list where I tell you about these sales!
The construction of this blanket is slightly different than your usual row by row blanket. I know big projects can sometimes be mundane so I wanted to keep it interesting! You will be making 2 end panels and 1 main panel! This breaks the project up into easily attainable goals. Once you make all 3 panels, you join them together with a row of Sc stitches! It’s super easy! I also used mostly treble crochet stitches in this project so your throw will grow quickly! Don’t be scared of the color work. Its very minimal and easy to do.
If you like this crochet blanket pattern, be sure to check out some of my other ones too!
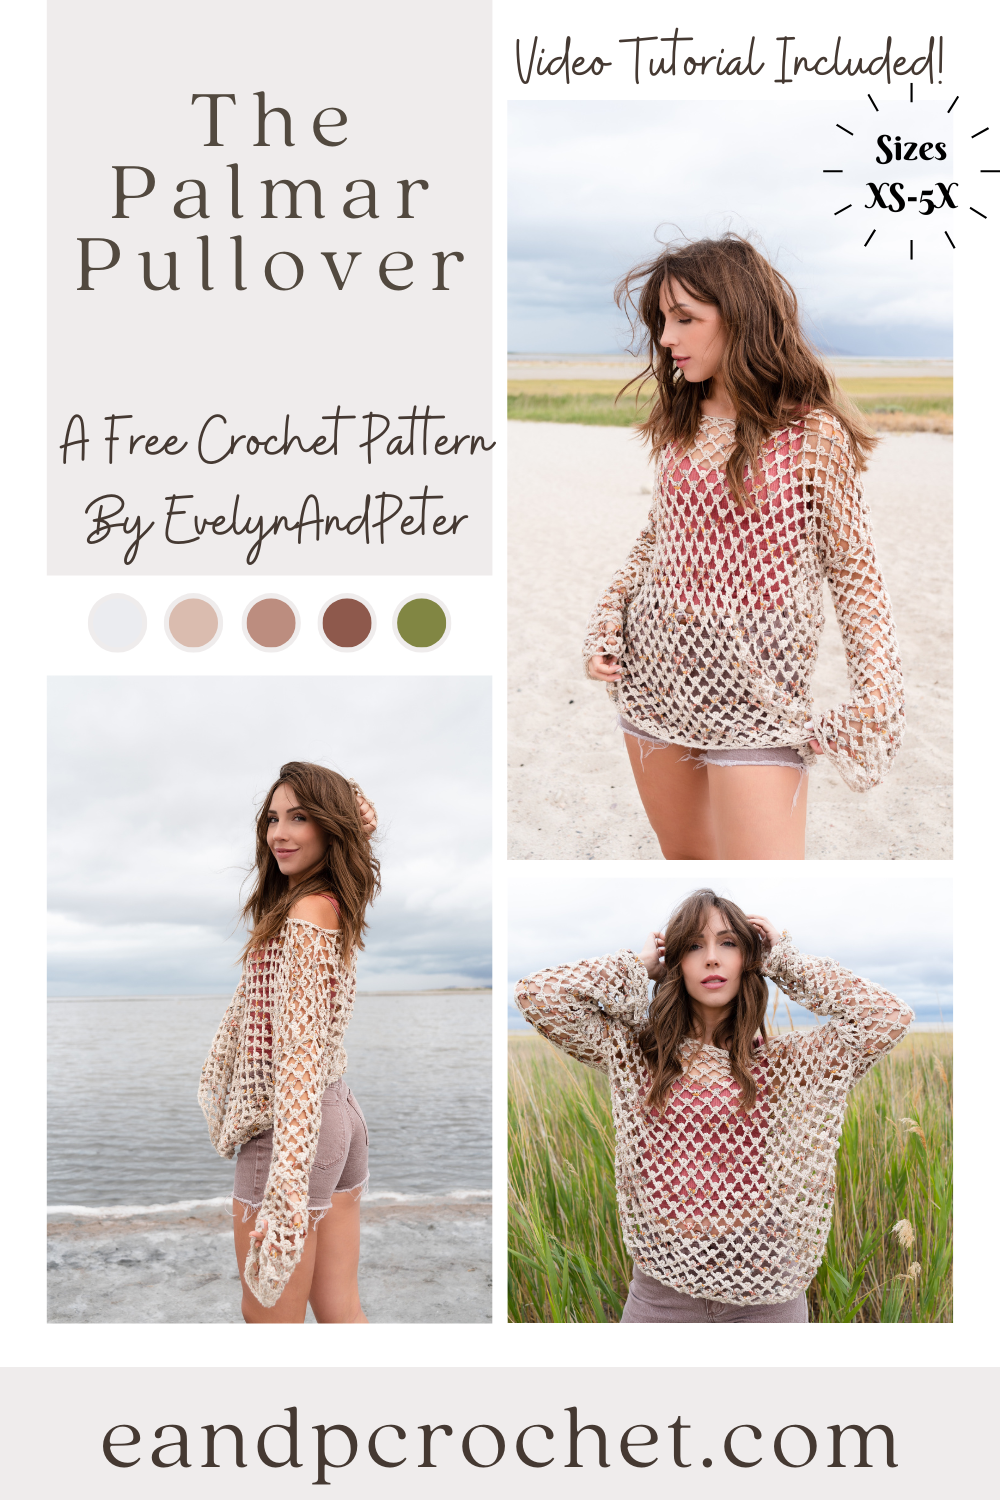
How are we already in this weird in between stage of summer and fall?! The end of summer is looming so that means my summer designs are also coming to an end. Luckily, The Palmar Pullover is perfect for this in between time!
The Picot Mesh stitch is one of my all time favorites for warmer makes! I think it’s one of yours too since The Zahora Cardigan was so loved! I used the Picot Mesh stitch for the Zahora and fell in love with the drape and comfy fit! After a few requests here and there for a pullover version I decided it was time to make one using Pima Cotton yarn! The Zahora used Lion Brand Comfy Cotton which is very similar to the Pima that I used here!
I wanted to give The Palmar Pullover a similar look to the Zahora with the speckled colors throughout a neutral base. Luckily, there is a few super cute options for the Pima yarn! I didn’t want it to be too overwhelming with color so I grabbed a neutral vintage and paired it with a colorful Seaglass! You might not even be able to see the striping, it’s so subtle! If you want to stick to solid stripes you can easily do that by picking 2 solid colors. Or, if you aren’t a fan of the stripes you can even make it in one solid color throughout! I definitely recommend grabbing the Lion Brand yarn kit so you can customize your look!
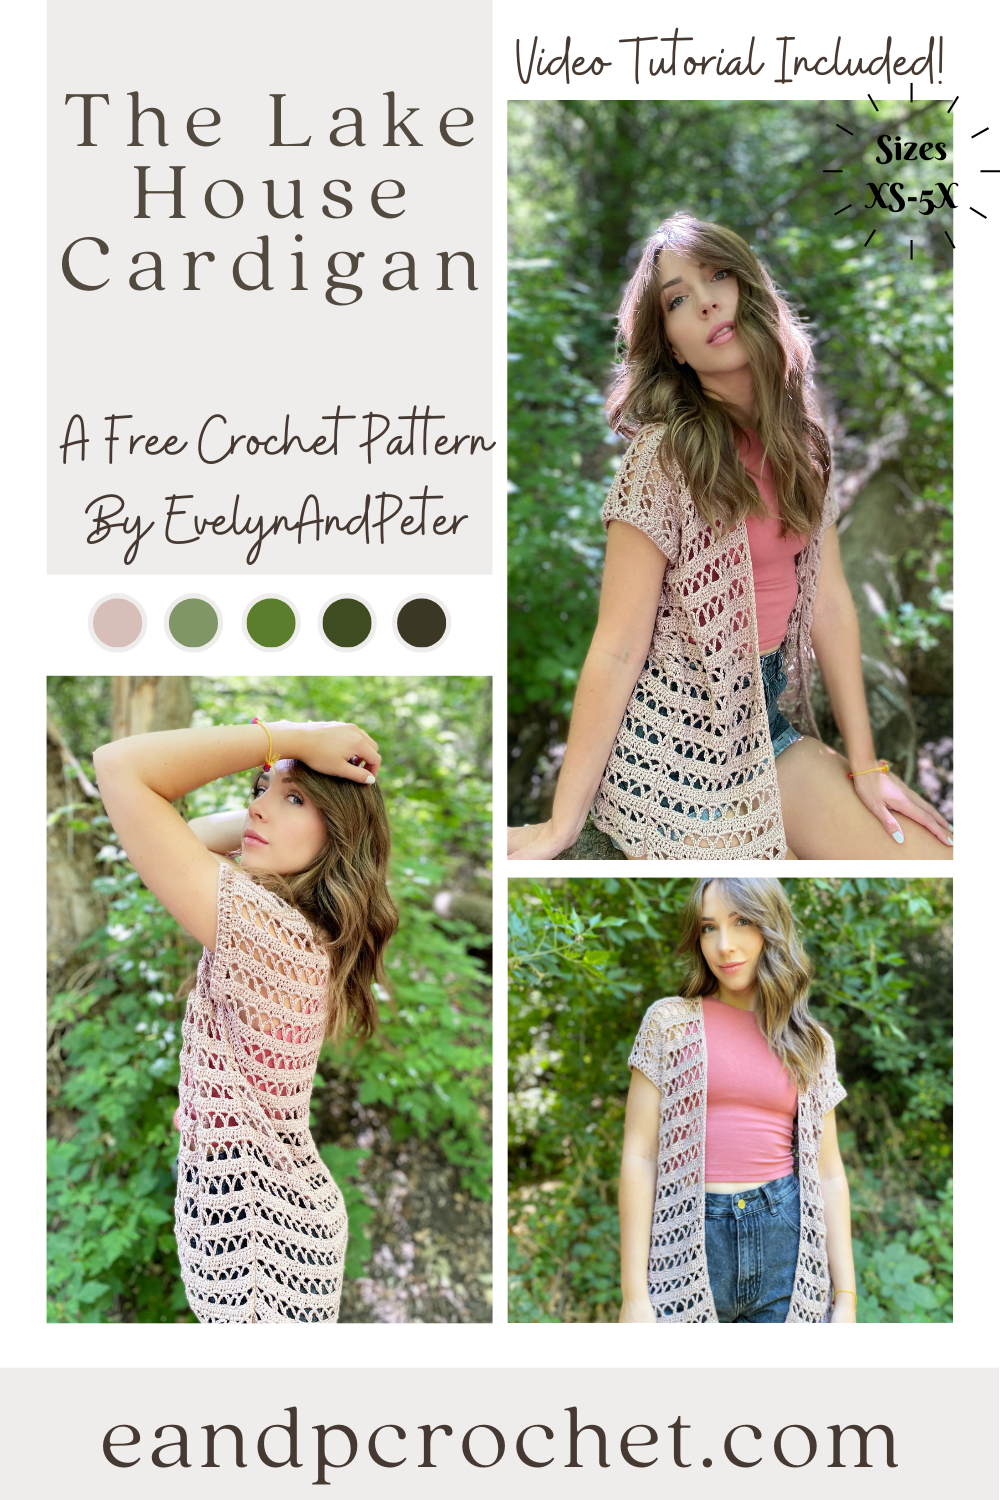
Total lake house vibes with my new cardigan crochet pattern! When I heard that name suggestion it was definitely a no brainer. The Lake House Cardigan is the perfect layering piece in the summer. Or really anytime of the year! It has a long flowy fit with an open lace stitch repeat. Plus, the Truboo yarn makes it extra silky. I can totally picture myself wandering around a summer house on the lake, sipping a glass of wine and crocheting by the water. Can’t you?
The construction of The Lake House Cardigan is very simple. 3 long rectangles, worked as long or as short as you want them! It’s super easy to adjust the length of this cardigan to your liking. After that, we just seam the shoulders together, then seam the sides together leaving a hole for our arms! Then the sleeves and the trim are added last.
Of course if you are a beginner or need a little extra help, I have a full video tutorial available for you! I go over step by step how to make your cardigan. I’m making a size small in the video so be sure to follow along with the written pattern, especially if your making a different size!
If you are using Truboo yarn like me, then you’ll notice it does stretch a bit with the weight of the cardigan as you go. The gauge listed below is a blocked gauge. So when you make your gauge swatch you’ll want to be just slightly under gauge. When you block your swatch it stretches to meet the correct gauge listed. I pinned mine and did a steam block. If you want to make your gauge unblocked it will be closer to 19 Dc by 11 rows for 4×4″
I hope you guys enjoy working up this cardigan! It was so fun to make and I love the finished piece! I have lots of other cardigan patterns available so be sure to check them out!
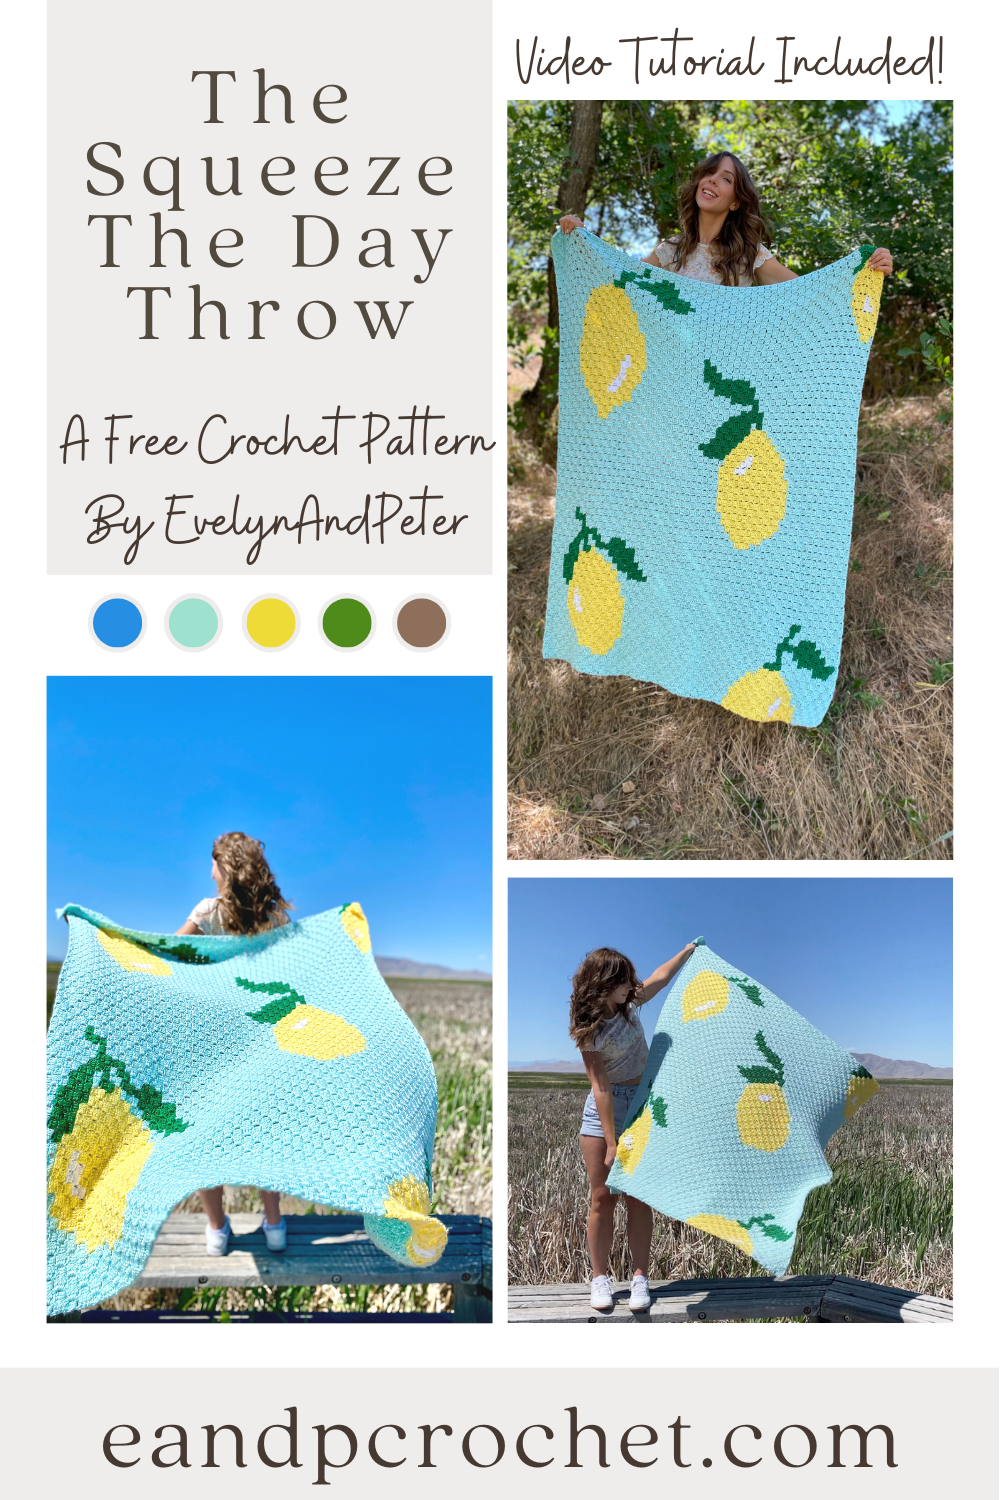
You guys already know I have a slight addiction to making fun C2C crochet patterns. Well, here’s another one for ya… The Squeeze The Day Throw crochet pattern! What’s better than bright happy lemons on a beautiful frosty background? I just love how it turned out so much! It totally reminds me of warm summer days in the middle of July. Perfect timing, right?!
This one has a similar style to The Daisy Day Throw. That one was a HUGE hit. My top performing pattern of the last few months, that’s for sure! You guys loved it so much and I hope you love this one too! Once again, I used Lion Brand Basic Stitch Anti-Pilling yarn to make it. And I can attest to the fact that it really is anti-pilling! My blanket was stuck in some prickers that I had to carefully pull off and then had to wash some dirt off. It definitely is anti-pilling to say the least!
This blanket is Corner 2 Corner (C2C) style. If you’ve never heard of that, it’s exactly what it sounds like! You work from the bottom right corner to the top left corner to create this blanket! Each block on the graph below is made up of a square. Each Sq is a Ch 3 and 3 Dc. I have the full written pattern down below as well as the graph. I always recommend cross referencing the graph if you think you made a mistake. The graph is EXACTLY how your blanket should look. If you think you have 1 too many yellow squares in a row, look at the graph, then look at your blanket! Do they match? If not you can go back and pull out your mistake!
If you need a little extra help with this blanket or your new to C2C I recommend checking out my video tutorial to get going! Once you learn the basics of the squares it’s easy breezy from there on out. If you need some extra help learning how to organize your yarn or keep it from tangling there are a ton of helpful videos and blog posts out there!
I hope you guys enjoy this pattern and I can’t wait to see all of your Squeeze The Day Throws!
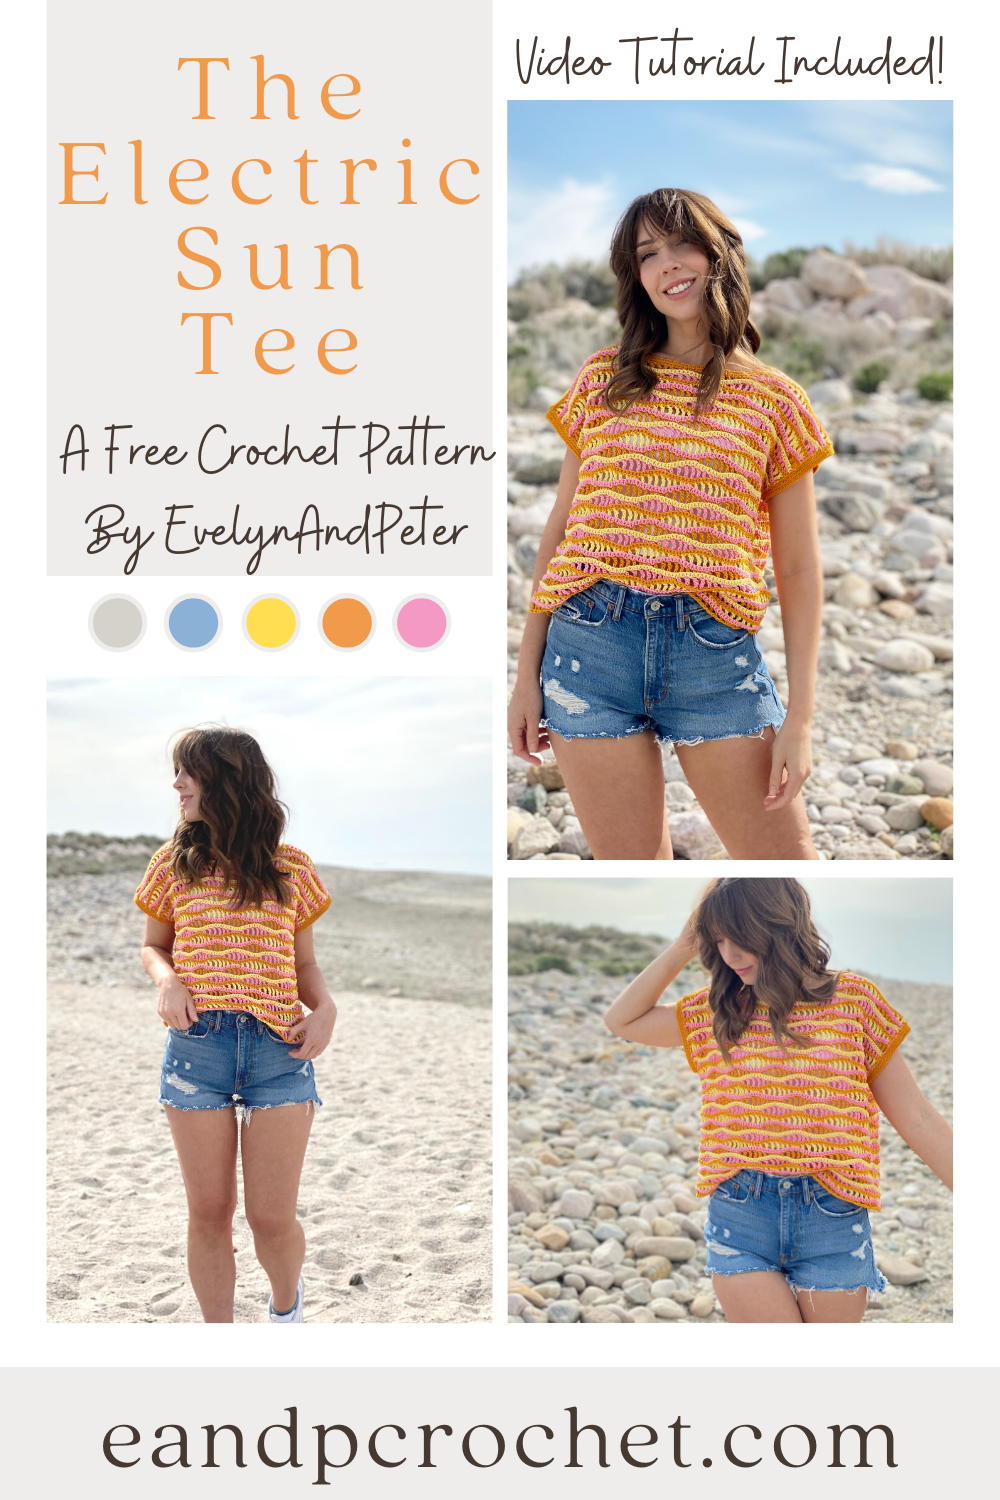
Stepping out of my color comfort zone with The Electric Sun Tee Crochet Pattern! This oversized top was so fun to make! I used 3 different colors for mine and switched them out with each row. The stitches create a really cool wave effect!
This top is written with plenty of positive ease for a very oversized look! Because of the oversized fit, each of the 3 sized can fit a wide range of body shapes and sizes! You can also make your top longer if you want by adding as many row repeats as you want before you start the shaping of the neckline. Be sure to add the same amount on both panels!
Make sure you do not cut your yarn when you change colors. If you do, you will have a ton of ends to weave in! I kept my yarn attached with each color change. Then, when I come back to that color I simply picked it back up and switched colors. This leaves small floats along the outer edge of your panel. When we sew the front and back panel together, we will sew over the floats and they will be hidden within the seam on the inside of the shirt! And TaDa! You just save yourself a ton of work!
The first few rows might be a little tricky to remember the stitch repeat. If you need some extra help, be sure to check out my video tutorial! If you have a question, it is most likely covered in the video!
If you like this top, then be sure to check out some of my other ones!
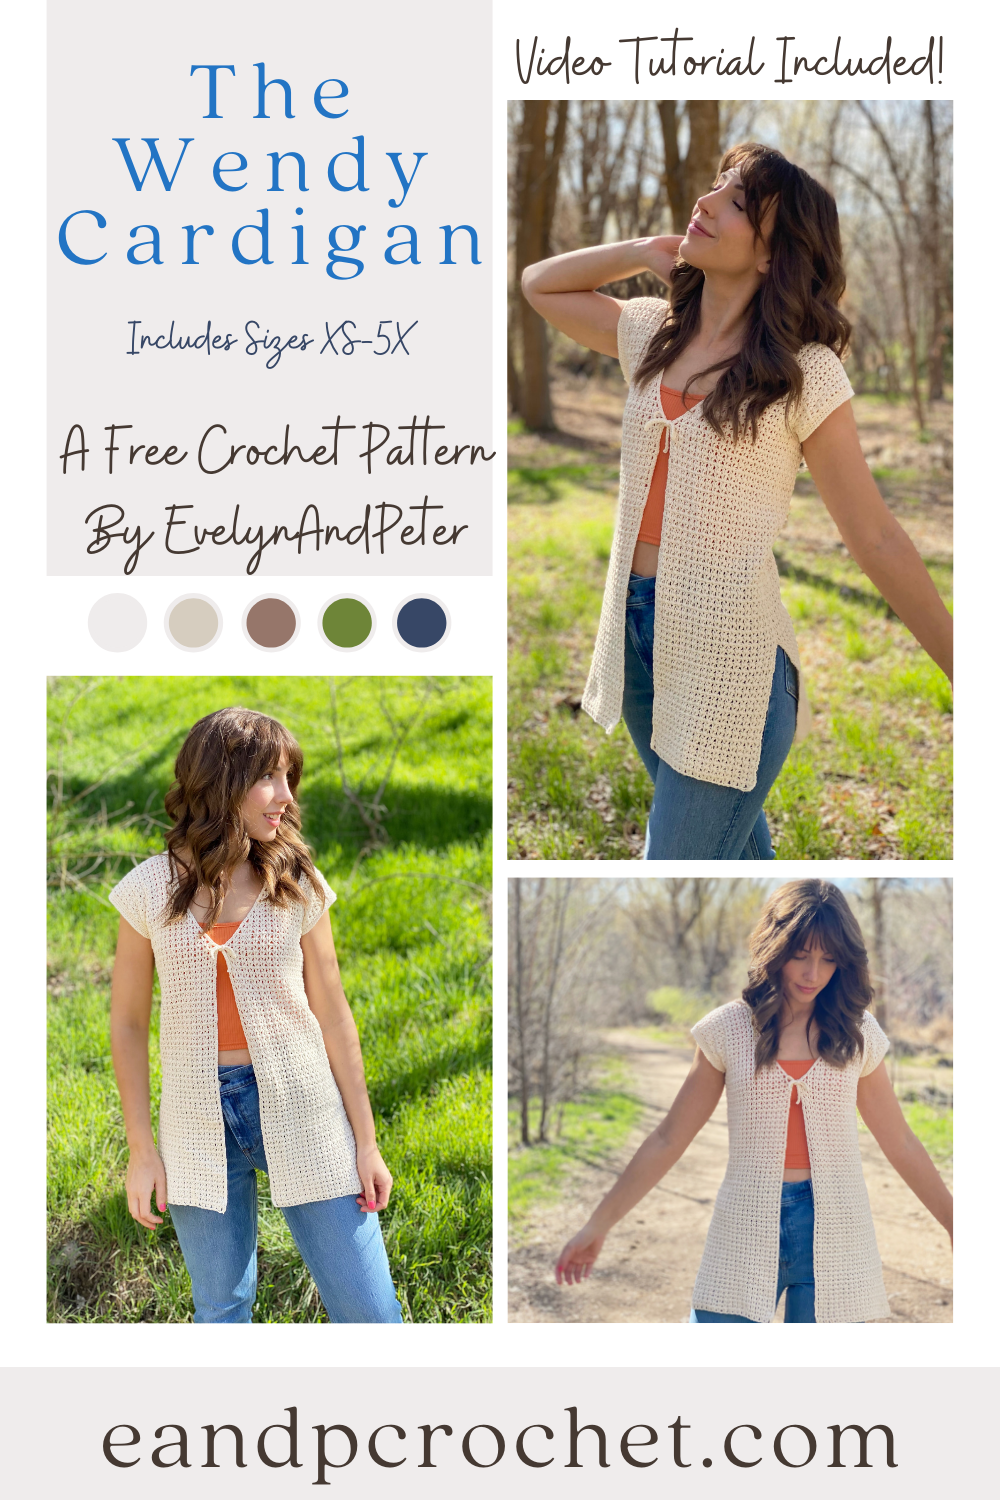
I love the soft romantic vibes that The Wendy Cardigan gives. Somebody suggested the name Wendy for it on my name contest because it reminded them of Peter Pan and I totally see it. 🙂 It’s light weight and made of soft cotton which makes it perfect for warm weather. I’m excited to pair mine over sundresses this summer!
The Wendy Cardigan is worked from the bottom up in 3 separate panels. You can easily adjust the length of your cardigan by adding or taking away rows before you begin to decrease on the front panels. Make sure you adjust the same amount of rows on the back panel as well. I think this cardigan would look SO cute cropped. If you make a cropped version I would love to see it!
The stitch used in this cardigan is very similar to the classic V stitch but it does not have the Ch 1 in between the 2 Dc stitches. This is a great pattern to make and not have to use much brain power on the stitches! It’s just Dc stitches across the row, working them in between the 2 Dc from the previous row!
If you are a beginner and need a little bit of extra help, then be sure to check out my full video tutorial! I’ll walk you through step by step on The Wendy Cardigan crochet pattern!
If you like this pattern be sure to check out some of my other cardigans too!
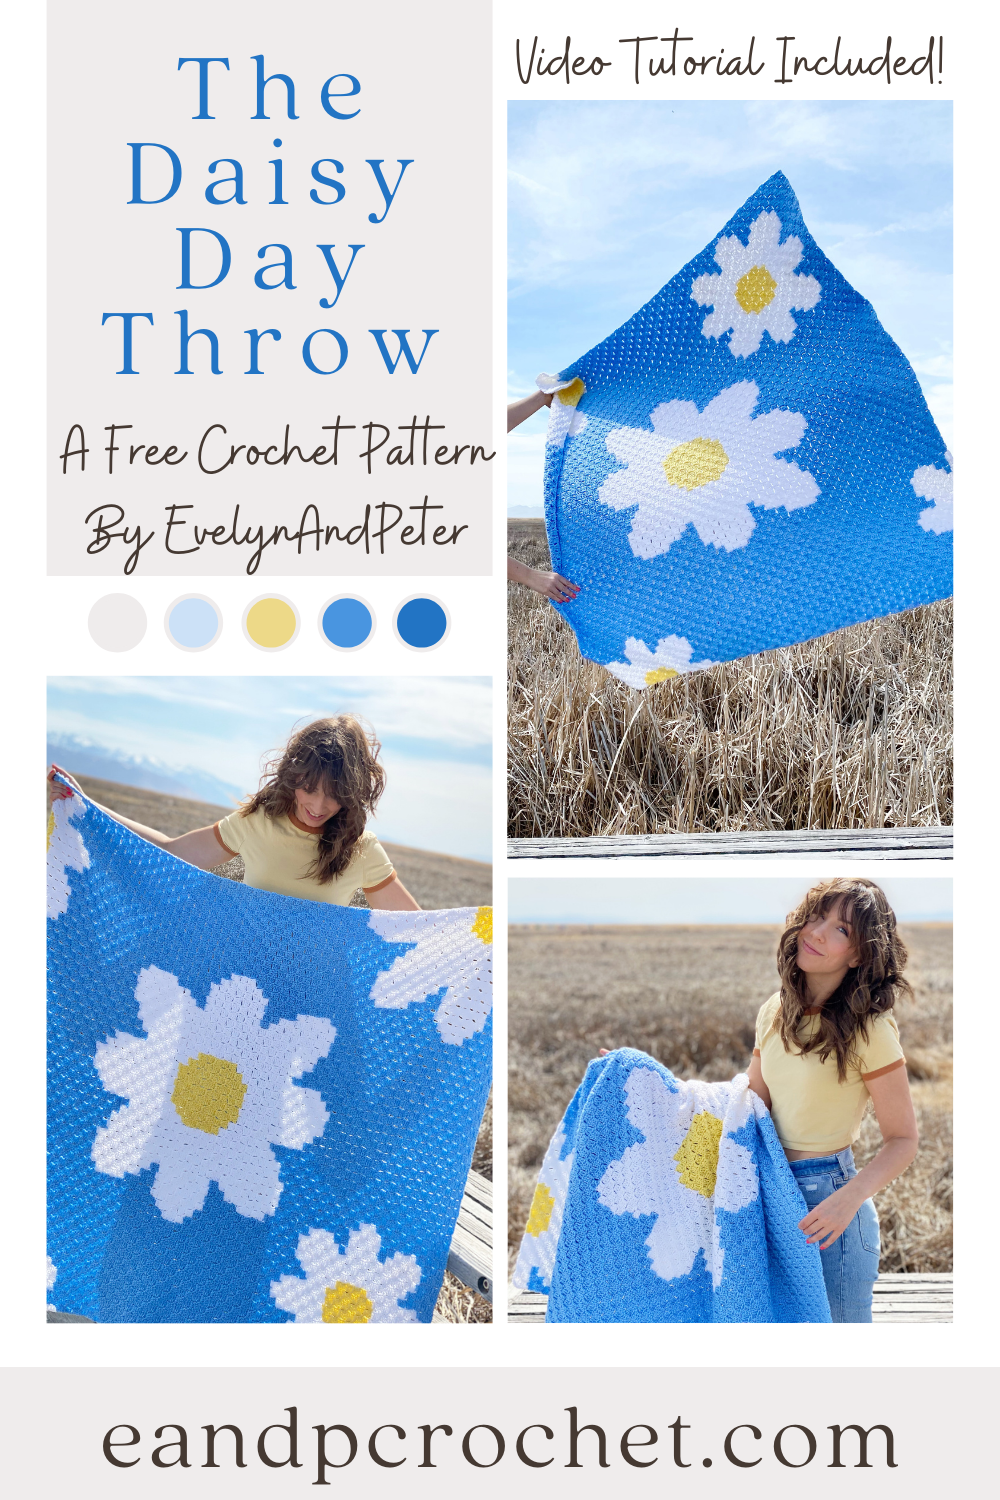
Every few months I get the urge to make a C2C crochet blanket and it never disappoints. The Daisy Day Throw was perfect to make on these cloudy spring days, to bring some happiness. I don’t know if you guys have noticed but the 90s are making a big comeback in design and fashion! I think that the Daisy Day Throw fits in perfectly with 90s vibes. It reminds me of my childhood and I love it!
The Daisy Day Throw is a Corner 2 Corner (C2C) blanket which means it’s made from the bottom right corner, diagonally to the top left corner. If you’ve never made a C2C then I recommend checking out my video tutorial as you create the blanket. You could even work up a practice swatch before diving into the project.
I also recommend making separate balls of yarn to help prevent cutting and joining your yarn with each color change. For example, when you get to the petal sections you will want a separate ball/skein of yarn for each petal and a separate ball for the blue sections in between. That way you don’t have to cut and join the yarn each time. Now, at some points there will be NO avoiding the cutting of the yarn. You will have to do it and you will have ends to weave in. I found with this blanket that it wasn’t too overwhelming and I got them all weaved in within an hour or so. If you need some visuals on how to keep your yarn organized there are lots of tutorials available out there!
If you love C2C make sure you check out some of my other free patterns!
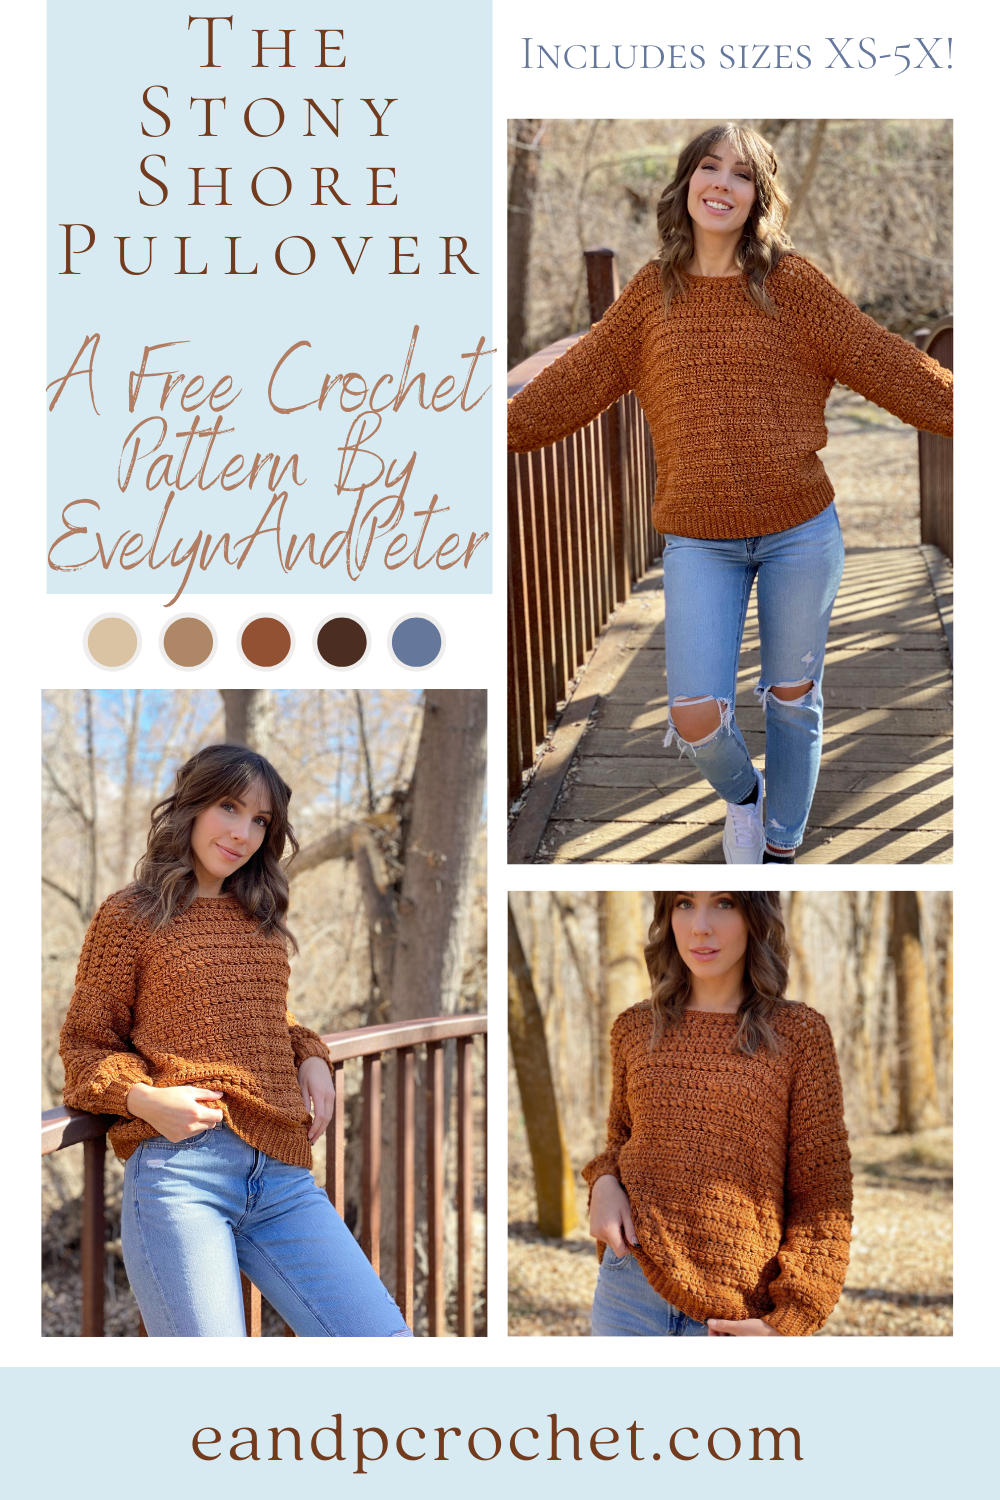
Didn’t I tell you guys that there would be a matching pullover to the beloved Stony Shore Cardigan?! Well here it is… The Stony Shore Pullover! Haha, I had to keep the name the same obviously since they are sister designs. If you enjoyed the Cardigan design then you will definitely love the pullover!
The Stony Shore Pullover crochet pattern is constructed very similar to the cardigan. It’s actually a bit quicker to do because you don’t have to worry about pockets and the trim is a lot smaller! This is an oversized pullover! You do NOT need to size up to get this slouchy look like mine! I am wearing a size small in the photos. Be sure to check the size chart below and pick yours size via your bust size. If you want a less slouch fit, size down.
I used Lionbrand Jeans for the pullover instead of Heartland like I did in the cardigan. However, either one works great for this! So if you prefer Heartland you can still swap it out. Although, I’m in love with Jeans yarn and highly recommend it!
Description: The Stony Shore Pullover is the sister design to the Stony Shore Cardigan! It has a cozy oversized fit with cute balloon style sleeves. The stitch gives a beautiful and fun texture. Beginner friendly and fun to make!
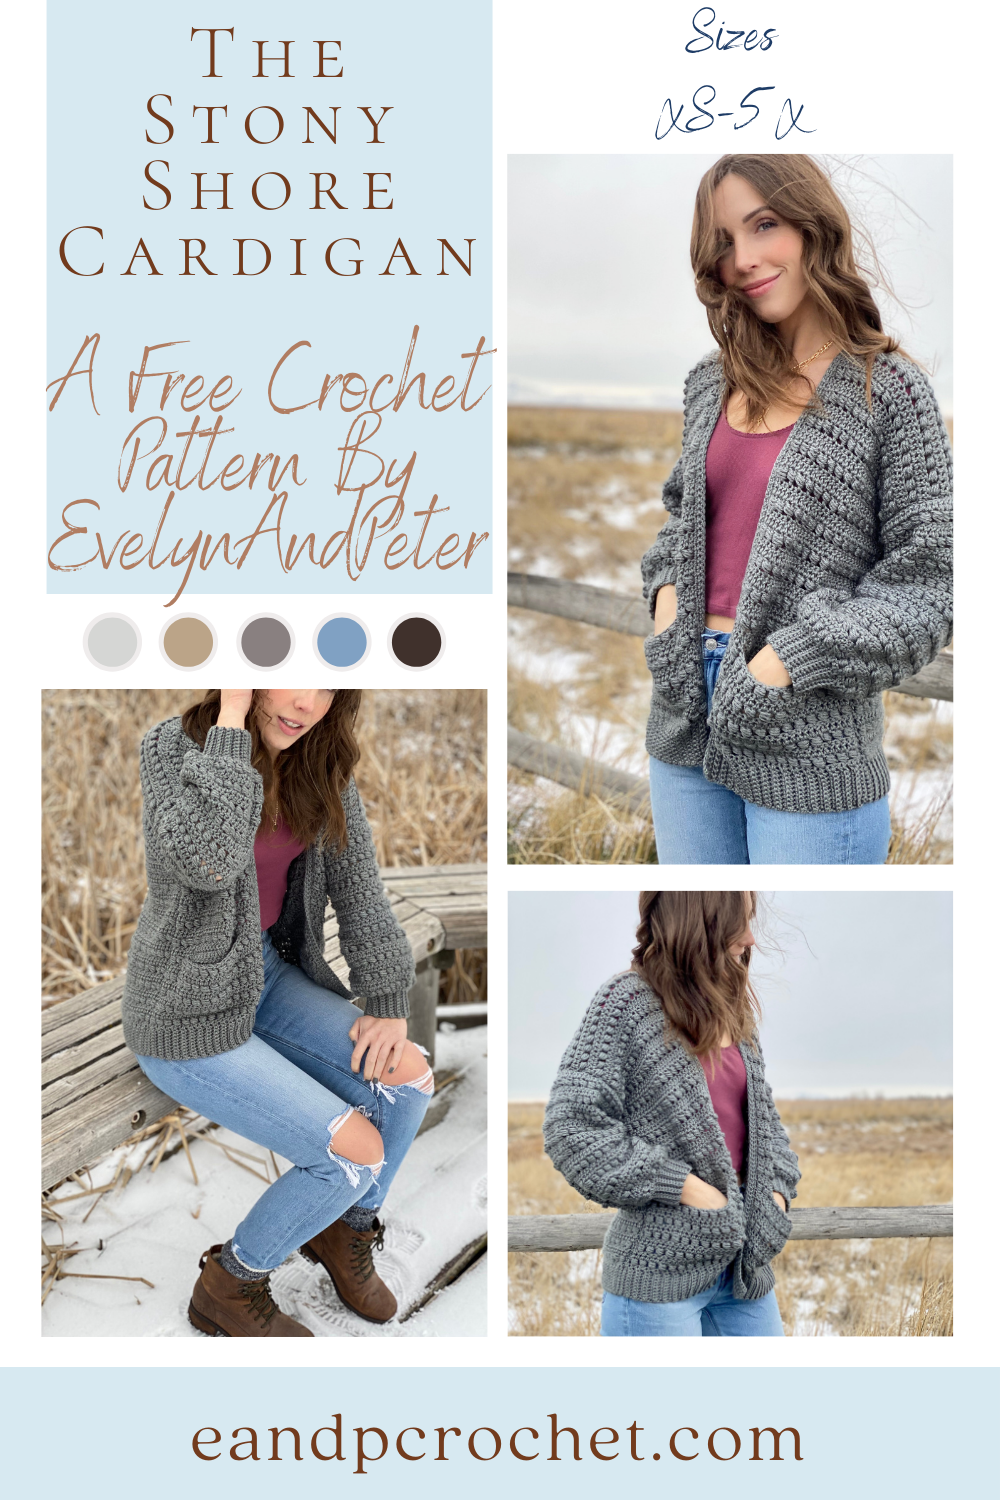
The Stony Shore Cardigan Crochet Pattern is here! I’ve been wanting to make something with this stitch for a long time and I’m glad I finally did it! I also knew immediately I would be doing a loose balloon style sleeve. I actually attempted it on my Sunset Bomber but it just didn’t go with the style. I’m sooooo happy that it worked out that way because they look AMAZING on this cardigan.
I’ve been posting sneak peeks of this sweater on TikTok and Instagram. The amount of crocheters that told me they couldn’t wait for this pattern was kind of insane. I can’t even begin to tell you all how much I appreciate the love and support on this design. It’s also a bit nerve wracking because I hope it lives up to the hype. I just want you all to love it as much as I do. Even my husband said this was his favorite sweater of mine and he is my toughest critic when it comes to crochet!! lol.
The Stony Shore Cardigan Crochet Pattern is worked in separate panels from the bottom up and is beginner friendly. Once you get the bead stitch nailed down it’s a breeze to make. You will alternate bead stitch rows and double crochet rows throughout. You can easily make your sweater longer or shorter by adding/taking away rows in multiples of 2 before tying off. Same with the sleeves!
If you are a complete beginner and need a little extra help then be sure to check out my full video tutorial!