search results for
set
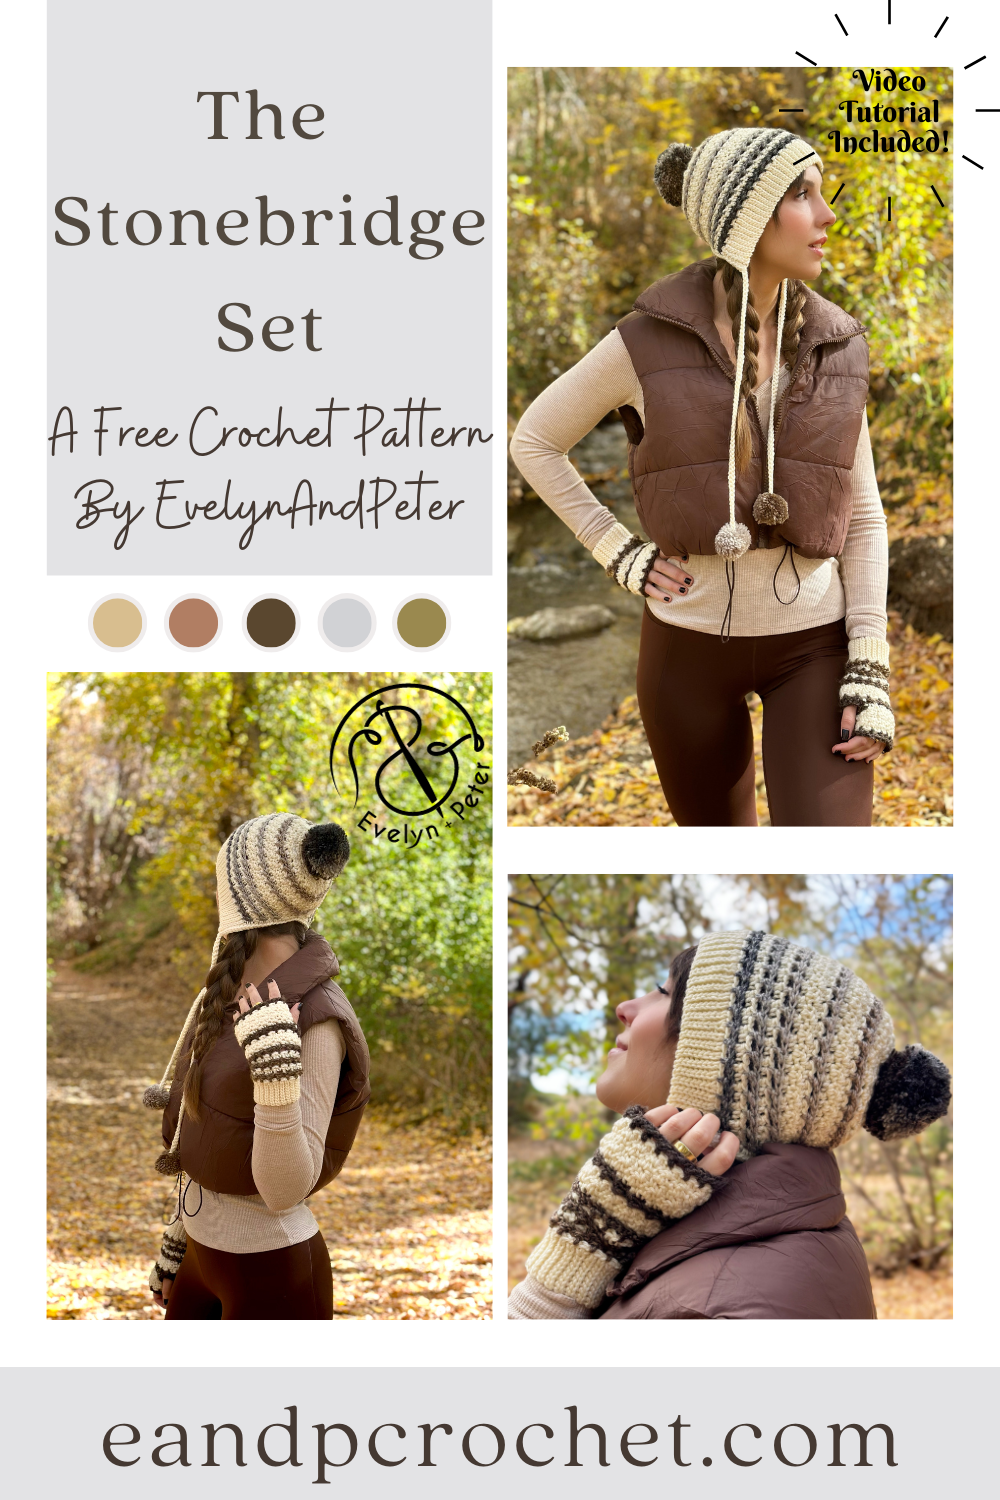
I can’t believe it’s already November and cold enough for my annual Beanie and Mitt set! Last winter I released The Winter Moonlight Set and this year is The Stonebridge Set crochet pattern!
I wanted to do something a little bit different than your typical beanie. I decided to construct it in more of a “bonnet” style and add a tie with little poms on the ends! You’ll start the beanie by creating the ribbing in rows, then crocheting your first row into the sides of the ribbing rows made. You’ll continue the first several rows back and fourth before joining the piece together and crocheting the remaining beanie in joined and turned rounds. Don’t forget the turn! It’s very important to do so within the pattern.
The fingerless mitts uses the same stitches but worked up slightly different. The ribbing is made the same as the beanie but you will immediately join together and worked in turned rounds throughout the entirety of the main body of the mitt. Take note of the thumb hole round! This will be slightly different for the left vs. the right mitt. Other than that, both left and right will be the same!
I used worsted (4) weight yarn for this set. The main color A is Lion Brand Skein Tones in “Ivory or Basic Stitch Anti-pilling in “ecru” (these are the same colors and either one will work) and Color B is Ferris Wheel in “Morning Java”. If you want your fingerless mitts to have the same color stripes, be sure to start on the same color within the ferris wheel skein. You’ll have to pull the yarn out and cut so you can start at the same point! Other than that, no need to worry about rearranging the colors as they stripe on there own! You can find this yarn in the Lion Brand kit along with a free copy of my PDF pattern!
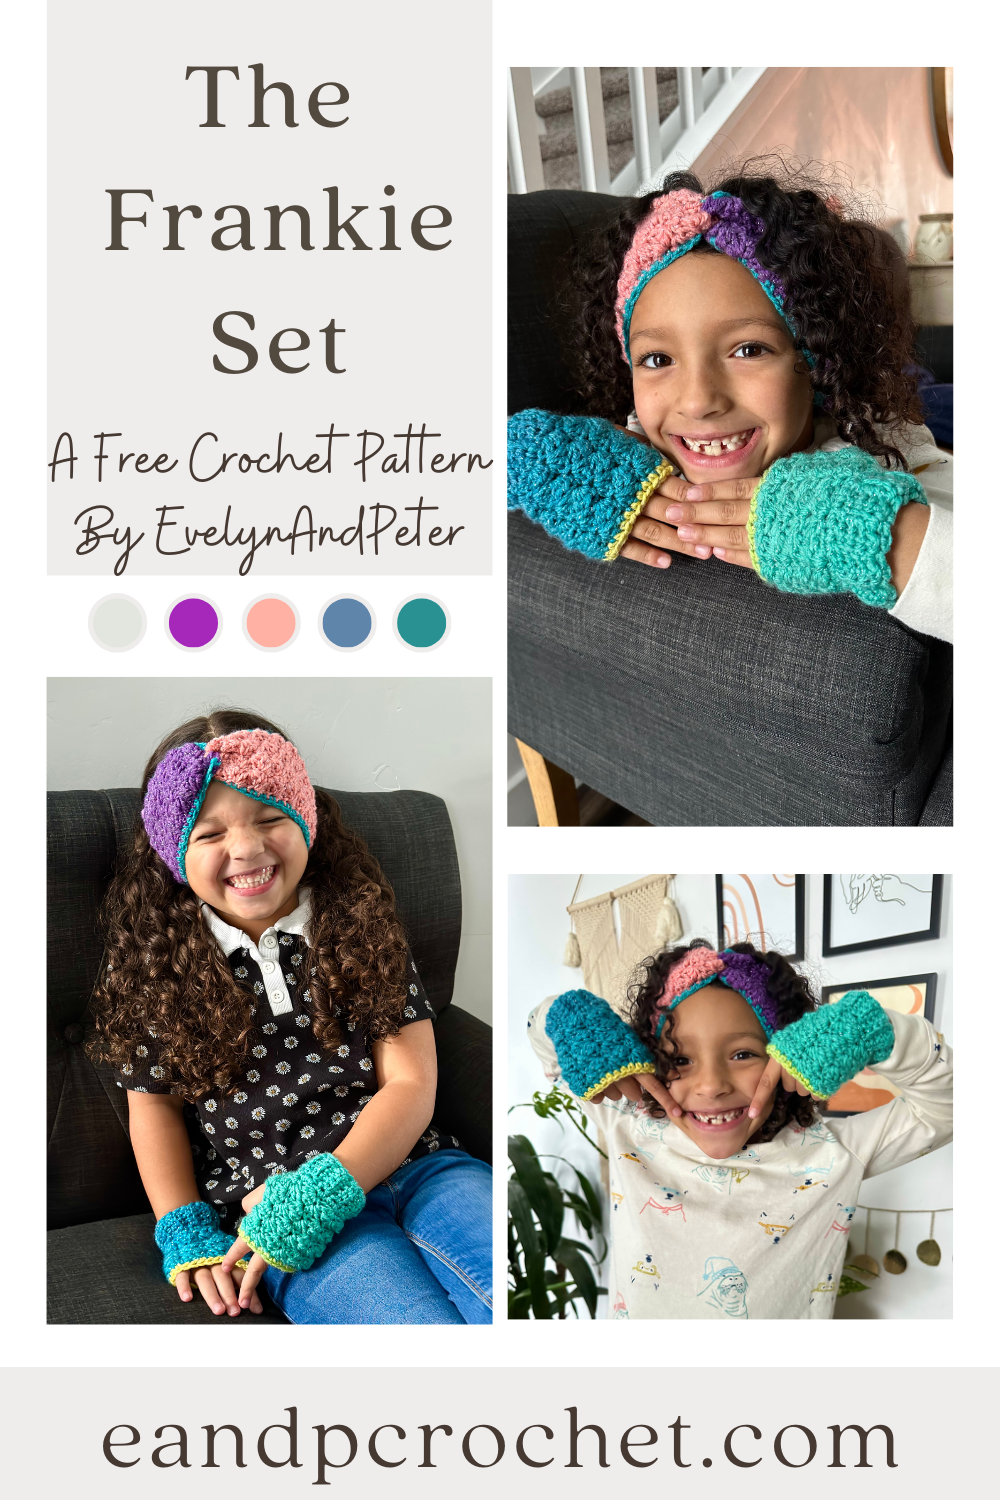
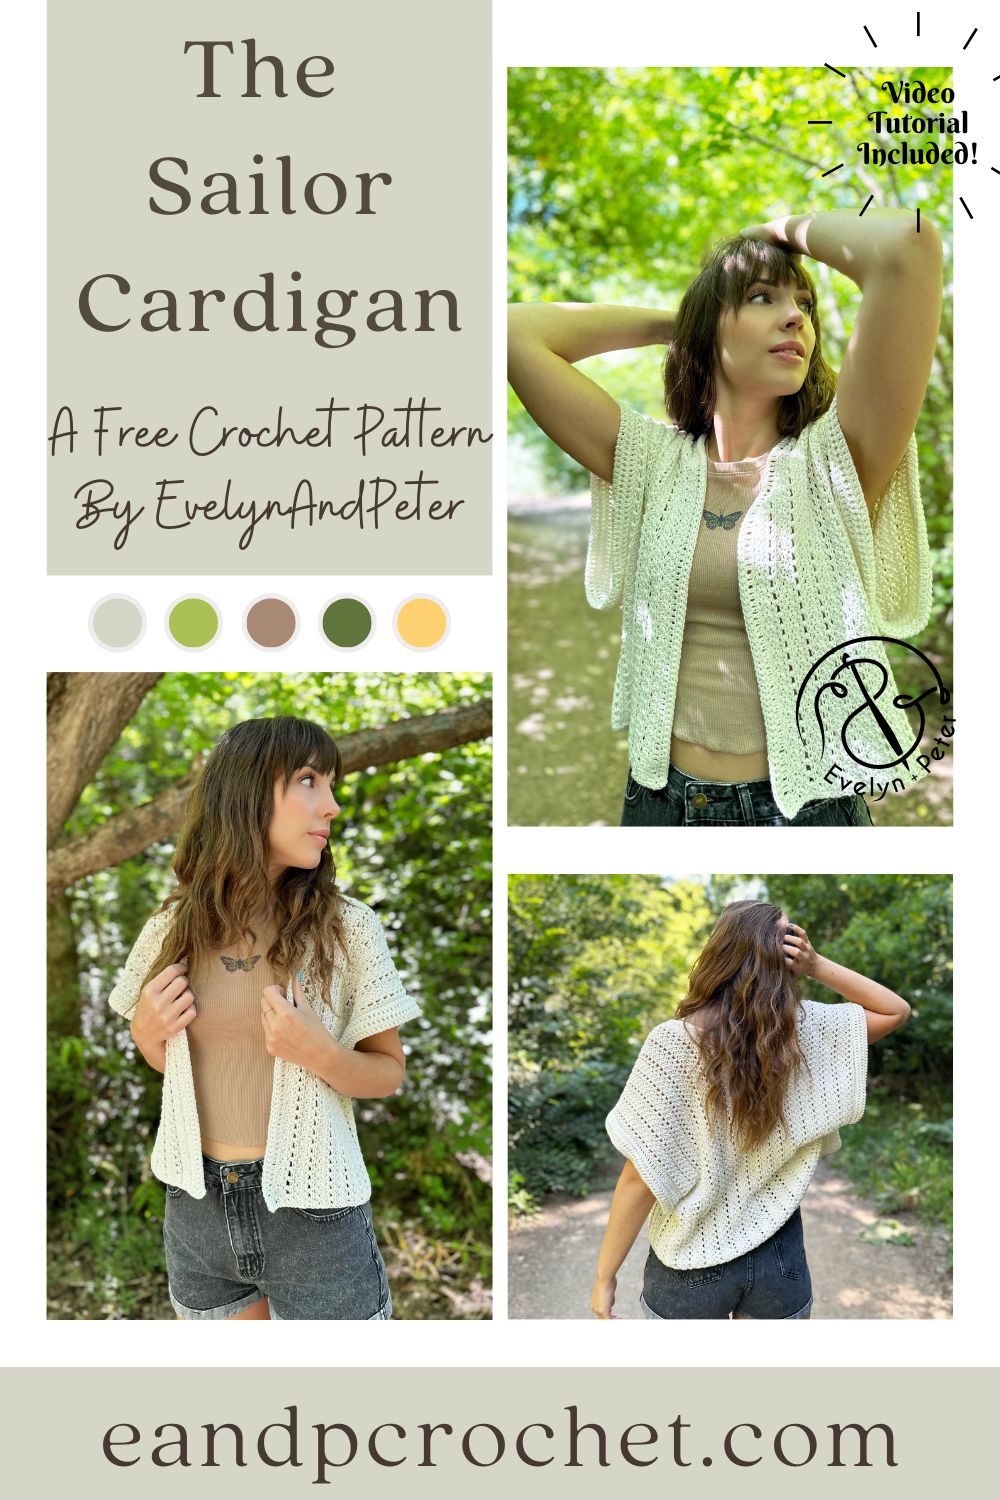
The girls have been begging for me to crochet them something with lots of bright, rainbow colors. Of course i’m going to oblige! I already knew a matching headband and fingerless mitt set would be super cute but I still had to hunt down the perfect yarn!
I decided to go to JOANN and check out the yarn because I knew it was currently the Yarnormous sale! Unless you are brand new to the yarn life, than you already know the Yarnormous sale that happens every year is THE best time to stock up on yarn!
I found a really pretty Mandala Sparkle yarn by Lion Brand and knew it would be perfect for this project! The color I picked was Serpents but they had a ton of different color combos to chose from. I absolutely had to get this color because it reminded me of Lisa Frank! Don’t you agree? I had so many Lisa Frank folders, stickers and pencils back in the day with fun crazy colors like this! I had to go with the name Frankie for this design! Haha
The best part about this project is using up the different colors in the cakes however you want. You can cut and join to arrange colors to your liking! I ended up with a purple and pink headband with matching green and blue mitts! I added some trim on to both the mitts and headband to give it even more color.
Make sure you head to YouTube for the full video tutorials! I have one available for the headband and one available for the fingerless mitts if you need some extra help!
You might recognize this stitch as the same one I used in The Kiah Cardigan and The Winter Moonlight Set! If you want adult size mittens, beanie and cardigan then be sure to check them out!
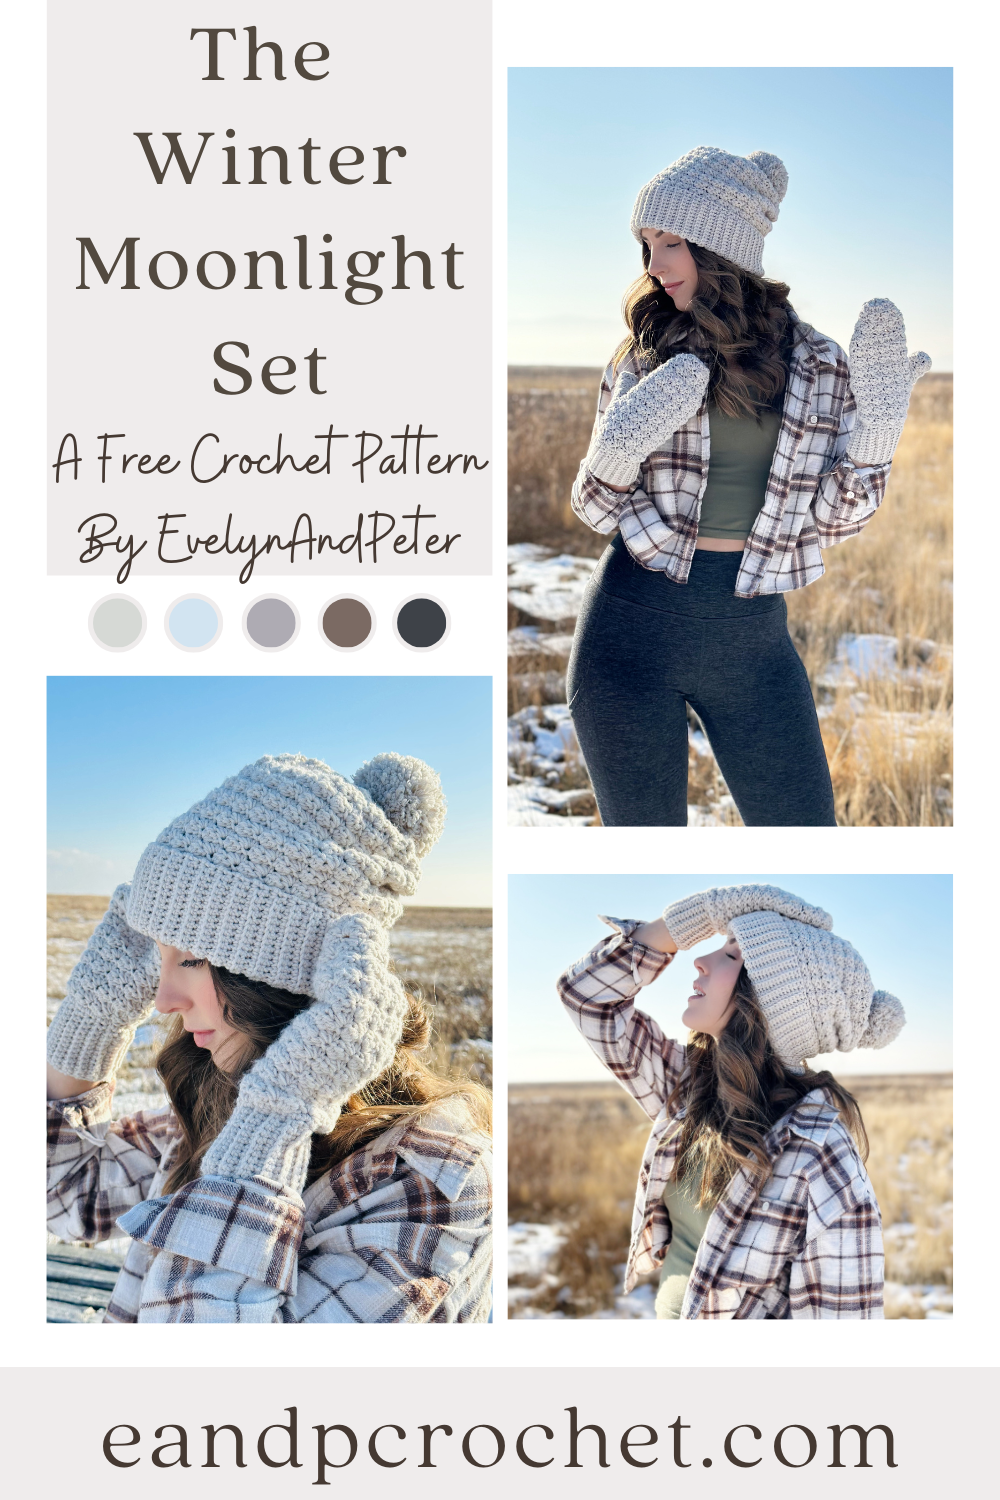
I have to crochet a beanie and mitt/scarf set at least once a year. Making these cute little sets is definitely one of my favorite things to crochet! This year I decided to go with something solid and neutral colored. The Winter Moonlight Set has to be my new fave so far!
I new exactly what stitch I wanted to use for this set from the get go. I’ve only ever worked this stitch in rows so it was fun to design with it in the round and a bit of a challenge to figure out how I wanted to decrease it since technically there is no easy way to do that with this stitch repeat. I think it worked out beautifully though and I’m happy with the result. Both the mittens and the beanie are worked from the bottom up. You will begin with the ribbing before moving onto the main body of the pattern. Once you get past the ribbing you will be working the rounds in turned rounds. SO join with a Sl St, Ch 1 and don’t forget to TURN! Very important to the integrity of the stitch!
I used Lion Brand Color Theory yarn. If you haven’t tried it yet, you should! Lots of pretty colors and the texture is nice and soft. I used the color Moonbeam for mine but there are a bunch to chose from! You can check them out here. The Winter Moonlight Set is available as a kit with Lion Brand as well. You get all the yarn you need plus a free copy of the PDF digital download. Be sure to grab one for the best deal!
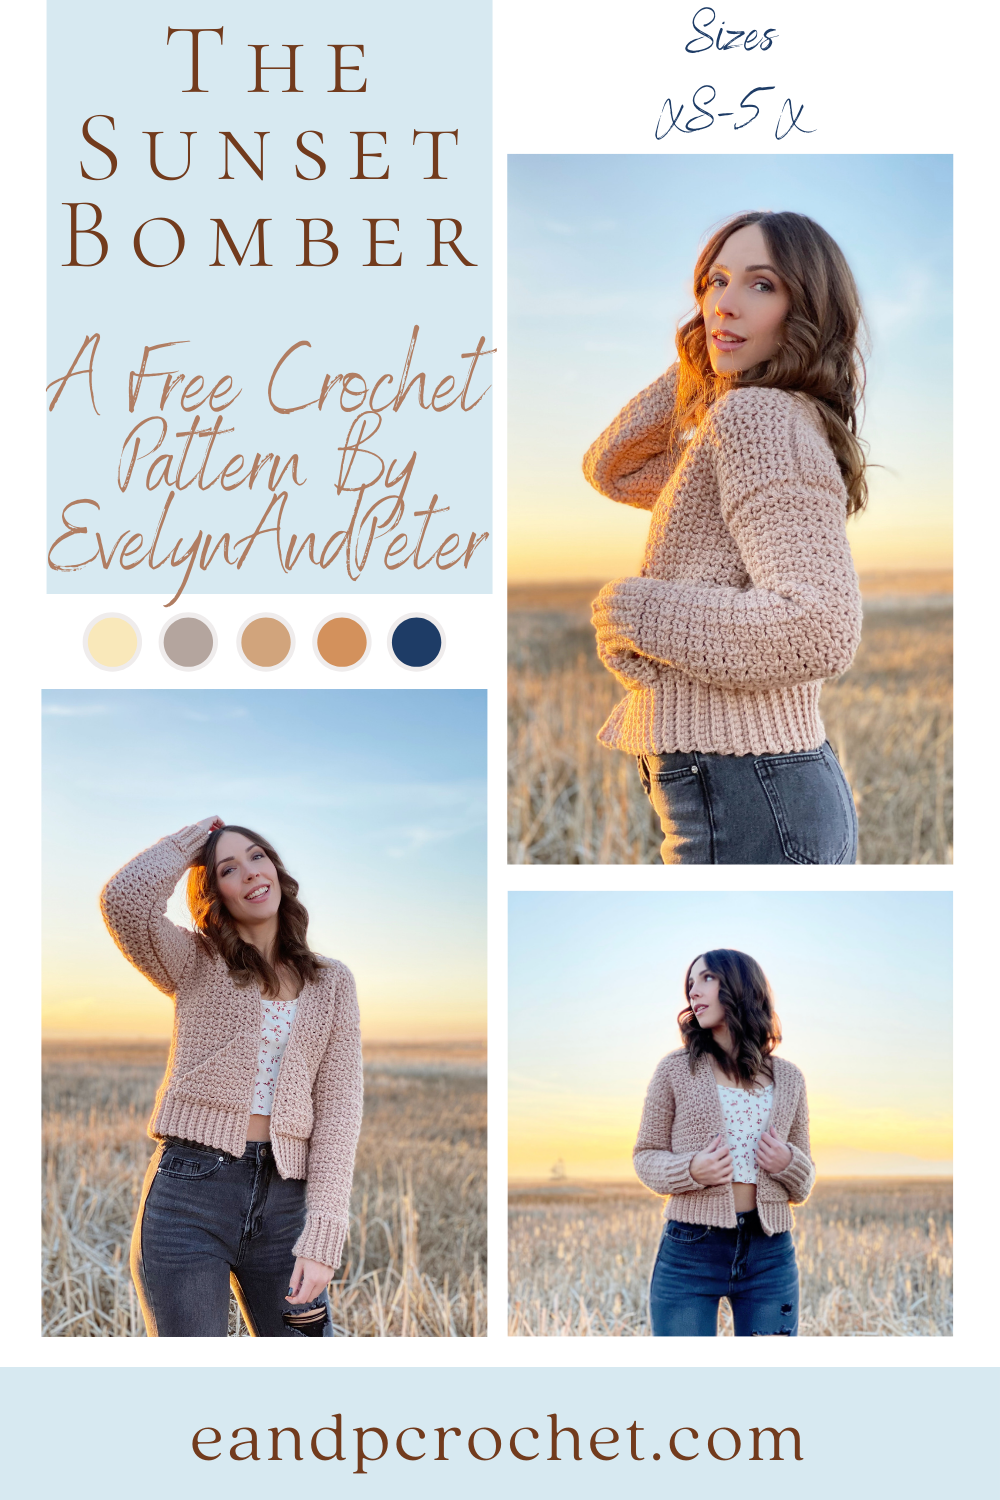
My last pattern of the year is here! The Sunset Bomber is a fun make using bulky yarn with a beautiful outcome! I love when a pattern works up quickly and this one does just that! I wanted more of a jacket look for this design and am super happy how it turned out!
The Sunset Bomber is worked in separate panels from the bottom up. Now, you will be using 2 different sized hooks for this pattern so make sure you switch when you are supposed to! The smaller hook is used in the ribbing and the larger hook is used in the main body of all the panels.
The stitch repeat in this pattern is very simple. Just single crochet, Ch 1, Sk 1! Your single crochets will be worked in the single crochet from the row below and you will always ch 1 and Sk 1 over the Ch from the row below!
If you like this pattern then be sure to check out some of my other designs!
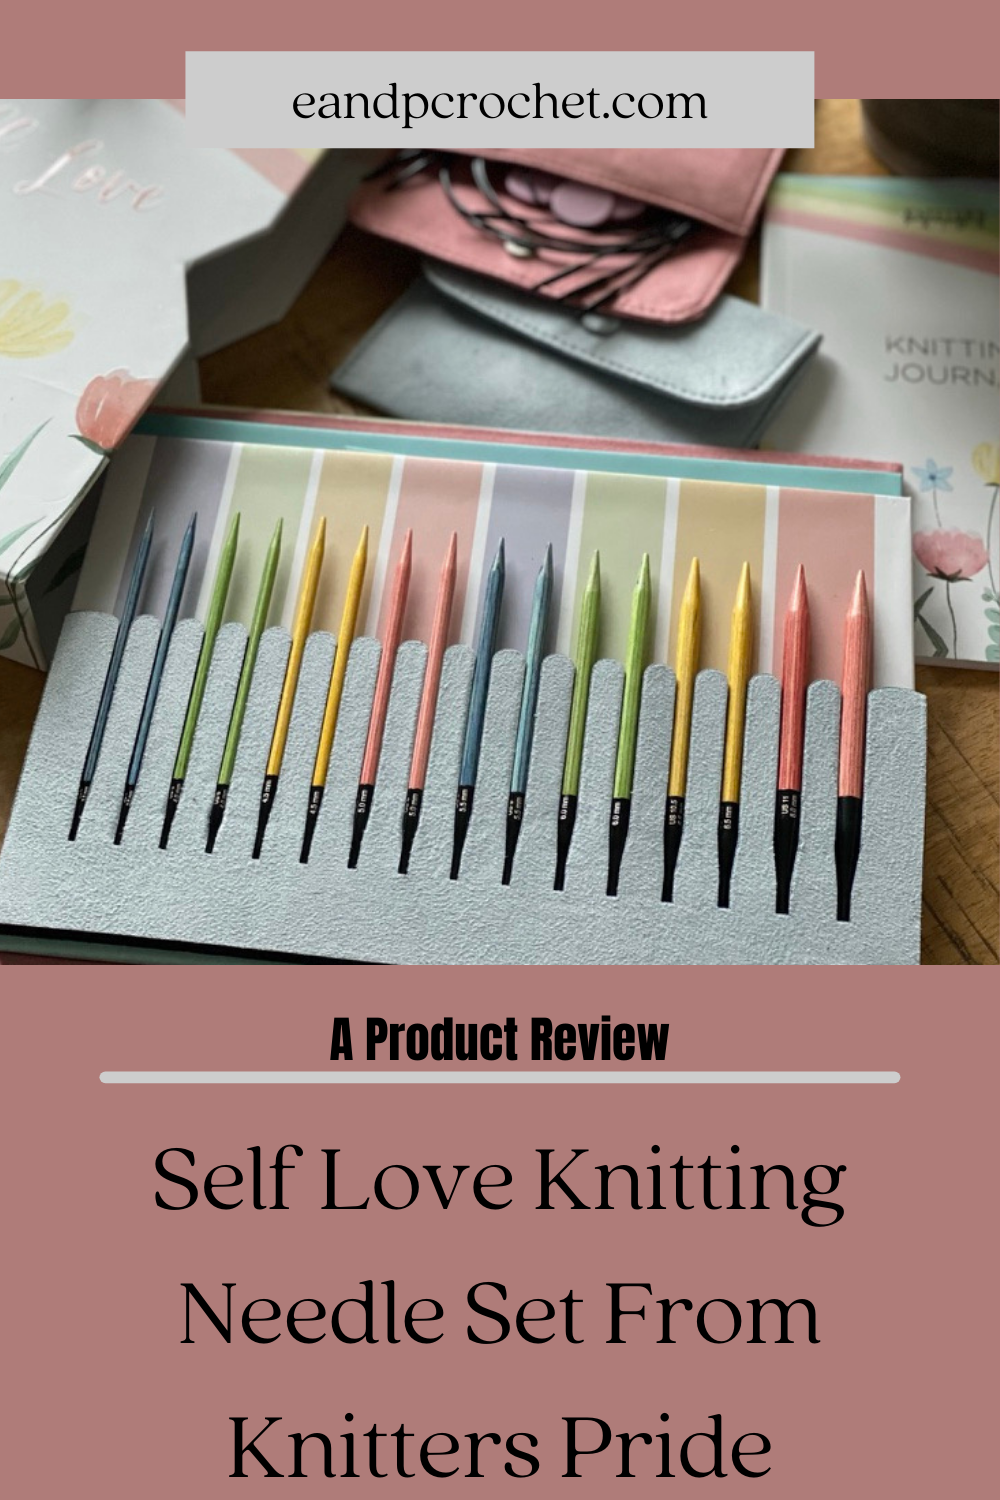
Knitters Pride recently sent me a beautiful set of knitting needles to try out- The Self Love Gift Set! I was immediately drawn to the colors of this set. The happy pastel colors made me think of spring and flowers which make me so happy!
The set includes Interchangeable Needle Sizes US 4, 6, 7, 8, 9, 10, 10.5 & 11 with matte black connectors. The needles themselves are super smooth and easy to work with. I had no trouble slipping the yarn off as I worked my stitches! Plus, changing out the cables was a breeze too.
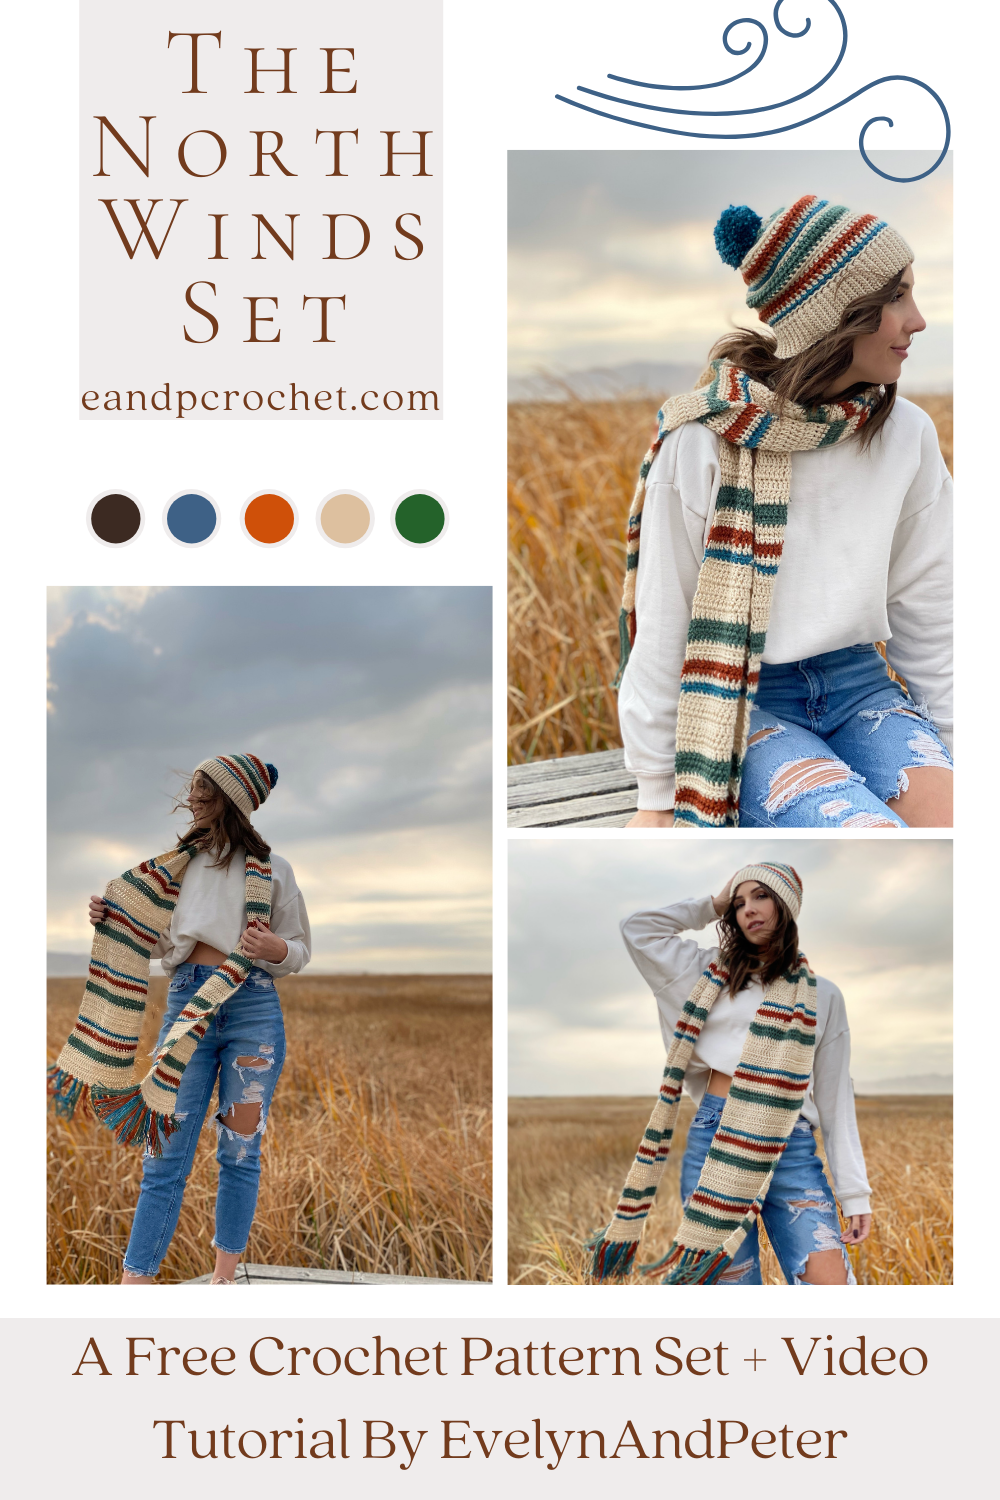
The North Winds Set is here! I’m thinking It’s going to be great for Christmas gifts this year. Beginner friendly and fast to make but also kept my interest throughout with the subtle stitch changes!
The striping on the scarf and beanie are my favorite part. And believe it or not, I had almost no ends to weave in when I was finished! Every time I had a color change for the scarf I cut the yarn, tied a knot and worked my stitches directly over the ends. This worked out amazingly and I’m so glad I did it so I had wayyy less ends to weave when I was done!
Heartland yarn is one of my favorites and It’s what I used for both patterns! The yardage listed below is enough to make at least 1 hat and 1 beanie, including a pom and fringe!
I made a full video tutorial for both patterns as well. You can find the beanie tutorial here and the scarf tutorial here. Be sure to check them out if you need any extra help!
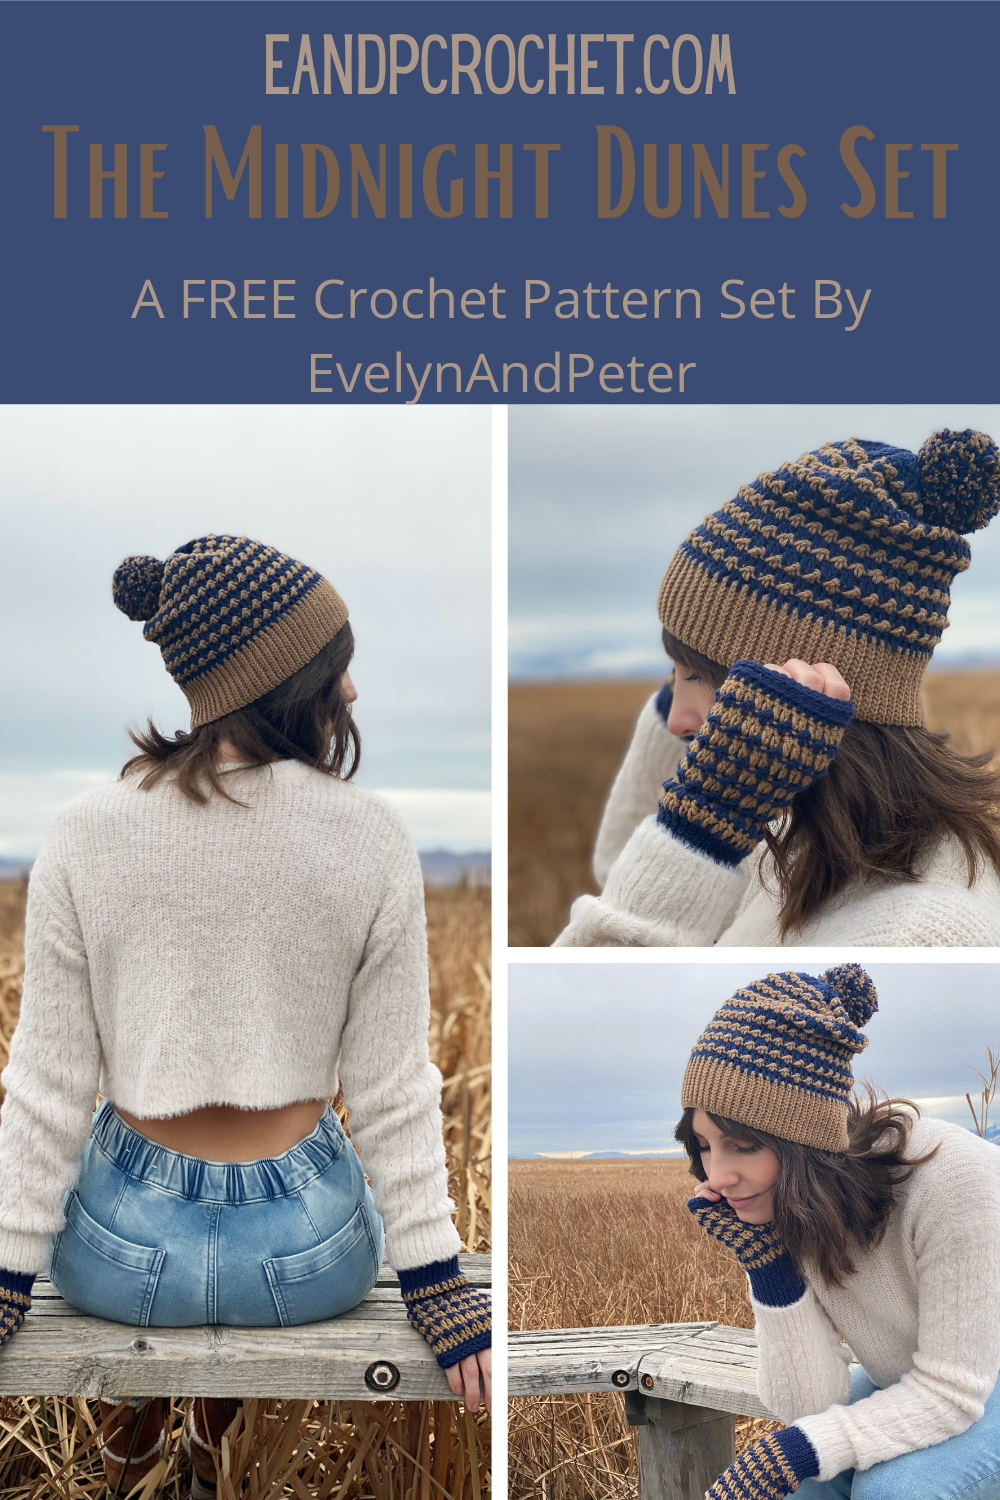
When I got my hands on Lion Brand Merino Camel I knew immediately I wanted to make a matching beanie and fingerless mitt set. The super soft and fine yarn was perfect for the Midnight Dunes Set!
The colors reminded me of a nautical east coast chilly beach feel. I asked my followers on Instagram what they thought a good name would be and someone suggested The Midnight Dunes set! A really fitting name in my opinion!
This set is great for an advanced beginner. Maybe you already have the basics down and want to try out something a bit more challenging then scroll on down! You will be doing some color work and fun stitches.
I even made full VIDEO tutorials for both the beanie and the mitts! So if your still new to crocheting you can follow right along! You can find the beanie video here and the mitt video here!
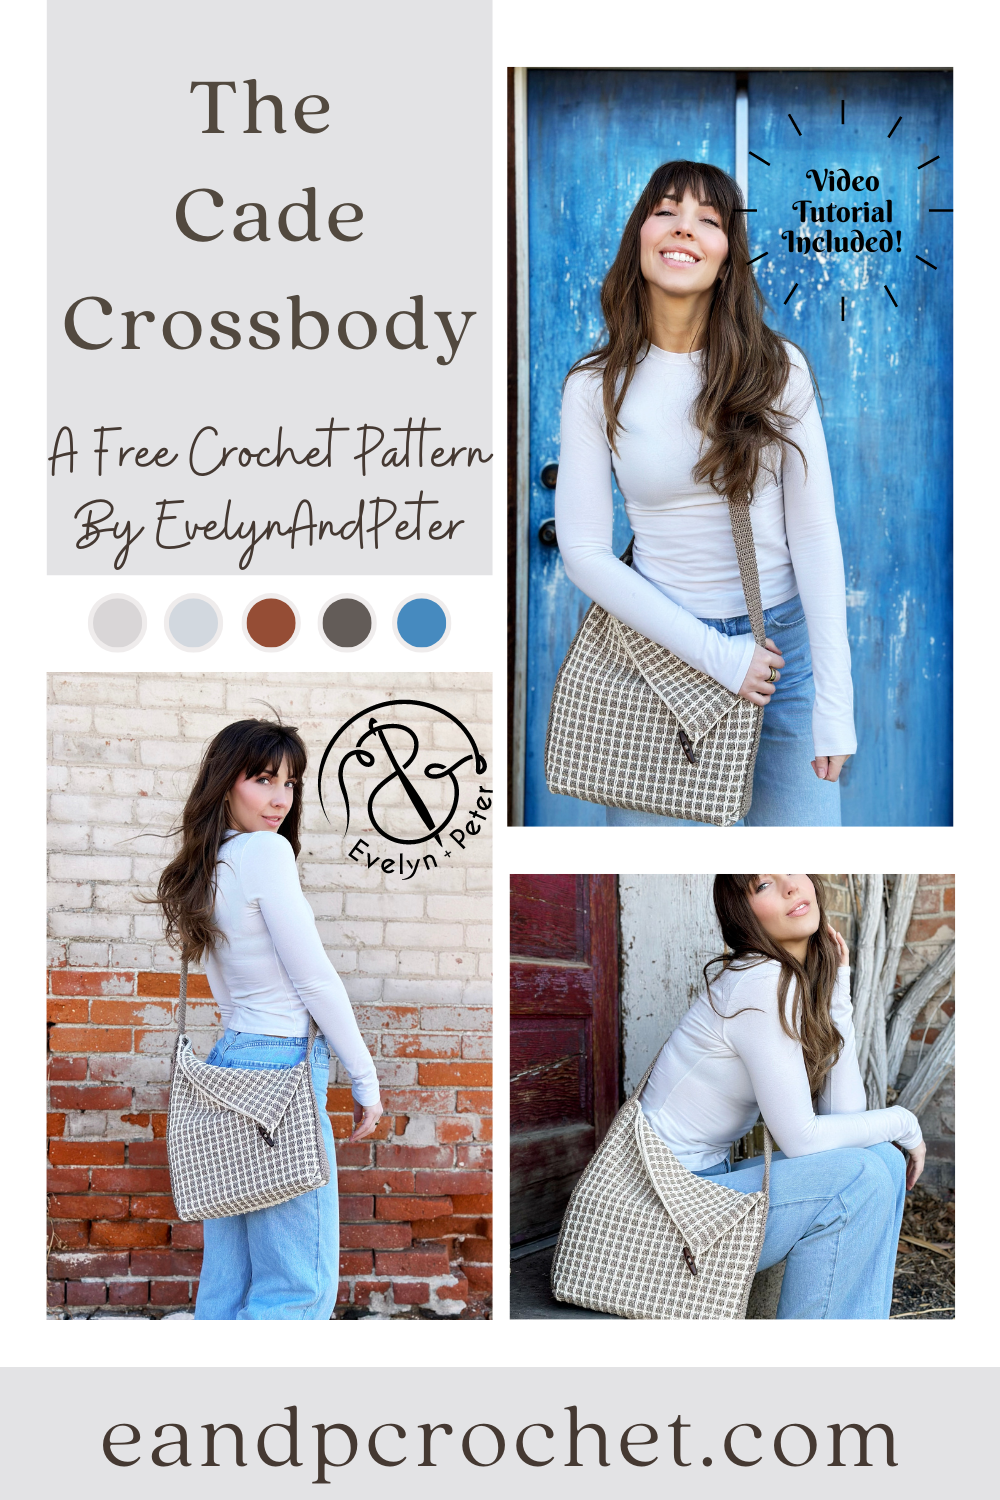
I had so much designing The Cade Crossbody. Why? Because it’s part of a collab with my yarn bestie Meghan from Meghanmakesdo! I made the crochet version and she made the knit version! It’s always nice to have options so maybe if you are seeing this but you are a knitter, than be sure to check out her blog!
The Cade Crossbody crochet pattern is actually pretty simple. It’s 2 rectangles sewn together and a long strap added last! You’ll add the strap on with a unique twist to give it the slanted fold over look. To give your bag some shape, you will be tacking/sewing the corners up into a triangle point when you add the strap. Once side is sewn further up than the other. That’s it!
When Meghan showed me the knit stitch she was going to use for her bag, I knew I would have to do some swatching and figure out how to get my crochet version looking similar! I tried a bunch of different stitch combinations. Finally I settled with a combo of Sc, Sl St and surface stitches to give the look you see here! There will be some ends on your rectangle panels. But don’t worry!! Most of them you will crochet right over, so don’t let the ends scare you! Just check out the notes section or watch the video tutorial!
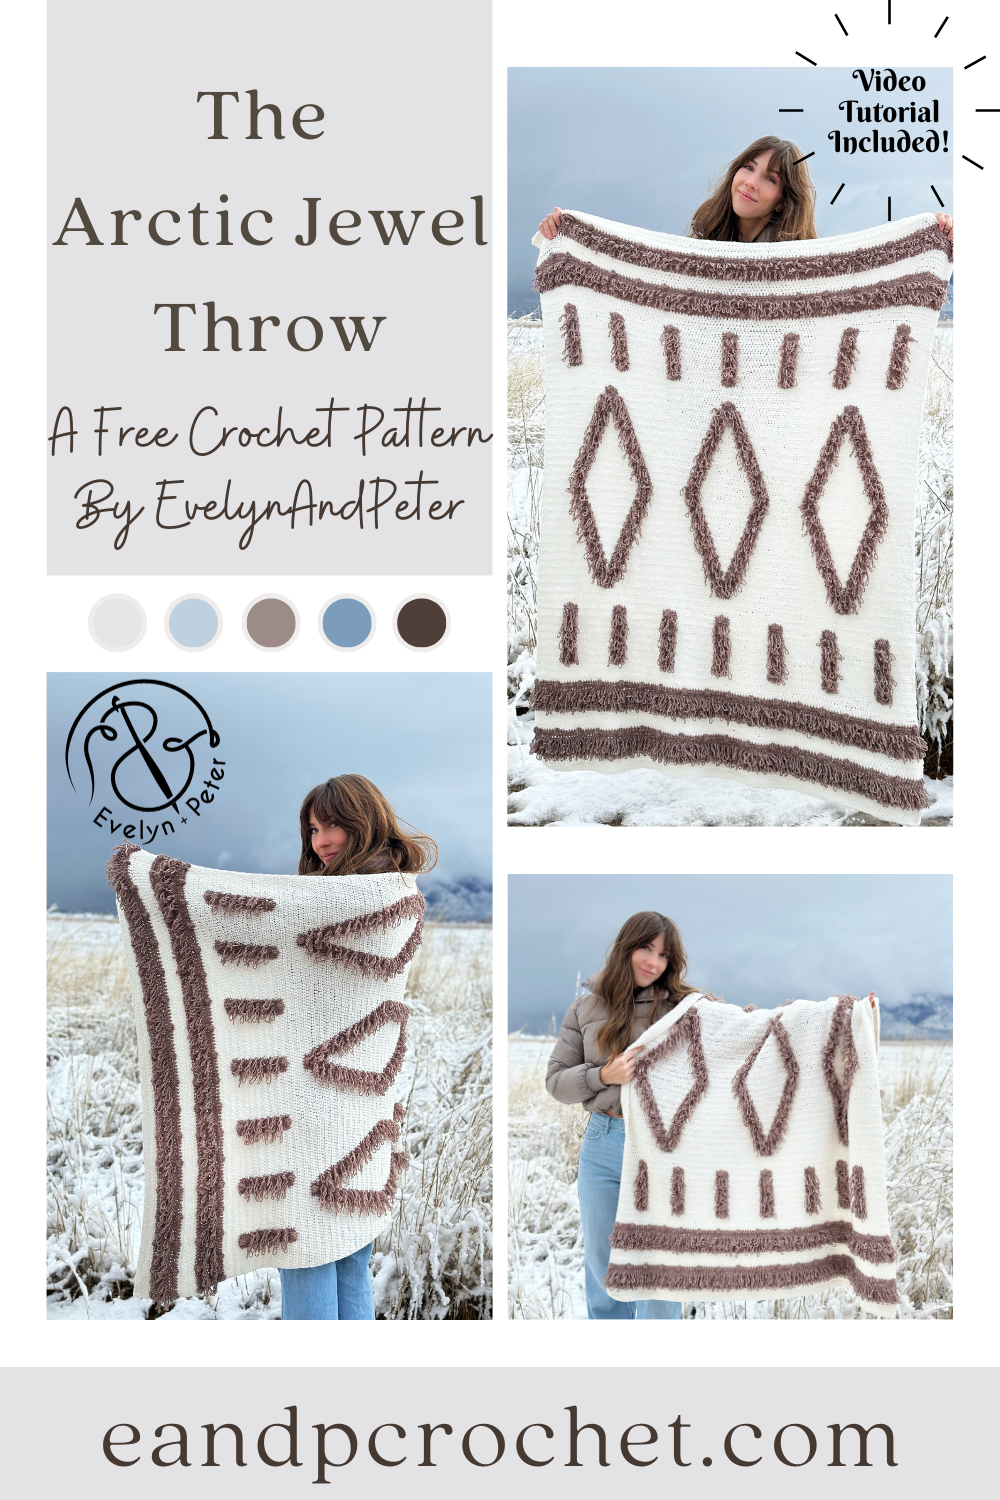
It’s finally time for my last crochet design of the year, The Arctic Jewel Throw! I’m very excited to share this blanket pattern with you guys and I hope you love it just as much as I do!
I was vacuuming my dining room rug one day and instantly got inspired for this project! My rug has different textures where the design is fluffier and sticks out more than the main portion of it. I tried different stitches to achieve a similar look and finally settled on doing a loop stitch. I knew I wanted to do this blanket in Hdc so I ended up altering your typical single crochet loop stitch into a Hdc Loop St. It worked out perfectly after some swatching and I went right into designing what I wanted the blanket to look like.
The Hdc loop St in this blanket takes a tiny bit of practice but I know you can do it! Take a look at my video tutorial where I show you exactly what you need to do! Once you have that stitch down the only other stitches you will be doing are regular Hdc and a small bobble! You do need to know how to change colors at the end of a row, as well as mid row. I show this in my video too!
The best way to make this blanket is to separate your CC (contrasting color- stucco) into multiple balls. That way, you don’t have to cut and join your yarn a million times. You don’t need to worry about doing this until you reach the vertical stripes and diamond portion of the blanket. Once you reach this area you will use 7 separate balls of the brown color. Do not cut and join these, simply work your stitches needed, then drop the color and leave it there for when you need it in the next row, then just pick back up!