search results for
set
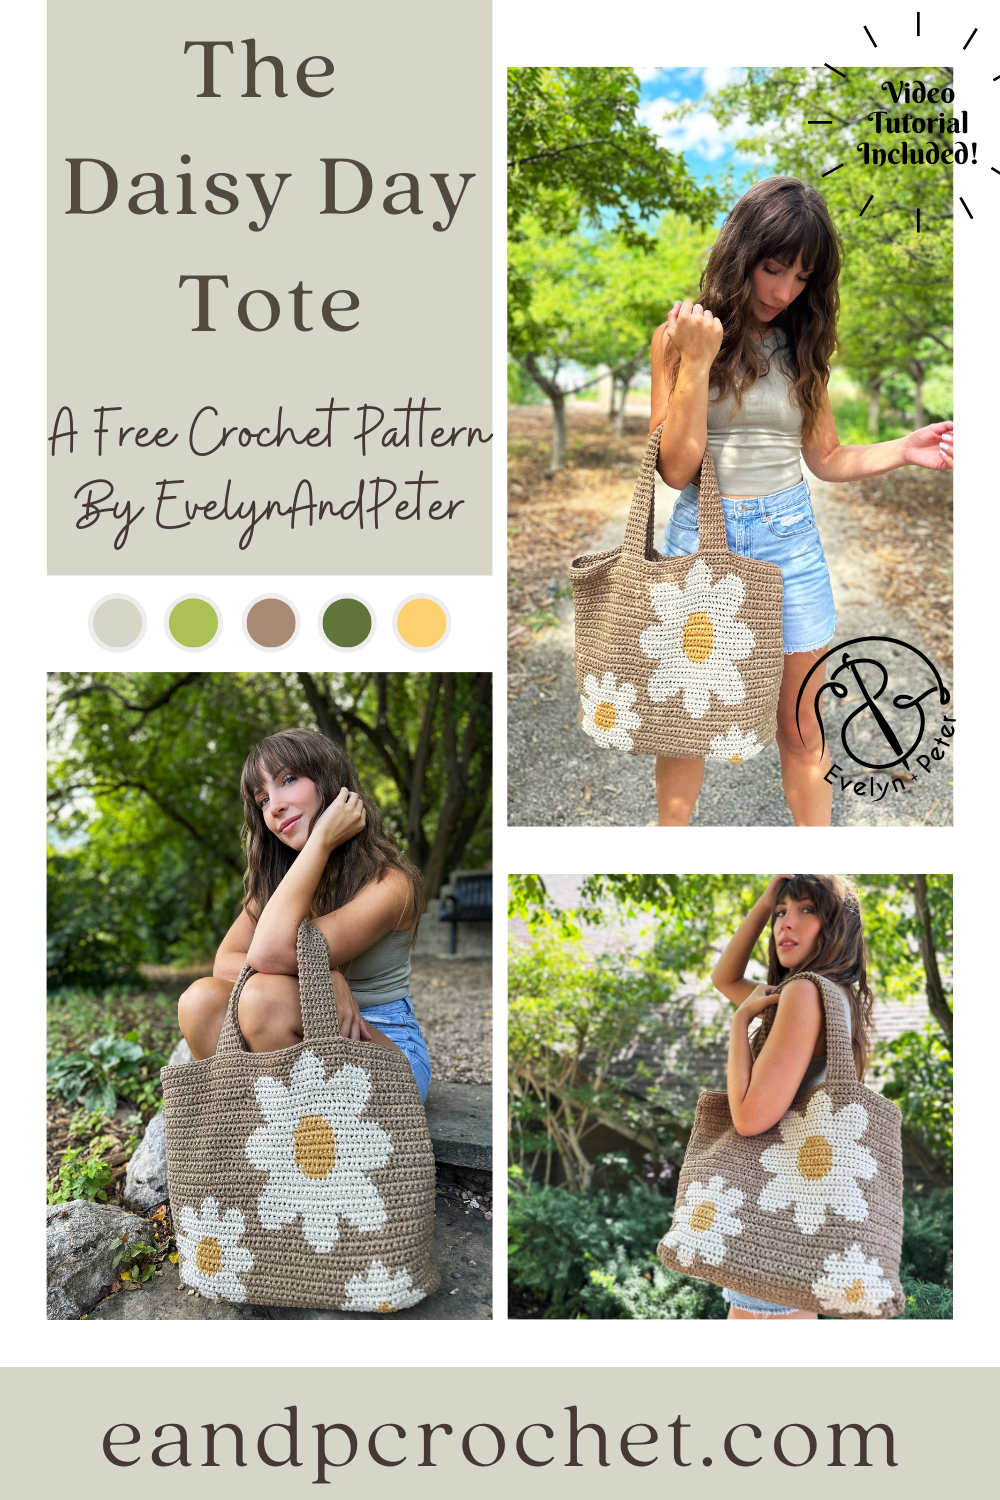
It’s been a long time coming… The Daisy Day Tote is finally here! You might recognize the cute little flowers from my previous pattern The Daisy Day Throw! I always knew I wanted to expand this collection and a large tote is what came next! Maybe there will be a Daisy Day Rug down the road??
The Daisy Day Tote Is made in 2 separate panels from the bottom up. You will also be making 2 straps. Then you will sew together! When you work the main panels of the bag you will be carrying Color A and Color B throughout. For mine, I crocheted directly over the yarn I was carrying to hide it. You will bring it up with you each row. If you aren’t familiar on how to carry yarn along in color work be sure to check out the video tutorial! For Color C, you will not carry it. Simply leave Color C where it is at and when you come back to it in the next row, just pick it up again. Only the center of the flower uses Color C so we don’t need to carry it. Once the center of one is finished just cut Color C and move to the next flower center.
The straps are made using thermal stitch which makes them extra sturdy! Be sure when you sew the straps to the bag that you place them far enough down on the inside of the tote before seaming. This keeps everything nice and secure.
If you plan on purchasing yarn, I recommend checking out the Lion Brand kit! The kit comes with all the yarn you need to make your Daisy Day Tote plus a FREE copy of the printable PDF pattern! You can even customize your yarn colors.
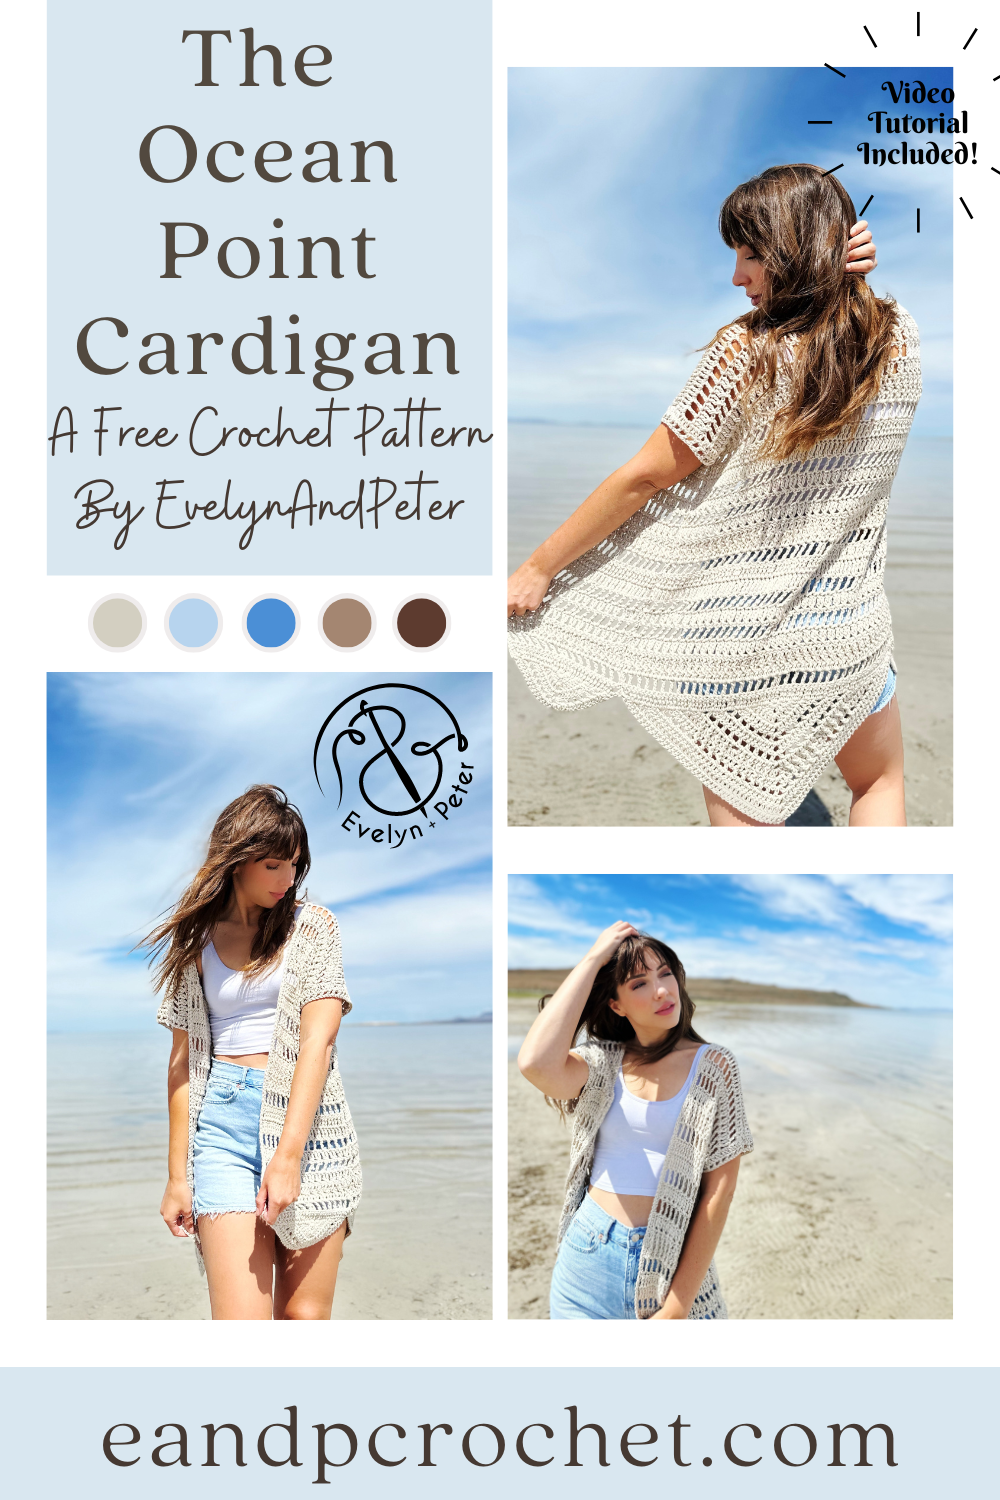
Are you nose deep in summer crochet patterns right now like I am?! Can I add another one to your “must make list”? Summer crochet patterns have always been one of my favorite things to spend time on. There is just something about the open stitches, the cotton yarn and also the fact that you don’t have to make long sleeves! haha! Summer makes usually work up quickly just like my new cardigan design, The Ocean Point Cardigan crochet pattern!
Is it weird that I have never designed a triangle shawl before? I have definitely crocheted a few in the past but never designed my own! I have been wanting to lately but I did not want to make a shawl in the middle of summer! I got the idea to somehow incorporate the shape of a triangle shawl into a cardigan and I am SO glad I did!! After a lot of math and a little bit of frogging I finally came up with the final result!
To create The Ocean Point Cardigan crochet pattern you start at the bottom, creating the triangle shape. If you are familiar with triangle shawls you will have no problem jumping right in. Once you have the triangle complete, you will rotate your work and create the first row of the main body into the ends of the rows you made in the triangle. After you get set up it’s just row repeats with no more shaping there on out! I used tall stitches like double crochet, treble crochet, and treble X St. There is also plenty of Ch 1 Sk 1 sprinkled in for an airy and lacy feel.
Because of the very specific St count and math going on in this cardigan there are 3 separate combo sizes written in the pattern. This cardigan is oversized and has a loose, flowy fit. Each size provided can fit a wide range of body shapes and sizes! To find your size, just locate your bust size on the size chart.
I used a worsted weight yarn for The Ocean Point Cardigan pattern- Pima Cotton from Lion Brand. This is a very soft cotton yarn! I have no trouble with this yarn. It works up beautifully and does not split or snag if you have to frog! They have lots of pretty colors available as well. If you end up purchasing the kit, you can swap out the color if you want to!
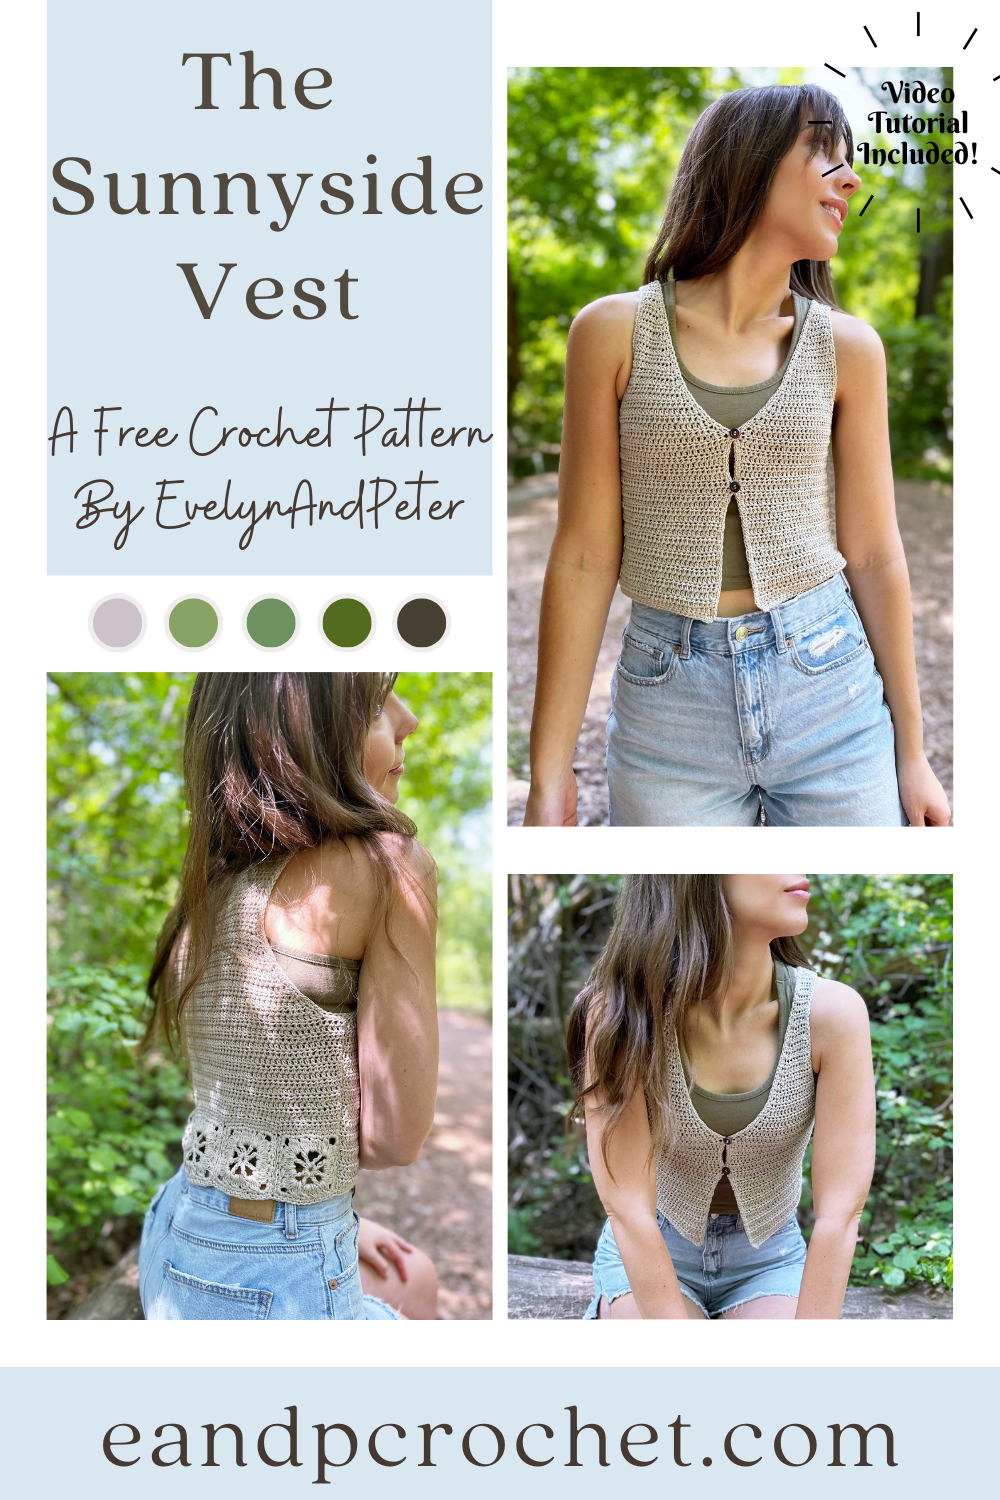
I’ve always wanted to crochet a cute little vest but I wanted to do something a little more unique than just all basic stitches. I knew I wanted to incorporate granny squares or motifs somehow after being inspired by a shower curtain with pretty motifs along the middle that reminded me of sunshine. That’s how we ended up with The Sunnyside Vest crochet pattern!
The Sunnyside Vest is worked in 3 separate panels after you get the motifs worked up. Each size will have a different amount of motifs along the back. Once you make all of your motifs you will join them together before finishing the back panel from the bottom up. The front panels are also worked from the bottom up before being joined at the shoulder and side seam.
I used Cotton Bamboo Linen yarn from Lion Brand which is a Fine (2) weight yarn. This is a newer yarn and has some lovely colors. I used Shale for my Sunnyside Vest crochet pattern. I loved the lightweight feel of this yarn and the fiber combo is perfect for a warm weather garment!
You will notice some of the sizes are combination sizes. This is due to the fact that it is a form fitting garment and the motifs along the back are all the same size. To find your size, just locate your bust size on the chart!
Usually I make a full video tutorial walkthrough for my designs. For this one I was not able to do a tutorial for the entire thing. I did make a video on how to make the motifs, join the motifs, and set up the first row for the back panel. In my opinion this might be the trickiest part for beginners so I wanted to make sure I provided a visual for you guys! After you are all set up it is just Hdc stitches throughout, with some decreasing and shaping! I had a very busy month when designing the Sunnyside Vest crochet pattern and my family was sick with the stomach bug for weeks. I hope you can forgive me for not having a full walkthrough but I am always available to help with pattern questions! Check out the video tutorial here!
If you like this crochet vest, please be sure to check out some of my other top patterns as well!
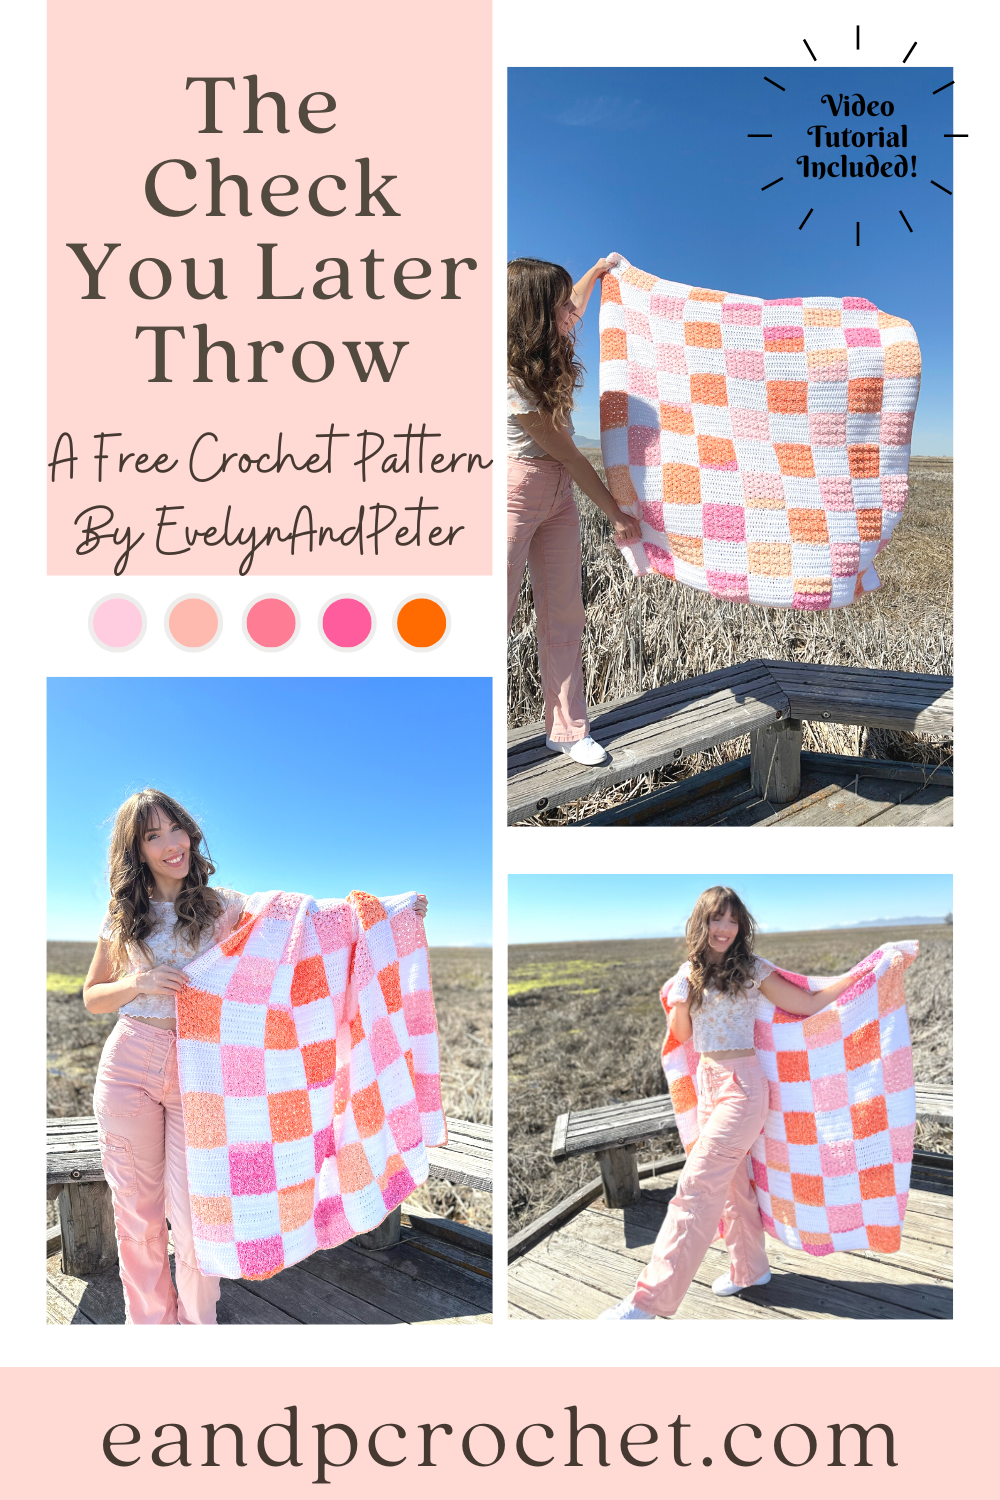
I don’t know about you but I’ve been seeing checkers everywhere this season! On shirts, shoes, hats, rugs, bags and of course, blankets!! I wanted to put my own spin on the trend and came up with The Check You Later Throw!
After testing out different ways to make a checkered design I finally settled on working it up in strips. I know doing separate squares is more time consuming and can be intimidating so I got rid of that idea. I swatched a bit with C2C but ultimately decided that there would be too many skeins of yarn going at once for the amount of squares I wanted. I also thought about working in rows but that would still require too many balls of yarn at once for me. I wanted something a bit easier for a beginner to do! After I did a test working it from the bottom up in separate strips I knew I found the winner!!
There are 2 separate strip patterns, Panel A and Panel B. You will be making 5 Panel A and 4 of Panel B. They are made from the bottom up. You will have to cut and join yarn each time you change colors for the squares but don’t worry! Tie the tails together in a secure knot. Then, you can crochet over the tails for less ends to weave. I only did this when changing from color B to Color A. I would work my Dc stitches over half the tail. Then after I was done I weaved them back the other way to make it extra secure. I did not crochet over the tails when making the Color B square. I found that because of the stitch I used it didn’t hide the tails well enough and you could see it peaking through. I save those to weave in at the end.
When I made my strips, I kept my colors in order as they came. I did not do any special cutting and rearranging of yarn colors. I worked my panels from let to right starting with the first Panel A and picked up each skein where I left off in the previous square. That does not mean you have to do the same though! You can join in your colors from the Mandala however you would like.
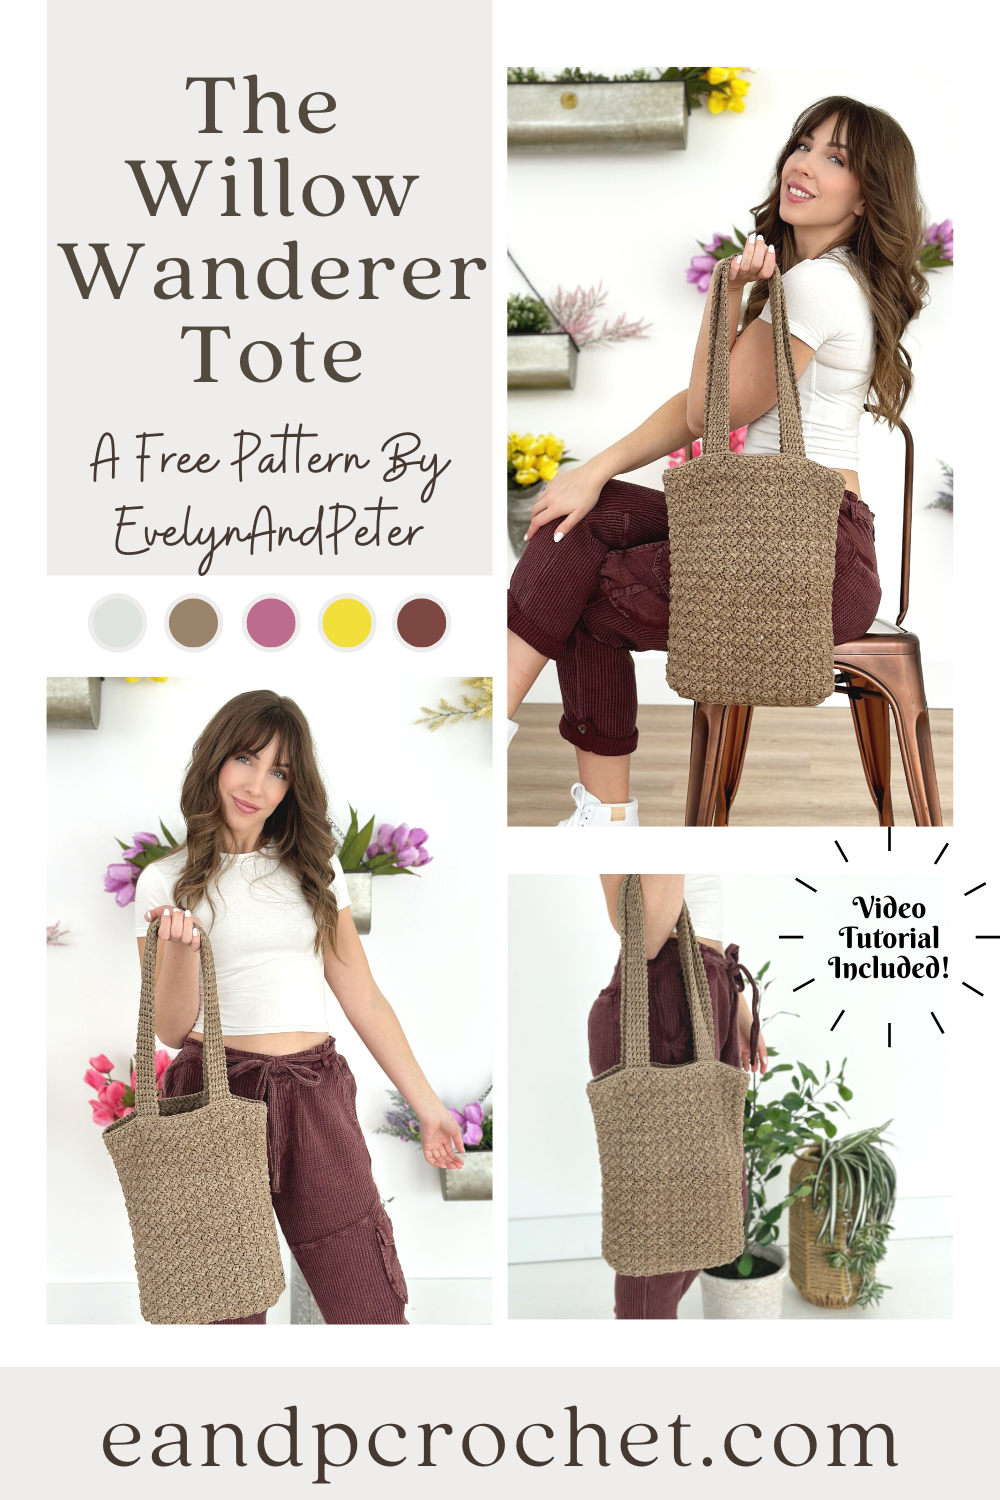
I love a good tote bag! I especially love a good tote bag when it uses Rewind yarn. The Willow Wanderer Tote uses Rewind yarn AND one of my favorite stitches!
The Willow Wanderer Tote is worked in 2 matching panels from the bottom up. Once both panels are made you’ll join them down the sides and bottom. The panels are made using the Sedge Stitch! You might recognize this stitch from my Kiah Cardigan and my Winter Moonlight Set! Overall this pattern is pretty beginner friendly. There is one spot where you will need to know how to work a Foundation Single Crochet (Fsc). It’s only a small part totaling 6 Sc in the shaping. If you don’t know how to work a Fsc, don’t worry!! I show you how to do it in my video tutorial, so be sure to check it out.
Once you have the 2 main panels made you have to make the straps! The straps are worked up in the Thermal Stitch. This is a very thick and sturdy stitch. My straps are approximately 26″ long. When you sew them onto the bag you will position it about 1.5″ down from the top of the bag on both sides. This way when you sew it on, it’s attached in a square shape and makes it extra sturdy.
I used Rewind yarn for this bag. This is such a nice yarn in my opinion. It’s super soft and a flat tape shape. There are so many nice colors too! My tote is available as a Lion Brand kit which comes with all the yarn you need to make your tote plus a FREE copy of the digital PDF pattern!
Be sure to check out some of my other bags here!

What’s better to kick off the new year than a brand new crochet cardigan?! The Kiah Cardigan is definitely in the top 5 of my favorite patterns. I hope you guys love it just as much as I do!
I used Heartland yarn for The Kiah cardigan. I love this yarn so much I try to design at least one awesome cardigan with it each year! This time I’m using the color Wolf Trap. I actually ordered this yarn a while back to make something completely different with it. When it came in the mail it had a pinker hue than what I was expecting and it didn’t go with the other colors on my project. It was absolutely beautiful though, so I shelved it for a later date. I’m so glad I kept it because I think it’s perfect for this design.
The Kiah Cardigan is worked from the bottom up in separate panels. You can easily make your cardigan longer or shorter by adding or removing as many rows as you want on the back and front panels. I think a cropped version would be super cute too! You might recognize the stitch used as the same one in my Winter Moonlight Set! I fell in love with the texture of it and knew that I had to make a cardigan!
I have a full video tutorial available if you are a beginner and need a little extra help! Be sure to check it out and subscribe so I can bring you guys more free tutorials and content!
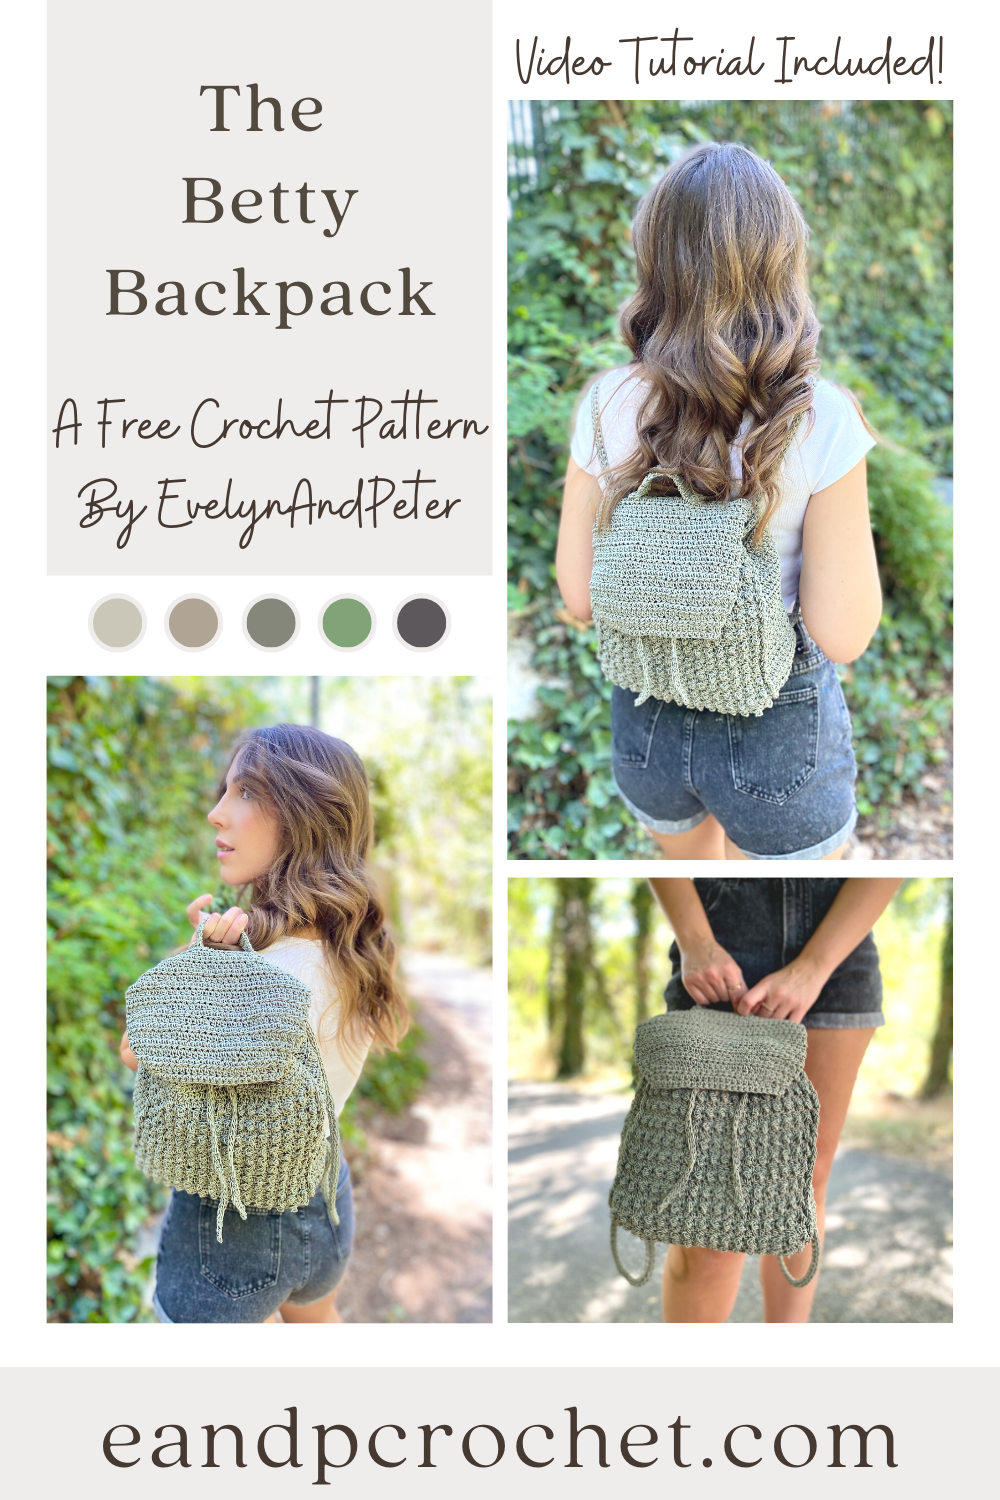
Have you tried out the new For The Home Cording by Lion Brand? I saw it and immediately knew I had to create some sort of bag with it. The Betty Backpack was the perfect outcome!
The Betty Backpack is worked flat and all in one piece! If you’ve made my Aspen Loop Bag, then you will be familiar with this construction. Once you get the main body of the backpack done, you fold it together and join on both sides. After that, you will add the upper trim in the round (don’t forget to join and turn!) and add the flap! Finally, the straps, drawstring and handle are added last.
The stitches used in this backpack are so simple but they create such a beautiful texture! You will use a combination of Hdc stitches throughout and alternating Tr/Sc stitches! Doesn’t it look like tiny puffs or bobbles? Well they aren’t! It’s just the Tr St being pushed to the front of your work! So simple and so cute.
I highly recommend using the yarn I used for this pattern or something similar. This is a cording yarn so it is very sturdy and has no stretch. It might feel a little strange and stiff to work with at first but I promise it’s worth it! If you don’t want to use a cording yarn then make sure you get a sturdy cotton or something with no stretch. The cording helps keep the shape of the backpack and is more secure for heavier weight.
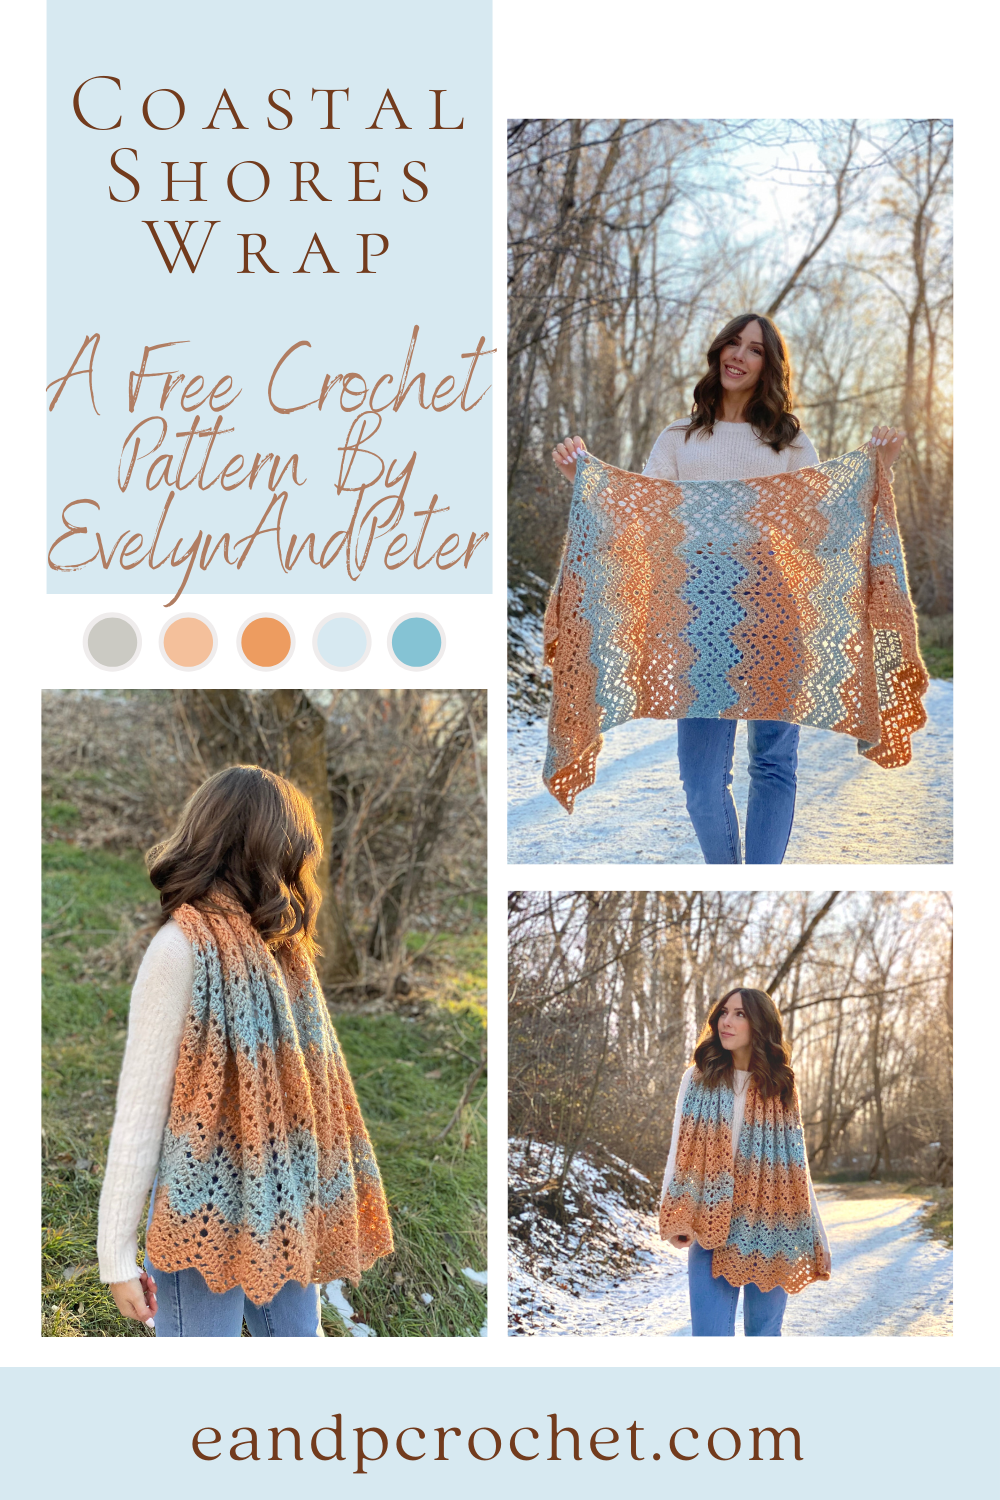
Have you seen the beautiful Scarfie yarn colors that Lion Brand has? When I saw the Seafoam/Clay color I totally fell in love. I got some and decided to use it for a future project. That future project turned into the Coastal Shores Wrap! I actually worked on this design while I was visiting family at the beach. I played around with a few different stitch ideas but ultimately settled on a beautiful ripple stitch because it reminded me of the sunrise/sunset on the coast!
The way that the colors changed so perfectly in this project made me so happy. It really did give me warm, beachy sunset vibes. There is a ton of different color options in this yarn that I think would look so great!!
Once you get the stitch repeat down the Coastal Shores Wrap is a really relaxing project. It worked up so quickly for me and was really fun to do. If you need any extra help be sure to check out my video tutorial!
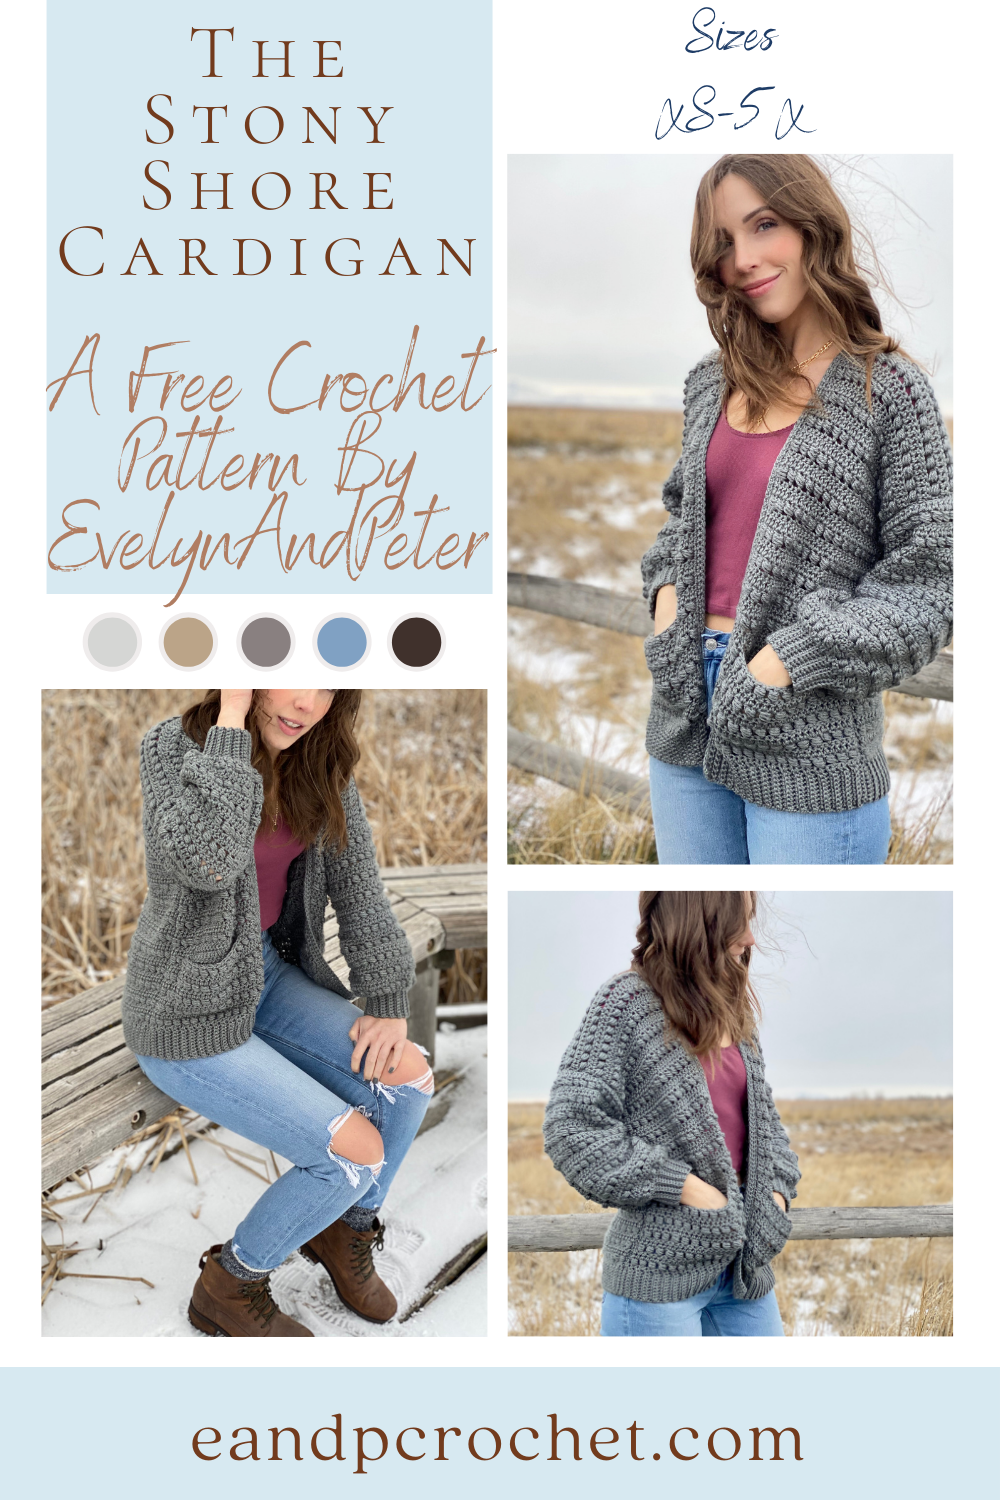
The Stony Shore Cardigan Crochet Pattern is here! I’ve been wanting to make something with this stitch for a long time and I’m glad I finally did it! I also knew immediately I would be doing a loose balloon style sleeve. I actually attempted it on my Sunset Bomber but it just didn’t go with the style. I’m sooooo happy that it worked out that way because they look AMAZING on this cardigan.
I’ve been posting sneak peeks of this sweater on TikTok and Instagram. The amount of crocheters that told me they couldn’t wait for this pattern was kind of insane. I can’t even begin to tell you all how much I appreciate the love and support on this design. It’s also a bit nerve wracking because I hope it lives up to the hype. I just want you all to love it as much as I do. Even my husband said this was his favorite sweater of mine and he is my toughest critic when it comes to crochet!! lol.
The Stony Shore Cardigan Crochet Pattern is worked in separate panels from the bottom up and is beginner friendly. Once you get the bead stitch nailed down it’s a breeze to make. You will alternate bead stitch rows and double crochet rows throughout. You can easily make your sweater longer or shorter by adding/taking away rows in multiples of 2 before tying off. Same with the sleeves!
If you are a complete beginner and need a little extra help then be sure to check out my full video tutorial!
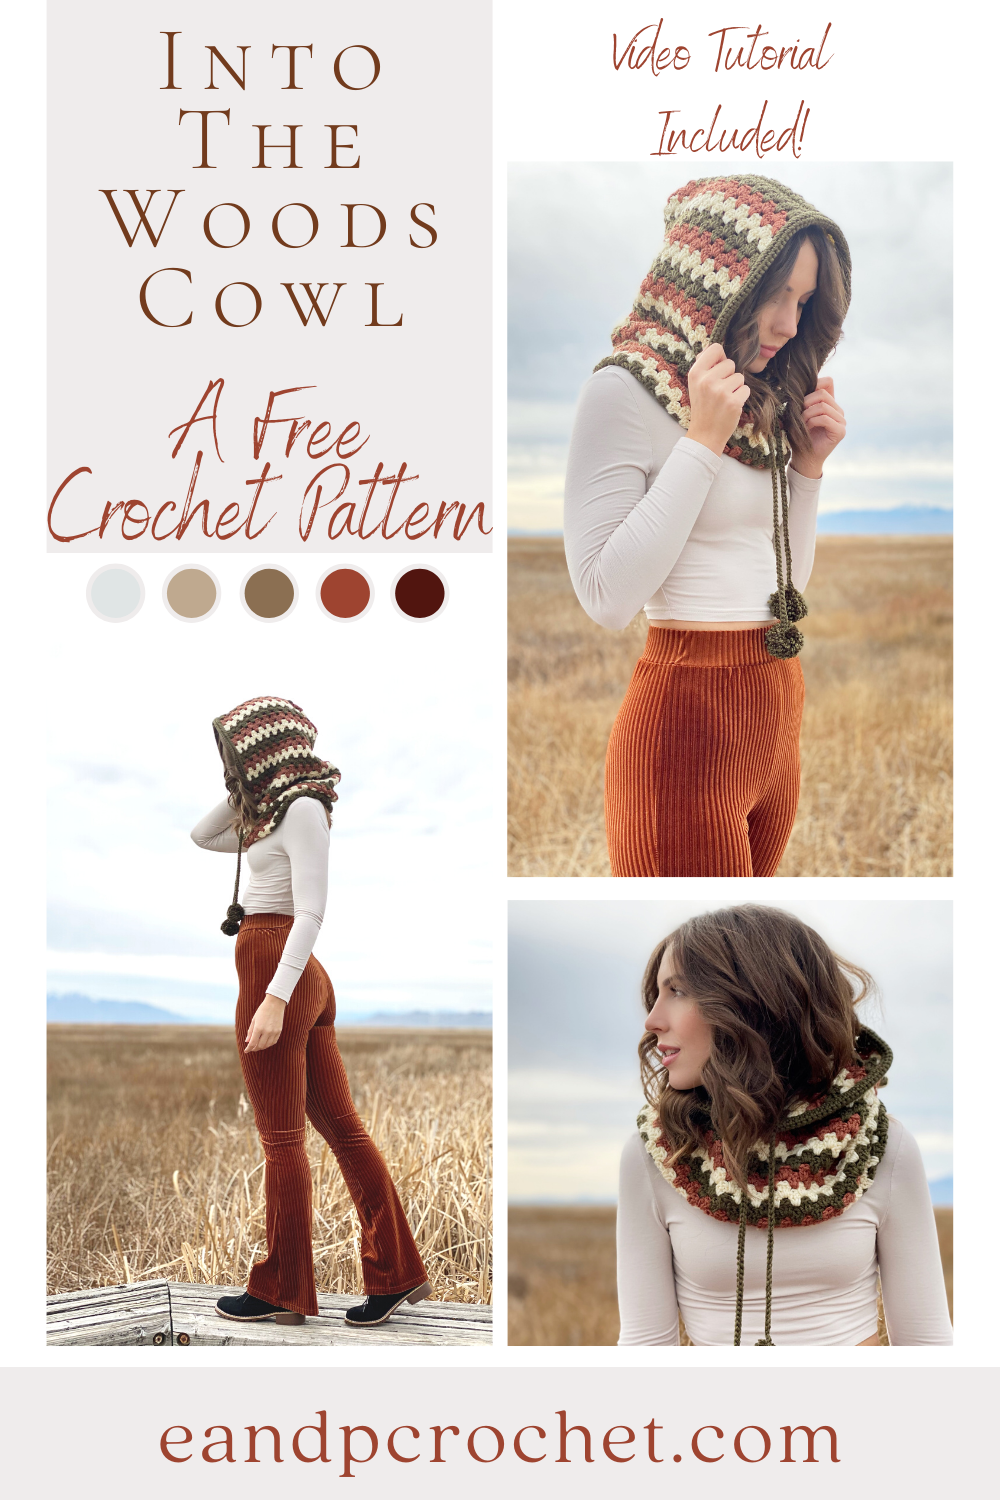
This is a new one for me and I hope you guys like it as much as I do! I’ve never made a hooded cowl before but it has definitely always been something on my “must design” list. I drew some inspo from the classic granny stitch and combined it with some retro looking colors! It’ll keep you super warm and cozy that’s for sure!
This design is worked from the bottom up! For the cowl portion you will work in turned rounds using the granny stripe stitch. Once you reach the hood portion you will work in turned rows. I recommend cutting and joining your yarn for the cowl. When you reach the hood, no need to cut your yarn. Just pick it up the side when you need to switch colors. The trim to the hood is added last. Make sure you thread your drawstring as you go to make it easier on yourself!
I used Basic Stitch Anti-Pilling yarn for my Into The Woods Cowl. They have some really nice color options too! If you purchase the Lion Brand kit you can switch out your color choices! The kit also comes with a complimentary digital download of my pattern!