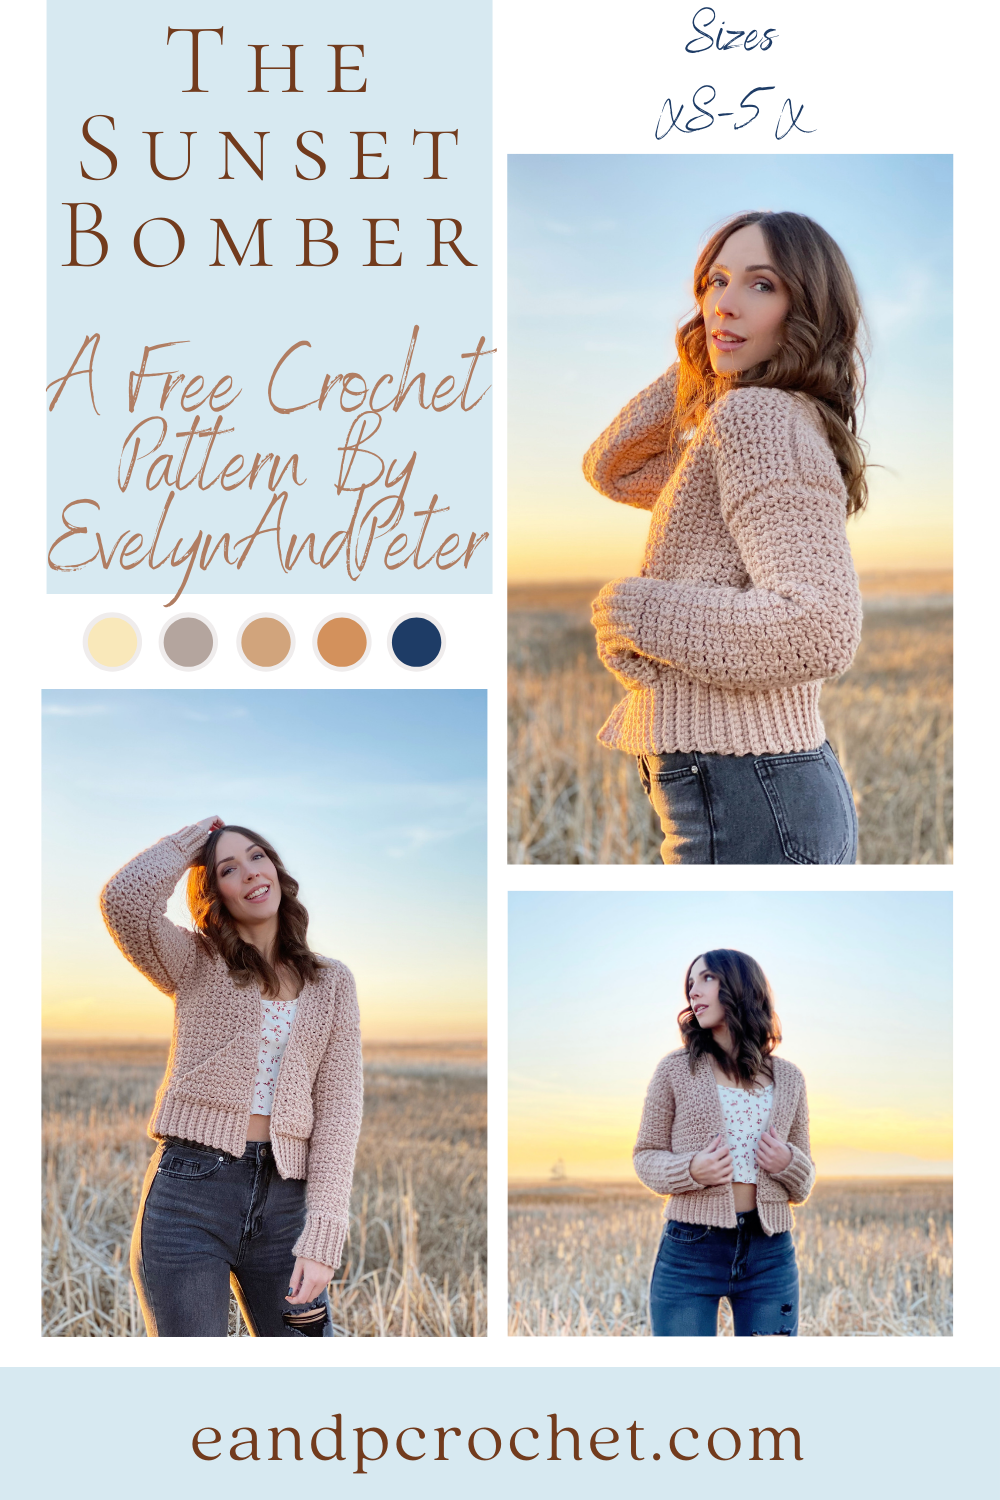
My last pattern of the year is here! The Sunset Bomber is a fun make using bulky yarn with a beautiful outcome! I love when a pattern works up quickly and this one does just that! I wanted more of a jacket look for this design and am super happy how it turned out!
The Sunset Bomber is worked in separate panels from the bottom up. Now, you will be using 2 different sized hooks for this pattern so make sure you switch when you are supposed to! The smaller hook is used in the ribbing and the larger hook is used in the main body of all the panels.
The stitch repeat in this pattern is very simple. Just single crochet, Ch 1, Sk 1! Your single crochets will be worked in the single crochet from the row below and you will always ch 1 and Sk 1 over the Ch from the row below!
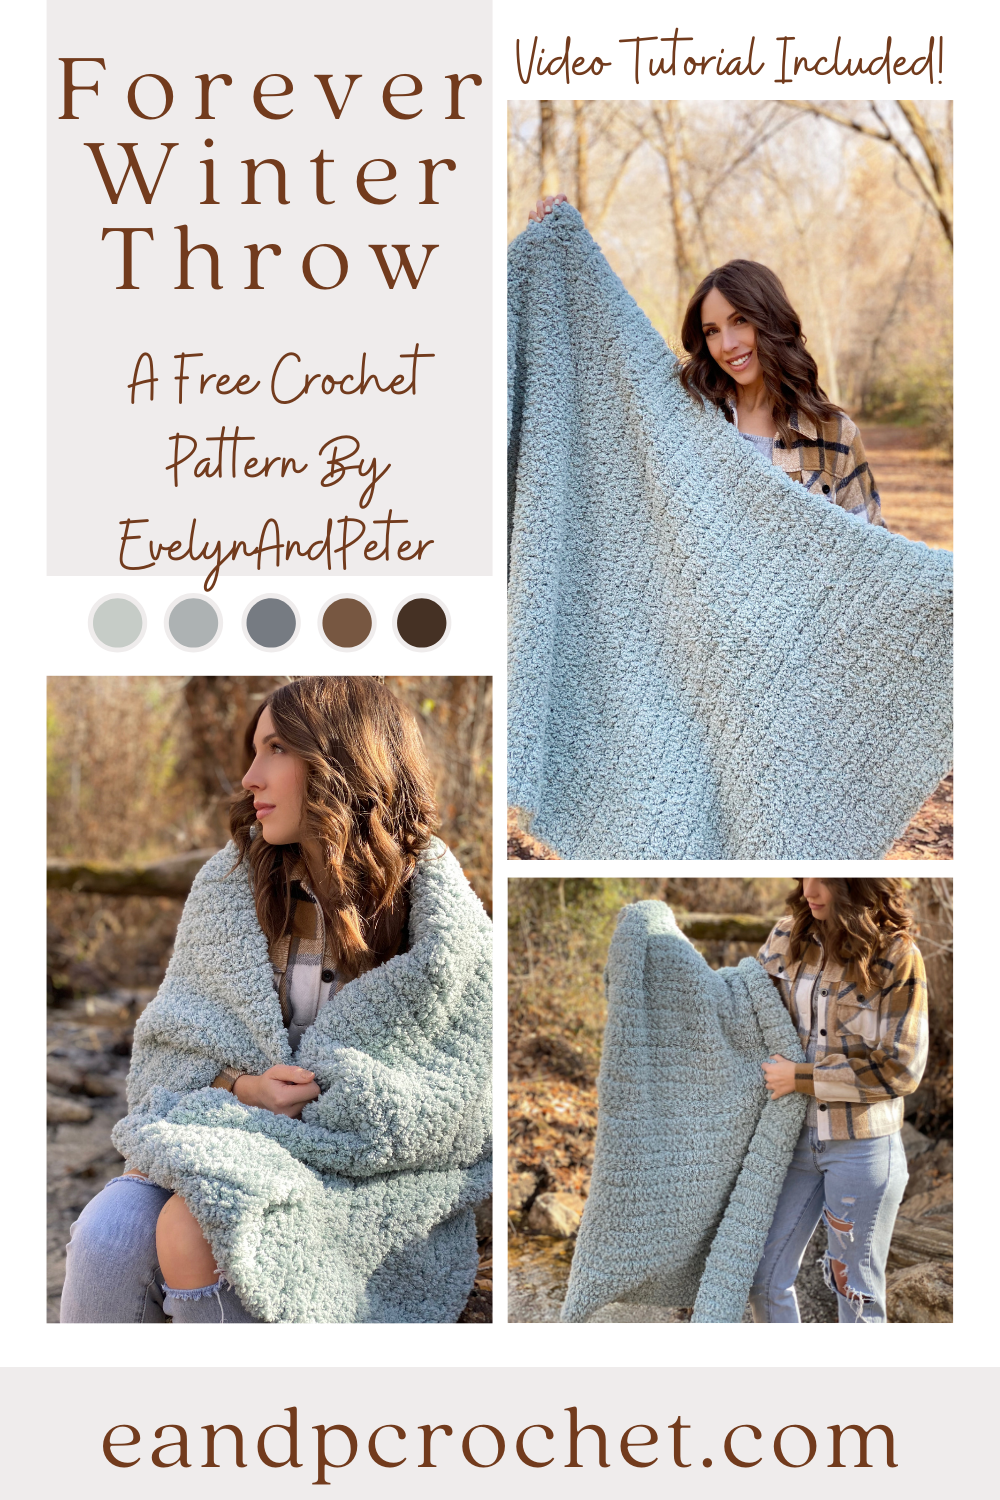
I had to do it. I just couldn’t help myself. After making The Luna Cardigan using Lion Brand Go For Fleece Sherpa I KNEW I had to make a blanket. The Forever Winter Throw is here and definitely my coziest blanket pattern! Not only is it the coziest but it’s also the easiest.
Even a beginner can do this project! The entire blanket is worked up in single crochet stitches. You can easily feel your stitches as you go and I even made a video tutorial to help you out!
If you want your Forever Winter Throw to be bigger just add more chains to the starting chain and add more rows until you are happy with the size! I only used 7 skeins for mine.
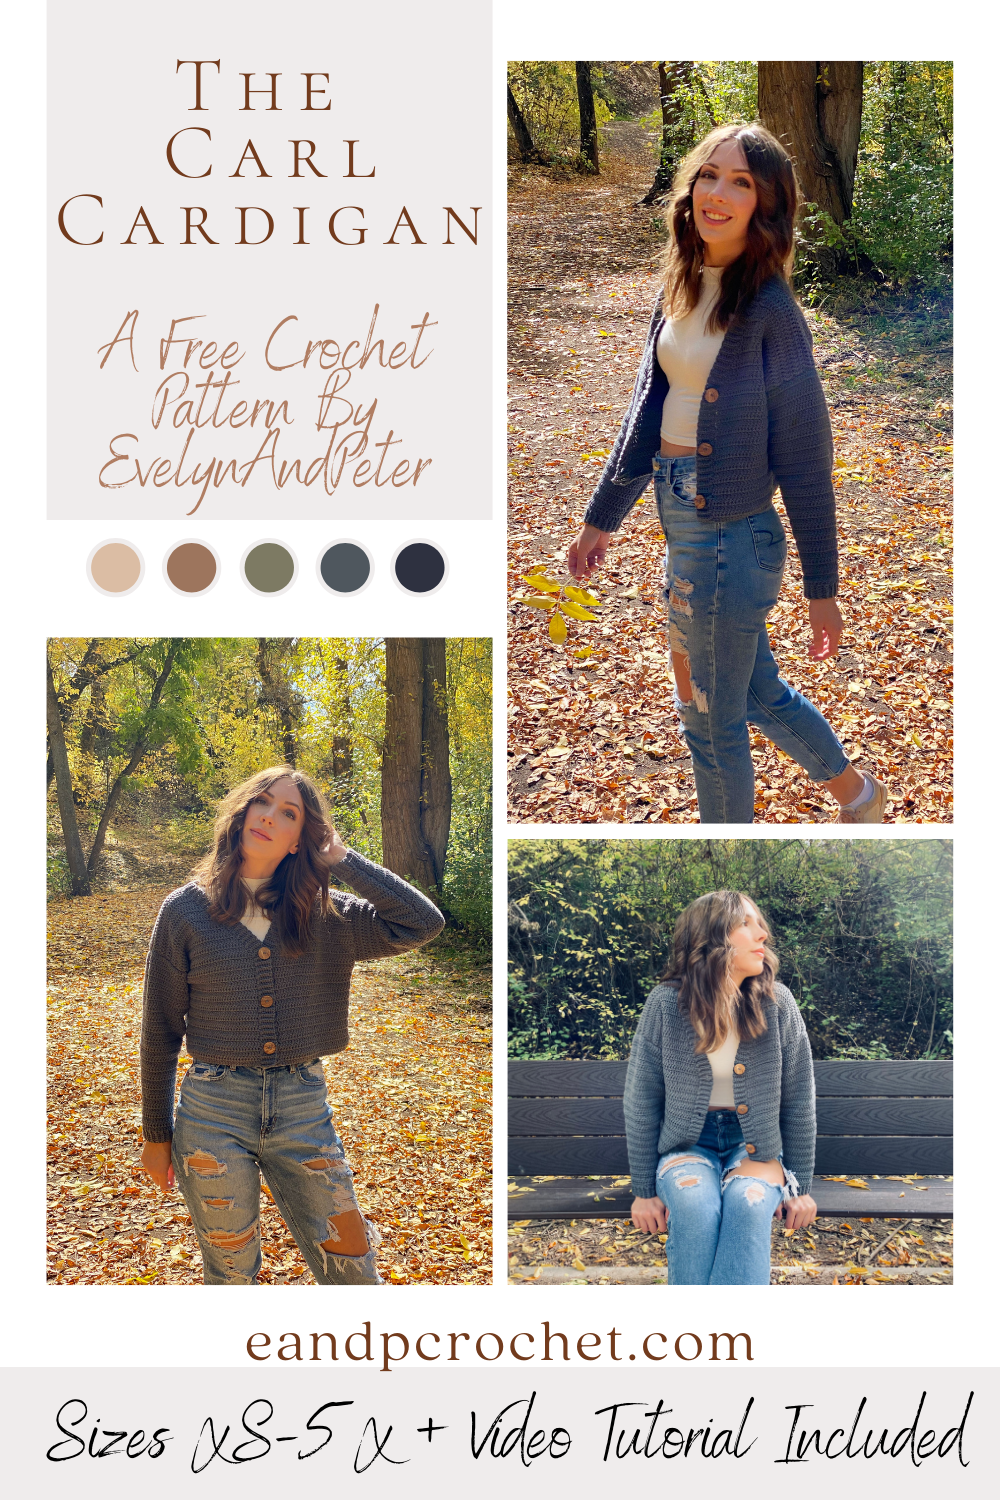
I love the look of oversized V-neck button up cardigans. There’s just something about them that I find so appealing! They give me such comforting “grandpa” vibes haha. I knew I had to make one but put my own trendy spin on it. The Carl Cardigan is my cropped and a bit more girly version of this!
The Carl Cardigan is worked in separate panels from the bottom up. When you break it down into each piece tackling this sweater is a breeze. I used the same stitch throughout and have very beginner friendly shaping. I used Feels Like Butta which is one of my favorite soft yarns. It’s very smooth to work with and frogs back easily if you make a mistake!
I know some of us prefer to have our cardigans longer instead of cropped. Good news, it is super easy to make this longer! Just add as many rows as you would like to the back panel (in multiples of 2). Then, when you make the front panels, add the same amount of rows before you start decreasing! Remember, you will need extra yarn!
You might recognize the ribbing technique around this cardigan. I did the cuffs from The Pemberly Pullover the same way! You will be working the trim of the cardigan directly off the sides of the front panel. It might look a little intimidating at first, but when it comes down to it, you are just slip stitching to the panels as you go! If you are new to this technique be sure to check out my video tutorial where I show you exactly how to do it.
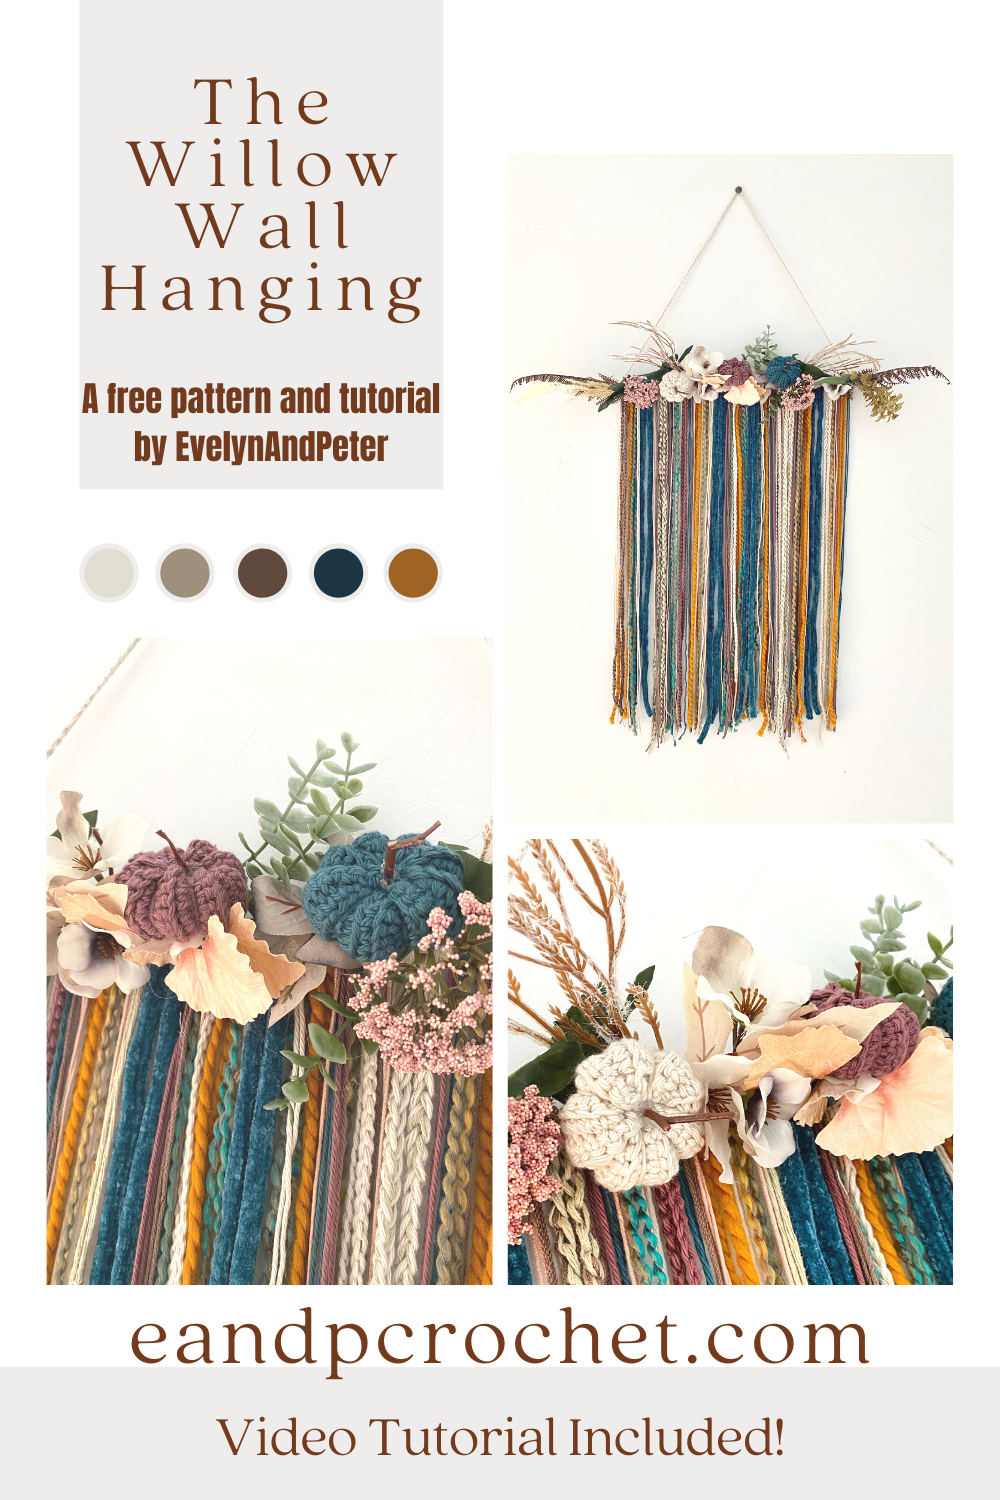
I’m back with another seasonal design. This time, I decided to combing my love of crochet, yarn and fall colors to make The Willow Wall Hanging! The Willow Wall Hanging is beginner friendly and honestly just super fun to make. It was a nice break from a long garment project and it really lets your creative side shine! It goes great with my fall/Thanksgiving decor!
I picked a bunch of different yarn from JOANN for this project. Basically I just walked up and down the aisle with a color pallete in mind and grabbed all the yarn colors that went with my vision! I wanted a warm autumn look to mine but you can easily mix it up with whatever colors you want! I also did not follow any rules when it came to picking the fiber type and weight. I used light weight yarn all the way up to Jumbo! Really, anything goes!
Another fun thing with this project was picking out the floral. JOANN has an amazing selection of flowers, stems and picks. I matched up my yarn and flowers as I went. You can easily customize the colors to your liking. You can even leave the pumpkins off. Or maybe even switch them out with every season!
I hope you guys enjoy this tutorial! Be sure to check out the full video tutorial if you need any extra help! Will you be making a Willow Wall Hanging?!
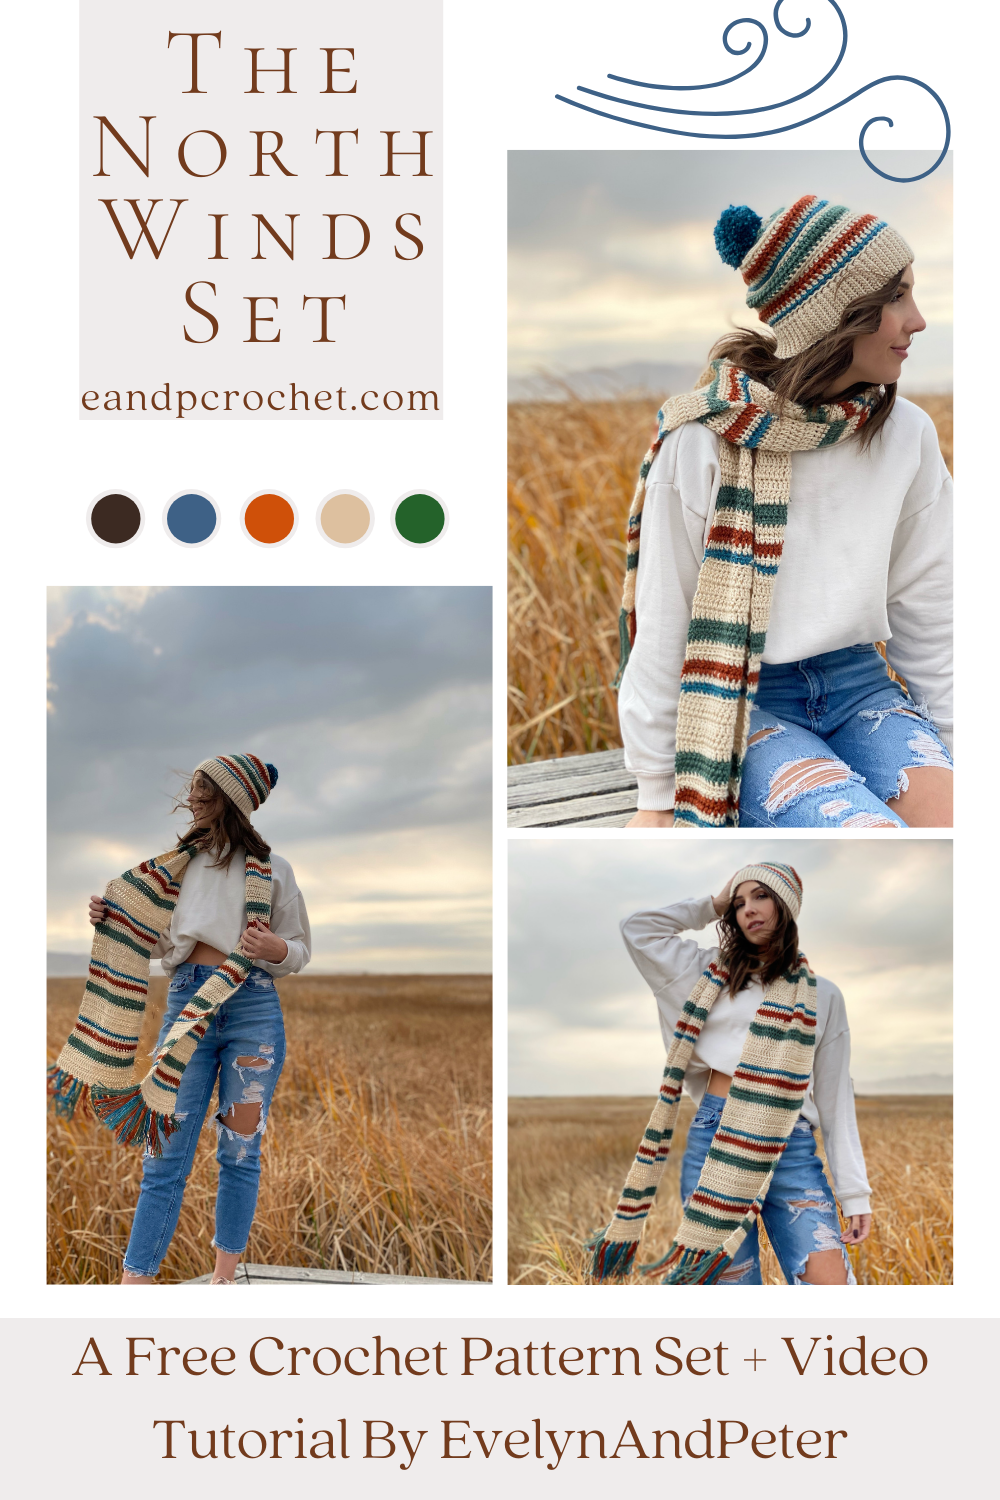
The North Winds Set is here! I’m thinking It’s going to be great for Christmas gifts this year. Beginner friendly and fast to make but also kept my interest throughout with the subtle stitch changes!
The striping on the scarf and beanie are my favorite part. And believe it or not, I had almost no ends to weave in when I was finished! Every time I had a color change for the scarf I cut the yarn, tied a knot and worked my stitches directly over the ends. This worked out amazingly and I’m so glad I did it so I had wayyy less ends to weave when I was done!
Heartland yarn is one of my favorites and It’s what I used for both patterns! The yardage listed below is enough to make at least 1 hat and 1 beanie, including a pom and fringe!
I’ve been keeping Leo The Spider a secret since the first week of July. It’s finally October and I get to share him with you! I’m not normally huge into Halloween decorations but Leo The Spider is definitely one I can get behind.
If there was ever a cute and cuddly spider then Leo is totally it. His fluffy fur and cute little eyes are more sweet than spooky. All 3 of my girls have been trying to claim him as their own but I think he will stay in my office as my little buddy. haha.
I used Lion Brand fur yarn for the body and some blanket yarn for the legs! The body is made in one piece and the legs are made by crocheting 4 tubes! There is no sewing at all for this giant amigurumi which is my favorite part! He works up so quickly and was really fun to make. Don’t be scared to use the fluffy yarn, you can easily feel the stitches with your fingers and the body is worked in continuous rounds with a stitch marker so it’s easy to keep track!
I have a full video tutorial available of Leo if you need some extra help! Be sure to check it out and subscribe to my channel for more free patterns! All of the supplies I used are available at JOANN and are linked below!
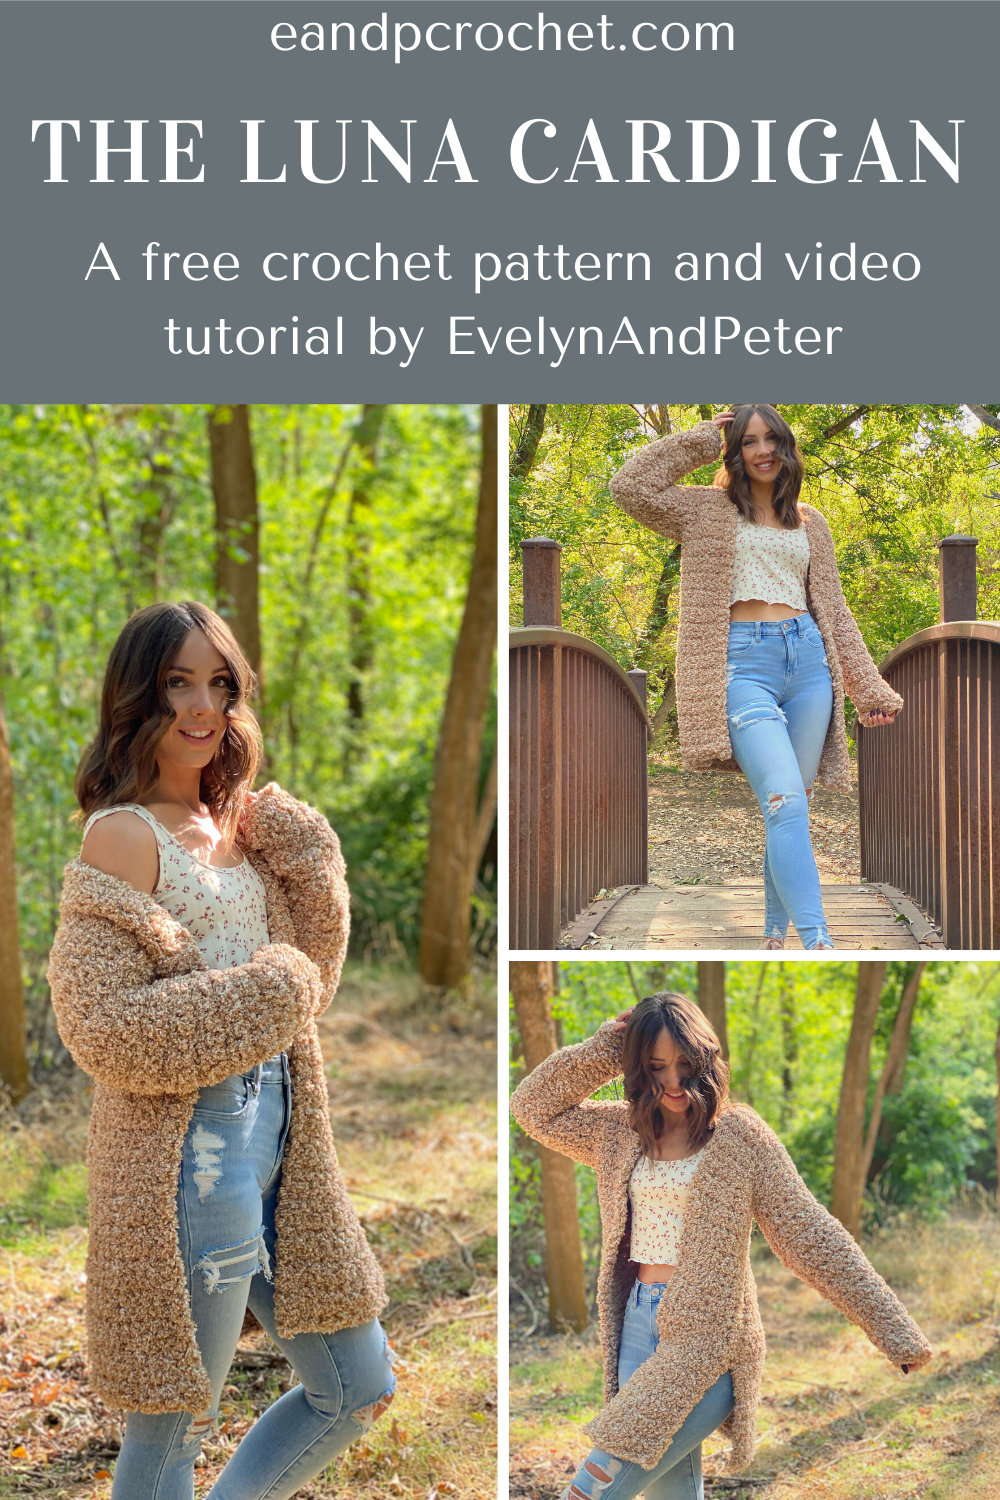
The secret is finally out!! My friend Meghan and I have been working on an awesome collab for you guys and we finally get to reveal it! The Luna Cardigan isn’t being released by herself. She has a knit sister design called The Lottie Cardigan!
The Luna (crochet) and The Lottie (knit) are both beginner friendly and available in sizes XS-5X! Although one is knit and one is crochet we designed them so that they would still be similar in look and fit! Both are free on our blogs and each have a full video tutorial! Not only that but they each are available as kits with Lion Brand! As always, the kit comes with the yarn to make your own cardigan + the PDF digital download of the pattern.
The Go For Fleece Sherpa yarn is so soft and amazing! Although it does take a tiny bit of practice working with fluffy yarn, the outcome is worth it! I have a full video tutorial available in case you need some extra help!
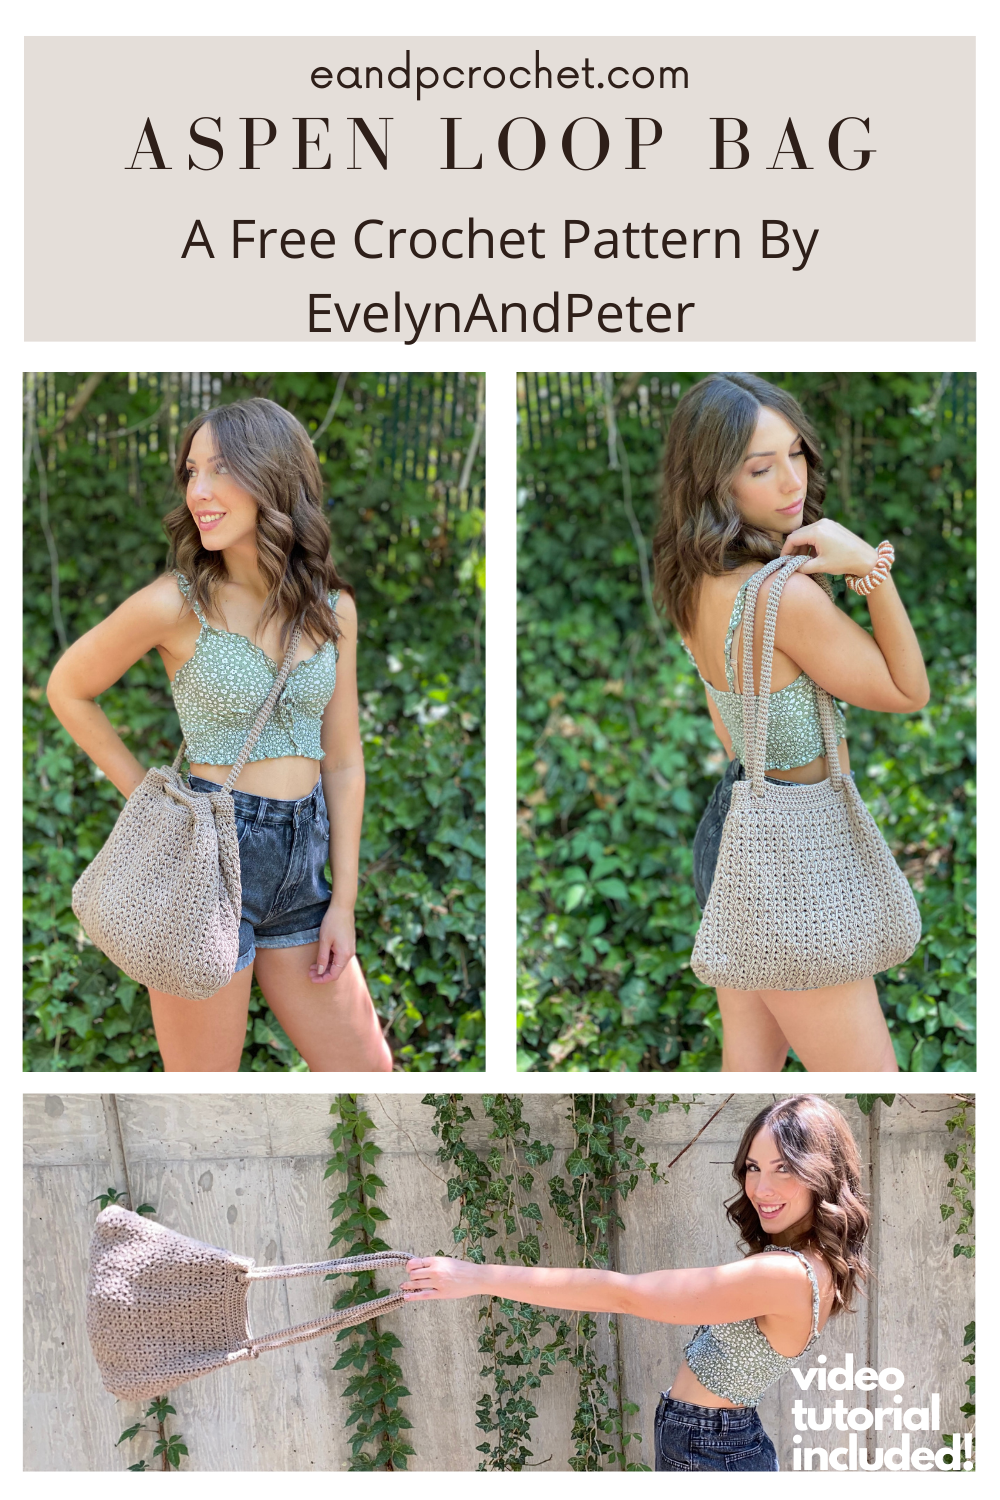
Did I just make my favorite crochet bag ever?? Yup! The Aspen Loop Bag crochet pattern is here! It’s worked up in one large piece and then seamed up the sides to form the bag! The trim and loop handle are added last.
I used the Feather stitch for The Aspen Loop Bag! I saw this stitch a while back and have been keeping it in the back of my mind for the perfect project. I’m so glad I decided to use it for this bag! Once you get the stitch down this pattern is a breeze. You’ll just be repeating the Feather stitch over and over! I know this stitch is probably a new one for most of you so I even made a full VIDEO tutorial! I’ll walk you through step by step on making your bag!
24/7 Cotton is the perfect yarn for this project. Nice and sturdy but not rough on the hands! There is also so many different color options for it. If you switch out the yarn I still recommend trying to use some sort of sturdy cotton!
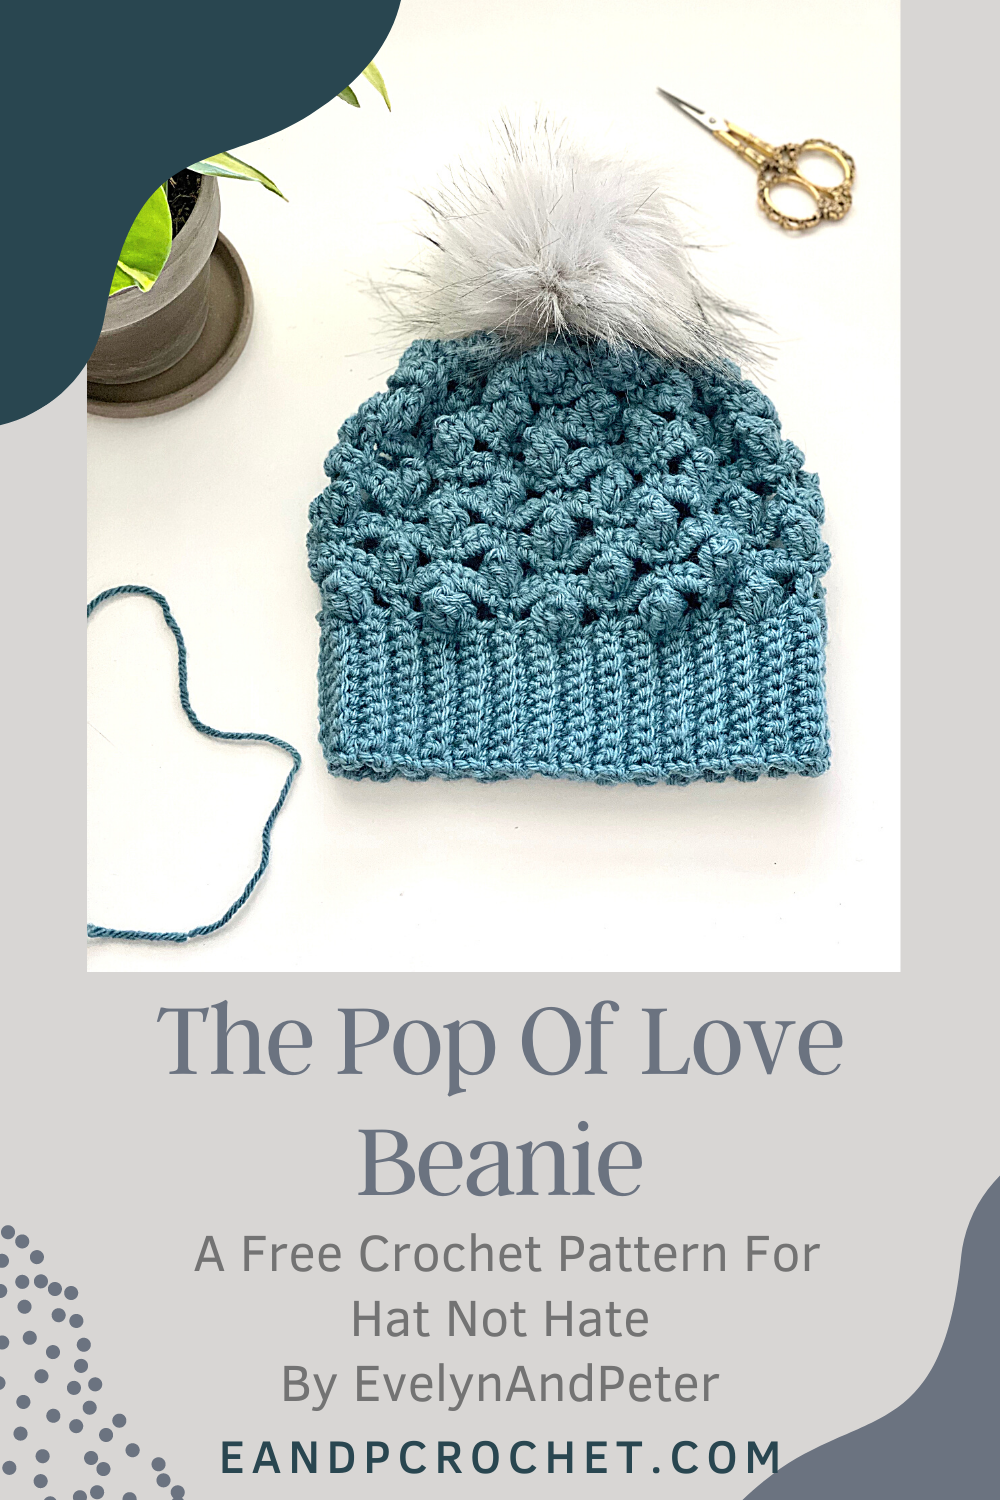
I’m sure you have already heard about Hat Not Hate but if not, let me tell ya about it! Hat Not Hate is an anti-bullying campaign by Lion Brand! I’m sure we’ve all experienced being bullied at some point growing up. It’s not fun at all and can be to an extreme amount for some kids! Hat Not Hate is a “craftivist” movement to actively eradicate bullying!
So what do you do? Make a blue hat that fits head sizes 16-20″ in circumference (ages 5-18) and donate it to Lion Brand! October is national bullying prevention month. The hats that are donated will be distributed to kids in school across the country! A total of 58,248 hats have been made and donated so far!! Let’s get that number even higher!
Check out the Hat Not Hate website for all the info you need on where and how to donate a hat!
I designed a crochet pattern- The Pop Of Love Beanie for Hat Not Hate! This beanie is really quick and fun to work up. The circumference is about 18″ which fits the Hat Not Hat criteria for donation! I used popcorn stitches in the pattern which are really fun to make and give it a cute texture. I also designed the Be Kind Beanie a couple years ago which is also available on my blog!
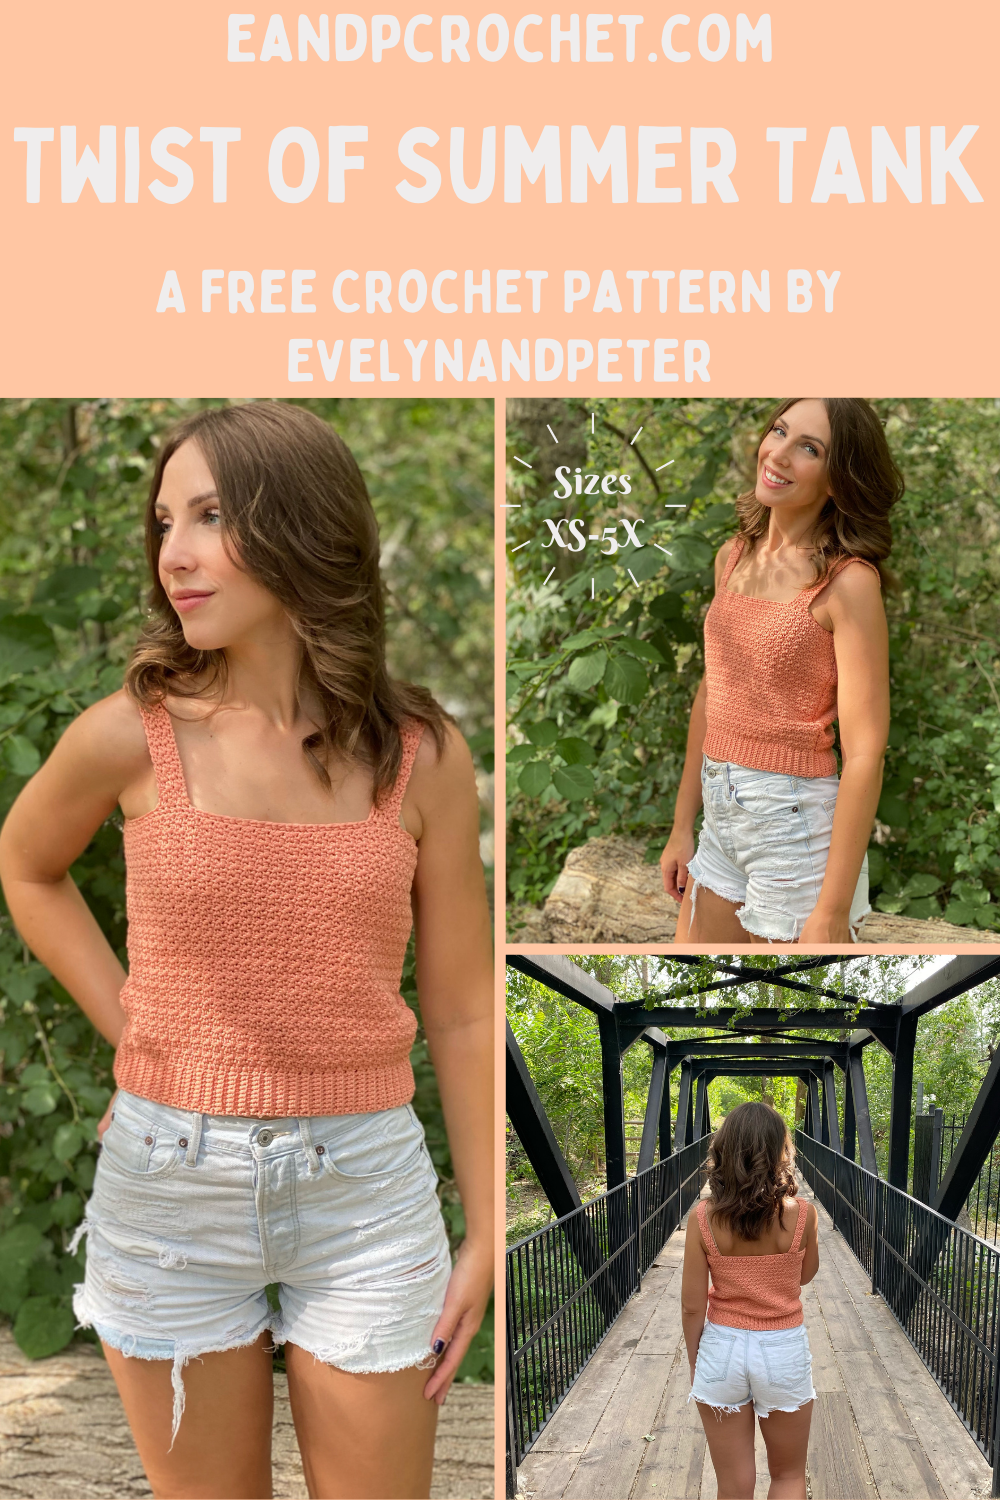
I’m back again with another summer design! This time I made a square neck style tank top with Coboo yarn called The Twist Of Summer Tank! This design is definitely beginner friendly and a very easy make. I used the Lemon Peel stitch to work up the main body of this top. I love the beautiful texture this stitch creates, it’s one of my all time favorites! You might recognize it from my Harvest Pullover!
The Twist Of Summer Tank is worked up in 2 panels from the bottom up. You will create the ribbing first and then rotate to work the main body. Each panel is exactly the same. Next we will sew the panels together, add a quick trim and then crochet the straps!
It’s also super customizable. You can easily add some rows to make it a longer length top or remove rows for a more cropped look! Just adjust the length before tying off your panels.