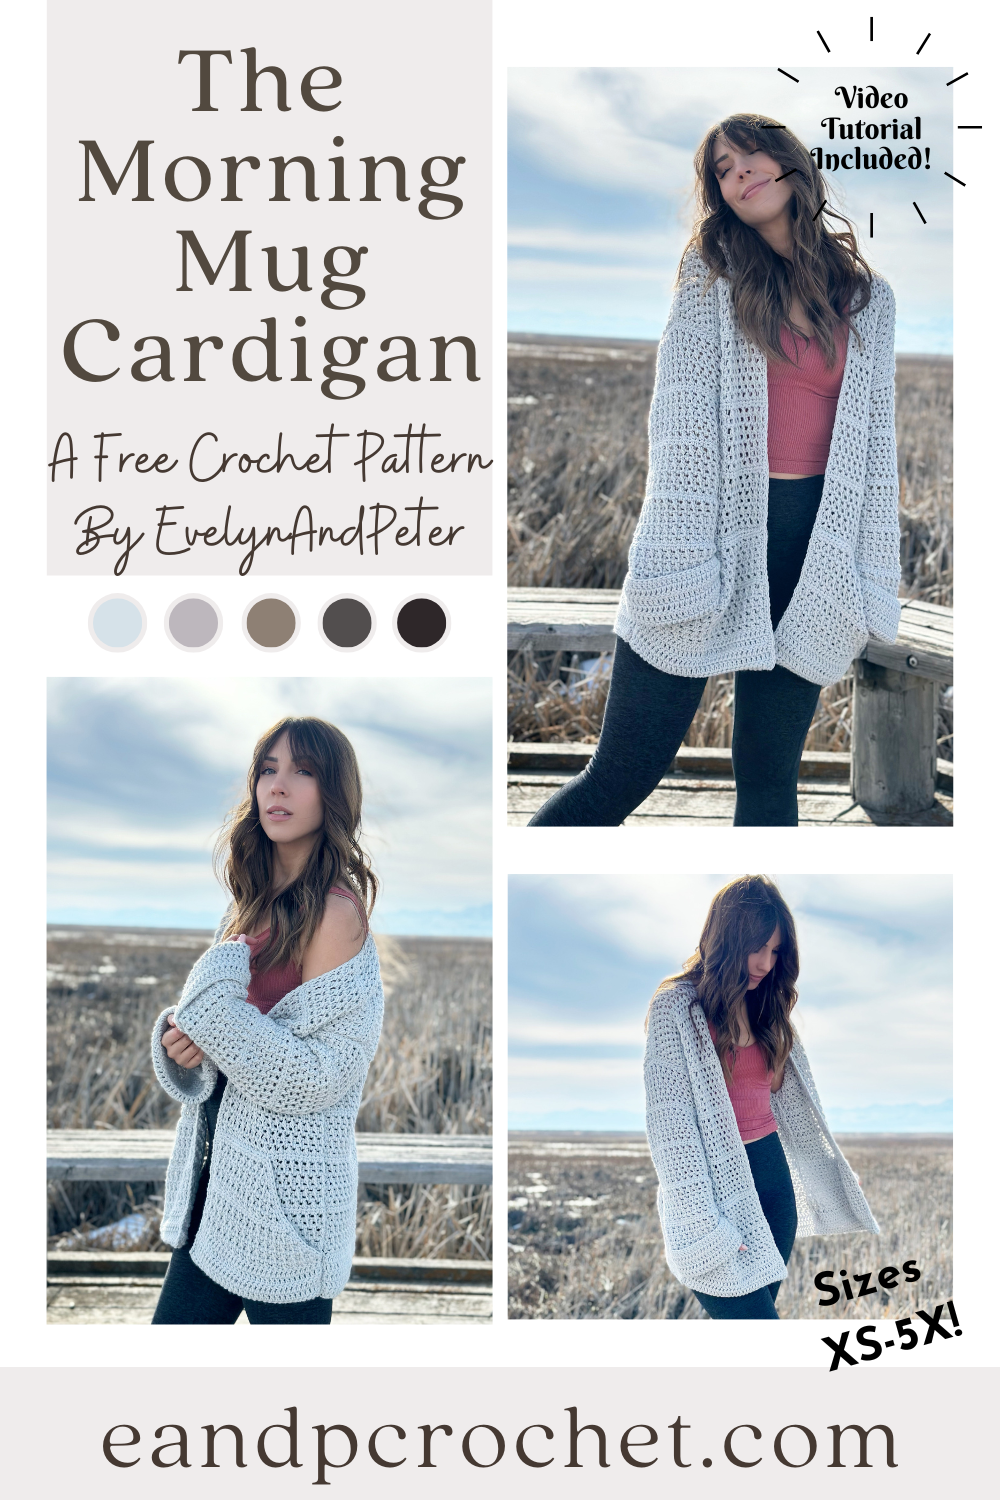
I’ve been wanting to design a longer style cardigan so that I can wear it over leggings for extra coziness. The Morning Mug Cardigan is long, with oversized cuffed sleeves and deep pockets!
The Fit- This cardigan is long and written with plenty of positive ease for a loose comfy fit. The stitch that I use in it is super stretchy. Once you work up your cardigan and put it on, it stretches another 6-8″ than what is listed in the chart below. The sleeves are extra long so that you can do a large cuff at the end. The large pockets are as wide as the front panel and are added last so you can always keep them off if you want to!
The Yarn- I used Lion Brand Pound Of Love for this design. I feel like this yarn doesn’t get the love it deserves. A lot of times, it is looked over for garments because the skein is SO big and you don’t think you need that much. For this cardigan you will use between 2-3 skeins depending on the size you make. It was actually really nice not having to join in a bunch of skeins while crocheting! It’s also a soft and sturdy yarn which holds up nicely. Another plus is all the color options that are available! I used Elephant Grey for mine but there is a bunch to choose from! Be sure to check out my kit, it comes with the yarn and a FREE copy of my printable pattern!
The How- This cardigan is worked in separate panels from the bottom up. You can easily adjust length by adding or removing the 8 row repeat on the back and front panels. Keep in mind the cardigan uses a stretchy stitch and will stretch down with the weight of the cardigan when worn! The chart below does not include the 6-8″ that the cardi will stretch. The sleeves are long and oversized so that you can cuff them. You will notice that the larger sizes have shorter sleeves. This is because it is a drop shoulder design! If you need to adjust sleeve length you can add or remove rows as well. The pockets are wide and deep. They are the width of your front panel with some decreases on one side. If you don’t want pockets just skip over the instructions and move on to the trim!
Don’t forget I have a full video tutorial available if you need some extra help or have a question! Be sure to subscribe to my channel for more free patterns and content!
What’s better to kick off the new year than a brand new crochet cardigan?! The Kiah Cardigan is definitely in the top 5 of my favorite patterns. I hope you guys love it just as much as I do!
I used Heartland yarn for The Kiah cardigan. I love this yarn so much I try to design at least one awesome cardigan with it each year! This time I’m using the color Wolf Trap. I actually ordered this yarn a while back to make something completely different with it. When it came in the mail it had a pinker hue than what I was expecting and it didn’t go with the other colors on my project. It was absolutely beautiful though, so I shelved it for a later date. I’m so glad I kept it because I think it’s perfect for this design.
The Kiah Cardigan is worked from the bottom up in separate panels. You can easily make your cardigan longer or shorter by adding or removing as many rows as you want on the back and front panels. I think a cropped version would be super cute too! You might recognize the stitch used as the same one in my Winter Moonlight Set! I fell in love with the texture of it and knew that I had to make a cardigan!
I have a full video tutorial available if you are a beginner and need a little extra help! Be sure to check it out and subscribe so I can bring you guys more free tutorials and content!
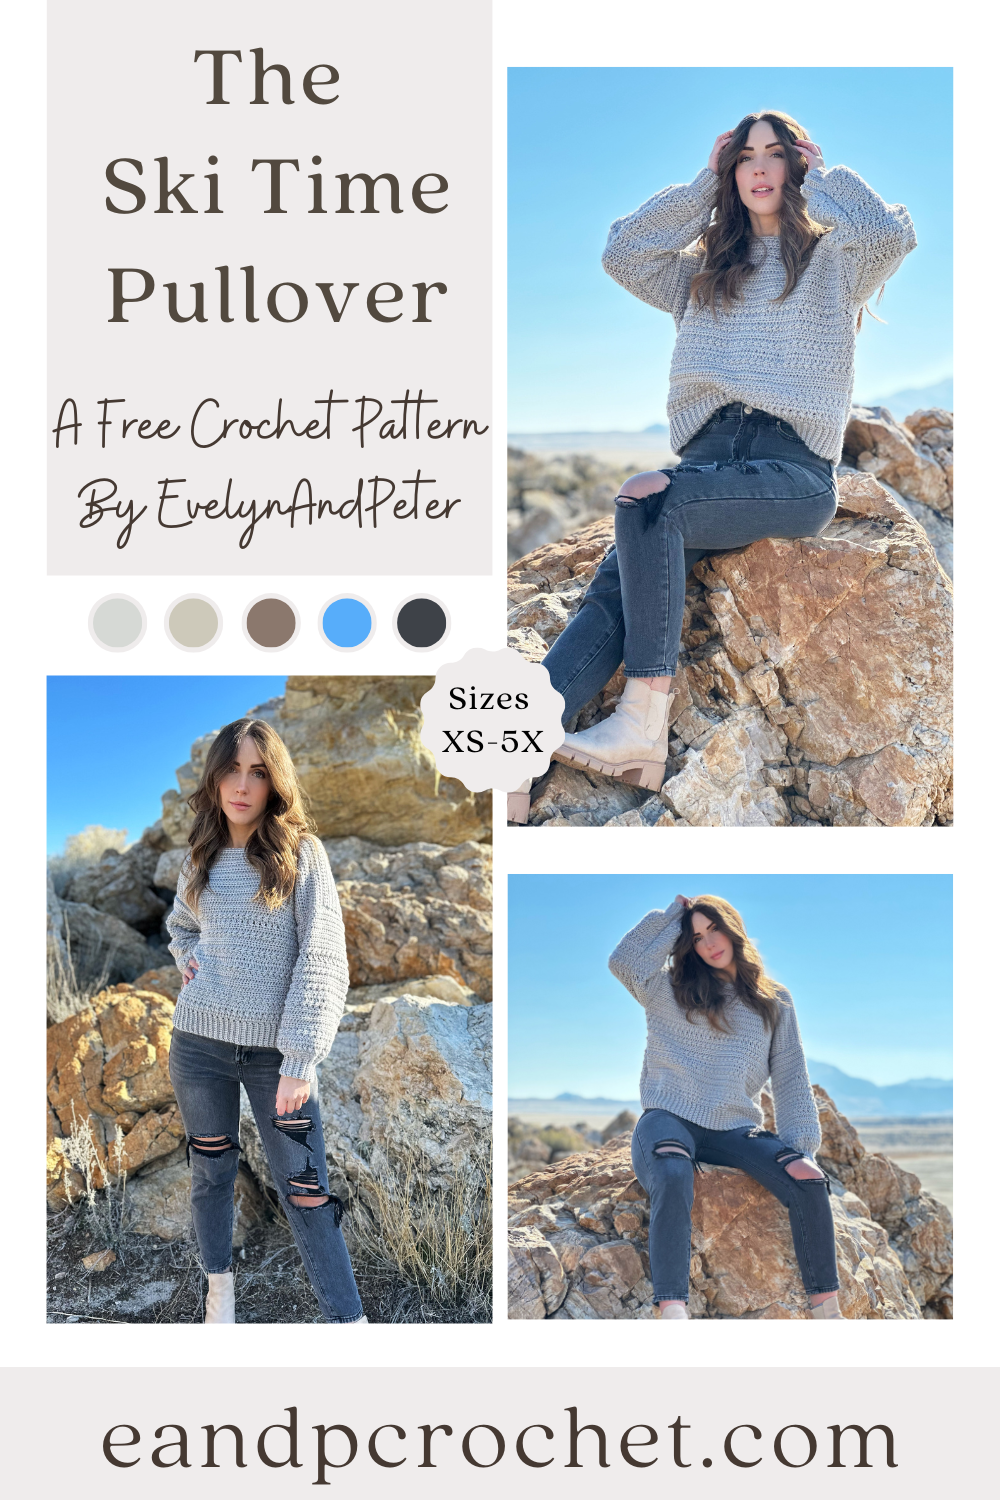
Which do you prefer… Teatime? Or Ski Time? The Ski Time Pullover is the sister design to The Teatime Cardigan! I decided to go with my same stitch pattern but wanted to make this one a solid color for a more subtle look! But…I do reallllly want to see someone make this one with different color stripes! I think it would be so cute!!
I used Heartland yarn for this design which is one of my favorite soft and cozy yarns. It’s the same yarn I used for The Stony Shore Cardigan and The Pemberly Pullover! Be sure to check them out if you want more heartland design! There are a ton of colors in Heartland to chose from and it’s really easy to work with. No snagging or catching on your hook and the sheen is beautiful! If you want a free copy of this PDF pattern and want to use Heartland yarn, then be sure to purchase my kit for the best deal!
The Ski Time Pullover is worked from the bottom up in separate panels. You can easily add more rows if you want a longer sweater! Just add as many rows as you want before the neckline shaping on the front panel, then add the same amount to the back! It’s also written with several inches of positive ease, so no need to size up. I’m wearing a size small in the photos!
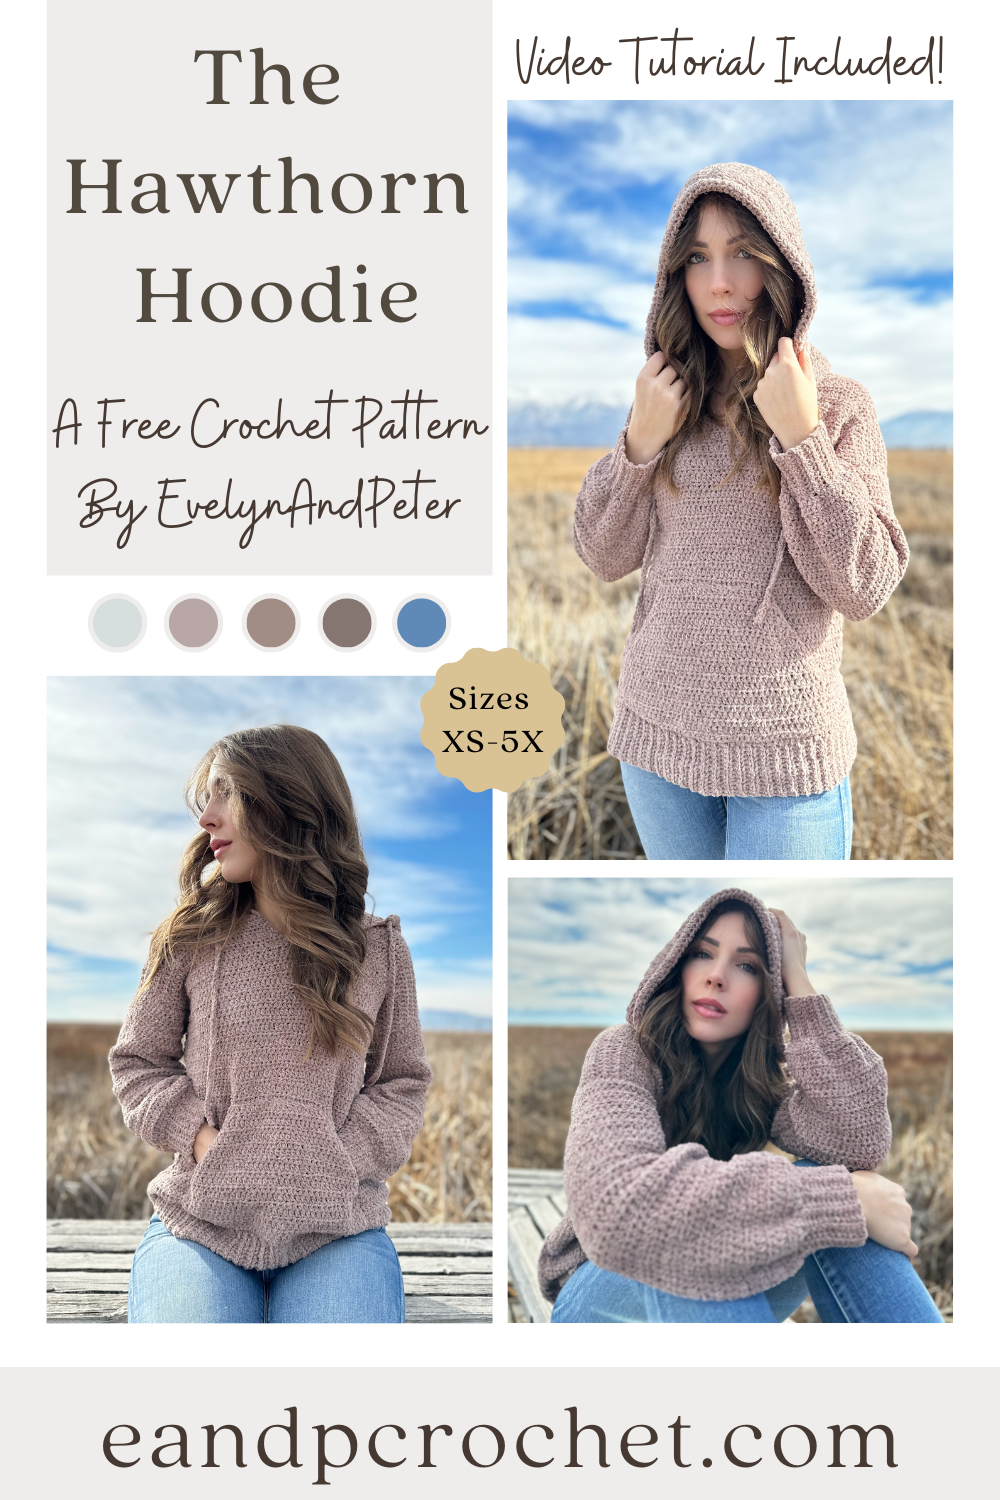
I might have a little obsession with hoodies. Especially cozy ones. And this one might be the coziest one yet. Meet The Hawthorn Hoodie!
This Hoodie uses a super soft yarn from Lion Brand called Let’s Get Cozy: Chenille Appeal! I loved working with this yarn and think the finished texture of The Hawthorn Hoodie is amazing! There are lots of pretty colors to pick from as well.
If you want your hoodie to be longer or shorter, you can easily add or remove rows on the front panel before shaping the neckline. Just make sure you add or remove the same amount of rows to the back panel as well. Don’t forget this will alter the amount of yarn required. You can also leave the pocket off the front as well although I think it ties this design together perfectly! My favorite part of The Hawthorn Hoodie is the oversized cozy hood.
You’ll be using Hdc stitch for most of this design so the panels work up quickly! This yarn has a fluffy texture but overall I found it easy to work with! I have 2 other hoodie patterns available that you might enjoy if you like this one. The Happy At Home Hoodie and The Bonfire Beach Hoodie. Be sure to check those out as well!
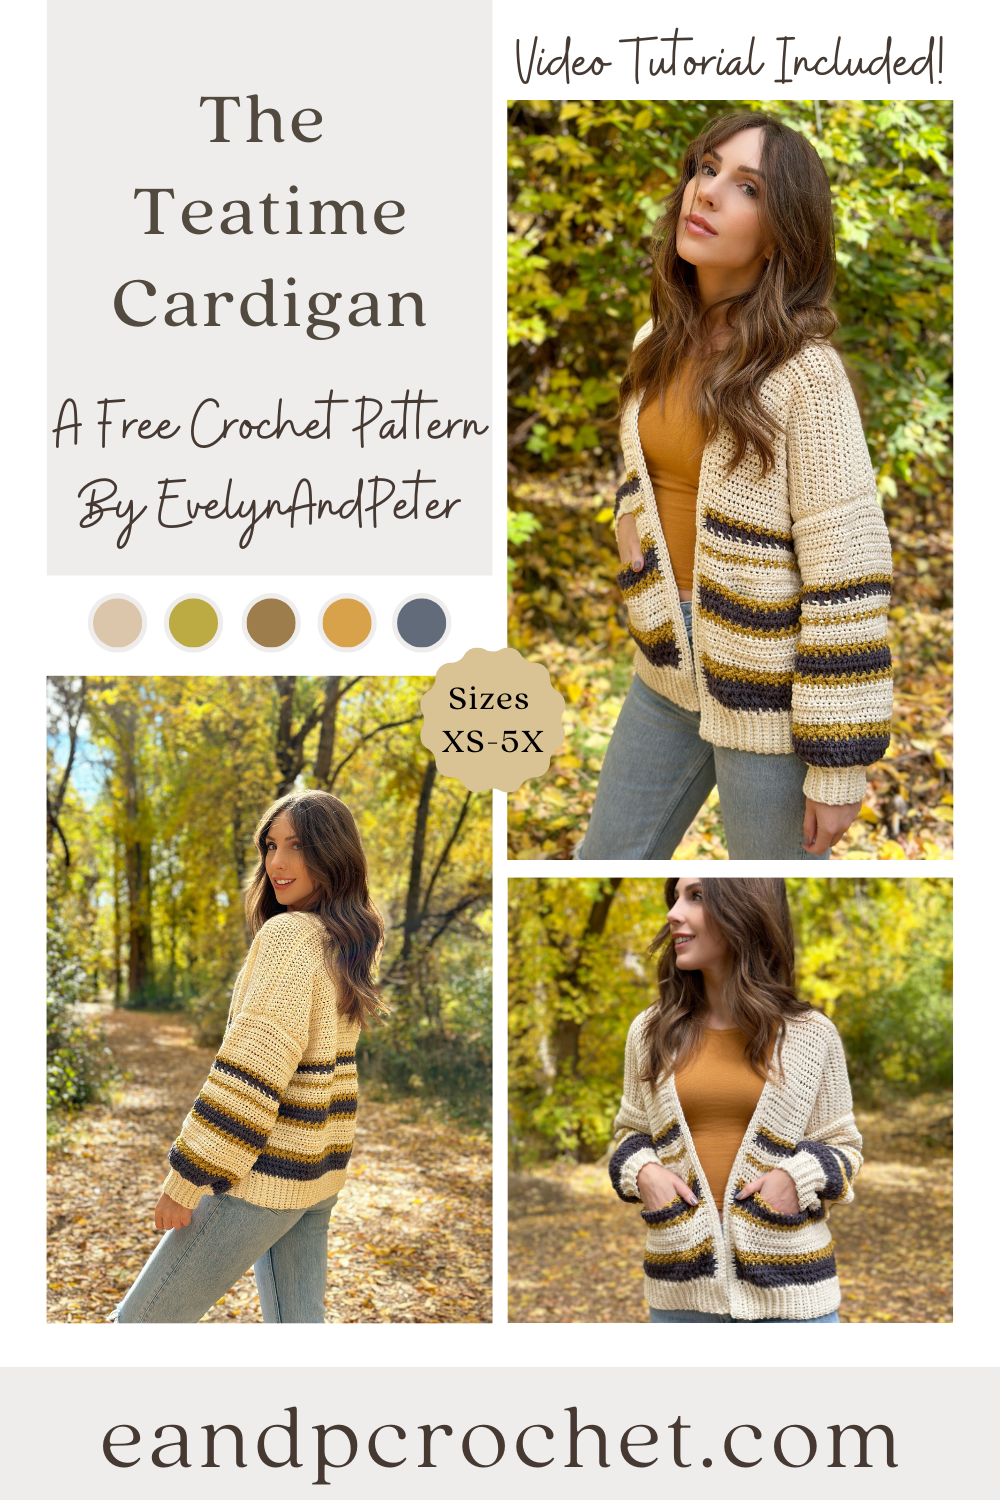
It’s Teatime! So obviously that means you need The Teatime Cardigan crochet pattern! This cardigan pattern gives all the cozy vibes. The Teatime cardigan features fun stripes using a unique blend of stitches, giving it a collegiate look. It has a slightly oversized fit with balloon style sleeves. There are so many color options to fit your style!
The construction of this cardigan is pretty beginner friendly. I do use a few different stitches for the stripes that you may have not used before but don’t be afraid! I have a full video tutorial on how to do these stitches if you need a little bit of extra help. They really are very simple to do once you get them down. The same stitch repeat is used on all of the panels.
One of the fun things about this cardigan is picking out the color combo that you want! There are so many options to do and I can’t wait to see what everyone picks! I used Color Theory yarn for my cardigan and I do have a kit available! You can customize the yarn colors if you purchase the kit. I have a couple of tips when working with stripes. When you change colors at the end of each row, you can crochet the next row directly over the tails of yarn for less ends to weave in! You can also crochet your trim directly over the tails of yarn. I like to tie my tails in a knot first before doing so.
Another great thing about The Teatime cardigan is the length is easy to adjust! You can simply add more rows to both the back and front panels if you want your cardigan longer. If you want it cropped, just remove rows. Do the same amount of rows to all 3 panels before fastening off.
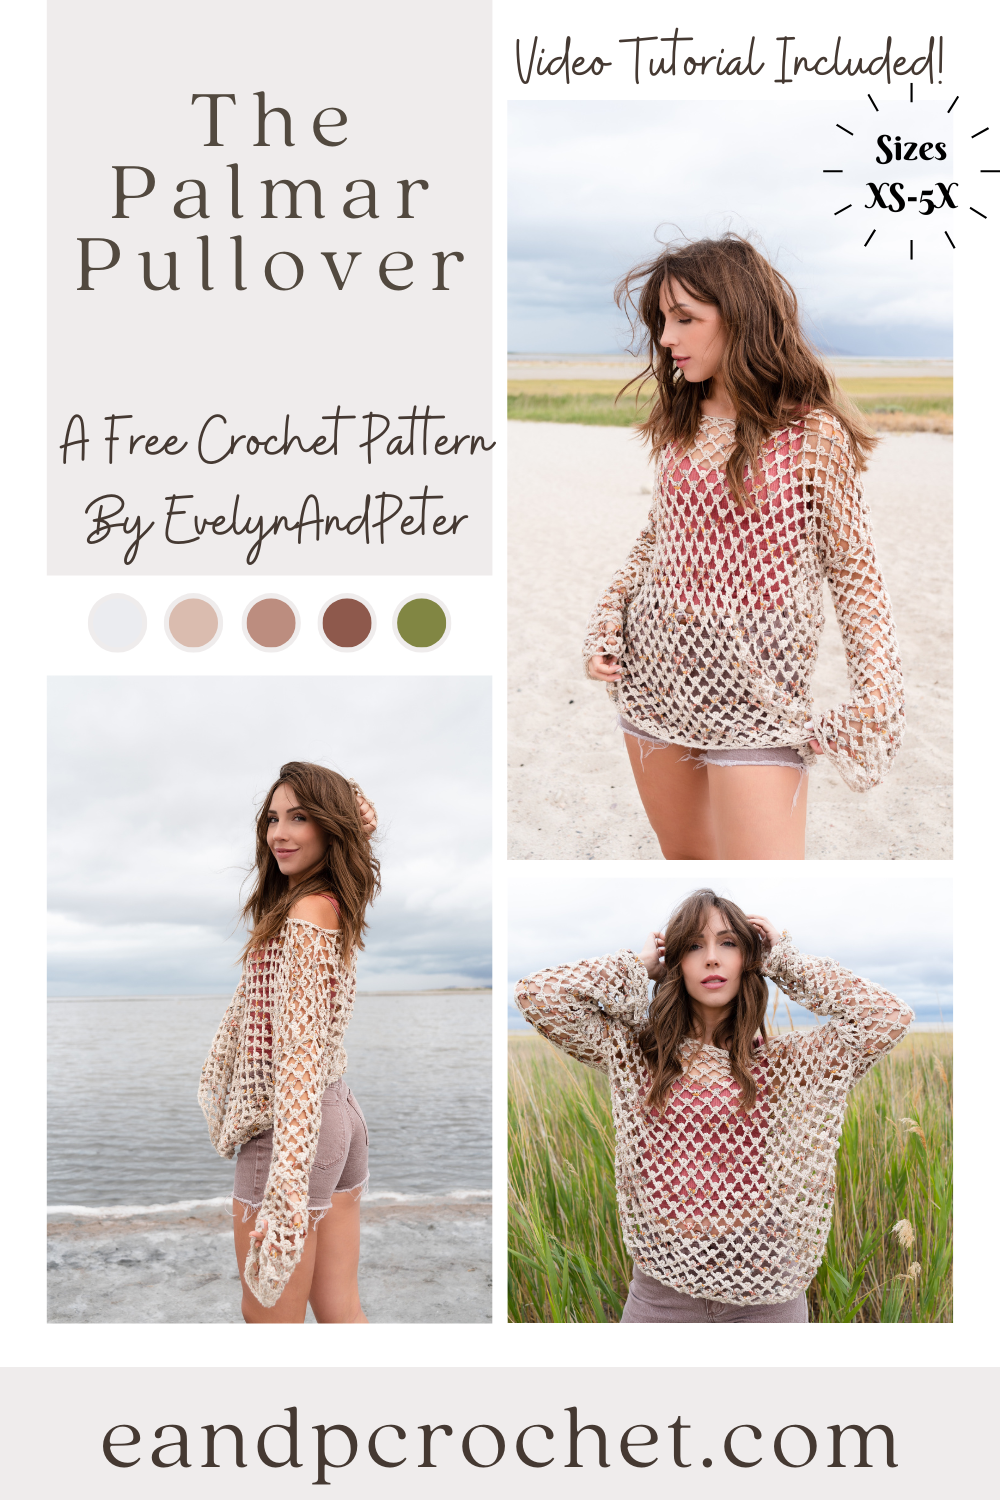
How are we already in this weird in between stage of summer and fall?! The end of summer is looming so that means my summer designs are also coming to an end. Luckily, The Palmar Pullover is perfect for this in between time!
The Picot Mesh stitch is one of my all time favorites for warmer makes! I think it’s one of yours too since The Zahora Cardigan was so loved! I used the Picot Mesh stitch for the Zahora and fell in love with the drape and comfy fit! After a few requests here and there for a pullover version I decided it was time to make one using Pima Cotton yarn! The Zahora used Lion Brand Comfy Cotton which is very similar to the Pima that I used here!
I wanted to give The Palmar Pullover a similar look to the Zahora with the speckled colors throughout a neutral base. Luckily, there is a few super cute options for the Pima yarn! I didn’t want it to be too overwhelming with color so I grabbed a neutral vintage and paired it with a colorful Seaglass! You might not even be able to see the striping, it’s so subtle! If you want to stick to solid stripes you can easily do that by picking 2 solid colors. Or, if you aren’t a fan of the stripes you can even make it in one solid color throughout! I definitely recommend grabbing the Lion Brand yarn kit so you can customize your look!
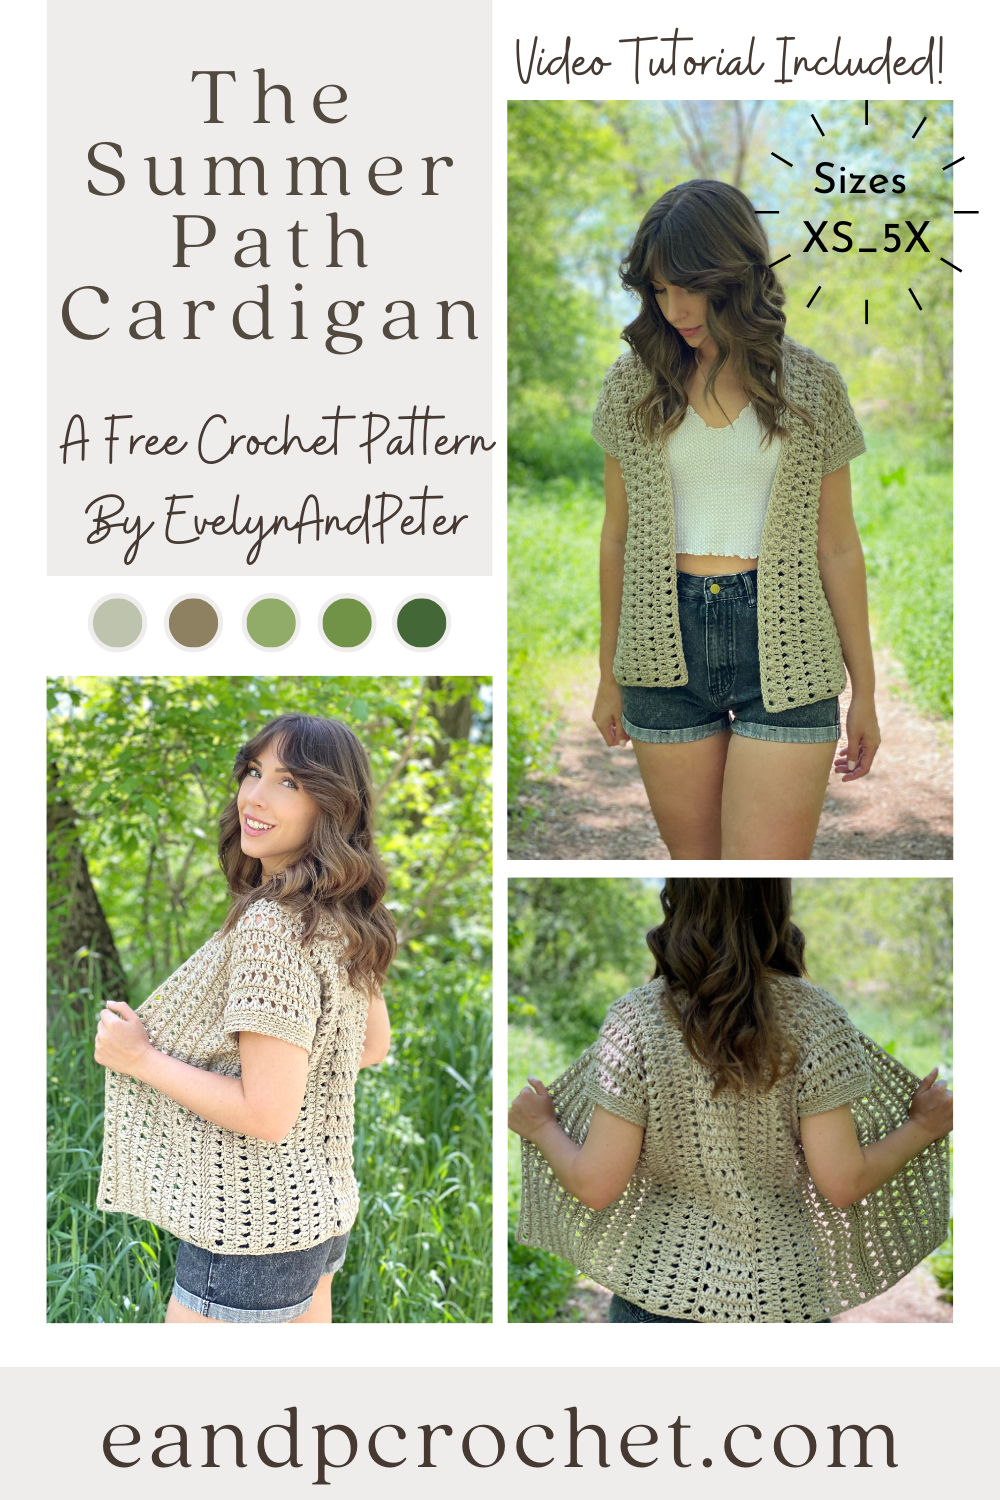
Is there anything better than exploring the woods on a warm summer day? It’s quiet and peaceful, nowhere to be and no responsibilities. You can hear the birds chirping and the creek trickling. That’s what I picture when I wear The Summer Path cardigan at least. 🙂
This cardigan is worked in 3 separate panels. The 2 main panels are worked side to side and the last one is worked bottom up. The one that is worked from the bottom up is the back detail of the cardigan that will be sewn in between the 2 main panels half way up. I’ve made a couple other things are worked side to side. Check them out here and here!
I absolutely love the Triad Stitch that I used in this design! It works up quickly and gives it an open stitch look, perfect for summer! Make sure you pay close attention to where you are sticking your hook for the Triad! I have a video tutorial available for those that need a little extra help. Be sure to check it out!
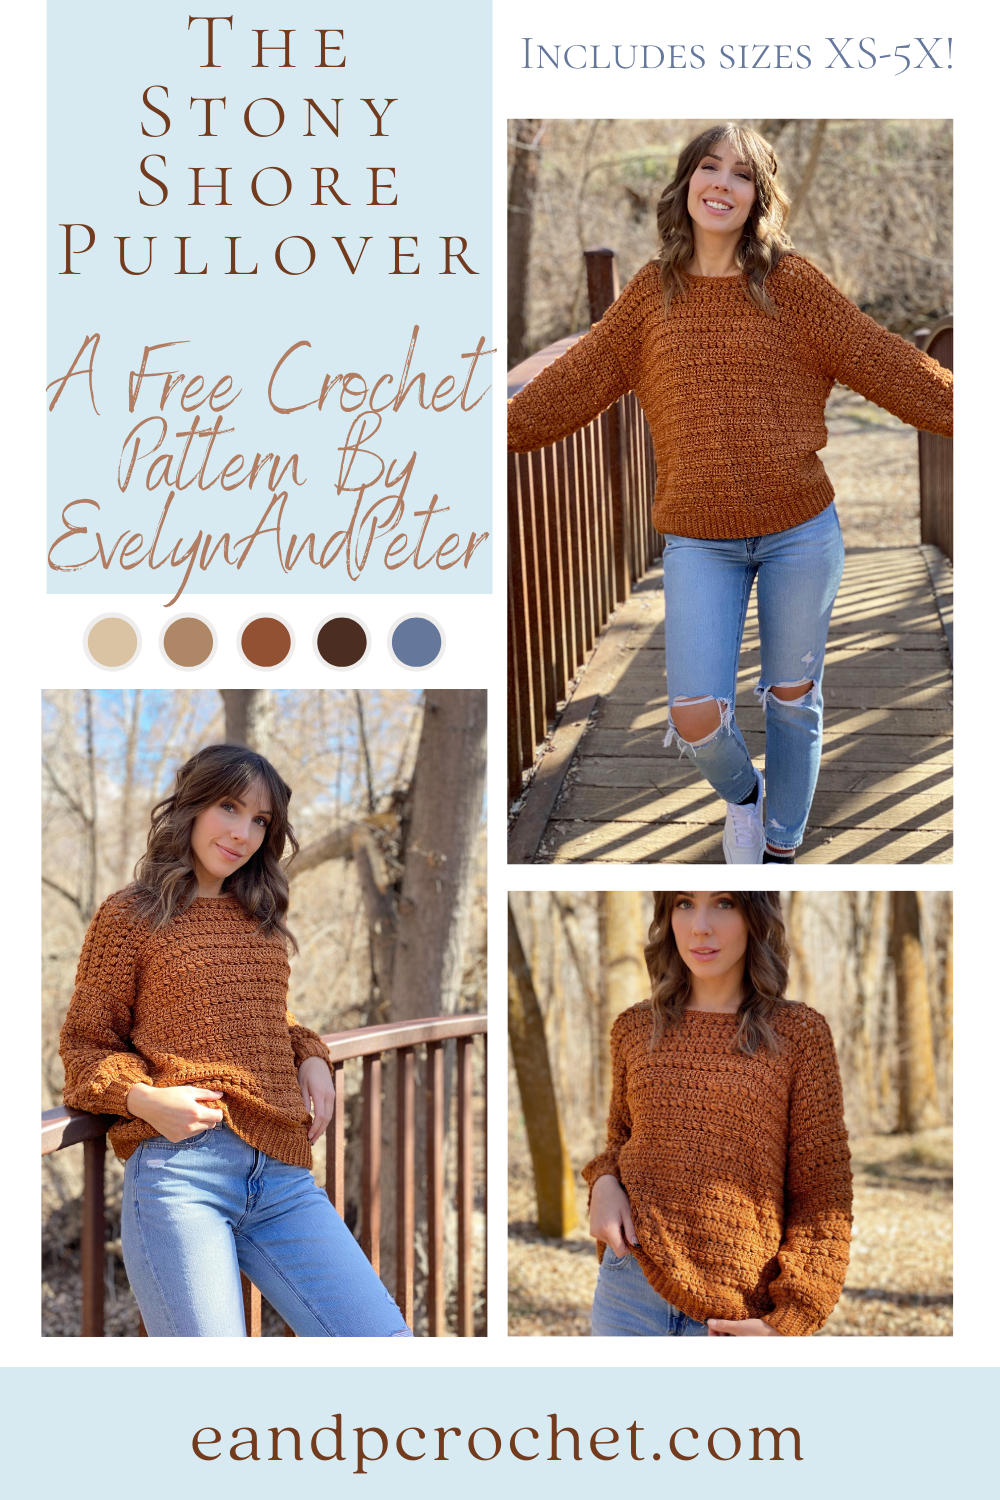
Didn’t I tell you guys that there would be a matching pullover to the beloved Stony Shore Cardigan?! Well here it is… The Stony Shore Pullover! Haha, I had to keep the name the same obviously since they are sister designs. If you enjoyed the Cardigan design then you will definitely love the pullover!
The Stony Shore Pullover crochet pattern is constructed very similar to the cardigan. It’s actually a bit quicker to do because you don’t have to worry about pockets and the trim is a lot smaller! This is an oversized pullover! You do NOT need to size up to get this slouchy look like mine! I am wearing a size small in the photos. Be sure to check the size chart below and pick yours size via your bust size. If you want a less slouch fit, size down.
I used Lionbrand Jeans for the pullover instead of Heartland like I did in the cardigan. However, either one works great for this! So if you prefer Heartland you can still swap it out. Although, I’m in love with Jeans yarn and highly recommend it!
Description: The Stony Shore Pullover is the sister design to the Stony Shore Cardigan! It has a cozy oversized fit with cute balloon style sleeves. The stitch gives a beautiful and fun texture. Beginner friendly and fun to make!
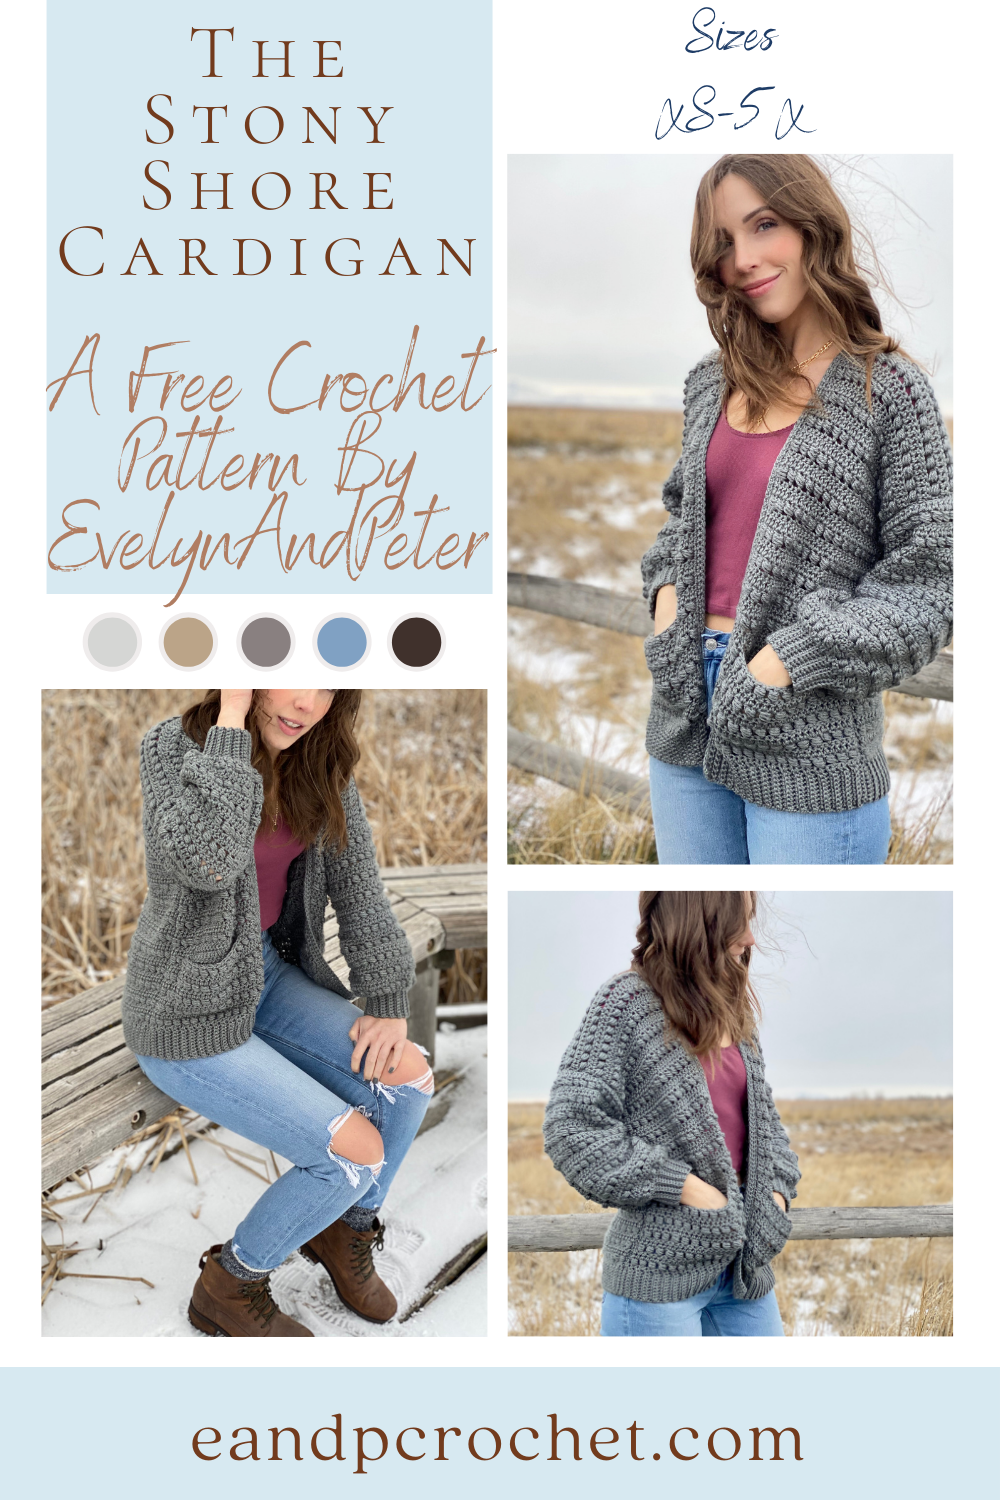
The Stony Shore Cardigan Crochet Pattern is here! I’ve been wanting to make something with this stitch for a long time and I’m glad I finally did it! I also knew immediately I would be doing a loose balloon style sleeve. I actually attempted it on my Sunset Bomber but it just didn’t go with the style. I’m sooooo happy that it worked out that way because they look AMAZING on this cardigan.
I’ve been posting sneak peeks of this sweater on TikTok and Instagram. The amount of crocheters that told me they couldn’t wait for this pattern was kind of insane. I can’t even begin to tell you all how much I appreciate the love and support on this design. It’s also a bit nerve wracking because I hope it lives up to the hype. I just want you all to love it as much as I do. Even my husband said this was his favorite sweater of mine and he is my toughest critic when it comes to crochet!! lol.
The Stony Shore Cardigan Crochet Pattern is worked in separate panels from the bottom up and is beginner friendly. Once you get the bead stitch nailed down it’s a breeze to make. You will alternate bead stitch rows and double crochet rows throughout. You can easily make your sweater longer or shorter by adding/taking away rows in multiples of 2 before tying off. Same with the sleeves!
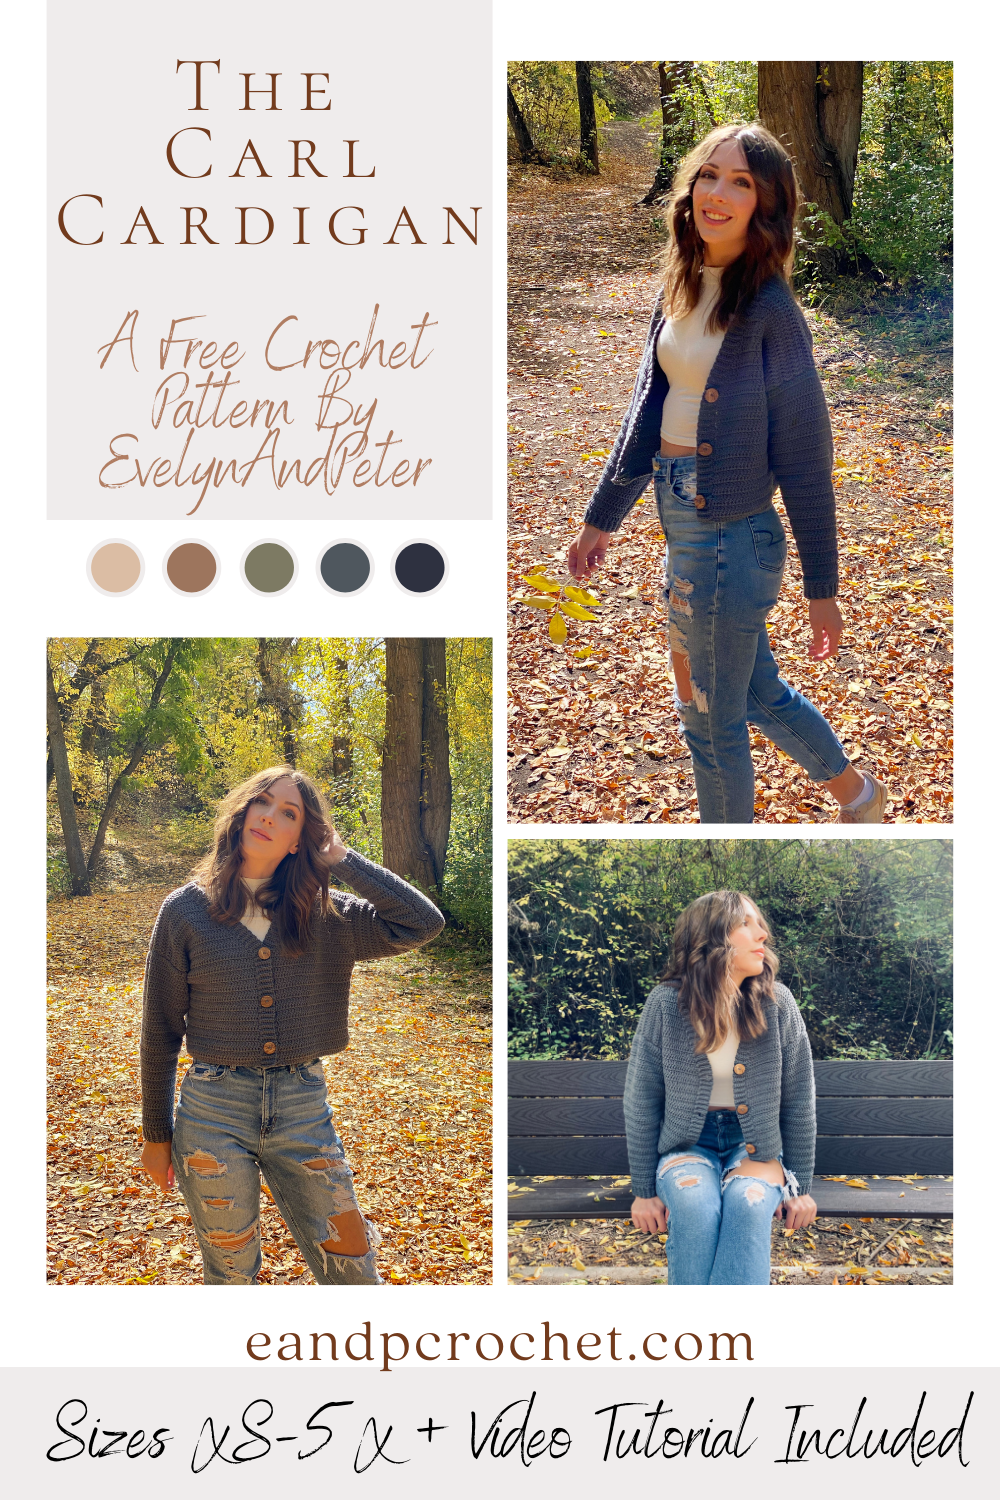
I love the look of oversized V-neck button up cardigans. There’s just something about them that I find so appealing! They give me such comforting “grandpa” vibes haha. I knew I had to make one but put my own trendy spin on it. The Carl Cardigan is my cropped and a bit more girly version of this!
The Carl Cardigan is worked in separate panels from the bottom up. When you break it down into each piece tackling this sweater is a breeze. I used the same stitch throughout and have very beginner friendly shaping. I used Feels Like Butta which is one of my favorite soft yarns. It’s very smooth to work with and frogs back easily if you make a mistake!
I know some of us prefer to have our cardigans longer instead of cropped. Good news, it is super easy to make this longer! Just add as many rows as you would like to the back panel (in multiples of 2). Then, when you make the front panels, add the same amount of rows before you start decreasing! Remember, you will need extra yarn!
You might recognize the ribbing technique around this cardigan. I did the cuffs from The Pemberly Pullover the same way! You will be working the trim of the cardigan directly off the sides of the front panel. It might look a little intimidating at first, but when it comes down to it, you are just slip stitching to the panels as you go! If you are new to this technique be sure to check out my video tutorial where I show you exactly how to do it.