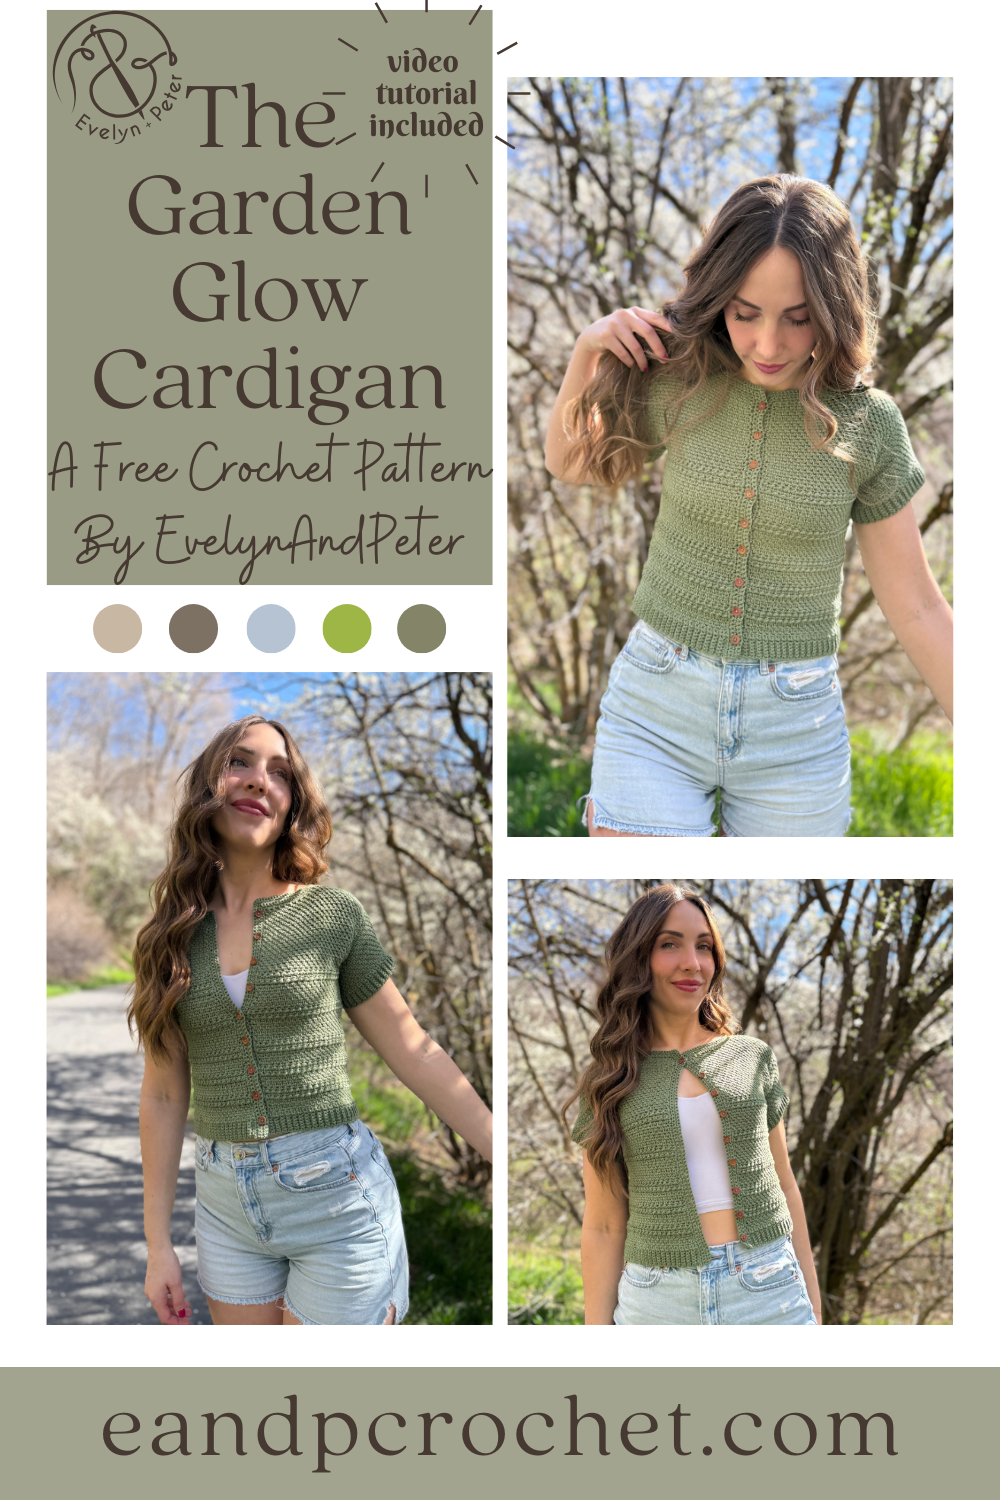
There’s something so special about a piece that feels both simple and quietly detailed, the Garden Glow Cardigan is exactly that. From the soft texture of moss stitch to the gentle rhythm of the stripes, this design came together in such a calming, satisfying way.
I wanted to create a cardigan that feels polished yet easy to wear, something you can throw on with anything and instantly feel put together. The fitted shape, classic button-up front, and short sleeves give it that effortless, everyday charm, while the texture adds just a little extra magic. A full video tutorial is on my YouTube Channel for The Garden Glow Cardigan crochet pattern. Be sure to check it out if you have questions!
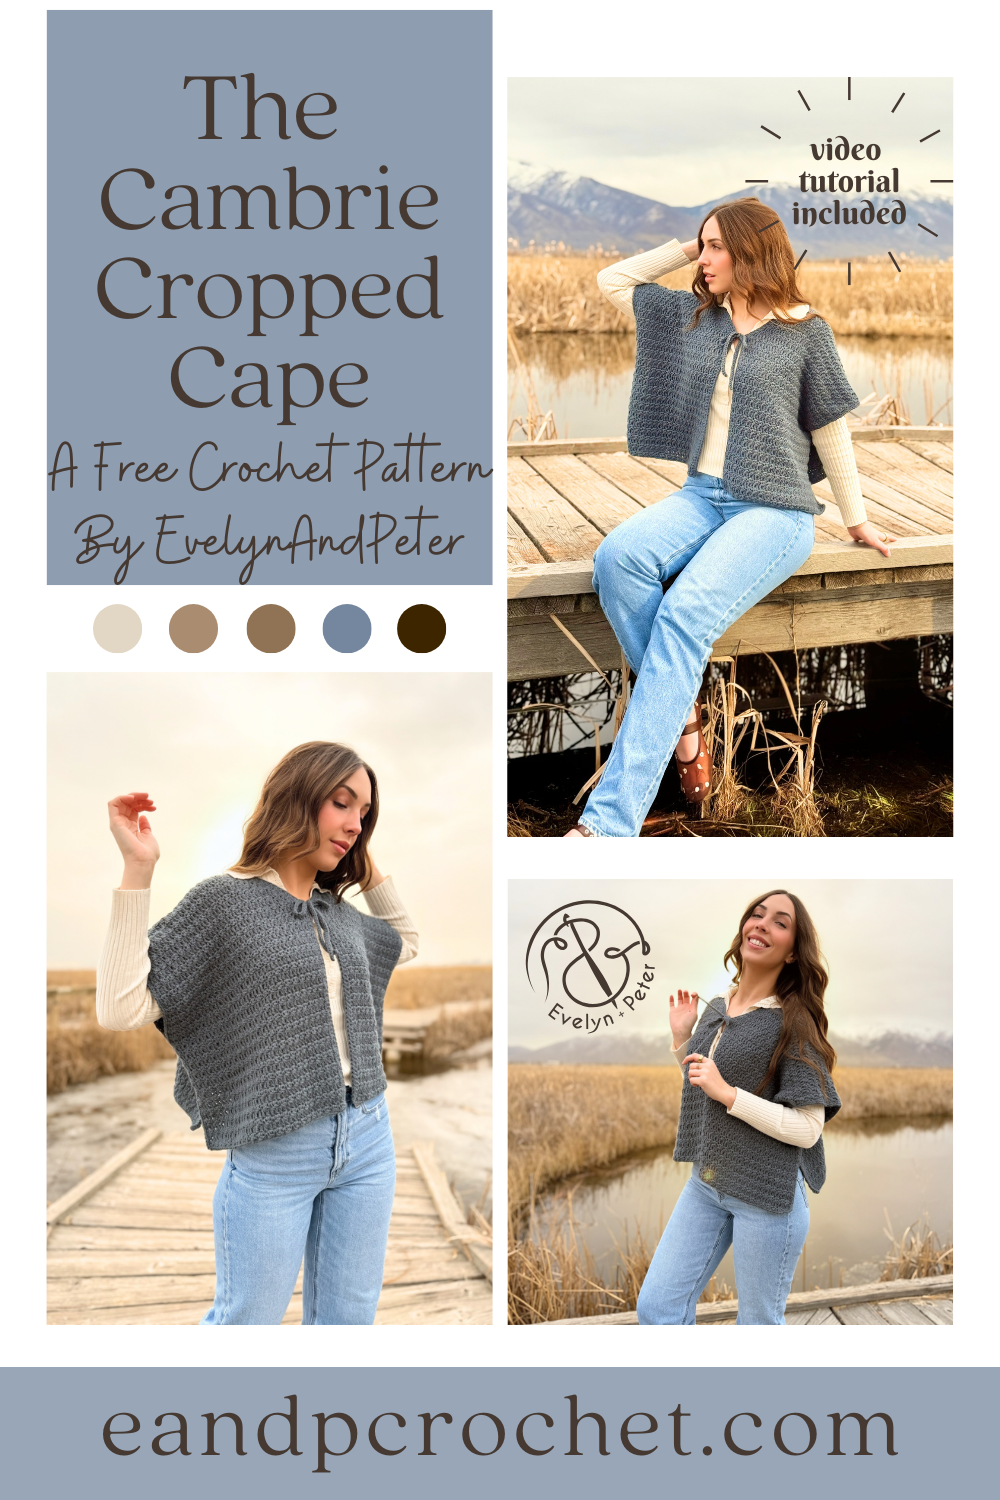
A couple of years ago I designed my Woodlands Blanket Wrap. I fell in love (and you guys too!) with the cozy, oversized feel of wearing something that almost felt like a blanket. It quickly became one of those pieces you can throw on and instantly feel warm and comfortable.
But as I kept wearing it, I started imagining a version with a similar construction that felt a little more refined and tailored for everyday layering while you are out and about. That idea eventually turned into the Cambrie Cropped Cape!
Not sure how I am already releasing my last crochet pattern of the year…but here we are! The Cottage Lattice Throw crochet pattern is a quick and easy blanket if you are looking for one final project to complete. It’s mindless and perfect to work up in between all the chaos of the holidays!
The entire blanket is worked up in double crochet and chain stitches. Super easy and beginner friendly. The layout of the shell stitches in combination with the mesh gives it a subtle checkered look which I love. A simple post stitch border is worked around to give it a finished and complete look.
The Daisy Daydream Cardigan has got to be the coziest sweater I have ever made! All it took was one time holding this yarn and I knew I had to make a sweater with it. Find the full Daisy Daydream Cardigan crochet pattern below!
If you have been following my blog for awhile then you know I have The Daisy Day Throw, The Daisy Day Tote and The Daisy Day Cardigan. They are some of my favorite pieces! I wasn’t quite sure what to name this one at first. I knew I already had a Daisy Day Cardigan, not realizing I would be making another cardigan in the future, so I had to come up with something different! The Yarn I used is “feels like a dream” so it only made since to try and sneak the word dream in somewhere. Daisy Daydream was just too perfect for it!
Cardigans and pullovers are definitely my favorite thing to design but bags are not far behind! You can never have too many cute bags right? The Sunny Cinch Satchel just might be your next favorite!
I love a good cotton yarn for crochet bags and purses. Pima Cotton has always been one of my favorites so I decided to use it for my bag but wanted to hold the yarn double stranded for extra sturdiness! Let me tell ya, I am obsessed with how it turned out! The yarn is soft and so nice to work with! Plus, this bag works up even faster with the double thickness!
If you plan on buying yarn I recommend checking out my lion brand kit! It comes with a free copy of the ad-free printable pattern and you can customize your yarn color. Subscribe to my newsletter to find out about 30% off sales!
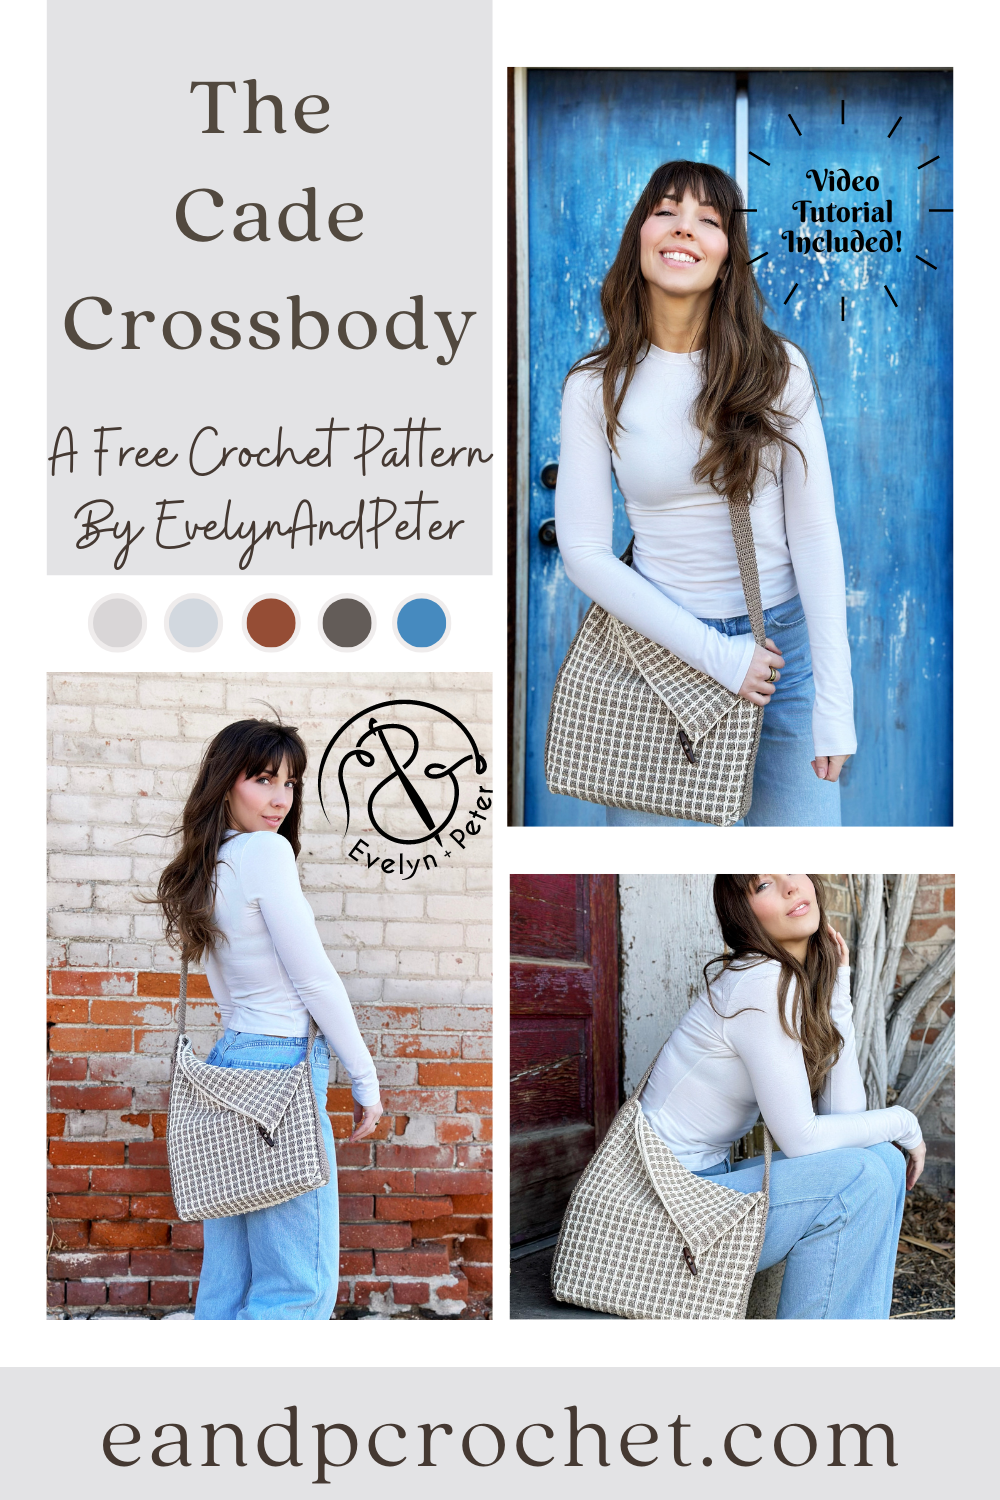
I had so much designing The Cade Crossbody. Why? Because it’s part of a collab with my yarn bestie Meghan from Meghanmakesdo! I made the crochet version and she made the knit version! It’s always nice to have options so maybe if you are seeing this but you are a knitter, than be sure to check out her blog!
The Cade Crossbody crochet pattern is actually pretty simple. It’s 2 rectangles sewn together and a long strap added last! You’ll add the strap on with a unique twist to give it the slanted fold over look. To give your bag some shape, you will be tacking/sewing the corners up into a triangle point when you add the strap. Once side is sewn further up than the other. That’s it!
When Meghan showed me the knit stitch she was going to use for her bag, I knew I would have to do some swatching and figure out how to get my crochet version looking similar! I tried a bunch of different stitch combinations. Finally I settled with a combo of Sc, Sl St and surface stitches to give the look you see here! There will be some ends on your rectangle panels. But don’t worry!! Most of them you will crochet right over, so don’t let the ends scare you! Just check out the notes section or watch the video tutorial!
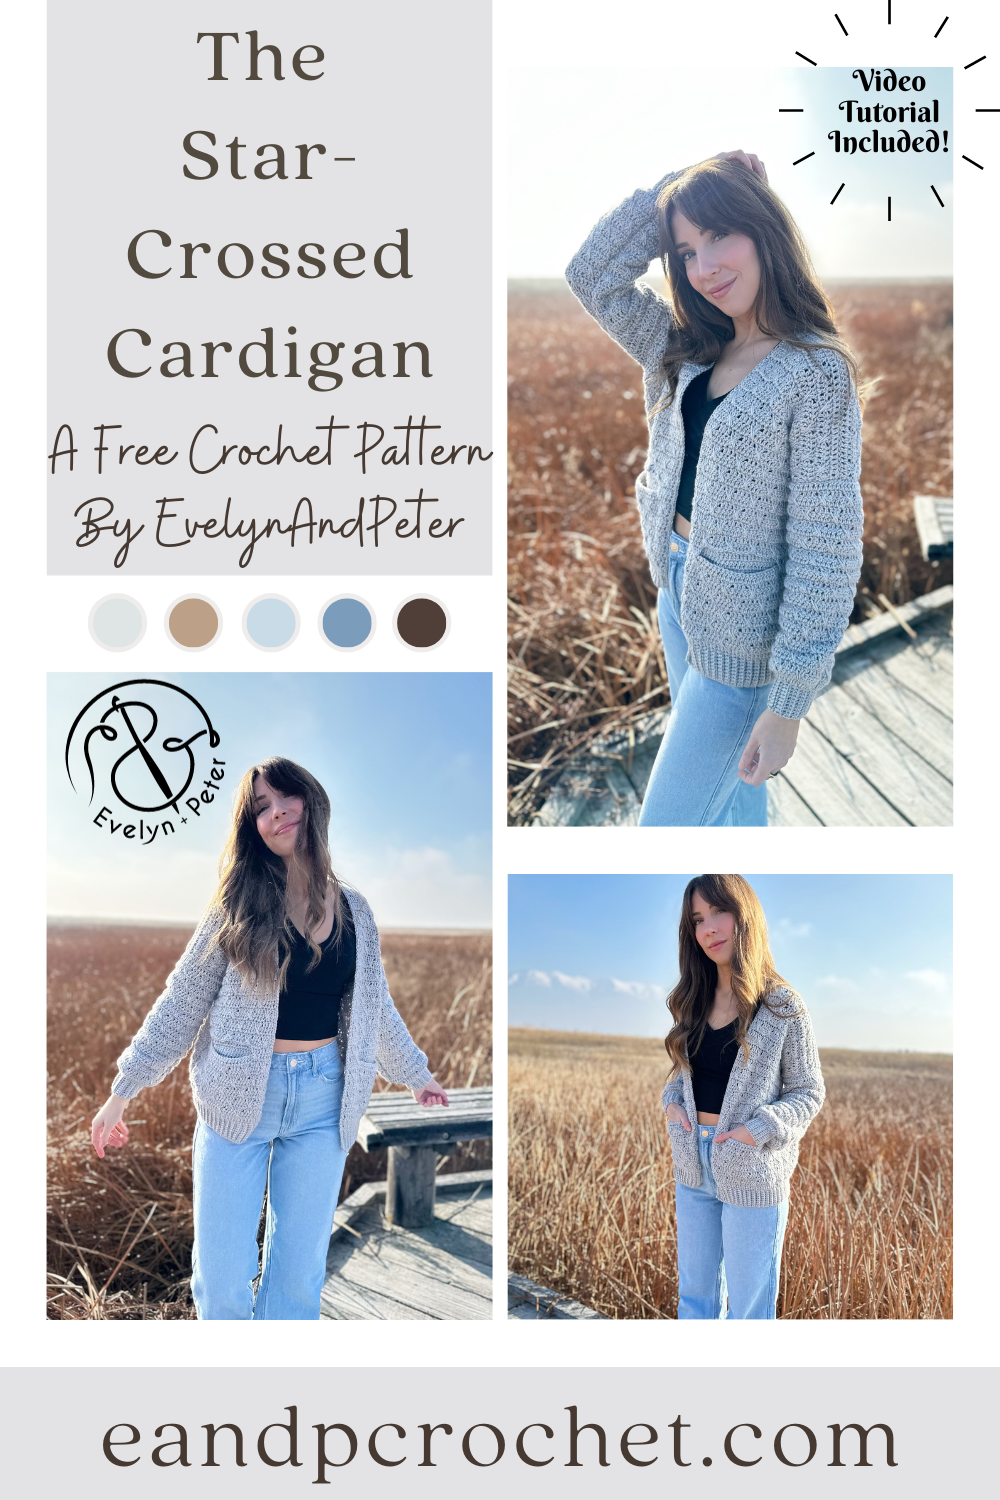
Let’s kick off the new year with a brand new crochet design, The Star-Crossed Cardigan Crochet Pattern! I wanted to start off strong with a cardigan design using Heartland yarn. You might remember my Stony Shore Cardigan and my Kiah Cardigan, both are very popular and well loved and both use Heartland yarn! I knew I needed something to add to the collection of my popular cardigans!
The Star-Crossed Cardigan crochet pattern is very beginner friendly and uses basic shapes. Once you nail the “double crosses spike” stitch you will work this cardigan up easy peasy! It’s basically a combination of all double crochet stitches with the ribbing using single crochet. You will work the panels from the bottom up and sew together.
Did you notice the Star-Crossed Cardigan crochet pattern has pockets?! The best part is that the pocket swatch is your gauge swatch. So feel free to jump ahead in the pattern and make a pocket swatch before starting. You will then use that swatch to measure 4×4″ within. Save it for later when you are required to seam to the inside of your cardigan!
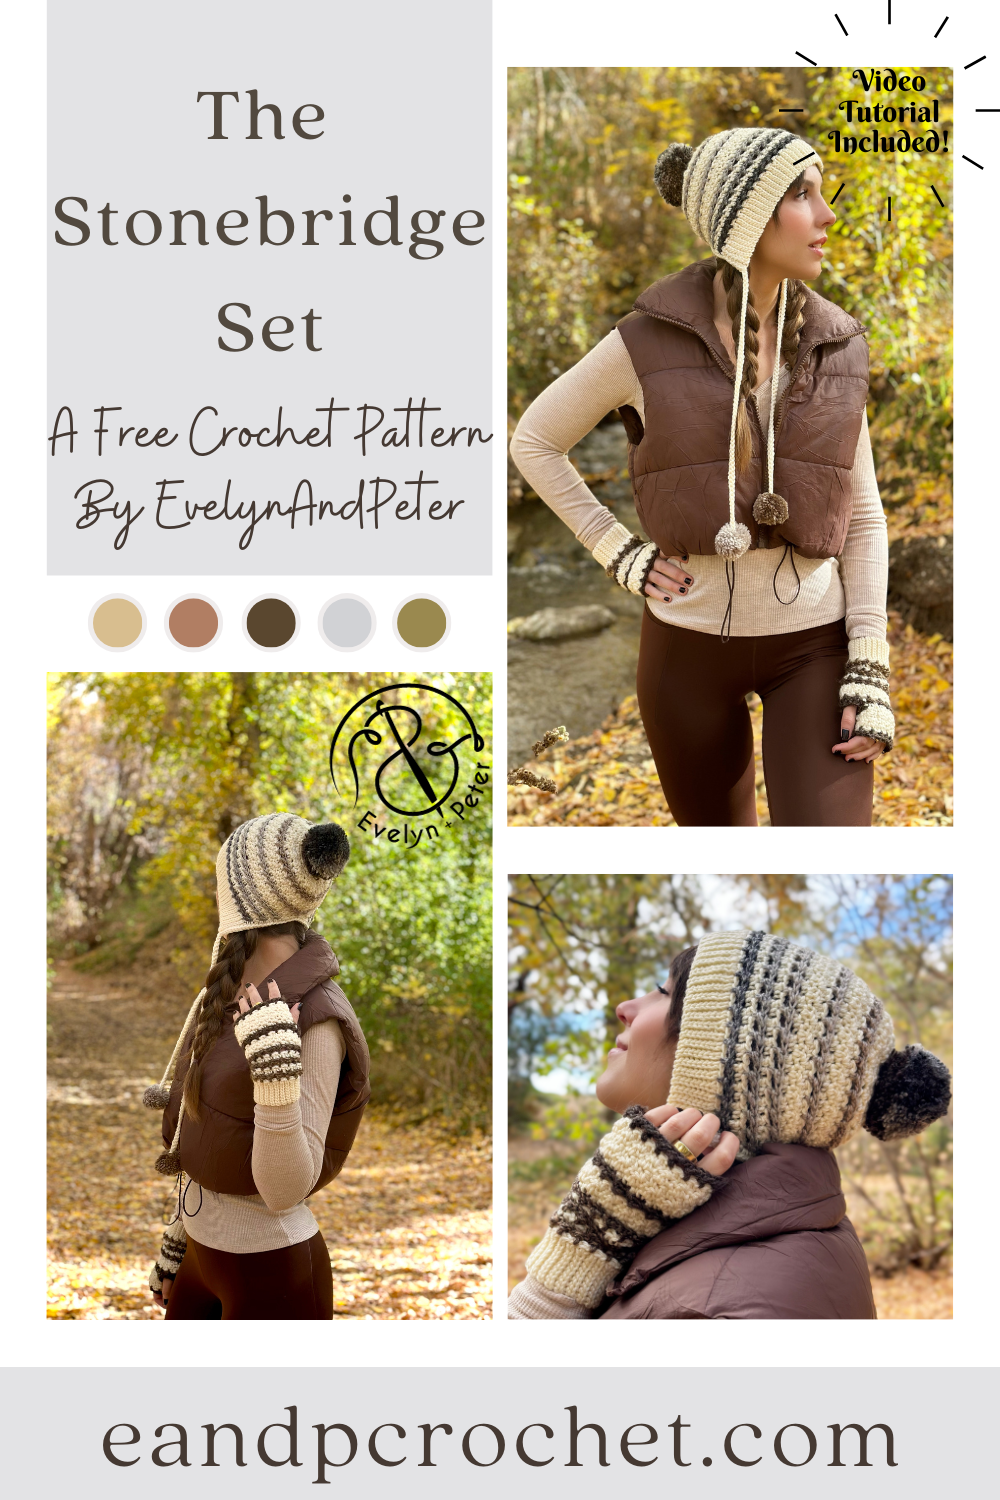
I can’t believe it’s already November and cold enough for my annual Beanie and Mitt set! Last winter I released The Winter Moonlight Set and this year is The Stonebridge Set crochet pattern!
I wanted to do something a little bit different than your typical beanie. I decided to construct it in more of a “bonnet” style and add a tie with little poms on the ends! You’ll start the beanie by creating the ribbing in rows, then crocheting your first row into the sides of the ribbing rows made. You’ll continue the first several rows back and fourth before joining the piece together and crocheting the remaining beanie in joined and turned rounds. Don’t forget the turn! It’s very important to do so within the pattern.
The fingerless mitts uses the same stitches but worked up slightly different. The ribbing is made the same as the beanie but you will immediately join together and worked in turned rounds throughout the entirety of the main body of the mitt. Take note of the thumb hole round! This will be slightly different for the left vs. the right mitt. Other than that, both left and right will be the same!
I used worsted (4) weight yarn for this set. The main color A is Lion Brand Skein Tones in “Ivory or Basic Stitch Anti-pilling in “ecru” (these are the same colors and either one will work) and Color B is Ferris Wheel in “Morning Java”. If you want your fingerless mitts to have the same color stripes, be sure to start on the same color within the ferris wheel skein. You’ll have to pull the yarn out and cut so you can start at the same point! Other than that, no need to worry about rearranging the colors as they stripe on there own! You can find this yarn in the Lion Brand kit along with a free copy of my PDF pattern!
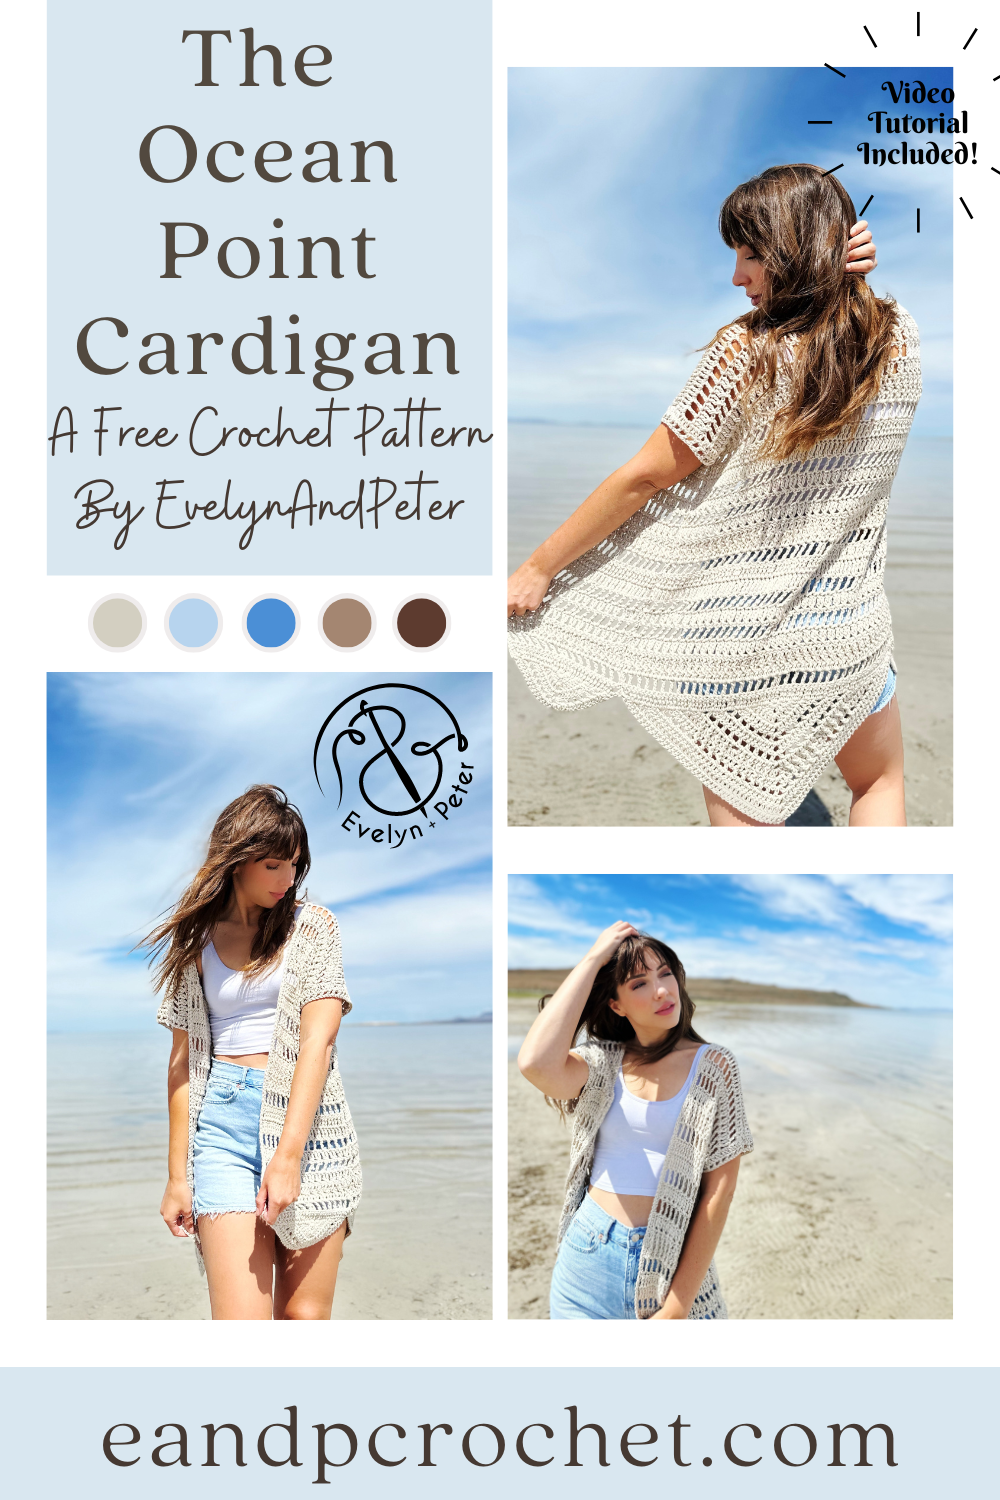
Are you nose deep in summer crochet patterns right now like I am?! Can I add another one to your “must make list”? Summer crochet patterns have always been one of my favorite things to spend time on. There is just something about the open stitches, the cotton yarn and also the fact that you don’t have to make long sleeves! haha! Summer makes usually work up quickly just like my new cardigan design, The Ocean Point Cardigan crochet pattern!
Is it weird that I have never designed a triangle shawl before? I have definitely crocheted a few in the past but never designed my own! I have been wanting to lately but I did not want to make a shawl in the middle of summer! I got the idea to somehow incorporate the shape of a triangle shawl into a cardigan and I am SO glad I did!! After a lot of math and a little bit of frogging I finally came up with the final result!
To create The Ocean Point Cardigan crochet pattern you start at the bottom, creating the triangle shape. If you are familiar with triangle shawls you will have no problem jumping right in. Once you have the triangle complete, you will rotate your work and create the first row of the main body into the ends of the rows you made in the triangle. After you get set up it’s just row repeats with no more shaping there on out! I used tall stitches like double crochet, treble crochet, and treble X St. There is also plenty of Ch 1 Sk 1 sprinkled in for an airy and lacy feel.
Because of the very specific St count and math going on in this cardigan there are 3 separate combo sizes written in the pattern. This cardigan is oversized and has a loose, flowy fit. Each size provided can fit a wide range of body shapes and sizes! To find your size, just locate your bust size on the size chart.
I used a worsted weight yarn for The Ocean Point Cardigan pattern- Pima Cotton from Lion Brand. This is a very soft cotton yarn! I have no trouble with this yarn. It works up beautifully and does not split or snag if you have to frog! They have lots of pretty colors available as well. If you end up purchasing the kit, you can swap out the color if you want to!
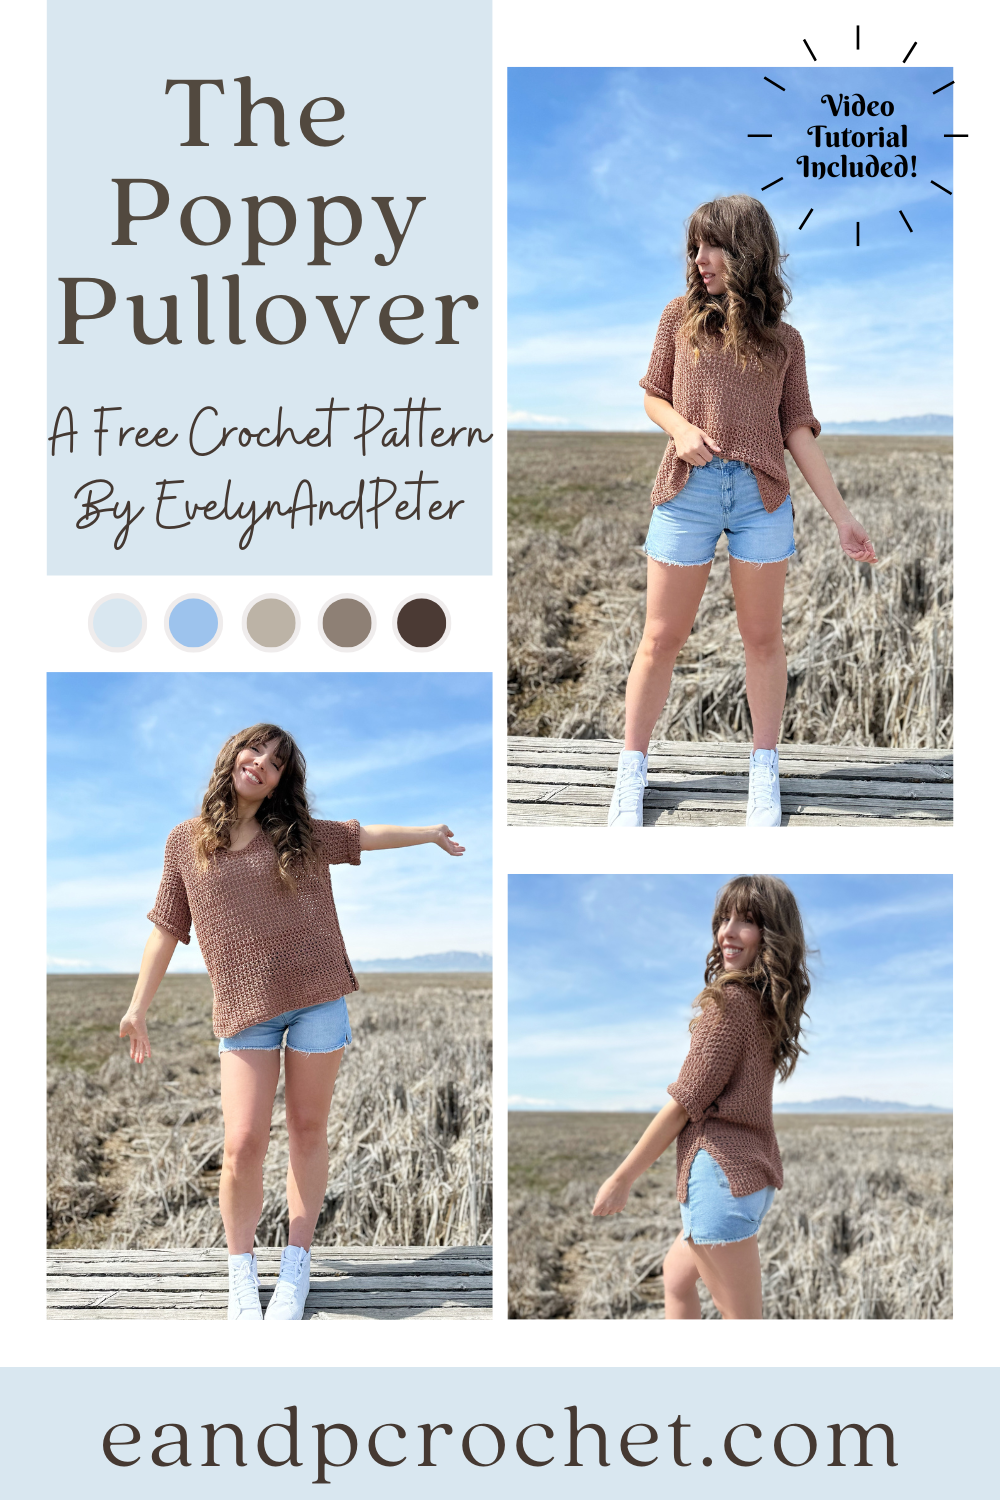
Did I just find my new favorite cotton yarn? I think I did. Be prepared for so many designs using this yarn because I am obsessed! My first make using this yarn is called The Poppy Pullover!
I used Lion Brand 24/7 cotton DK for the Poppy Pullover crochet pattern. Don’t get it confused with the worsted weight version! The DK weight is obviously thinner and much more soft. It had no splitting and no tangles as I crocheted. I’m absolutely in love with it! I used the color Cacao for mine but they have a lot of pretty choices.
The Poppy Pullover is crocheted in separate panels from the bottom up. You’ll be using a larger hook in comparison to the yarn to give it more of a mesh look. It’s important to not pull your stitches tight. You want a relaxed and even tension so you can give it the perfect drape. Feel free to go up in hook size if you normally have a tight tension and/or your gauge is off. Once you have all your panels complete you will sew them together.
The Poppy Pullover is easy to make adjustments to. You can add or takeaway as many rows as you want on the back panel to adjust the length. Just be sure to make the same adjustments on the front panel as well, right before you split the neckline.